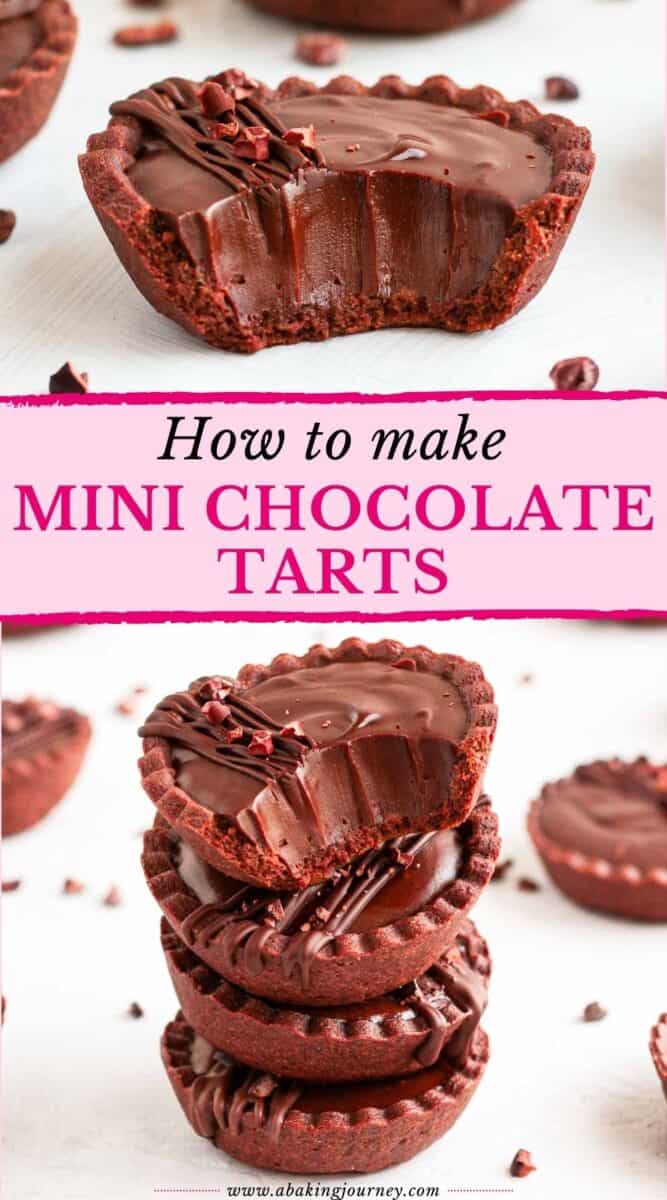
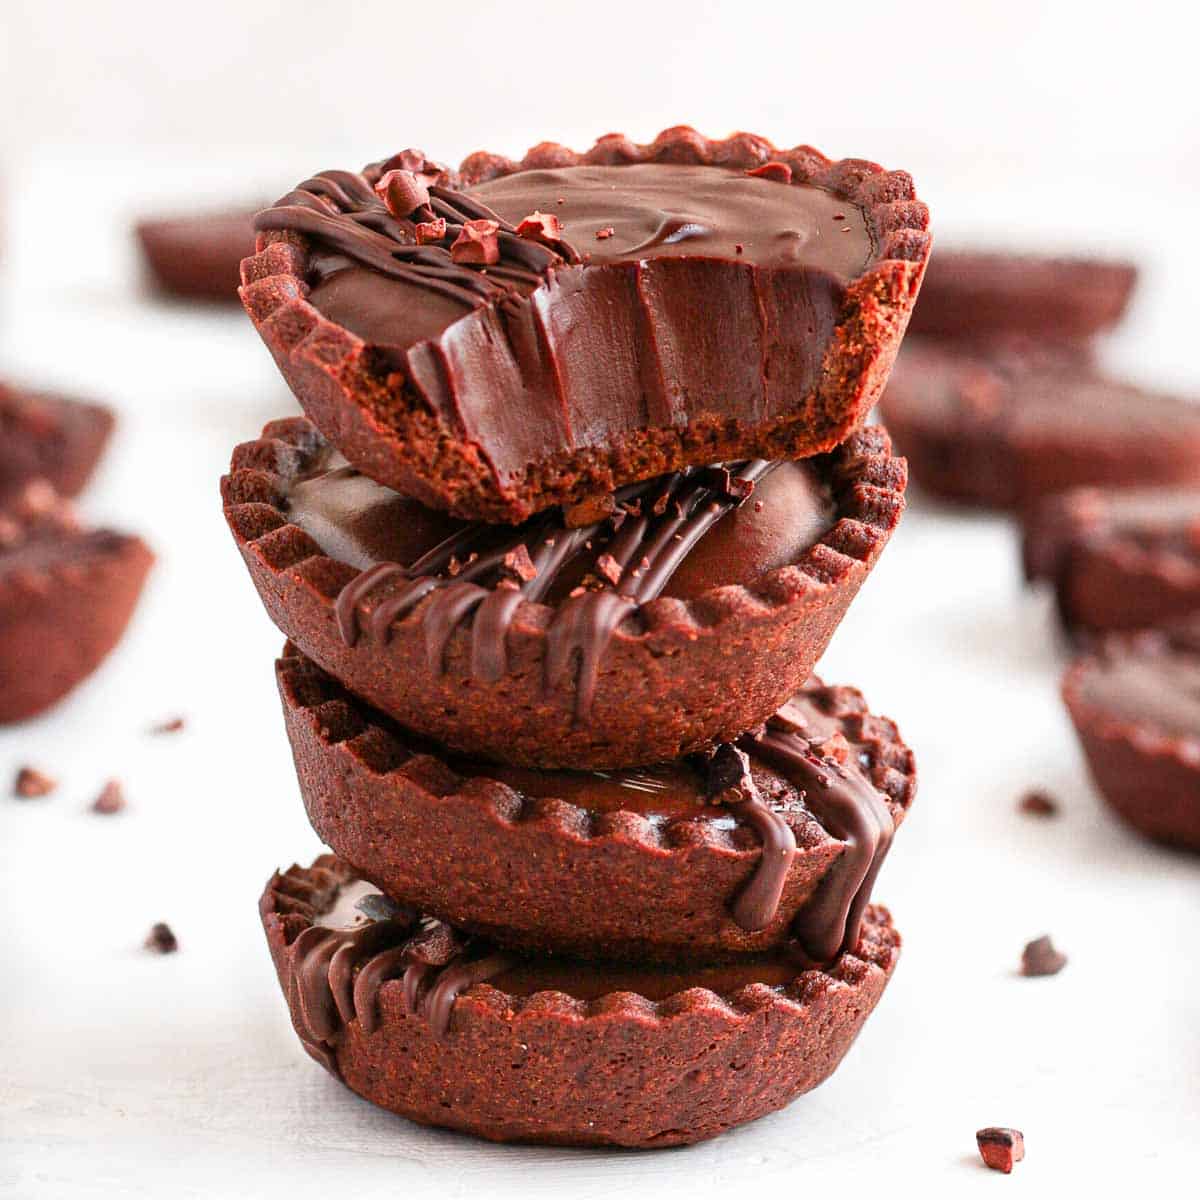
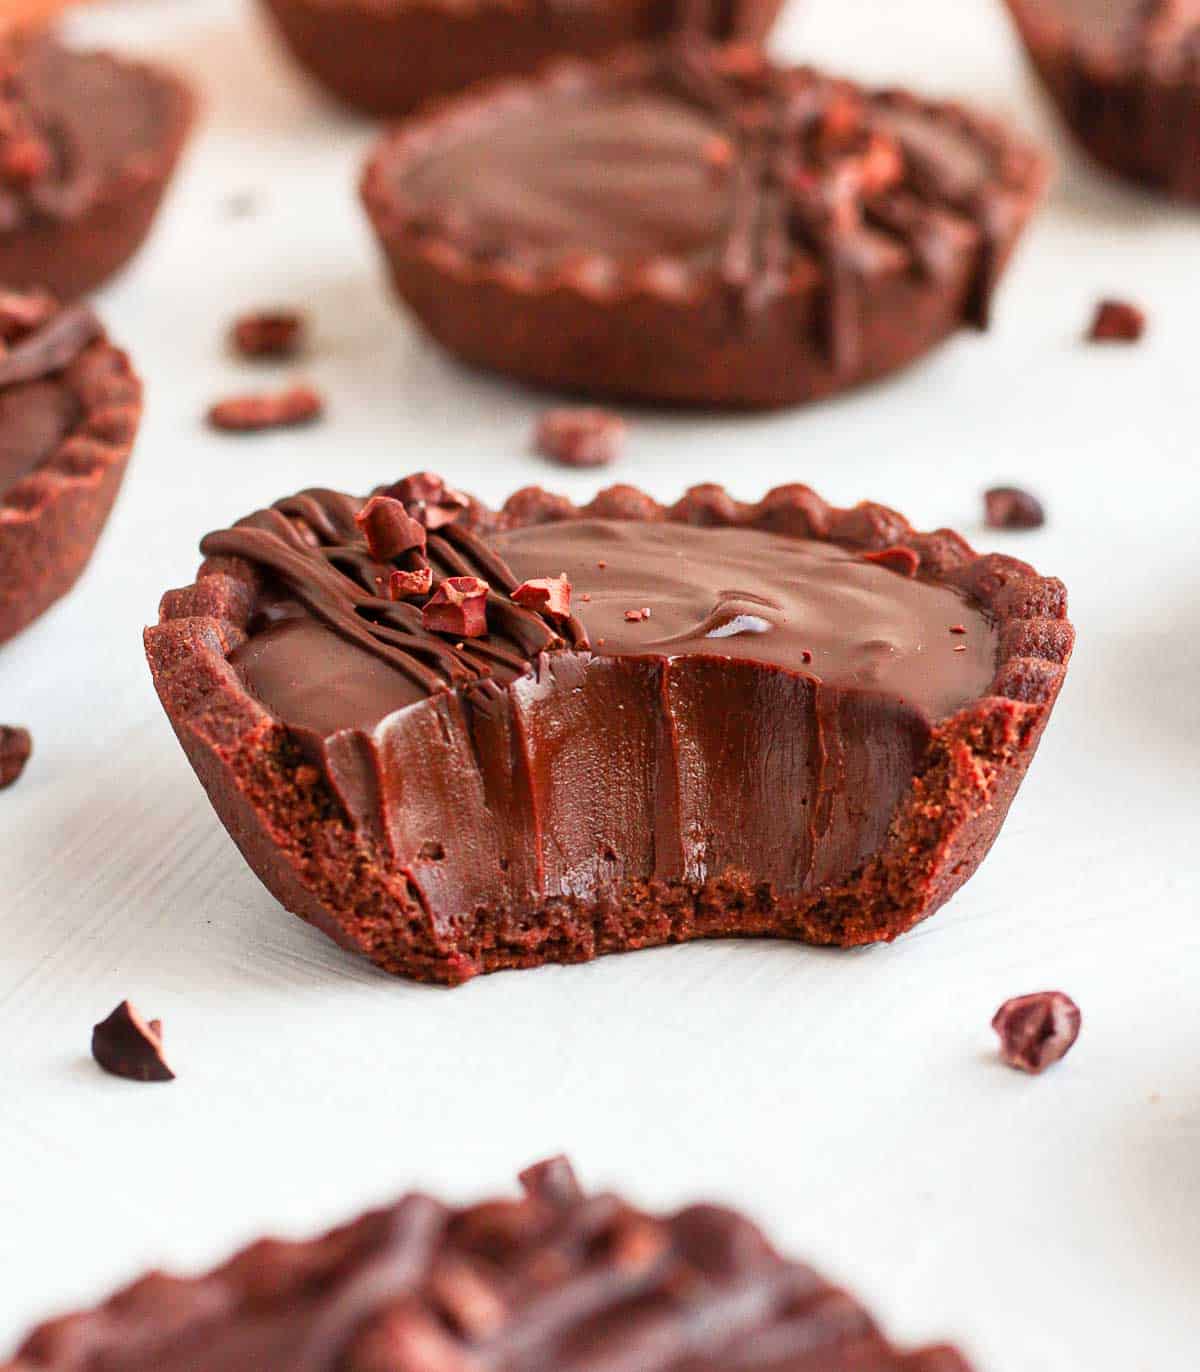
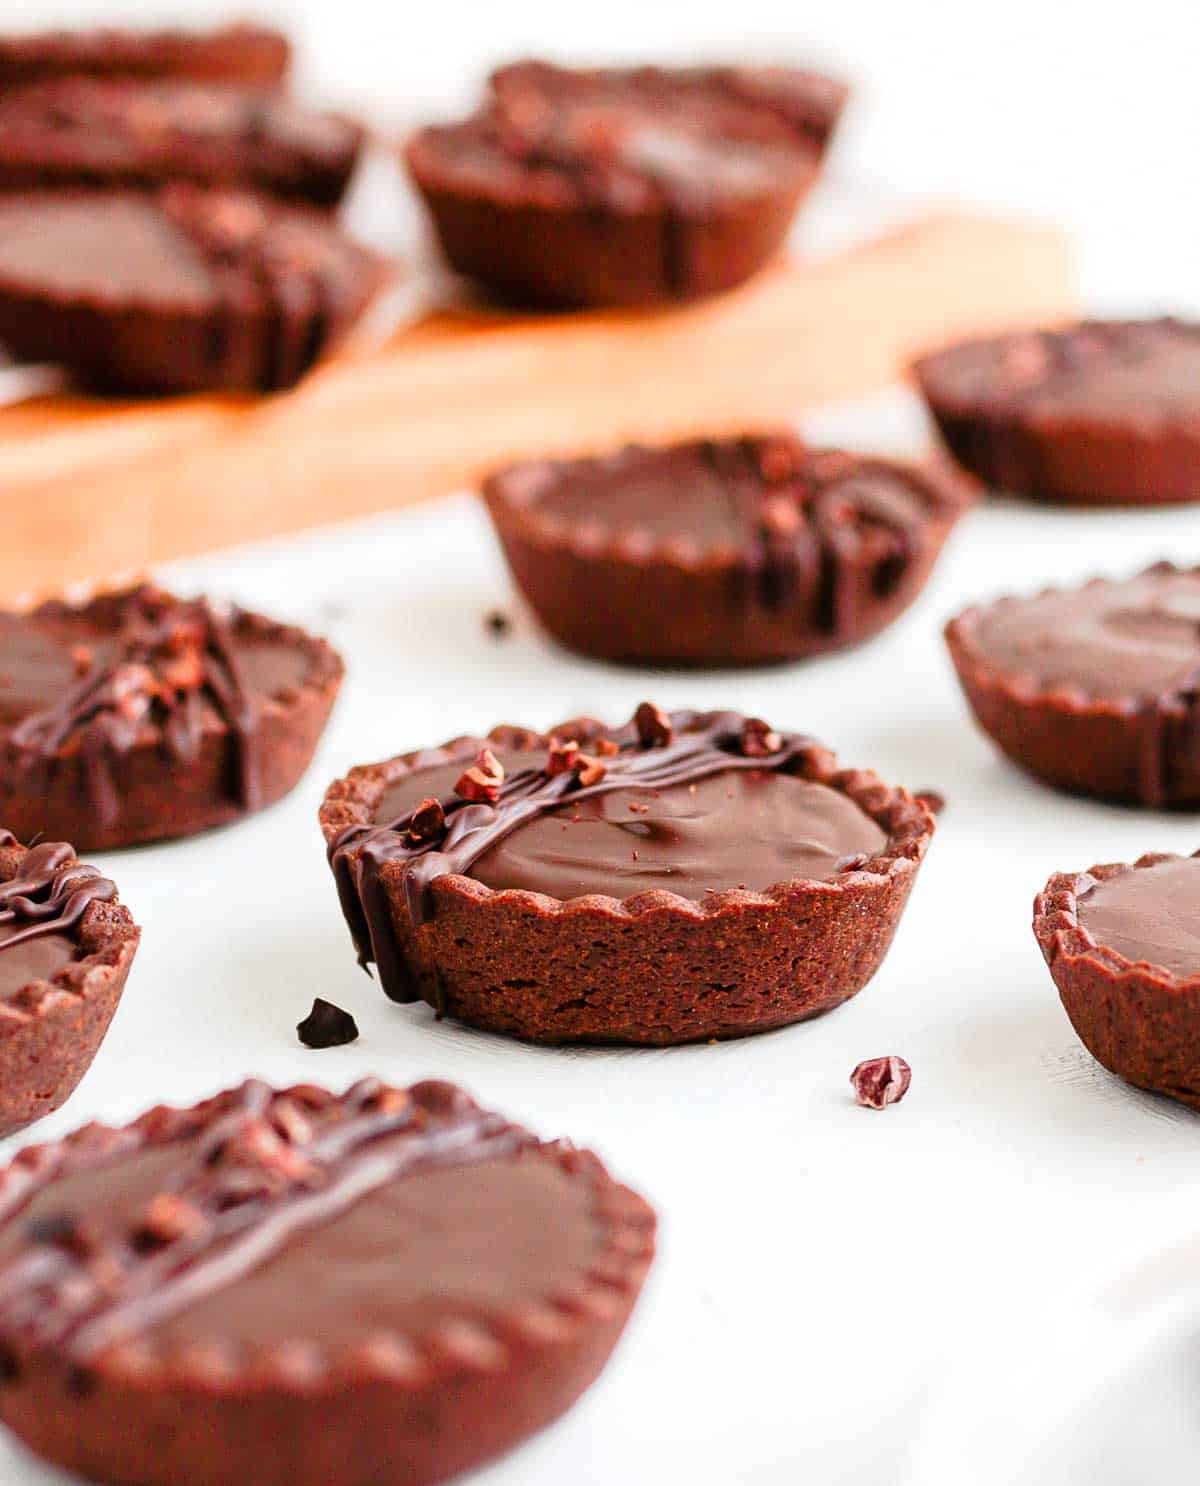
These decadent Chocolate Ganache Tartlets are the perfect sweet treat for a party, birthday, Holiday dessert table or afternoon tea. They combine a buttery Cacao Shortcrust Pastry and an intense Dark Chocolate Ganache Filling to create a simple yet delicious bite-size dessert!
Jump to:
Why we love this recipe
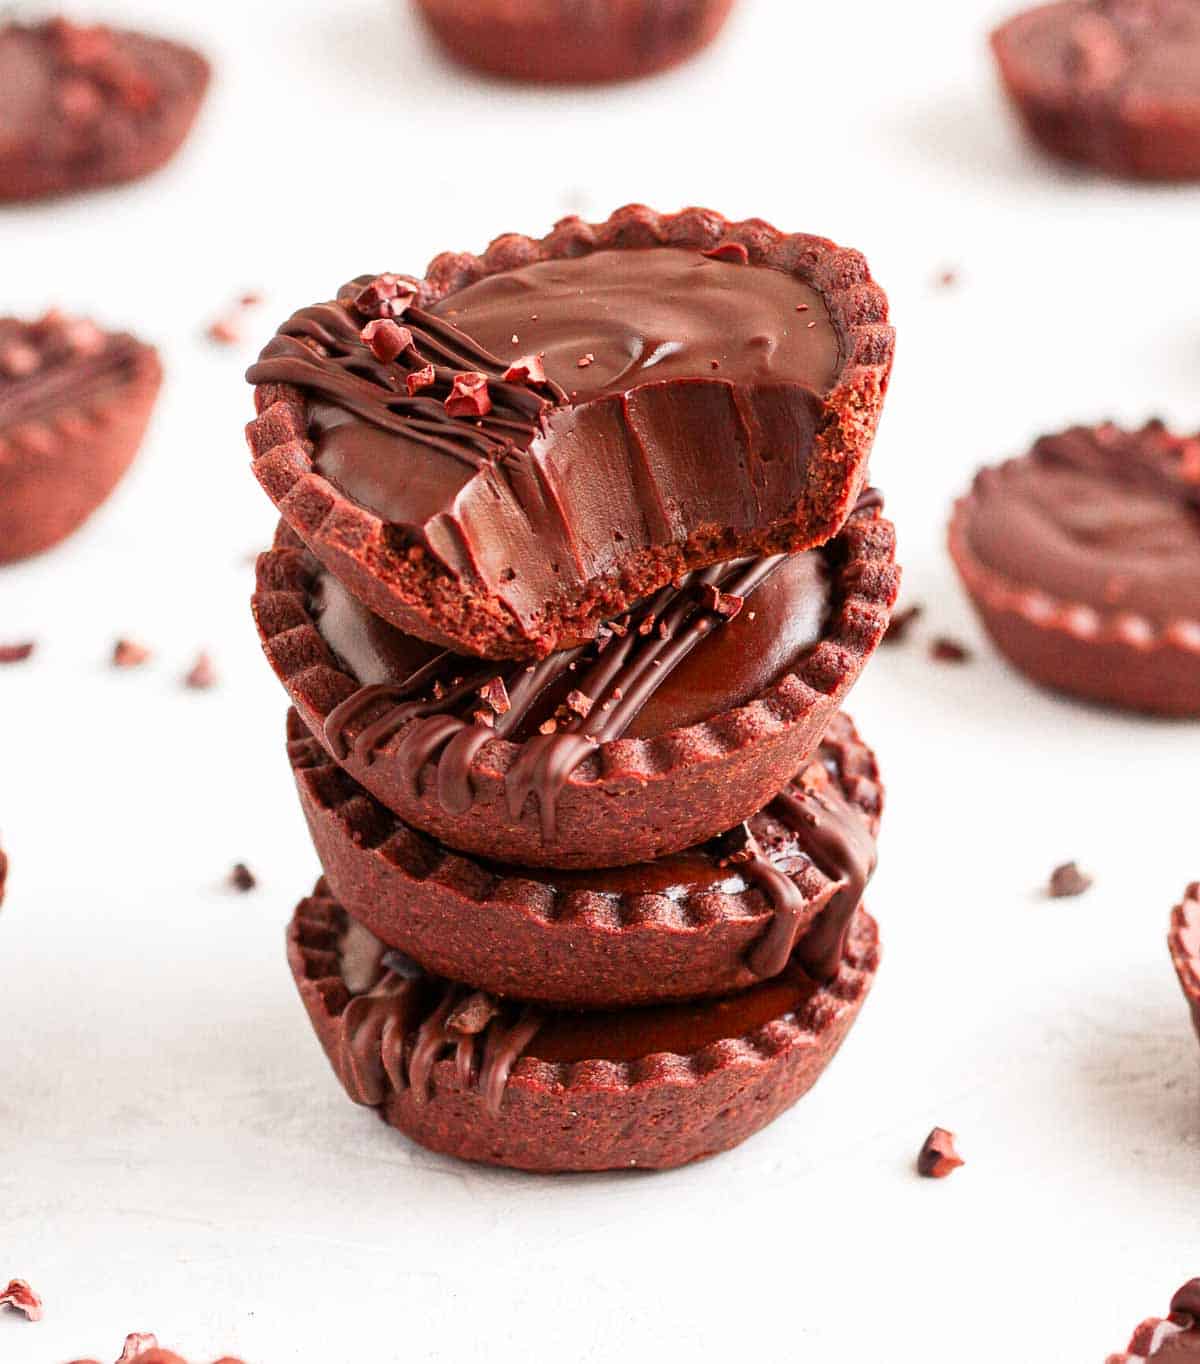
These decadent mini chocolate tarts seriously make the best little treat to serve at a party, gathering or simply for a sweet snack. They not only taste absolutely delicious, they are also quite easy to make and can be prepared in advance.
Just like its larger French Chocolate Ganache Tart version, these chocolate tartlets combine a Chocolate Tart Crust with a quick and easy 2 ingredients Chocolate Ganache Filling.
No need for tartlet tins or fancy equipment; the tartlet crust are simply made in a muffin tin like with these Tartlet Shells.
These tartlets can also easily be customised to create an even more fun treat. Garnish them with some fruits like berries or citrus (check out these Chocolate Orange Tartlets or Raspberry Chocolate Tartlets!), add a little bit of sea salt or coffee to the filling, or even add of a caramel layer like my Mini Chocolate Caramel Tarts!
How to make Chocolate Ganache Tartlets
Chocolate Tartlet Crusts
The first element of these Chocolate Ganache Tartlets is the chocolate shortcrust pastry. I love to make pastry in the food processor like here, but if you prefer (or have to) make it by hands, you can find the full tutorial in my chocolate pie crust recipe.
This pastry is basically a Pâte Sablée (Shortcrust Pastry) - a french pastry crust made out of Flour, Icing Sugar, a pinch of Salt, unsalted Butter and Egg - to which I have added a little bit of Cacao Powder.
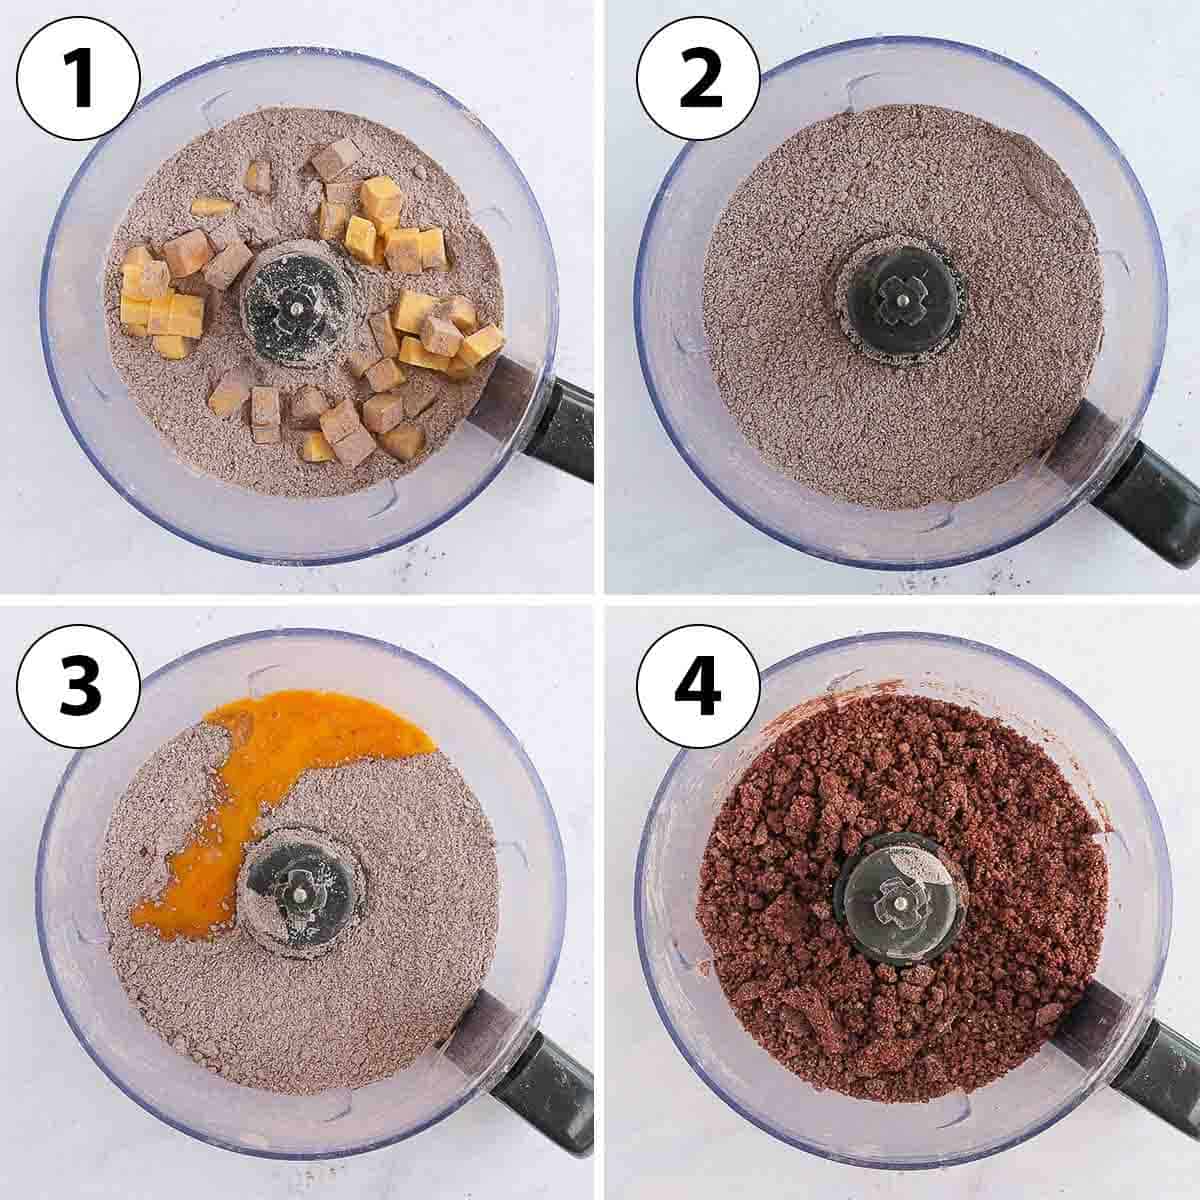
- Photo 1: Place the Flour, Cacao Powder and Icing Sugar in the bowl of your food processor and pulse to combine and remove any lumps. Add the very cold Butter cut into small cubes.
- Photo 2: Pulse to cut the butter into the dry ingredients until you get small crumbs. You should not see large lumps of butter or dry powders anymore.
- Photo 3: whisk the egg in a separate bowl and add it to the bowl.
- Photo 4: slowly blend to combine until the dough turns darker and starts to come together. Try not to over-mix here; if you press the crumbs together, they should stick and turn into a ball.
If the pastry is too dry and does not come together, add a little bit of very cold water (about 1 tbsp at the time) until it combines. If wet and sticky, add a little bit of flour (again, 1 tbsp at the time).
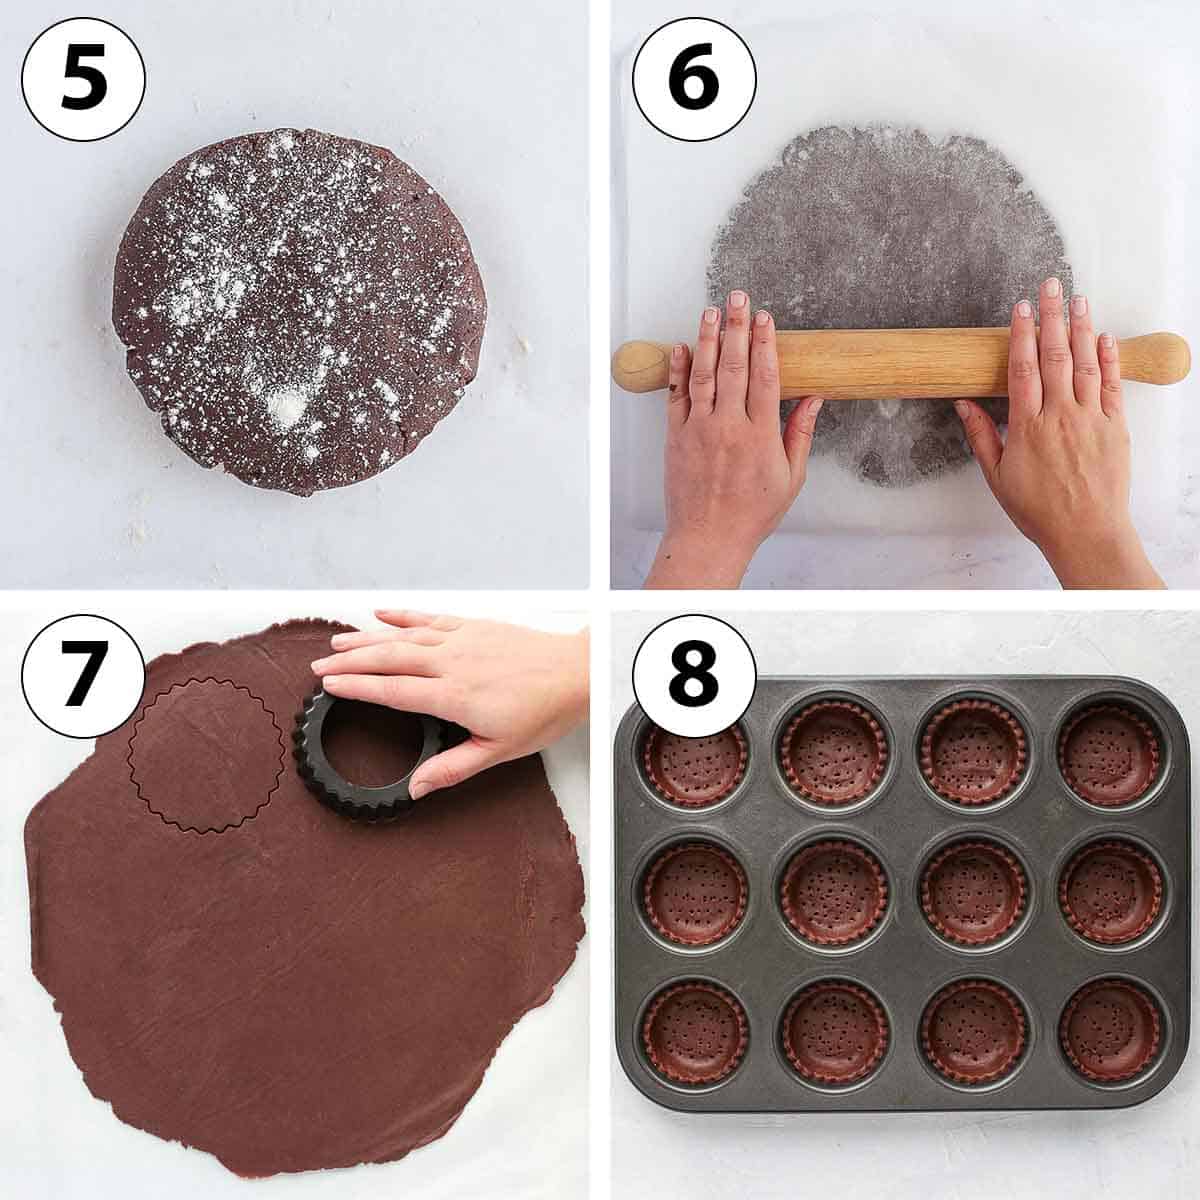
- Photo 5: assemble the pastry into large ball and flatten it into a disk. Dust with a little bit of flour is sticky.
- Photo 6: Roll between two sheets of baking paper with a rolling pin. I recommend rolling it to be about 3mm thick (1/8inch). Thiner might break when baked and thicker will make it harder to shape into mini tarts.
- Put the rolled tart crust over a large flat tray and place in the fridge to rest and chill for at least 1 hour - or up to 24 hours.
- Photo 7: using a round or fluted cookie cutter, cut out small rounds of pastry. The larger the pastry, the deeper the chocolate tartlets will be. I recommending cutting them out to be at least the same width as the openings of the muffin pan.
- Photo 8: place the pastry inside the muffin pan by gently sliding it inside each muffin pan opening. Run a finger along the corners between the bottom and sides to remove any air bubbles and create a sharp 45' angle. Dock the pastry with a small fork.
- Place back in the fridge (or freezer) for at least 1 hour, or up to 24 hours. Once the pastry has rested again, preheat your oven on 160'C/325'F and place the muffin pan in the freezer while it is preheating.
- Cover each pastries with a small piece of baking paper and fill with baking beads or dried beans/rice. Bake for 15 minutes, then remove the weights and baking paper and bake for an additional 15 minutes. Leave to cool down completely.
You can find more detailed step by step photos of the shaping of the shells in my Tartlet Shells recipe.
Dark Chocolate Ganache Filling
Once the mini chocolate tarts crusts are baked, it is time to prepare the filling. It is a super easy chocolate ganache filling made out two simple ingredients:
Would you like to save this recipe?
- Chocolate: always use Cooking/Baking Chocolate when baking (and especially when trying to melt chocolate like here). I used a 70% Dark Chocolate for an intense chocolate filling, but you can use any type of chocolate you want.
- Cream: heavy/thickened cream.
We are using a basic 1:1 ratio to make the ganache, which creates a super fudgy texture.
On top of those two basic ingredients, you can very much customise the filling with the addition of other ingredients like vanilla, coffee, sea salt or even some orange zest!
Alternatively, you could make a Chocolate Cremeux or Chocolate Pastry Cream filling for a creamier filling.
Here is how to make the tartlets ganache filling:
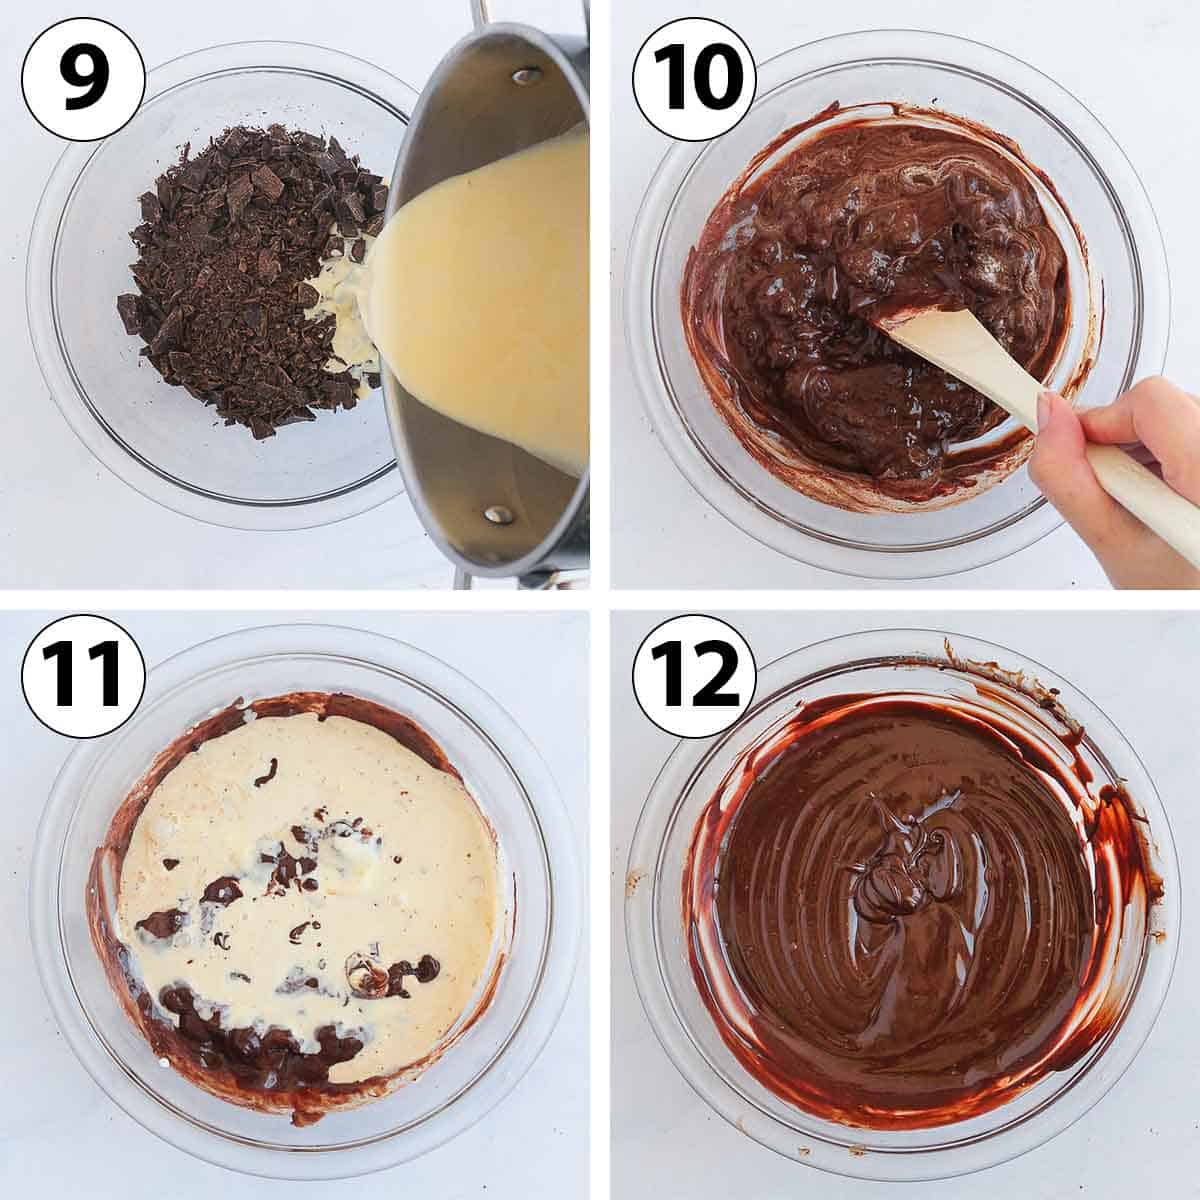
- Photo 9: finely chop the Cooking Chocolate and place it in a heat-proof mixing bowl. Heat up the cream in a small saucepan until it starts to simmer. Pour about half of the hot cream over the chocolate and let it sit for 2 to 3 minutes.
- Photo 10: using a spatula, mix the chocolate and cream in small circular movements until all the cream has been incorporated. You should see a mix of melted chocolate with a few chunks of still solid chocolate.
- Photo 11: pour the rest of the hot cream over the ganache. If the cream is not hot anymore, you can re-heat it up first.
- Photo 12: stir to combined until all the chocolate has melted. You should get a very shiny, smooth and fluid ganache.
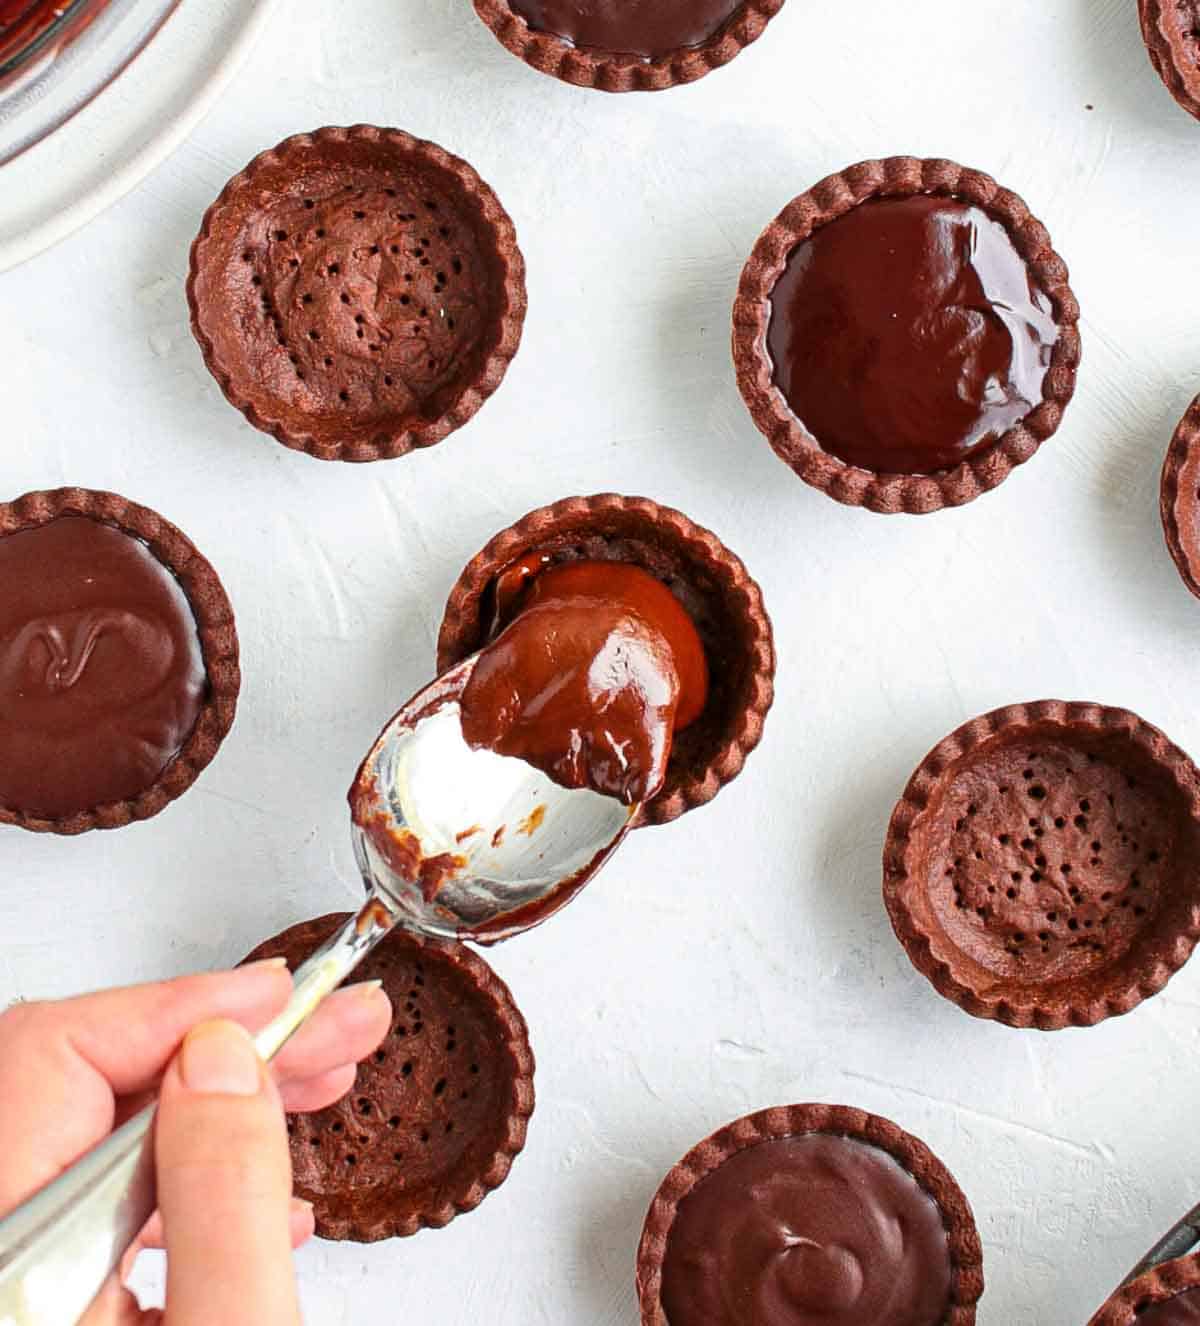
- Directly pour the ganache inside each tartlet shells while still warm (so that it spreads out more easily). Gently tap each tartlet on a hard surface to pop any air bubbles, then place in the fridge to set for at least 2 hours.
Tips & Troubleshooting
- Rest the chocolate pastry for at least 1 hour each time after handling it, but the longer you wait, the better. To make sure the pastry does not move, collapse or shrinks in the oven, you need to give time for the gluten created in the dough to relax and for the buttery to get very cold.
- Using baking weights/beads/dry beans or rice for the first half of the pastry baking is very important. Because these mini chocolate tarts are so small, you want to make sure the pastry does not puff too much in the oven. I have tried to make these crusts without weights and found that the pastry shrunk and puffed way more in the oven. Don't forget to remove them midway through the baking to dry out the bottom of the pastry.
- Because there is no sugar added to the filling, the choice of chocolate you use for the filling is very important to get the level of sweetness that is to your liking. If you like very dark, intense chocolate, use a 70% dark chocolate like I did. For something still intense but a bit sweeter, a 50% dark chocolate will do. For a much sweeter flavour, go for Milk Chocolate instead of Dark Chocolate. I highly recommend using a good quality chocolate as much of the flavour will come from it.
- If there are still a few chunks of unmelted chocolate after you've incorporated all the cream, you can finish melted them over a double-boiler, or for a few seconds in the microwave (but be careful with the microwave, you don't want to burn the chocolate).
Recipe FAQs
Yes, if you don't want to make your own pastry, you can absolutely use pre-made tartlet shells. You might struggle to find chocolate ones, but plain crusts will do just fine.
It is completely up to you, as long as it is proper cooking/baking chocolate! Never use eating chocolate to make a ganache (or generally, to bake with) as it will not melt properly and/or re-solidify nicely.
I used a 70% dark chocolate for a very intense chocolate flavour, but you can absolutely use a less strong dark chocolate or even milk chocolate if preferred.
Remember that there is no added sugar in the filling, so the sweetness of dessert will come from the type of chocolate you use (percentage of cacao, milk vs dark chocolate etc...)
I simply finished those chocolate tartlets with a drizzle of melted chocolate and some cacao nibs. But you could also add fresh fruits like berries, some chocolate shavings, or a little bit of sea salt for example!
Storing & Freezing
These mini chocolate tarts should be kept in the fridge, but I recommend taking them out of the fridge about an hour before serving. That is to allow for the ganache filling to get back to room temperature, which will give it its best, fudgy texture.
This dessert will last for up to 3 days in the fridge, but they are best served as soon as the ganache as set - or within 24 hours. This is to make sure the pastry stays crunchy.
I do not recommend freezing these chocolate tartlets, but if you want to start making them in advance, the tart shells themselves can be made ahead and frozen.
Although you could freeze them fully baked, you will get a much nicer texture by freezing them raw and baking them when needed. Simply add 5 minutes to the recommended baking time to allow for them to thaw in the oven.
Made this recipe?
Let us know if you liked it by leaving a comment below, and tag us on Instagram @a.baking.journey with a photo of your creation!
Recipe

Mini Chocolate Tarts
Ingredients
Chocolate Tart Pastry
- 225 gr (1 1/2 cup) Plain / AP Flour
- 20 gr (2 tables.) Unsweetened Cacao Powder, sifted
- 50 gr (1/3 cup + 2 tablesp.) Icing Sugar, or powdered sugar
- 1 pinch Fine Salt
- 120 gr (1/2 cup) Unsalted Butter, very cold
- 1 Egg, at room temperature
Chocolate Ganache Filling
- 200 gr (7 oz) Dark Cooking Chocolate, (*see notes below)
- 200 ml (3/4 cup + 1 tablesp.) Heavy / Thickened Cream
Instructions
Chocolate Tart Pastry
- Place the Flour, Cacao Powder and Icing Sugar in the bowl of your food processor and pulse to combine and remove any lumps (see note 1 if making by hands).
- Add the very cold Butter, cut into small cubes and pulse until you get a fine crumbs consistency. Add the whisked Egg and pulse to combine until a sticky dough starts to come together. If you press the crumbs together, they should stick.
- Bring the pastry together into a disk and place between two sheets of baking paper (see note 2) and roll into a large circle about 3mm (1/8 inch) thick. Place in the fridge to rest for at least 1 hour, or up to 24 hours.
- Remove the baking paper and cut out rounds of pastry using a round or fluted cookie cutter (see note 3). Gently slide the pastries into the muffin pan openings, lightly pressing the edge between the bottom and the sides to remove any air bubbles. Prick the bottom with a fork and place back in the fridge to rest for at least 1 hour, or up to 24 hours.
- Preheat your oven on 160'C/325'F and place the muffin pan in the freezer in the meantime.
- Line each tartlet shell with a small piece of crunched up baking paper and cover with baking beads, dry beans or rice. Bake for 15 minutes, remove the baking weights and baking paper, then bake for an additional 15 minutes or until fully baked. Leave to cool down completely
Chocolate Ganache Filling
- Finely chop the Cooking Chocolate and place it in a large heat-proof mixing bowl.
- Heat up the Cream in a small pot until it starts to simmer. Pour half of the hot cream over the chopped Chocolate and leave for 2 to 3 minutes without touching it. Using a stiff spatula, stir in small circular movements, starting from the centre of the bowl then making your way towards the edges until combined (see note 4).
- Pour the rest of the hot cream over the ganache (reheat it first if needed) and stir again in circular movement until all the chocolate has melted. You should get a smooth, fluid and shiny ganache (see note 5).
- Pour straight away into the baked tartlet shells while still warm. Gently tap each tartlet on a hard surface to remove any air bubbles, then place in the fridge to set for at least 2 hours (see note 6).
Would you like to save this recipe?
Notes
- Chocolate: always use Cooking Chocolate (and not eating chocolate) to bake with or make a ganache. Using eating chocolate would likely result in a grainy and/or split ganache as it will not melt and reset properly.
I used 70% dark chocolate but you could use any of your preferred dark chocolate or even milk chocolate if preferred! There is no sugar added to the filling so play with the type of chocolate to bring a sweetness that is to your liking.
- The pastry can be made by hands and/or with a pastry blender if you do not have a food processor. You can find the detailed step by step instructions in my Chocolate Pie Curst recipe.
- If the pastry seem to be a bit sticky, dust with a little bit of flour.
- The wider you cut out the circles of pastry, the deeper the tartlet shells will be. It is up to you how wide you cut them out, but I recommend having the width of the muffin pan openings as a minimum. Otherwise, the crusts will be quite flat and not deep enough for a filling.
- The chocolate won't be fully melted at this point - it is normal. Gently mix until all the cream has been incorporated into the chocolate.
- If you still have some unmelted chunks of chocolate after adding the second half of the cream, either place the ganache in the microwave (for no longer than 30 seconds at the time, stirring well each time until fully melted) or preferably over a double boiler.
- I recommend taking them out of the fridge for about 1 hour before serving them so that the ganache can come back to room temperature, which will give it the best, fudgy texture.