
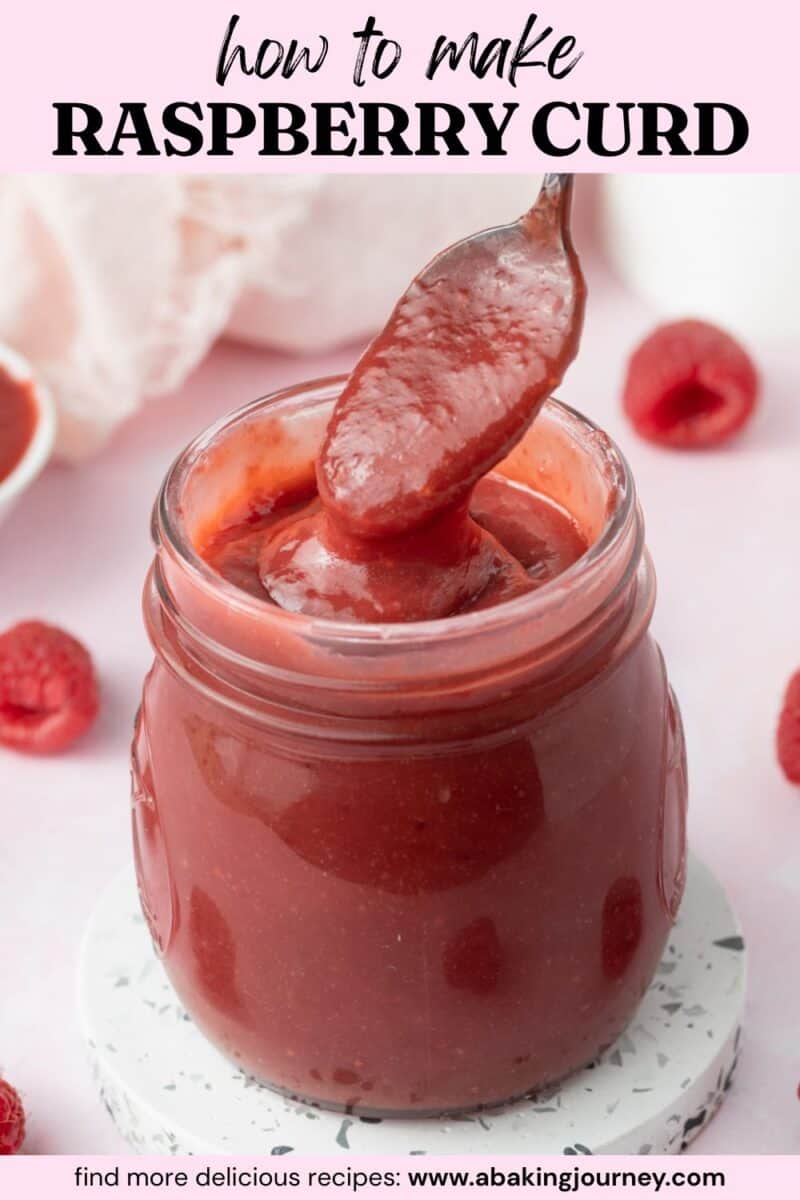
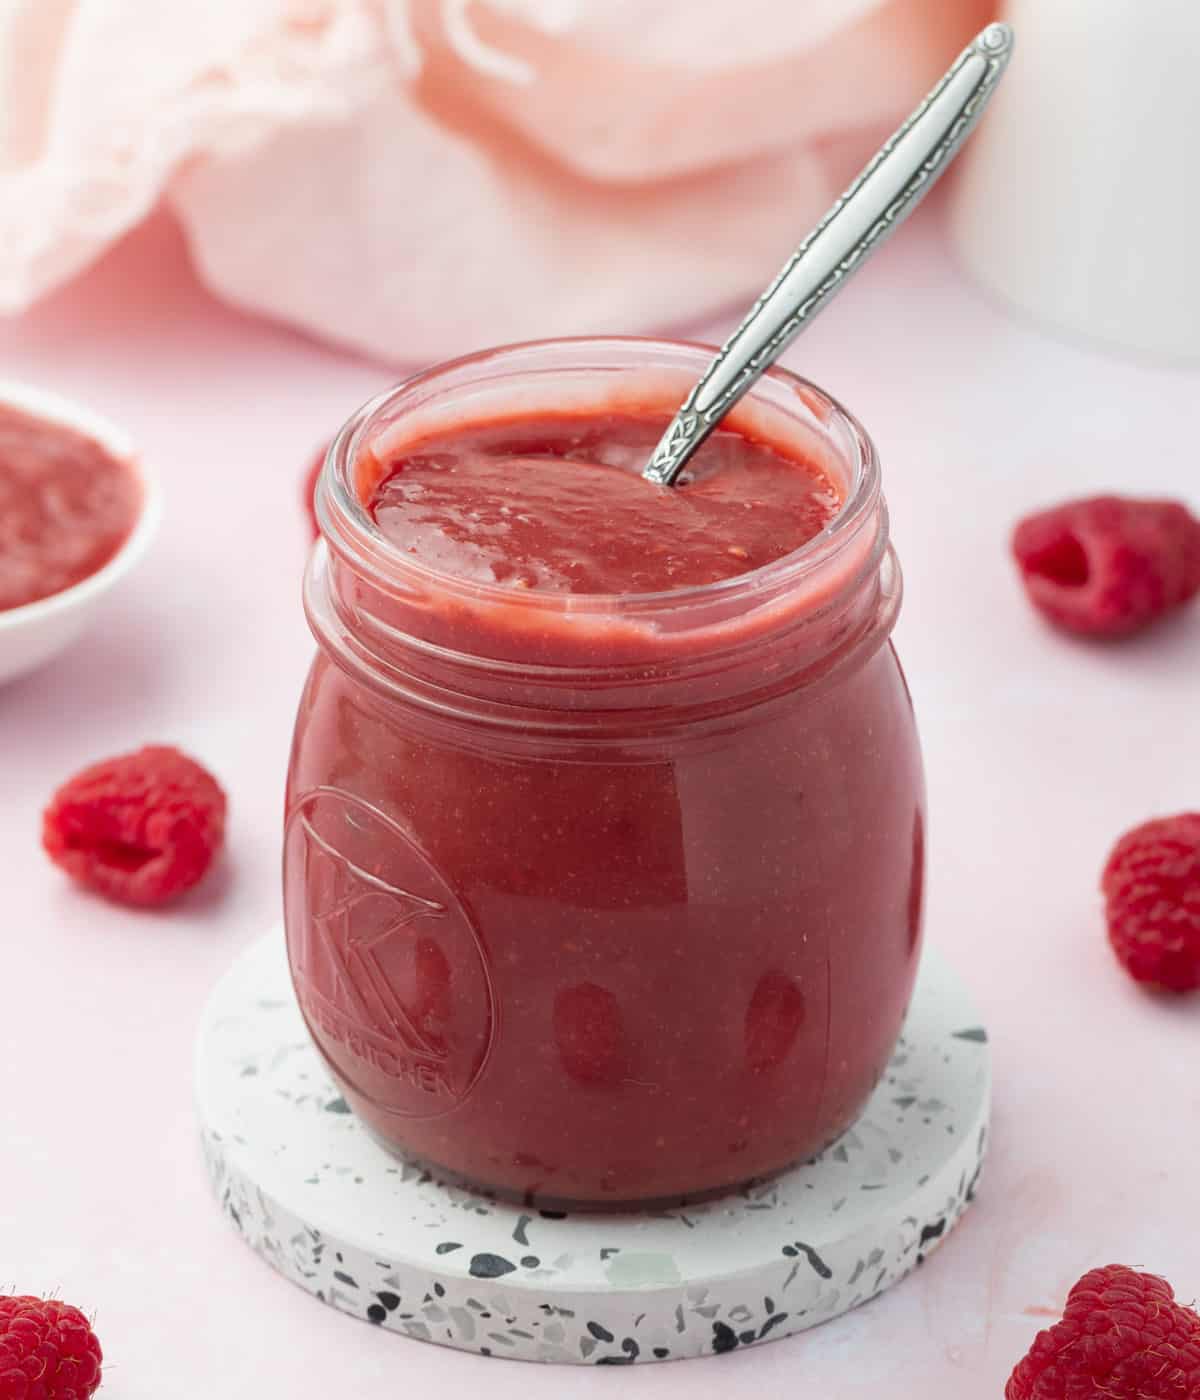
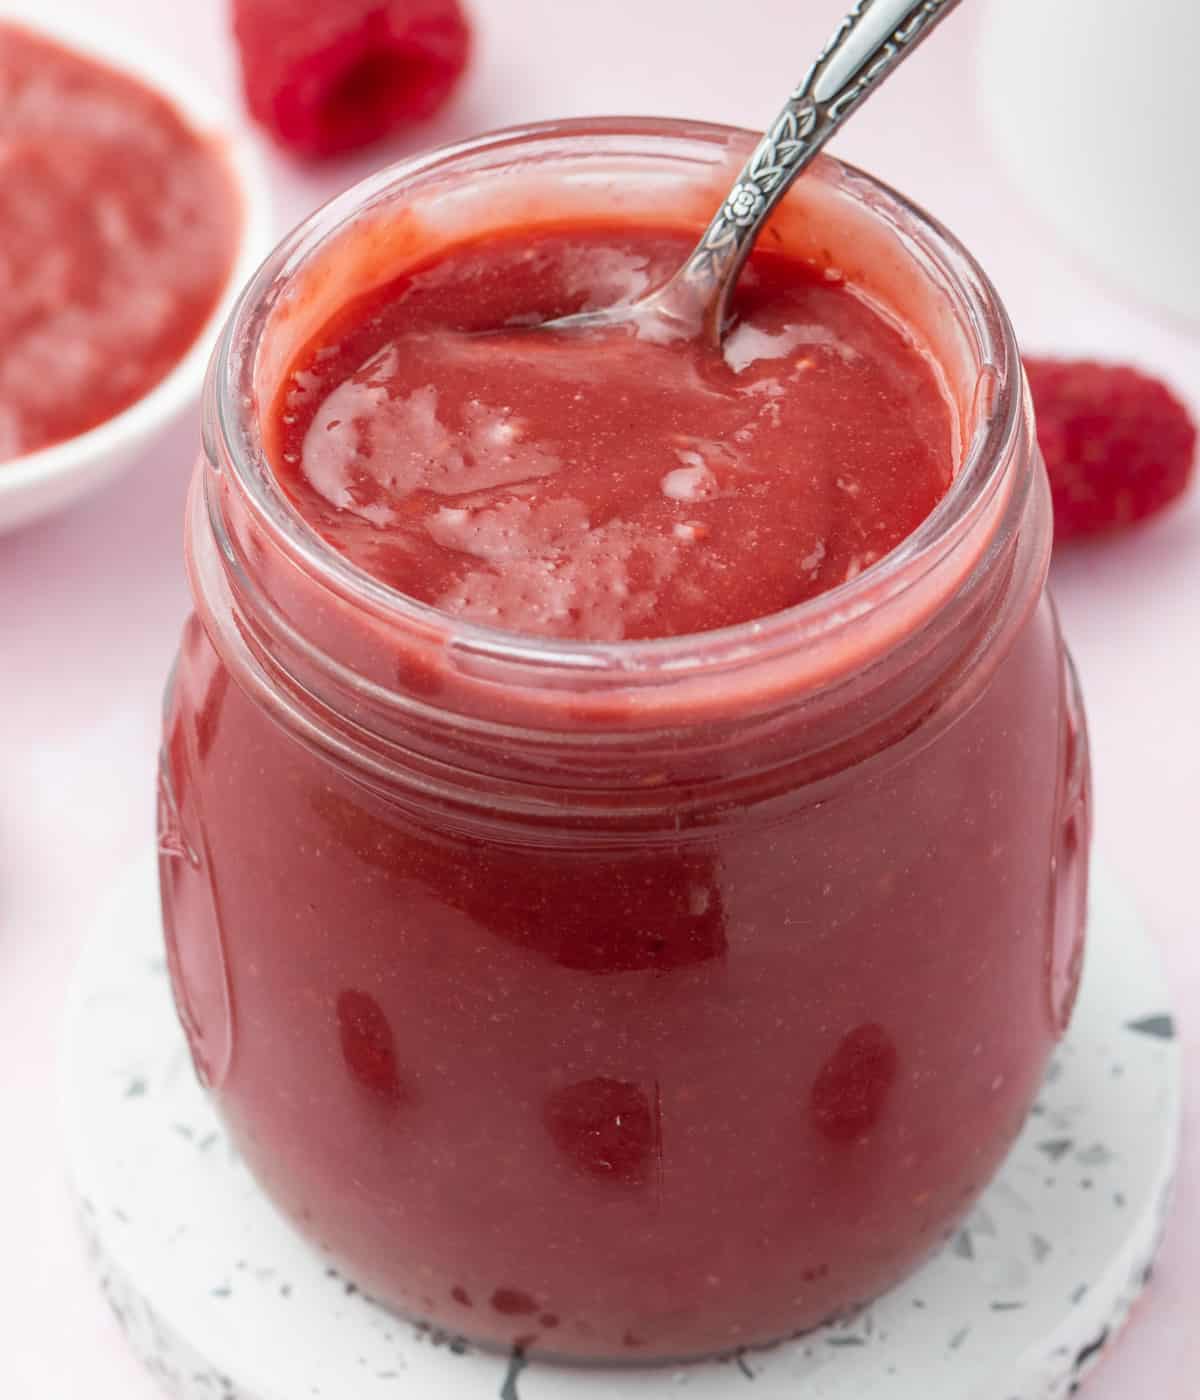
This easy Raspberry Curd is deliciously fresh and creamy with bright, bold flavours. It is the perfect spread to serve as a breakfast topping or to use as a pastries and cake filling.

Jump to:
Why we love this recipe
This 5 ingredients raspberry curd recipe is a delicious way to use flavourful raspberries and transform them into a creamy and fresh fruit spread.
It is super easy to make with either fresh or frozen raspberries - so it can be enjoyed all year round!
The curd is great to spread on toast, scones, waffles, crepes and pancakes or drizzled over ice cream and yogurt. It is also an amazing cream to use as a filling and topping for macarons, cakes and tarts like my Raspberry Tart!
More fruit curds recipes:
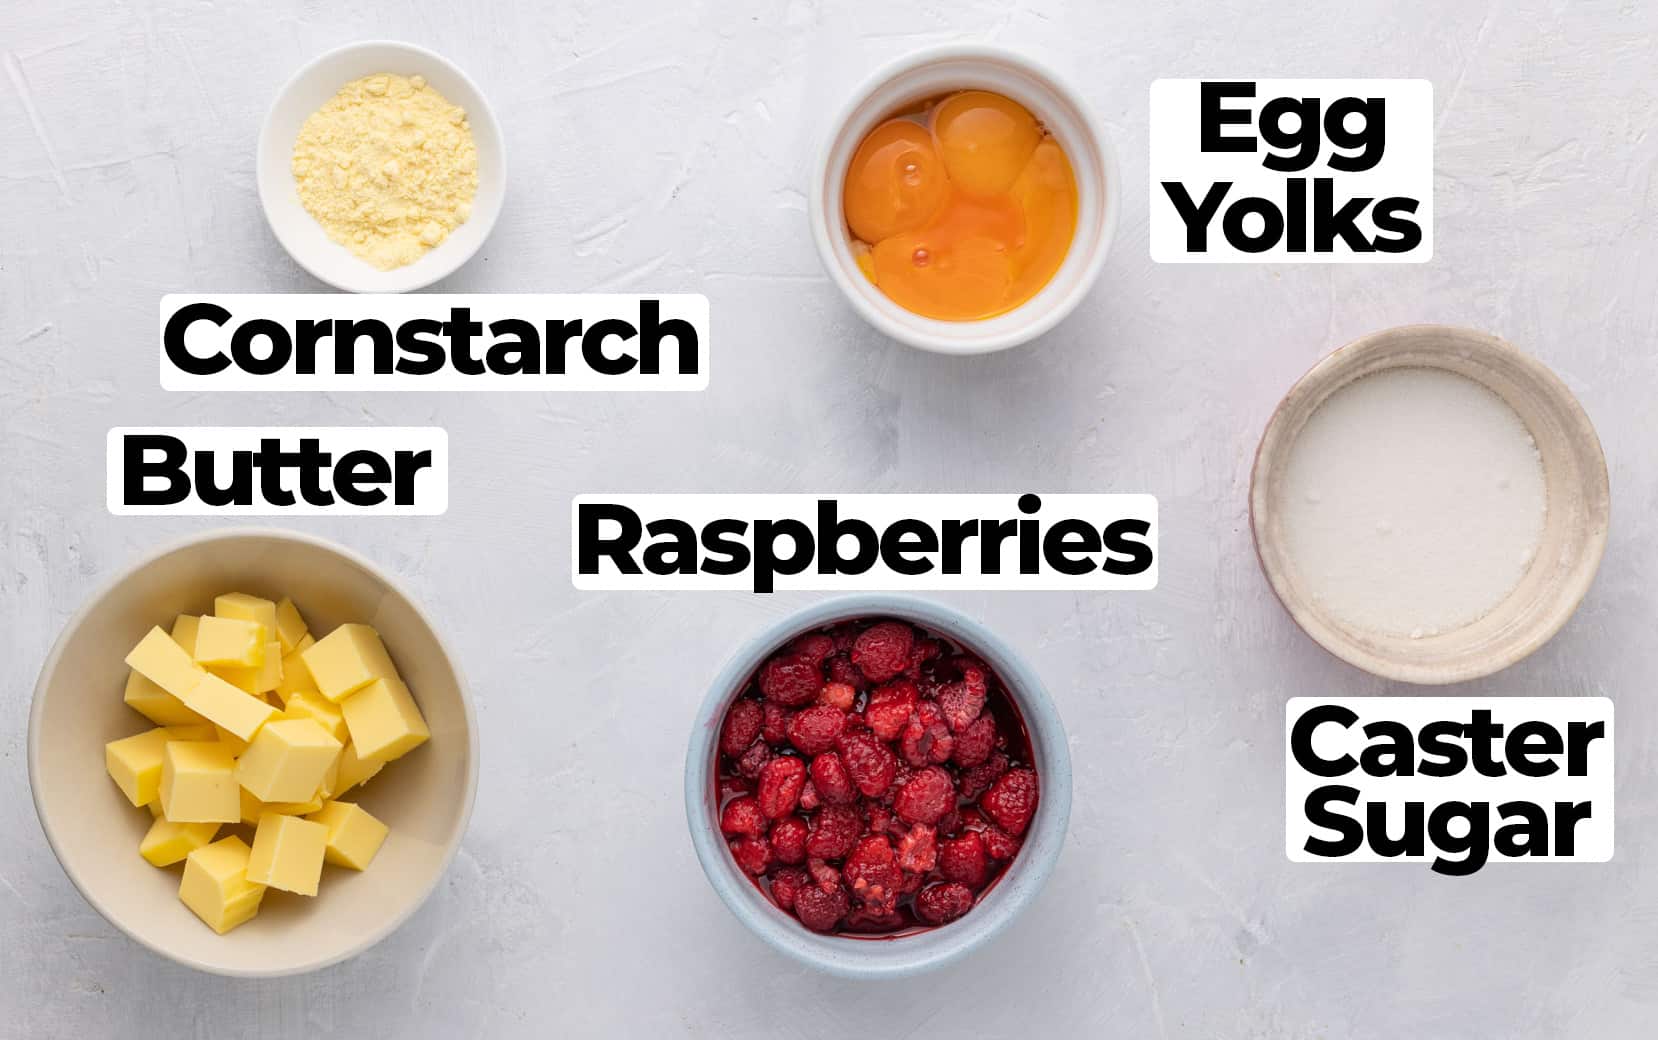
Ingredients
Scroll down to recipe card below for all quantities
What is raspberry curd made of:
- Raspberries : fresh or thawed frozen raspberries, blended into a thin puree that combines both the flesh and the juices of the berries. You can use store-bought raspberry puree as long as it is made out of 100% raspberries (with no added sugar).
- Eggs: large egg yolks at room temperature. Make sure the eggs are not cold or they might curdle when you start cooking the curd. You can keep the egg whites to make Financiers for example.
- Sugar: caster sugar or fine granulated sugar.
- Butter: unsalted butter at room temperature (but not too soft). I like to cut them into small cubes so that they melt quickly into the curd.
Optional Ingredients
- Cornstarch: depending on how you are planning to use this curd, you can add a little bit of cornstarch to make it thicker. I added cornstarch to use this raspberry curd as a tart filling for example.
- Salt and / or Vanilla: both used as flavour enhancers.
I usually add lemon juice and lemon zest to my fruit curds but in this case, I don't find it necessary. Fresh raspberries are quite tart on their own and the quantity of sugar is relatively low here.
How to make Raspberry Curd step-by-step
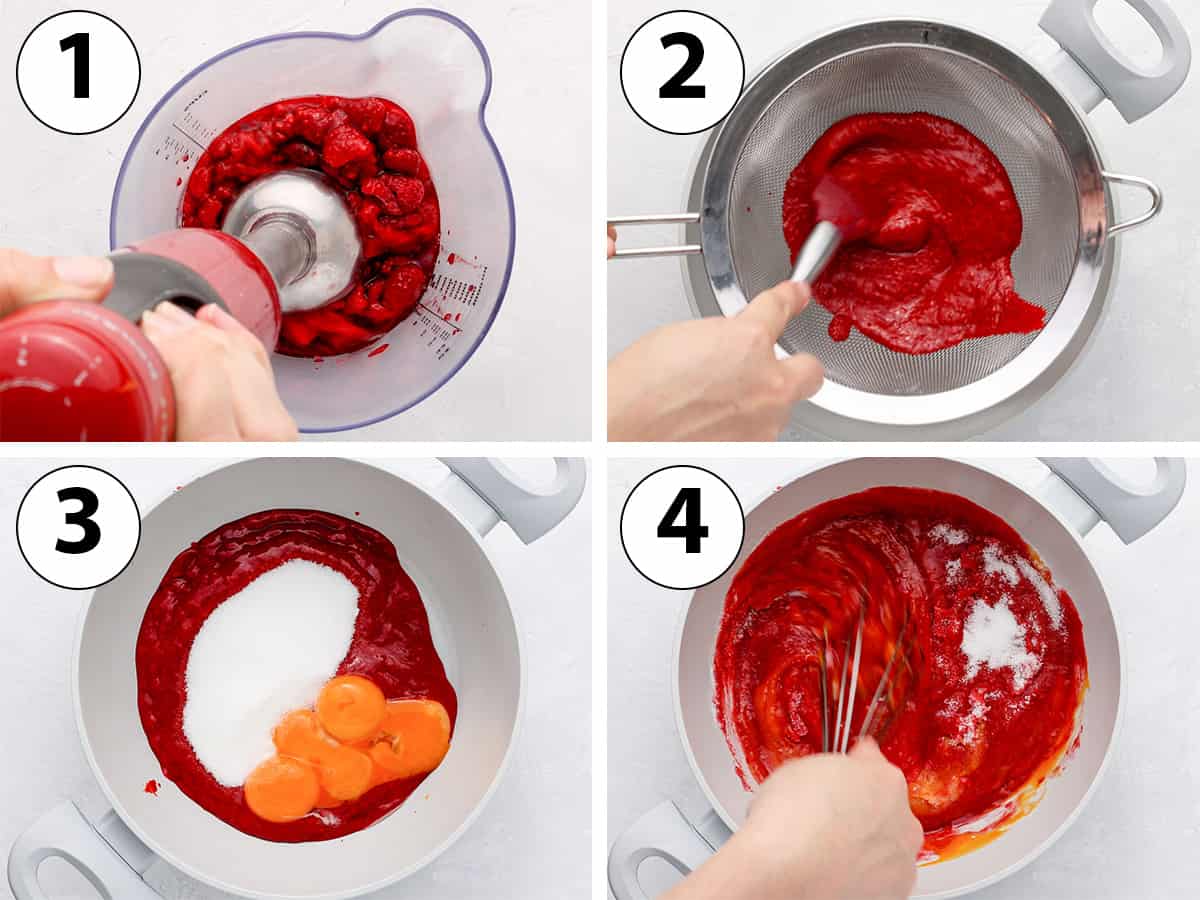
- Photo 1: Place the fresh Raspberries - or thawed and drained frozen raspberries - in a small jug or bowl and blend until completely smooth with an immersion blender (or in a regular blender).
- Photo 2: Place a fine mesh strainer over a non-reactive medium saucepan and pour the blended raspberry puree through it. Using a spatula, press the puree through the sieve and discard leftover seeds.
- Photo 3: Add the sugar and egg yolks to the pan.
Would you like to save this recipe?
- Photo 4: Whisk until combined.
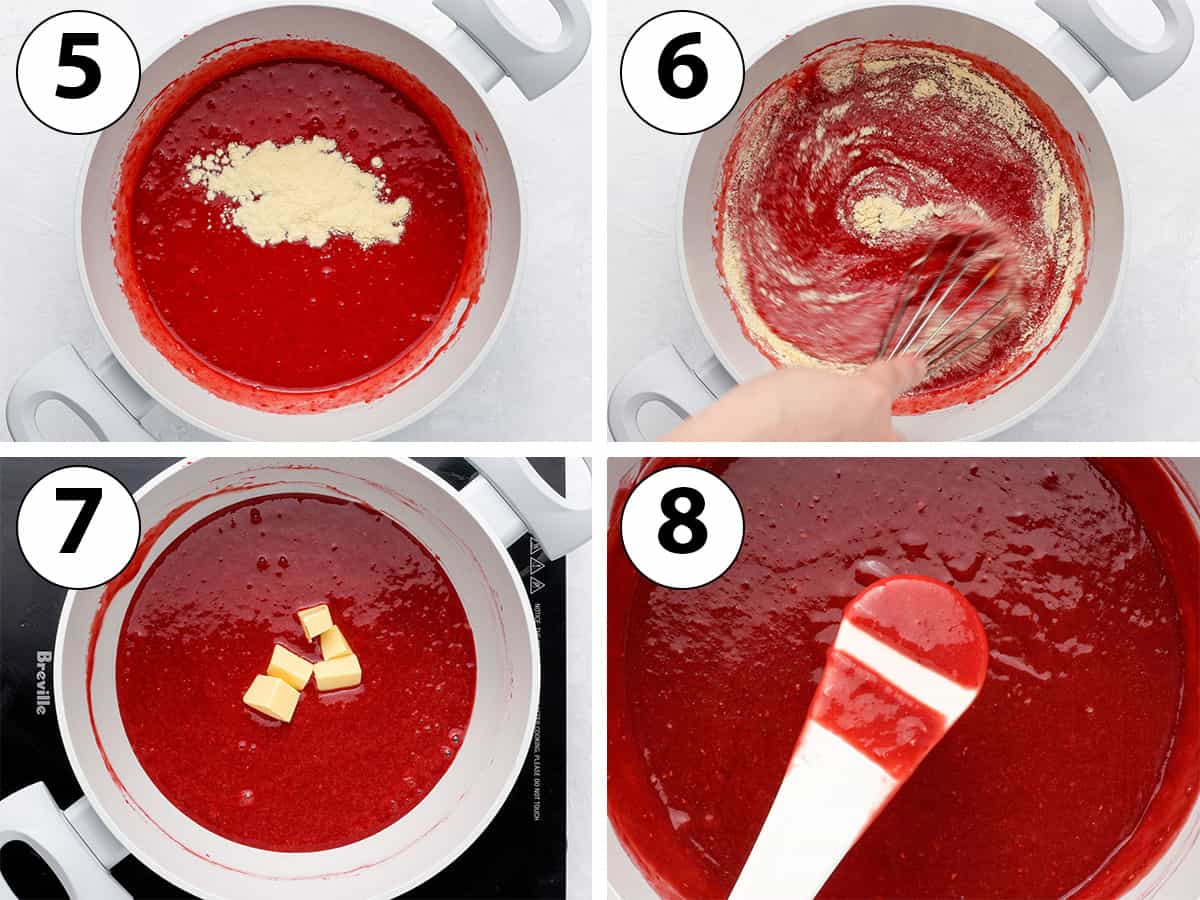
- Photo 5 & 6: optionally, mix in the cornstarch.
- Place the saucepan on the stove and turn on low heat. Cook for 3 to 4 minutes while constantly stirring with a heat-proof spatula or wooden spoon. The sugar should have dissolved and the mixture should have started to very slightly thicken.
Make sure to stay below medium heat, or the eggs will cook too quickly and start to scramble. This would result in a curdled or lumpy curd. The curd should only simmer and never boil.
- Photo 7: Add the butter cubes a few at a time, stirring until completely melted in the mixture. Continue to add the butter a little bit at the time until it has been fully incorporated.
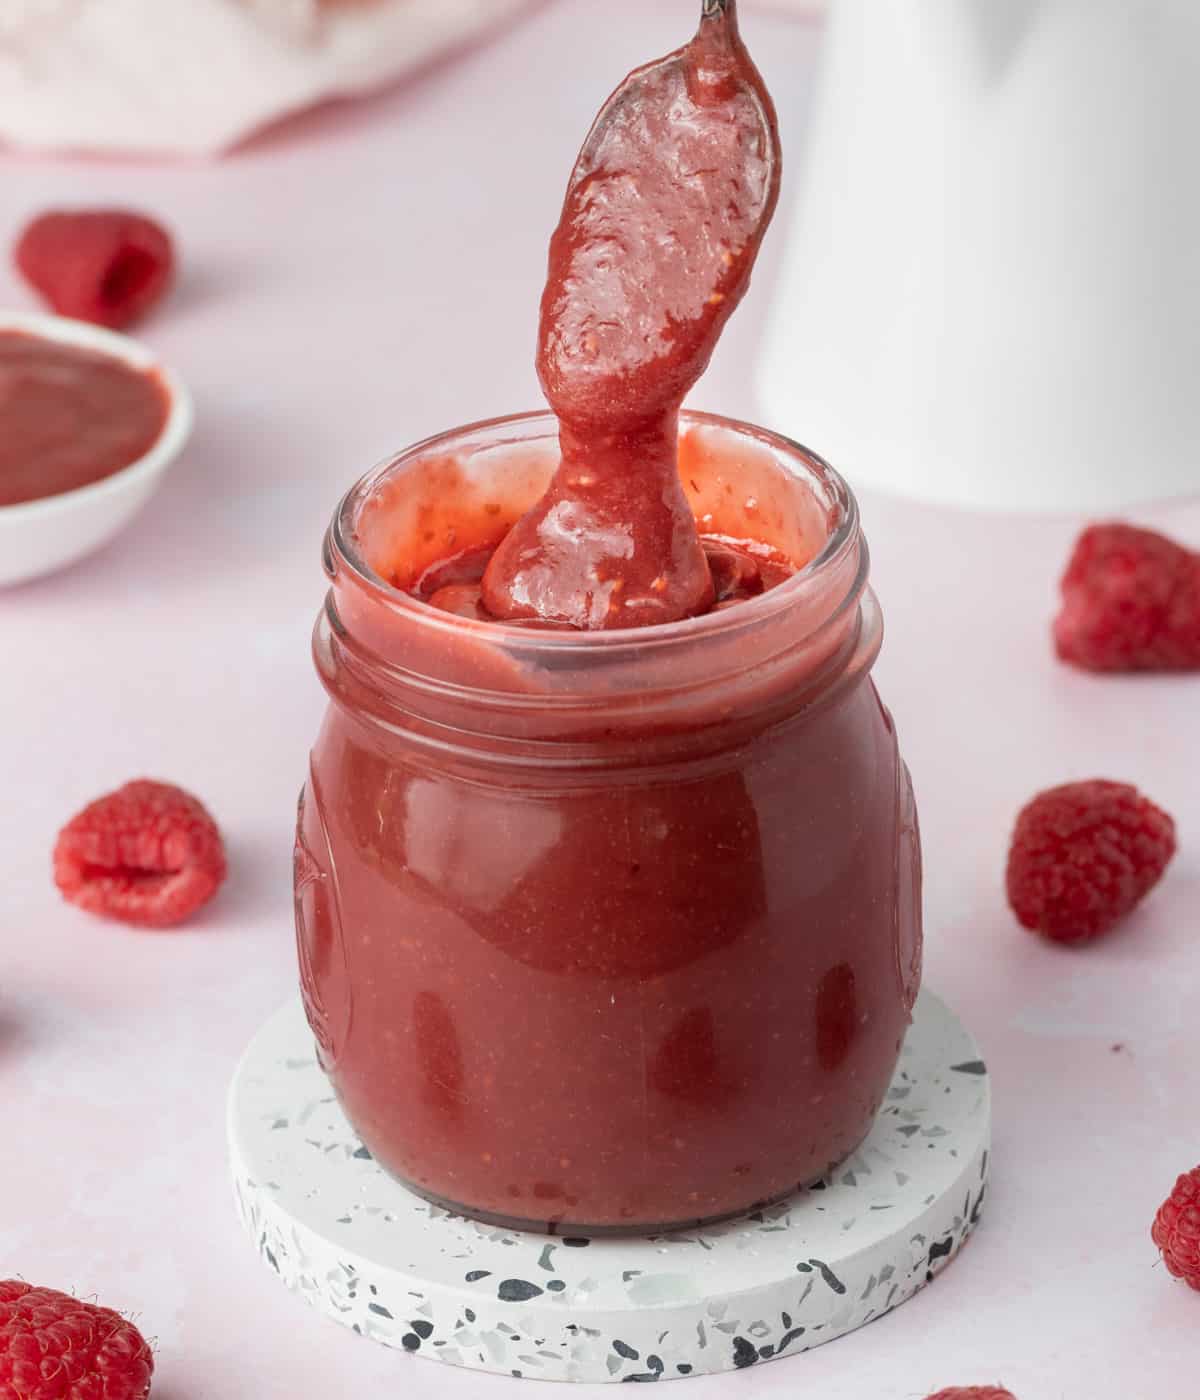
- Photo 8: continue to cook and stir for another 5 to 8 minutes (more or less depending on the heat and size of saucepan). The curd should have thickened and coat the back of a spoon or spatula. Note that if you are using cornstarch, the curd will thicken more quickly.
Ideally, use a kitchen thermometer to check if the curd is cooked. The curd is ready when it reaches around 82 degrees Celsius (180 degrees Fahrenheit).
- Optionally, pour again through a fine mesh sieve to remove any leftover seeds or bits of cooked egg.
- Transfer into a jar or a clean small bowl with plastic wrap touching the surface of the curd (to avoid the creation of a crust on top of the curd). Leave to cool down at room temperature for 30 minutes, then seal the jar and place in the refrigerator to chill and set for at least 2 hours, preferably overnight.
Recipe FAQs
Both mixtures are slowly cooked on the stove and rely on eggs to thicken. Usually, curds are flavoured with fruit juice or puree while custards are made with a dairy base (milk and / or cream).
With the "direct heat" method, you cook the curd directly inside the saucepan on a very low heat. It is the quickest method, but you risk overcooking the curd and the eggs.
The "indirect heat" method (or double boiler method) requires you to cook the curd in a heat-proof bowl placed on top of a saucepan filled with a little bit of simmering water. It takes longer to cook, but you avoid the risk of burning the curd.
There are two methods to check if a curd is cooked:
- Use a kitchen thermometer to check the temperature of the curd. It is ready when it reaches around 82 degrees Celsius (180 degrees Fahrenheit).
- Dip the back of a spoon or spatula in the curd, draw a line with a finger (be careful, it will be hot) and tip it down. If the curd looks liquid and runs over the clear line, it's not ready. If the curd looks thick and the line stays clear, it's ready.
How to use raspberry curd
- Spread over waffles, pancakes, french toast, crepes, scones, yogurt, ice cream,...
- As a pastries, macaron and cake filling - or a topping for desserts like cheesecakes. Perfect as a filling for a Raspberry Tart too!
- As a topping for other desserts like a Raspberry Panna Cotta, Pavlova Wreath or Raspberry Mousse.
- Inside a cake like my Pistachio Raspberry Loaf Cake or drizzled over my Almond Raspberry Cake.
- With a spoon straight out of the jar!
Tips & Troubleshooting
- Using a heavy bottom non-reactive saucepan will give you the best results. A metal pan may react to the acidity of the fresh berries and give a metallic taste to the curd.
- For extra smooth raspberry curd, strain the mixture after it has finished cooking. This will remove any leftover raspberry seeds and bits of cooked egg yolks. I personally like the texture that a few seeds add to the curd, but it is up to you!
- The raspberry curd is lumpy: this may happen if the heat is too high and the curd starts to boil; it should only ever go as high as a simmer. To smooth it out, pour the curd through a fine mesh sieve to remove the cooked eggs. If required, use an immersion blender to smooth it out as well.
- Why is my curd not thickening? It is probably not fully cooked yet. Because we are working on a very low heat source, making curd can take a while. Stay patient and keep stirring until it thickens! The curd will continue to thicken while it chills in the fridge too.
Storing & Freezing
Raspberry curd should be stored in the fridge, either in an airtight container (covered with plastic wrap) or in a sealed jar. It is best eaten within a week. There is not enough sugar in the curd to be safely canned or preserved.
Although curds can technically be frozen, I personally don't recommend it as the texture of thawed curd isn't as nice as the fresh one.
Made this recipe?
Let us know if you liked it by leaving a comment below, and tag us on Instagram @a.baking.journey with a photo of your creation!
Recipe

Raspberry Curd
Ingredients
- 200 gr (7 oz) Raspberries, fresh or frozen & thawed
- 4 large Egg Yolks, at room temperature
- 100 gr (1/2 cup) Caster Sugar
- 1 tablespoon Cornstarch, optional
- 100 gr (6 1/2 tablespoons) Unsalted Butter, cubed, at room temperature
Instructions
- Using an immersion blender or regular blender, blend the Raspberries until very smooth. Pour through a fine mesh sieve into a medium heavy bottomed saucepan. Using a spatula, press the puree through the sieve and discard leftover seeds. You should have approximatively 150 grams of raspberry puree left.
- Whisk in the Egg Yolks and Sugar, then optionally the Cornstarch (see note 1).
- Place on low heat (see note 2) and cook for 3 to 4 minutes while constantly stirring with a heat-proof spatula or wooden spoon.
- When the sugar has dissolved and the mixture has started to very slightly thicken, start adding a few cubes of butter at the time. Stir until completely melted before adding more butter.
- Once all the butter has been incorporated, continue to cook for another 5 to 8 minutes (see note 3) while constantly stirring. The curd is ready when it coats the back of a spoon or reaches 82 degrees Celsius (180 degrees Fahrenheit).
- Optionally, pour again through a fine mesh sieve to remove any leftover seeds or bits of cooked egg.
- Transfer into a jar or clean small bowl covered with plastic wrap touching the surface of the curd. Leave to cool down at room temperature for 30 minutes, then seal the jar and place in the refrigerator to chill and set for at least 2 hours, preferably overnight.
Video
Would you like to save this recipe?
Notes
- Depending on how you are planning to use this curd, you can add a little bit of cornstarch to make it thicker. For example, I added cornstarch to use this curd as a filling for a tart. Note that if using cornstarch, the curd will thicken more quickly.
- Make sure to stay below medium heat, or the eggs will cook too quickly and start to scramble. This would result in a curdled or lumpy curd. The curd should only simmer and never boil.
- The exact time can vary based on the heat of your stove and the size of your pan.


Comments
No Comments