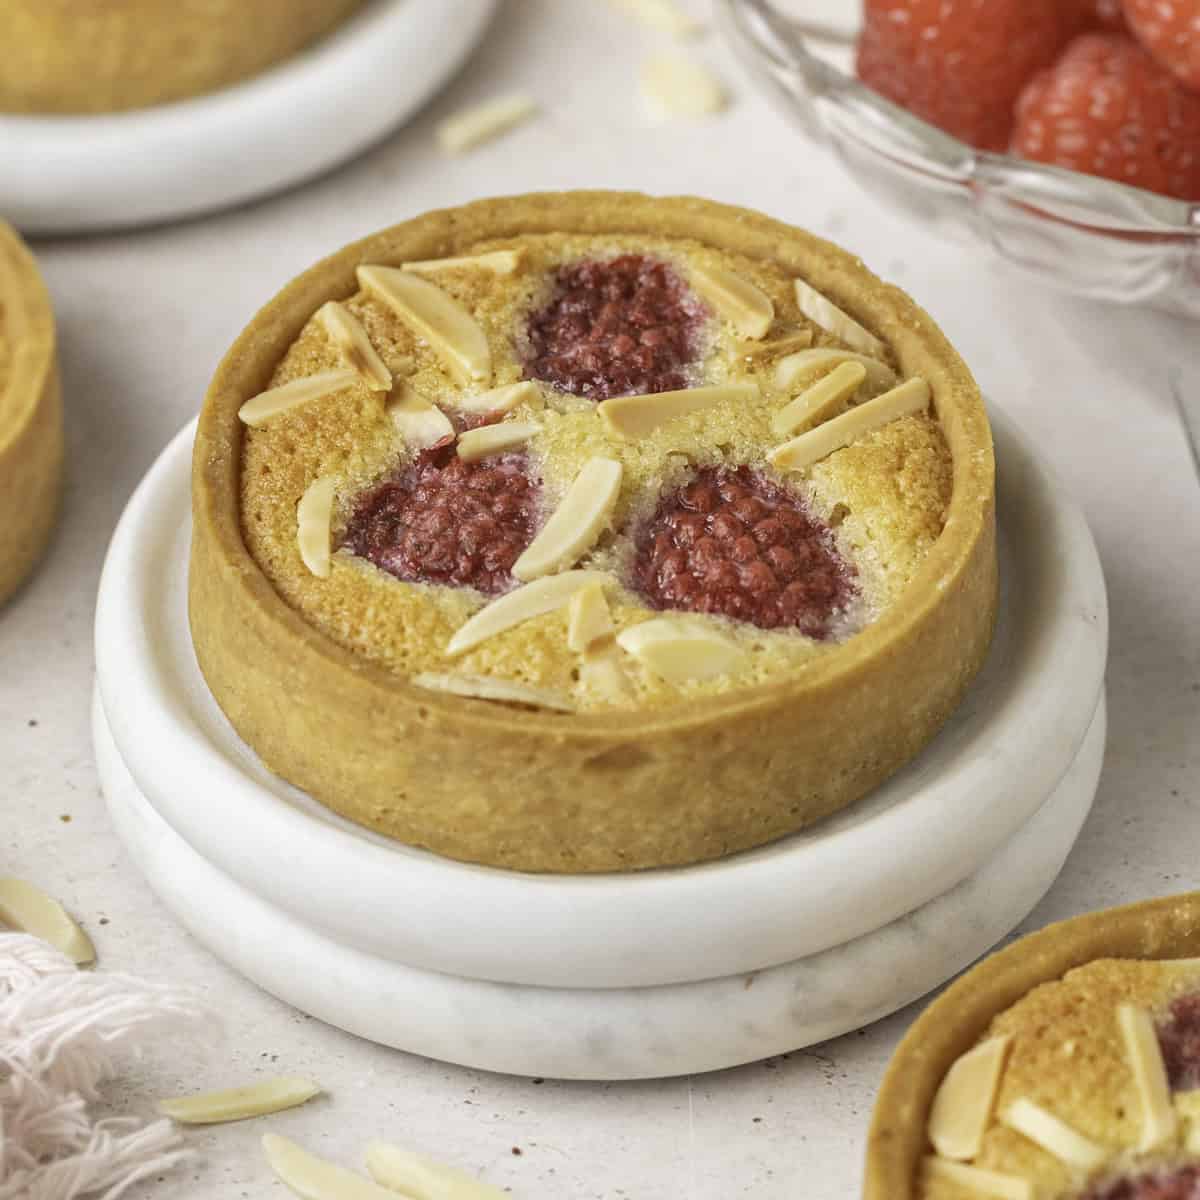
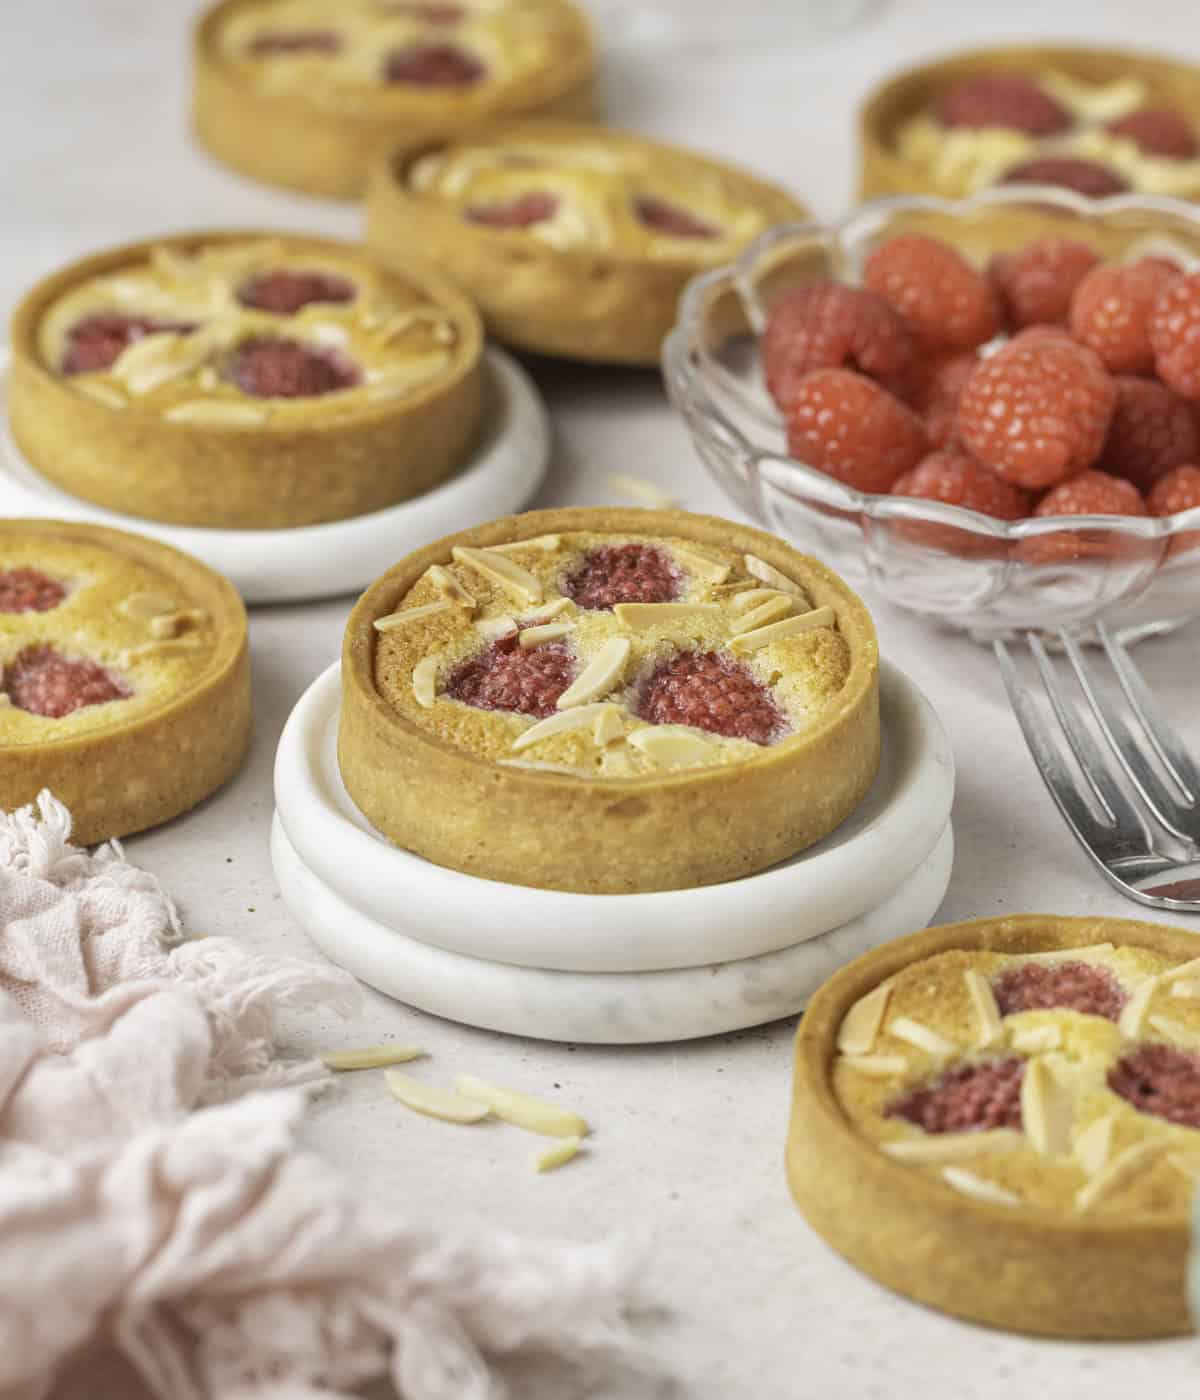
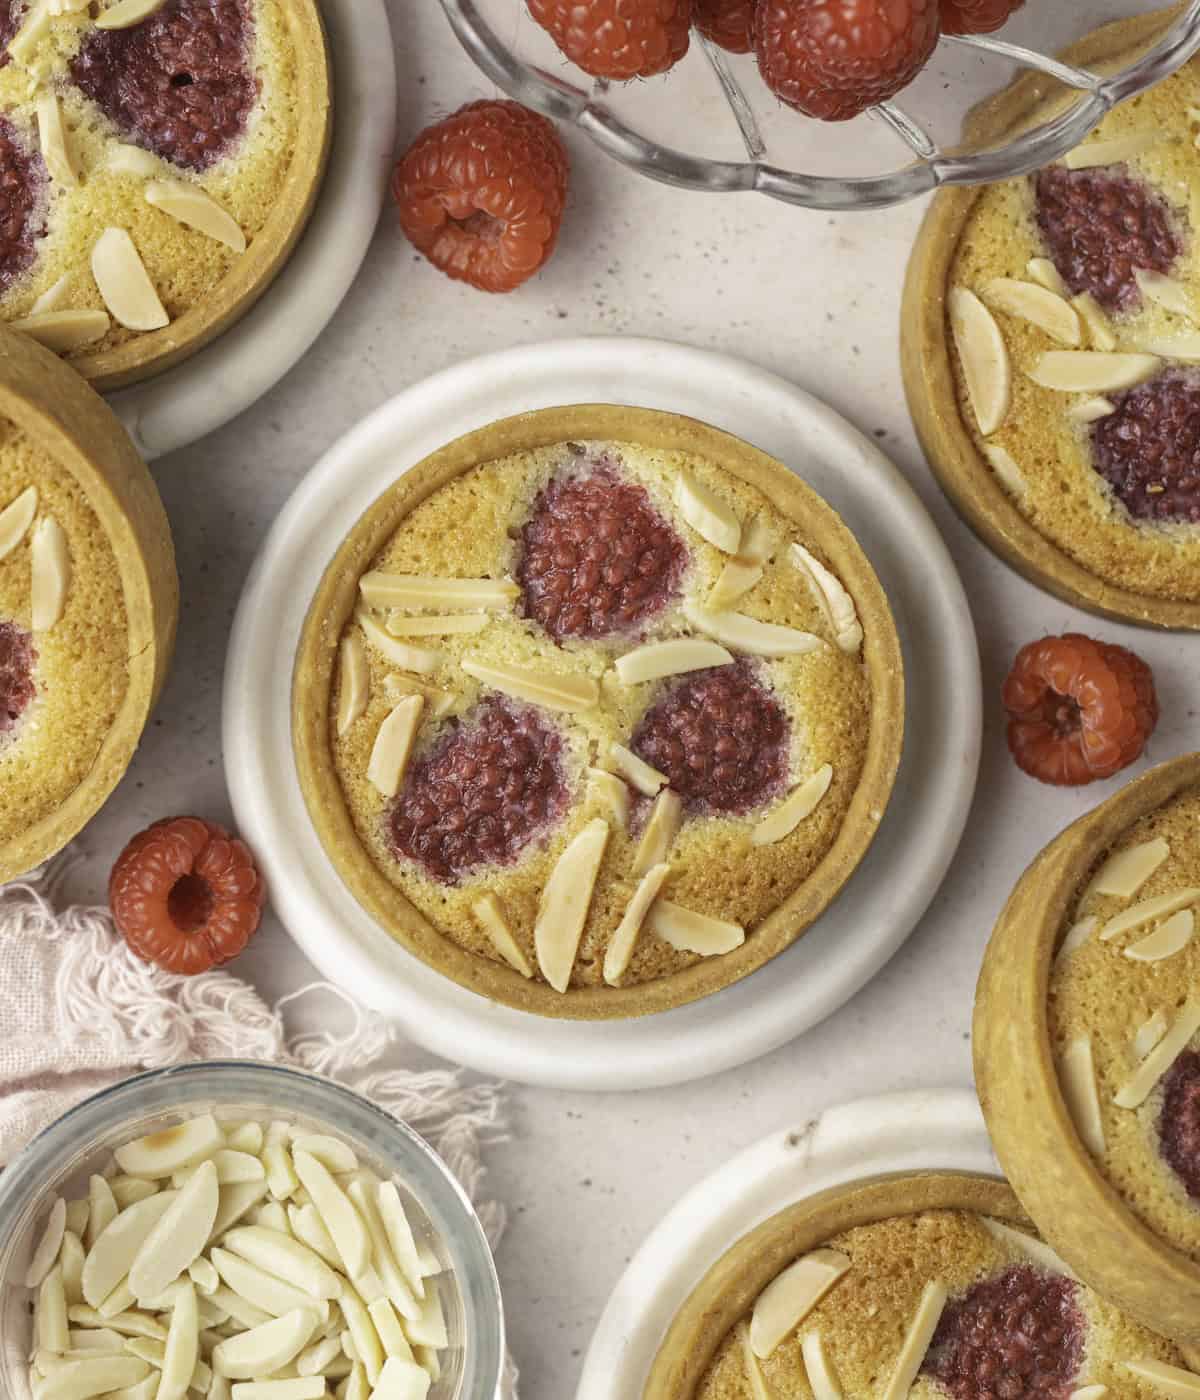
These Raspberry Frangipane Tartlets are elegant and delicious little pastries that are great for a Summer dessert table. The crispy mini tart shells are filled with a buttery almond cream and topped with fresh raspberries and slivered almonds. A perfect combination of flavours and textures!
Jump to:
These gorgeous little tarts are made with buttery and crispy Pâte Sucrée shells, melt-in-your-mouth Almond Cream filling and bursting fresh Raspberries. The extra slivered almonds add a delicious nutty crunch to the treats.
Elegant, fancy yet rather simple and easy to make, these Raspberry Almond Tartlets are the perfect mini dessert for a Summer party. The natural sweetness of the almond filling is perfectly balanced by the tangy raspberries.
What is Frangipane Tart
A Frangipane Tart is a classic French dessert that combines a pastry crust with a baked almond cream filling (sometimes called frangipane filling*). It is often topped with fruits (like a Tarte Bourdaloue with pears) but can be kept plain like this Almond Tart.
(*) Note that in French Pastry, a "Frangipane Cream" is technically not the same as an "Almond Cream". A Frangipane cream is made from combining Pastry Cream with Almond Cream. A "frangipane tart" is a name used for tarts made with an almond filling.
More Frangipane Tarts to try: Pear Frangipane Tartlets / Apricot Frangipane Tart / Apple Frangipane Tart / Peach Almond Tart.
Ingredients
What are Raspberry Almond Tarts made of:

Scroll down to recipe card below for all quantities
Tart Shells (Pâte Sucrée): made from soft Butter, Icing Sugar (powdered sugar), a full Egg (at room temperature), Almond Meal and Plain / All-Purpose Flour.
Almond Cream:
- Butter: soft unsalted butter, at room temperature. Make sure the butter is soft enough or it will not mix properly.
- Sugar: I like to use powdered sugar but caster sugar will work as well.
- Egg: whole large eggs. It is extremely important for the eggs to be at room temperature, or the mixture will split when you add it to the butter.
- Almond Meal: can use almond flour or finely ground almonds instead, but I personally prefer the slightly coarser almond meal that gives more texture to the filling.
Optional: you can flavour the almond filling with many ingredients if you want, such as Vanilla Extract, Almond Extract or even a drop of liquor.
Toppings:
- Raspberries: fresh Raspberries only. Using frozen raspberries, even if thawed, will add too much moisture to the filling and make it a bit soggy. Use raspberries that are still slightly firm for the best results; very ripe raspberries will tend to "melt" into the almond filling.
- Slivered Almonds: optional, but a great way to add extra crunch to the tarts. You could also use chopped almonds or flaked almonds if preferred.
How to make step-by-step
1. Pâte Sucrée Tartlet Shells
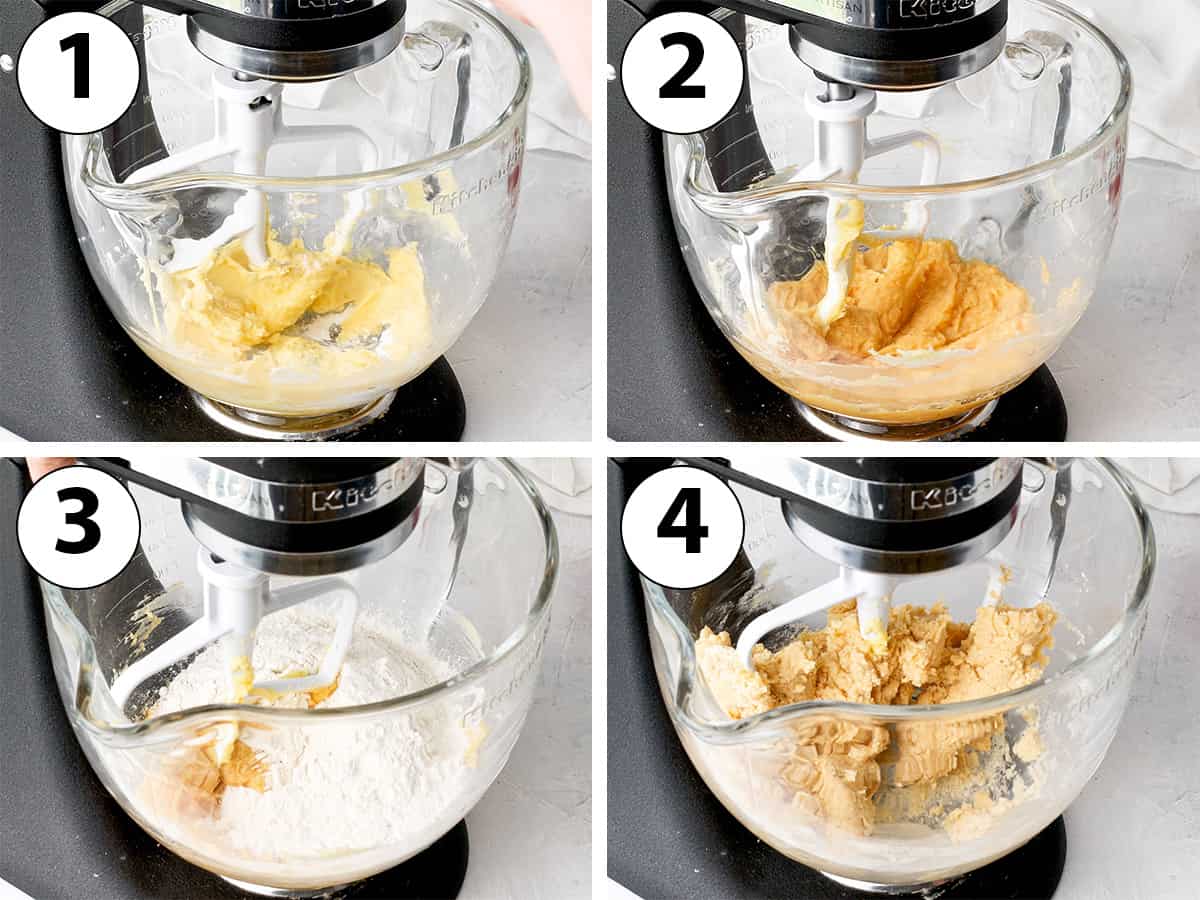
- Photo 1: place the soft butter and powdered sugar in the bowl of your stand mixer fitted with the paddle attachment (or large bowl if using an electric mixer). Mix on medium speed for about 3 minutes or until you get a creamy and smooth mixture.
- Photo 2: mix in the egg and almond meal.
- Photo 3: Add the sifted flour and pinch of salt.
- Photo 4: mix on low speed until a rough dough comes together. Stop to scrape the bowl with a spatula if needed to make sure all the flour is evenly distributed.
- Prepare two large sheets of baking paper. Remove the dough from the bowl, place over one of the sheets and very lightly knead to bring the dough together into a smooth ball.
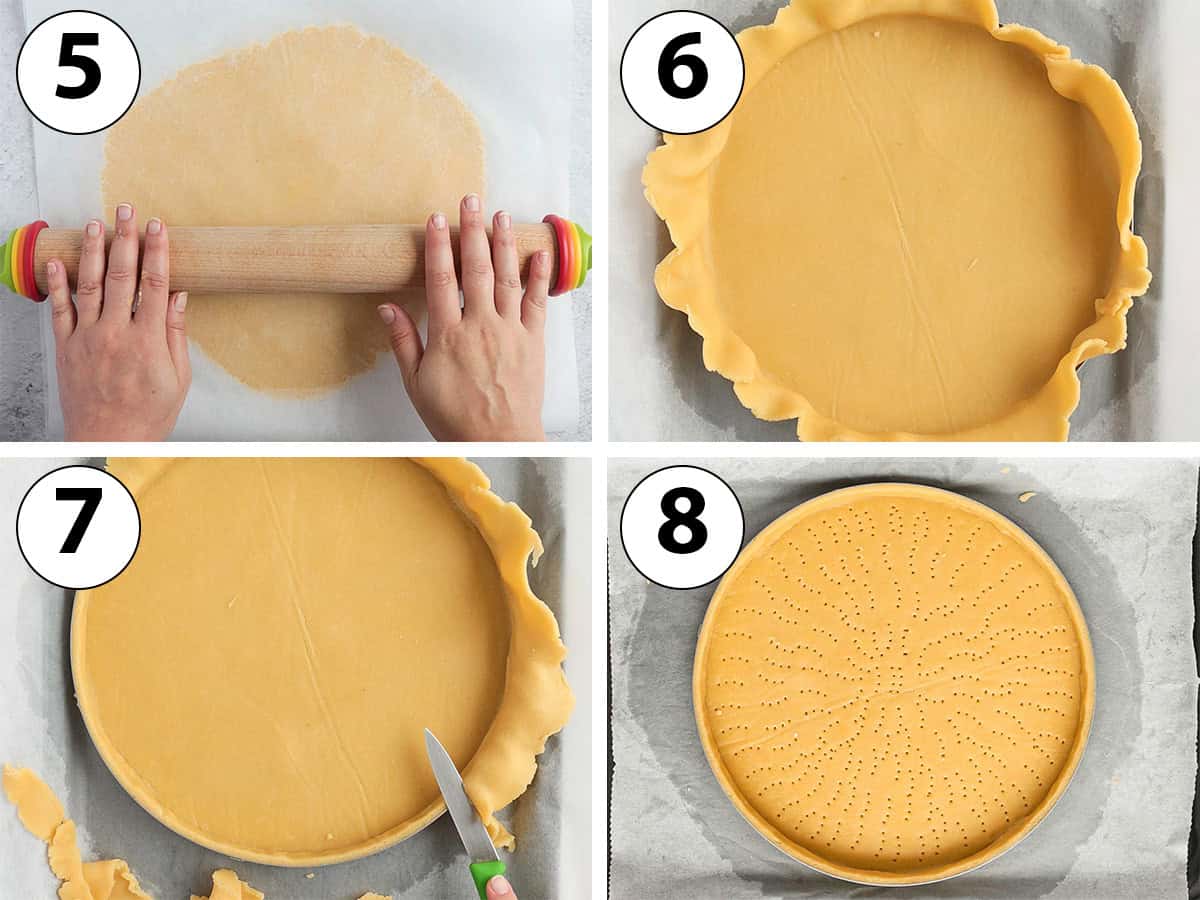
- Photo 5: Cover the dough with the second sheet of baking paper. Using a rolling pin, roll the dough into a large disk to a thickness of about 4 mm (1/8 inch).
I highly recommend using a rolling pin with thickness rings or some thickness strip guides to get a perfectly even thickness in your rolled dough.
- Place in the fridge to rest and chill for at least 1 to 2 hour. The dough sheet should be completely hard.
- Take the dough out of the fridge and gently peel off both baking paper sheets.
2. Shaping the shells
There are a few different ways to make tartlet shells. For this recipe, I have use 8 cm (3.15 inch) perforated tart rings. If you do not have rings, you can use mini tart tins or even a muffin pan (see my tartlet shells recipe for the muffin pan technique).
Shells with mini tarts pans:
- Using a round cookie cutter that is a few cm wider than the size of the pans you are using, cut out some disks of dough. Place each disk over the pan and gently press the sides down to make the dough slide towards the bottom.
Shells with tart rings:
- Photo 6: cut out slightly disks of dough that are a few cm larger than the rings (for a 8cm ring like here, I cut out disks that are about 12 cm). Place each disk over a ring. Gently press down the centre of the dough, then slide it down along the ring to create the sides. Gently run a finger on the corner between the bottom and sides to create a sharp angle. Make sure the sides are pressed again the ring.
Would you like to save this recipe?
Make sure to get a sharp angle between the bottom and the sides to avoid any air bubbles. You can turn the ring upside down to check the bottom of the dough; you should only see the flat bottom part of the tart shell (none of the sides).
Note that the exact number of tartlets you will get will vary based on the type of tart pan you use, their exact size and width as well as how thinly you rolled the dough. With 8 cm wide tart rings, you should get 8 to 9 tarts.
- Photo 7: run a small sharp knife along the top of the tart rings to cut out any excess dough.
Excess dough can be re-rolled between two sheets of baking paper, chilled again and used to make more tart shells.
- Place all the tart rings on a large tray - preferably a perforated tray with perforated baking mat - or a regular baking tray line with parchment paper or silicone mat. Refrigerate for at least 3 hours, preferably overnight for the best results.
- Photo 8: Preheat your oven on 160 degrees Celsius / 325 degrees Fahrenheit. Prick the bottom of the shells with a fork then place in the freezer for 10 - 15 minutes until your oven is preheated.
- Par-bake for 15 to 18 minutes or until the shells hold their shape and look dry to the touch. No need to use baking beads or weights here; if the dough has been properly rested and chilled, the tart crust should not move in the oven!
- Remove from the oven, place on a cooling rack and leave to cool back down to room temperature. At this point, if using tart rings, you can remove the rings.
3. Almond Cream Filling

- Photo 9: Place the very soft butter and sugar in a large bowl (if using a hand mixer) or the bowl of your stand mixer fitted with the paddle attachment. Mix on medium speed for about 3 to 5 minutes or until very soft, creamy and increased in volume.
- Photo 10: Add the eggs one at a time, mixing slowly until fully incorporated into the butter mixture.
The mixture can start to split at this point. This may happen if your butter was too cold/too soft or your eggs were too cold / too warm. Don't worry if this happens, the almond cream will come back together after you add the almond meal.
- Photo 11: Add the almond meal
- Photo 12: Mix until combined. You should get a thick, coarse paste.
If the filling looks a bit greasy, it usually indicates that the butter is too soft when used. You can try to chill the cream for 10 to 15 minutes to firm it up.
4. Assembling the tarts

- If needed, re-heat your oven on 160 degrees Celsius / 325 Fahrenheit.
- Photo 13: Spread the almond cream over the par-baked shells. You can use a piping bag or simply a spoon, but try to get a relatively even layer. Each shell should be filled about half way up the top. Don't over-fill as the sponge will puff up.
- Photo 14: Place 3 to 4 raspberries over the almond cream and slightly press them in. You can use more or less raspberries depending on their sizes. The raspberries will seem to poke out of the cream a fair bit, that's normal. The almond filling will puff up in the oven.
- Photo 15: Sprinkle with slivered almonds.
- Photo 16: Bake for about 20 to 25 minutes. The almond sponge should have puff up and look golden brown.
- Leave on a cooling rack to cool down completely before removing from the pan and serving.
Recipe FAQs
I recommend using fresh raspberries for this recipe.
Even when properly thawed and drained, frozen raspberries will tend to release a lot of water when baked, which could make your raspberry frangipane tarts soggy.
Absolutely - whatever works for you! Depending on their size, you may need to scale the almond cream filling quantity up or down to suit.
Almond meal and flour are technically two different ingredients but are in reality often sold as the same (or very similar) product.
- Almond flour: made from blanched peeled almonds ground into a very fine powder.
- Almond meal: made from whole almonds (skin on) ground into a slightly coarser powder. A lot of brands will sell almond meal made with skinned almonds though.
Tips & Troubleshooting
- You will get the best results with the tart shells when you rest and chill the dough very well, twice. First for at least an hour once rolled, then for at least 3 hours (preferably overnight) once inside the tartlet pans. This is to allow for both the butter to be very cold and for the gluten to relax completely, giving you a dough that does not move or shrink during baking.
- The almond filling split when I added the egg: usually happens when one (or two) of the ingredient's temperature was off. You want both the butter and the egg to have the same temperature (room temperature) to insure they mix (and emulsify) properly. If the mixture looks soft and greasy, it usually means the butter was too warm. If you see small chunks of butter, either (or both) the butter and the egg was too cold.
Storing & Freezing
The mini raspberry frangipane tarts can be kept at room temperature for up to a day and stored in the fridge for up to 3 days.
Both the par-baked tart shells and fully baked tarts can be frozen as well. Make sure to wrap them each individually with cling wrap then together in a large container to insure freshness. Thaw for a few hours at room temperature or overnight in the fridge.

I am so excited to share that my debut cookbook
"Bite-Sized French Pastries for the Beginner Baker"
is now available for purchase!
Recipe

Raspberry Frangipane Tartlets
Equipment
- 8 to 9 8 cm Perforated Tart Rings or mini tart tins - the exact quantity of tarts will vary based on the size of your tins.
Ingredients
Pâte Sucrée Tartlet Shells
- 100 gr Unsalted Butter, at room temperature, very soft
- 50 gr Powdered Sugar, sifted
- 1 large Egg, at room temperature
- 40 gr Almond Meal,
- 200 gr Plain / All-Purpose Flour
- 1 pinch Fine Table Salt
Almond Cream Filling
- 100 gr Unsalted Butter, at room temperature, soft
- 100 gr Powdered Sugar, sifted
- 2 large Eggs, at room temperature
- 100 gr Almond Meal
To assemble
- 200 gr Fresh Raspberries
- 25 gr Slivered Almonds, optional
Instructions
Pâte Sucrée Tartlet Shells
- In the bowl of your stand mixer fitted with the paddle (or large bowl with hand mixer), cream the soft butter and powdered sugar on medium speed for about 3 minutes - or until you get a soft, creamy and smooth mixture.
- Mix in the egg and almond meal, then add the flour and salt. Mix on low speed until a rough dough comes together. Stop to scrape the bowl with a spatula if needed to make sure all the flour is evenly distributed.
- Bring the dough into a smooth ball and place between two large sheets of baking paper / parchment paper.
- Use a rolling pin to roll the dough into a large disk that is about 4 mm (1/8 inch) thick (see note 1). Place in the fridge to rest and chill for at least 1 to 2 hour. The dough sheet should be completely hard.
- Take the dough out of the fridge and gently peel off both baking paper sheets.
- Using a round cookie cutter that is a few cm wider than your tart rings or mini tart tins (see note 2), cut out disks of dough.
- Place each disk over a ring. Gently press down the centre of the dough until it touches the bottom, then slide the edges along the sides of the rings/tins. Gently run a finger on the corner between the bottom and sides to create a sharp angle. Make sure the sides are pressed again the ring/tin (see note 3).
- Run a small sharp knife along the top of the tart rings/tins to cut out any excess dough. Any excess / leftover dough can be re-rolled between two sheets of baking paper, chilled again and used to make more tart shells.
- Place all the tart rings on a large tray - preferably a perforated tray with perforated baking mat - or a regular baking tray line with parchment paper or silicone mat. Refrigerate for at least 3 hours, preferably overnight for the best results.
- Preheat your oven on 160 degrees Celsius / 325 degrees Fahrenheit. Prick the bottom of the shells with a fork then place in the freezer for 10 - 15 minutes until your oven is preheated.
- Par-bake for 15 to 18 minutes or until the shells hold their shape and look dry to the touch (see note 4). Remove from the oven, place on a cooling rack and leave to cool back down to room temperature. If using tart rings, you can remove the rings at this point.
Almond Cream Filling
- Place the very soft butter and sugar in a large bowl (if using a hand mixer) or the bowl of your stand mixer fitted with the paddle attachment. Mix on medium speed for about 3 to 5 minutes or until very soft, creamy and increased in volume.
- Add the eggs one at a time, mixing slowly until fully incorporated into the butter mixture (see note 5).
- Add the almond meal and mix until combined. You should get a thick, coarse paste. If it appears greasy, it usually indicates the butter was too warm. Place in the fridge for 10-15 minute to firm up a bit.
- Using a piping bag (just cut out the tip) or simply a spoon, spread the almond cream into an even layer inside the par-baked shells. Fill each shell about halfway to the top; the filling will puff up in the oven.
To assemble
- Place 3 to 4 raspberries (depending on their size) over the almond cream and gently press them in slightly (see note 6). Optionally, sprinkle with slivered almonds.
- Bake for about 20 to 25 minutes. The almond sponge should have puff up and look golden brown. Leave on a cooling rack to cool down completely.
Would you like to save this recipe?
Notes
- I highly recommend using a rolling pin with thickness rings or some thickness strip guides to get a perfectly even thickness in your rolled dough.
- The exact size of cookie cutter will depend on the size and shape of your tart tins / rings. As a reference, with the 8 cm tart rings I used here, I cut out some 12 cm wide disks of dough.
- Make sure to get a sharp angle between the bottom and the sides to avoid any air bubbles. If you do not have any tart rings or mini tart tins, you could also use a muffin pan. Use the method explained in my Mini Tart Shells recipe.
- No need to use baking beads or weights here; if the dough has been properly rested and chilled, the tart crust should not move in the oven!
- The mixture can start to split at this point. This may happen if your butter was too cold/too soft or your eggs were too cold / too warm. Don't worry if this happens, the almond cream will come back together after you add the almond meal.
- The raspberries will seem to poke out of the cream a fair bit, that's normal. The almond filling will puff up in the oven.
Nutrition (per serving)
Made this recipe?
Let us know if you liked it by leaving a comment below, and tag us on Instagram @a.baking.journey with a photo of your creation!