
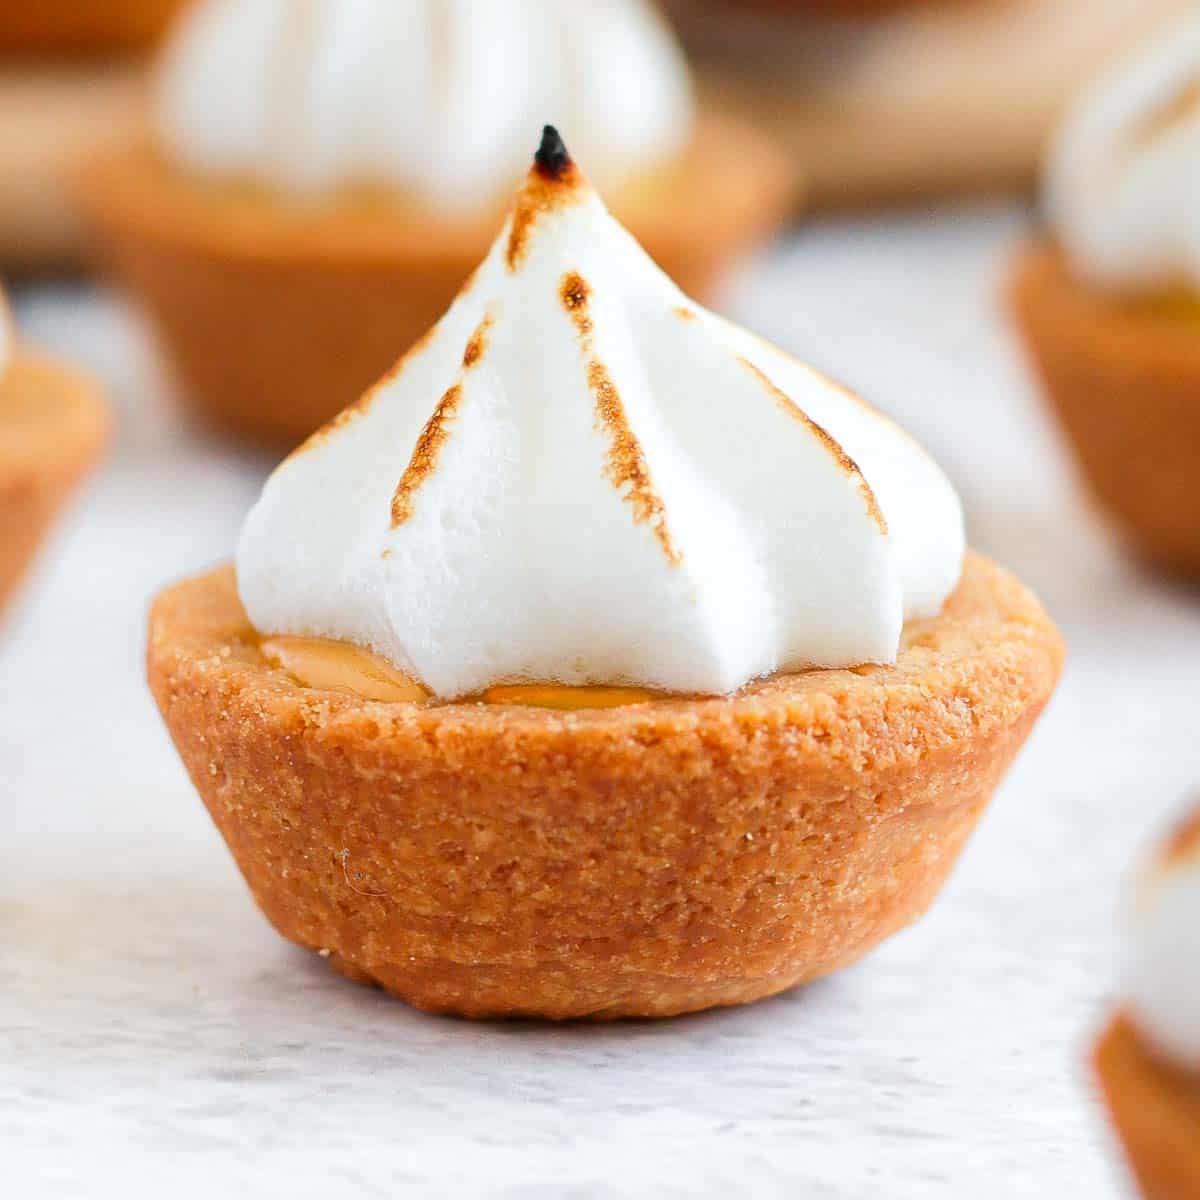
These delicious Mini Lemon Meringue Tarts combine some buttery Shortcrust Pastry Shells baked in a Mini Muffin Tin, a tangy Lemon Curd filling and a sweet toasted French Meringue topping. These classic mini lemon meringue pies are perfect for a party, birthday or Holiday dessert table!
Jump to:
Why we love this Recipe
These Mini Lemon Meringue Tartlets are always a crowd-pleasing treat. They are so crunchy, buttery, gooey, tangy yet sweet... they are the perfect bite! Perfect for a party, gathering or Holiday, these mini lemon tarts are sure to be loved by all of your guests.
Just like my Lemon Curd Tartlets, these Lemon Meringue Tartlets combine a homemade buttery and crispy Shortcrust Pastry (Pâte Sablée) baked inside a Mini Muffin Tin to create Mini Tartlet Shells and filled with a Tangy Lemon Curd. They are then topped with a lightly toasted sweet French Meringue to bring some sweetness.
Both the pastry crust and lemon curd can be prepared in advance too and combined on the day with the meringue. Wouldn't they be super cute served along their larger Lemon Curd Tart with Meringue version!?

Ingredients
These Lemon Meringue Bites combine three separate elements.
- Tartlet Shells: they are made with a classic Pâte Sablée (French shortcrust pastry) recipe combining Plain/AP Flour, Icing Sugar (or Powdered Sugar) a pinch of Salt, Unsalted Butter and an Egg.
Since we are making mini lemon pies, you can also add some extra Lemon Zest into the pastry crust if you want!
- Lemon Curd: your classic lemon butter recipe combining Lemon Juice & Zest, Egg Yolk, Sugar and Unsalted Butter. This lemon curd is rather tangy and low in sugar, but if you want something a bit sweeter, you can absolutely increase the sugar quantity.
- Meringue: a basic French Meringue made from Egg White, a pinch of Salt (or Cream of Tartare) and Caster Sugar (or fine white granulated sugar).

How to make Mini Lemon Meringue Pies
There are three main steps to make these Mini Lemon Meringue Tarts. Both the mini pie crusts and the lemon curd filling can be prepared in advance, but the meringue needs to be added last minute as it tends to melt.
Mini Tartlet Shells
For this recipe, I used my classic French Pâte Sablée (Shortcrust Pastry) recipe but you could also use a Pâte Sucrée (Sweet Shortcrust Pastry) if you want. Or simply buy a pre-made shortcrust pastry if preferred!
This pastry can be made by hands by I personally love to make it in the food processor as it is much quicker, cleaner and easier. You can find the step-by-step instructions to make it by hands here.
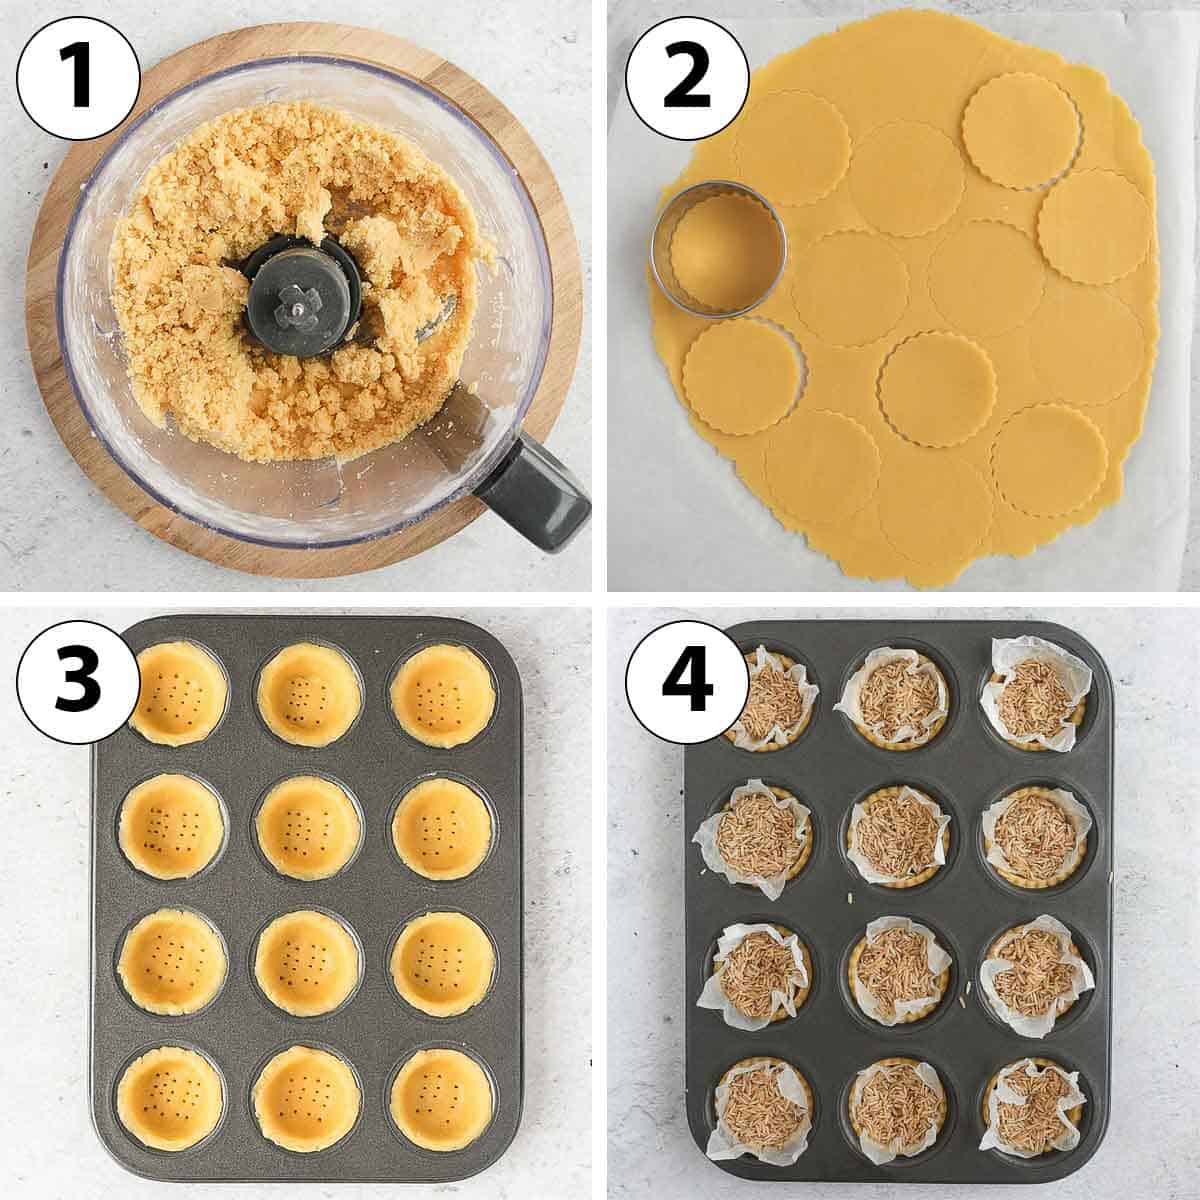
- Photo 1: Prepare the pastry.
Place the Flour, Icing Sugar and Salt in the bowl of your Food Processor and pulse to combine. Mix in the very cold Butter cut into small cube until you get fine crumbs. Add the Egg and mix until a loose dough starts to come together.
- Bring the pastry together into a large bowl and gently flatten it between two sheets of baking paper (lightly floured if sticky). Thinly roll into a large circle using a rolling pin. I recommend rolling it quite thinly so that the crust is not too thick, about 2 to 3 mm (1/16 to 1/8 inch) thick. Place in the fridge to rest for at least 1 hour.
- Photo 2: use a small round (or fluted) Cookie Cutter to cut out disks of pastry. Each pastry disks should be at least as wide as the opening of the Mini Muffin Tin, preferably slightly larger.
- Photo 3: slide each pastry disks inside the openings of a Mini Muffin Tin and gently press on the bottom and side to remove any air bubbles. The pastries should be sticking to the edges. Cut out any extra pastry with a small sharp knife if required. Dock (prick) the bottom with a small fork, then place back in the fridge for at least 1 hour.
- Photo 4: Preheat your oven on 160'C/325'F and place the mini muffin tin in the freezer in the meantime. Line each pastry with a small piece of baking paper (scrunch it up first so that it fits more easily) and fill with baking weights, dry beans or rice. Bake for 10 minutes, then remove the weights and baking paper and bake for an additional 10 minutes or until dry and lightly golden.
You can ready more about using a muffin tin to make mini tartlet shells here.
Lemon Curd Filling
The Lemon Curd Filling can be prepared while the pastry is chilling in the fridge, or once the shells are baked.
- Photo 5: Place the Lemon Juice & Zest, Egg Yolks and Sugar in a small Saucepan. Turn on low heat and keep whisking for about 5 minutes, or until the liquid starts to slightly thicken. Be careful not to let the liquid boil or it will cook the eggs (and you will get scrambled eggs).
Would you like to save this recipe?
- Photo 6: Slowly add the cubes Butter, a little bit at the time. Whisk until fully melted and incorporated before adding more.
- Photo 7: continuously whisk (still on low heat) for 5 to 15 minutes or until the curd has thickened. The exact time will depend on the temperature of your stove. To know the curd is ready, either use a food thermometer (the curd has to reach 82'C / 180'F) or dip the back of a spoon in it and draw a line with your finger (be careful, it'll be hot). If the line stays clear when you move the spoon and no liquid drips back over it, it's ready.
- Photo 8: pour through a thin-mesh sieve to remove any bits of cooked eggs and get a really smooth lemon curd filling.
- Either pour directly into the baked tartlet shells or keep in the fridge in an air-tight container for 3 days. Slightly heat up in the microwave when ready to fill the tart shells as it will be easier to pour when more fluid.
- Place the mini lemon tarts in the fridge to set for at least 2 hours before topping with the meringue and serving.

French Meringue Topping
Just before the mini lemon tarts are ready to be served, prepare the meringue topping. I don't recommend adding the meringue too much in advance because it will start to melt rather quickly.
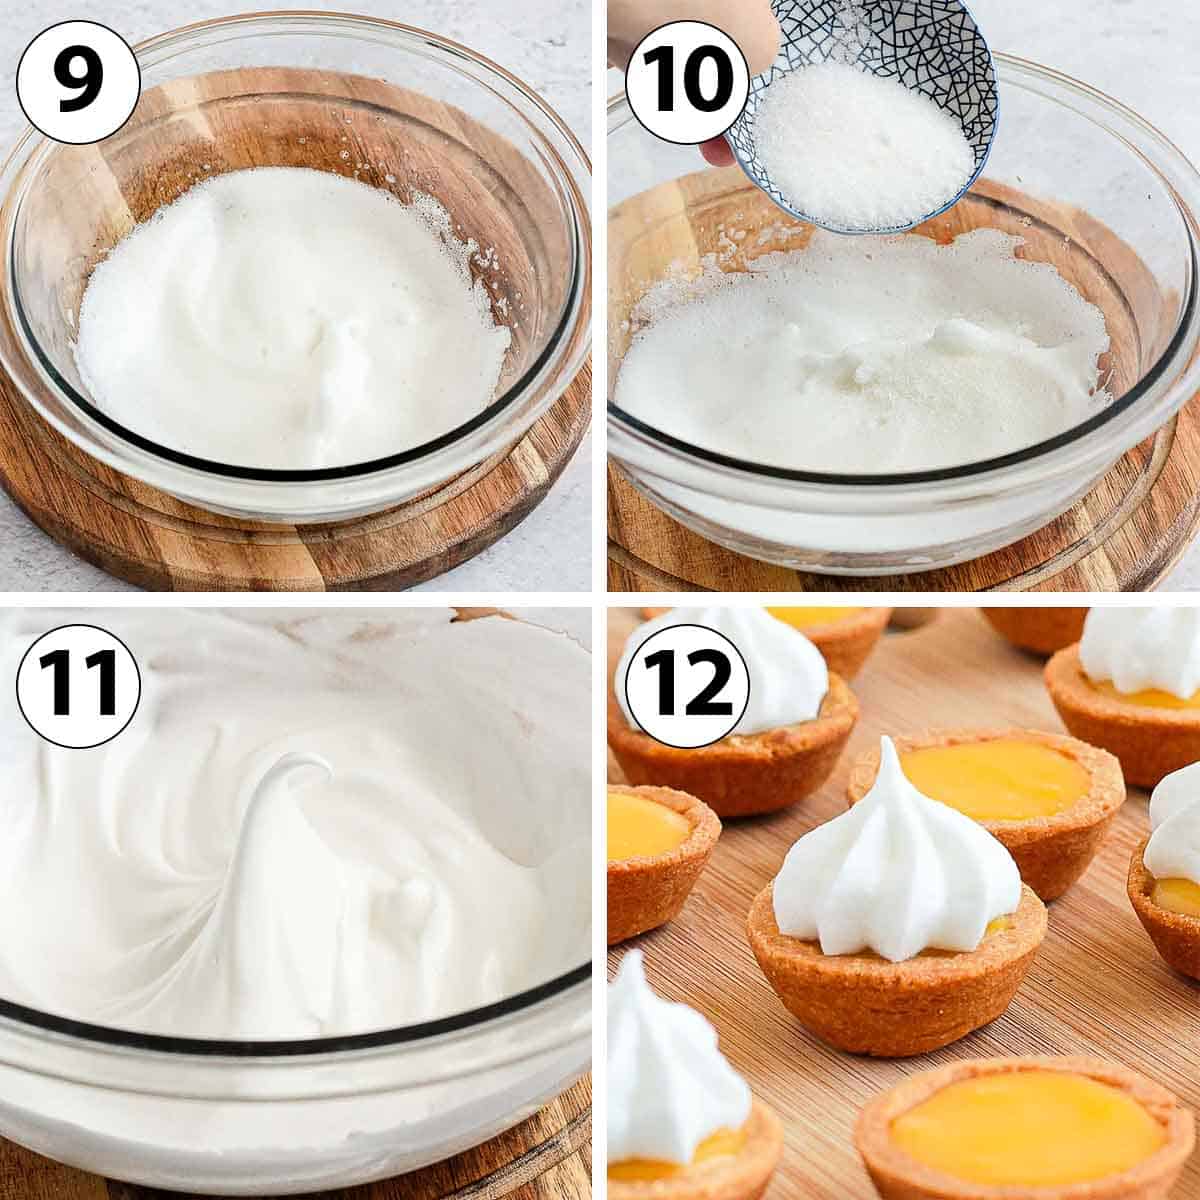
- Photo 9: Place the Egg White in a large, clean mixing bowl (or bowl of your mixer) with the pinch of Salt. Whisk until you get soft peaks, starting on medium low speed and slowly increasing to a medium speed. The egg white consistency should resemble shaving cream.
- Photo 10: slowly add the Sugar a little bit at the time, while continuously whisking and increasing the speed to high.
- Photo 11: When all the sugar has been incorporated, continue to whisk on high speed until you reach stiff peaks. The meringue should be glossy and shiny, and you shouldn't feel any grains of sugar in it.
- Photo 12: Transfer the Meringue in a Piping Bag fitted with a small star-shaped piping nozzle (or your preferred shape). Pipe over each Tartlets (the curd should have set for at least two hours before you add the meringue).
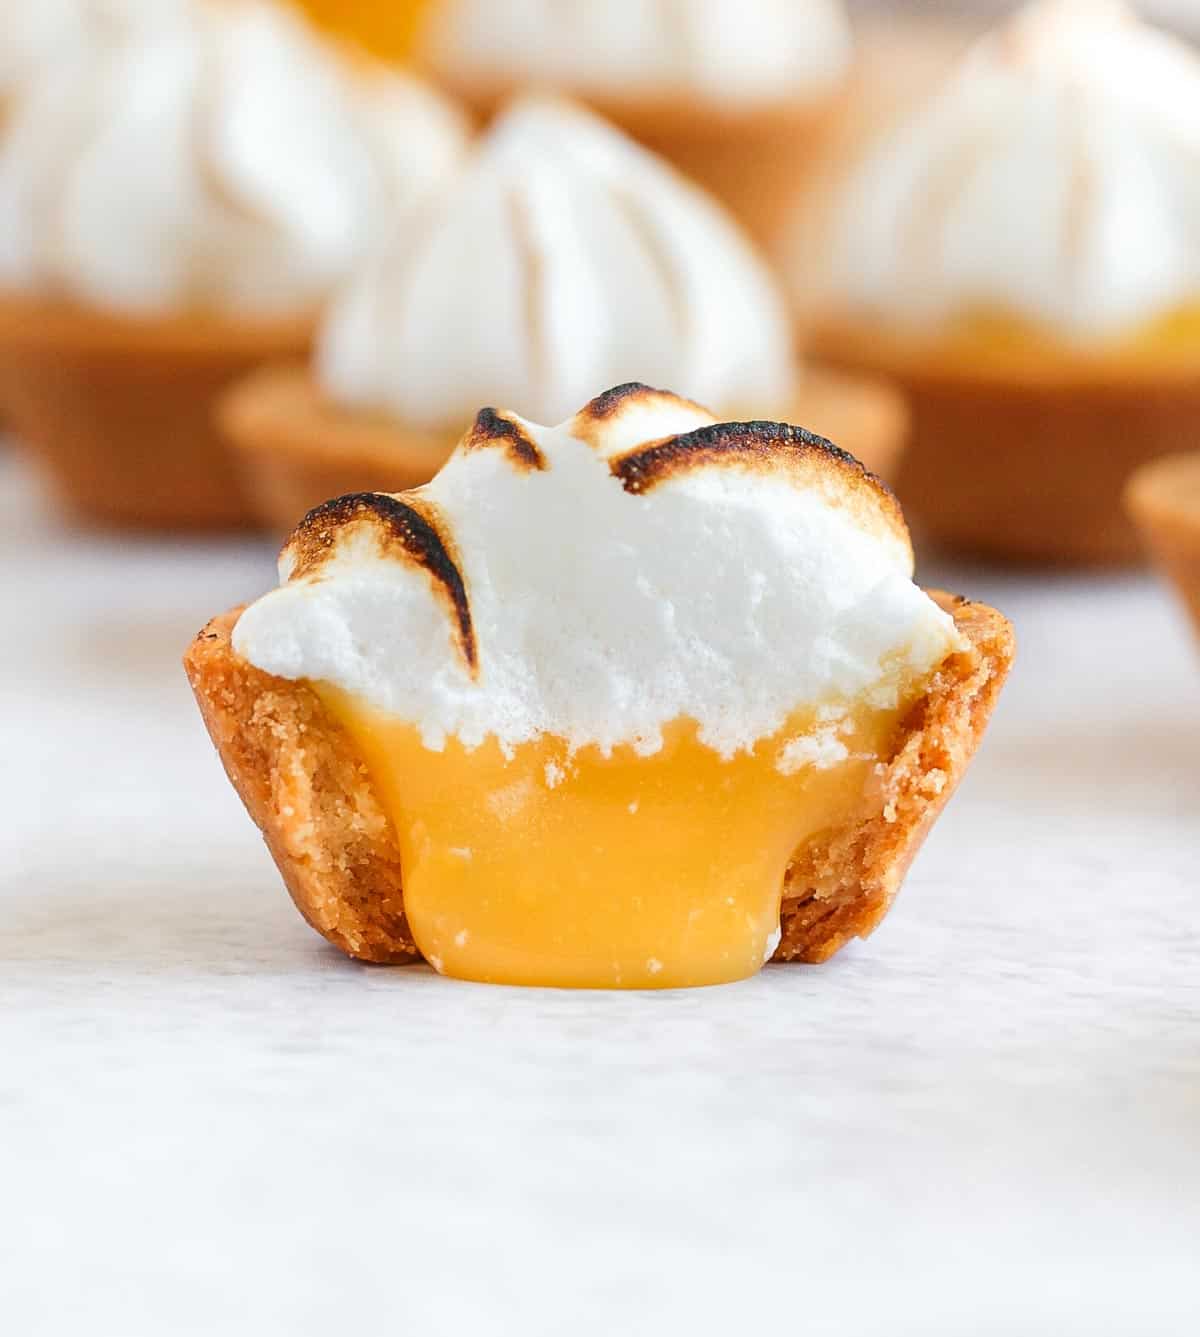
- Using a kitchen blowtorch, toast each Meringue topping until lightly golden (more or less, to your liking). Serve the Mini Lemon Meringue Tarts straight away (if you place back in the fridge at this point, the meringue will start to melt).
Recipe FAQs
Absolutely, if you can find some mini pie shells and don't want to make your own pastry, you can use pre-made ones.
No, I simply used a Mini Muffin Pan! If you don't have a mini muffin pan, you can also make a larger version of these mini lemon meringue tarts by using a regular Muffin Tin like I did for these Lemon Curd Tartlets.
Again, absolutely! I personally prefer to make my own lemon curd as it allows me to control the level of tanginess/sweetness and often find store-bought ones to be too sweet. But using pre-made one is a simple way to create these Mini Lemon Meringue Tarts much more quickly!
You will get the best results with a kitchen blow-torch, but if you don't have one, place the tartlets under the broiler in your oven for a couple of minutes. Make sure to keep an eye on them as they might start to burn (and/or melt) quite quickly.

Tips & Tricks
- For a slightly thicker / more 'set' lemon filling, add 1 tablespoon of cornstarch when making the lemon curd.
- Pipe the Meringue Topping just before serving the Mini Lemon Meringue Tarts as it will start to melt rather quickly. Alternatively, make a more stable Italian Meringue.
- For an even tangier bite, top the mini lemon meringue tarts with freshly zested lemon. For something a bit sweeter, add more sugar to your lemon curd (this recipe makes a rather tangy lemon curd).
- Switch things up by using Meyer Lemons, Limes or even Oranges!
Storing & Freezing
Both the Lemon Curd Filling and Mini Tarts Shells can be prepared in advance and assembled on the day. The Lemon Curd can be stored for 3 days in the fridge and the baked tartlet shells for 24 hours at room temperature (they will last longer but you will get the best texture when used within 24 hours).
Alternatively, the tartlet shells can be frozen either raw or baked - but I recommend to freeze them unbaked for the best texture.
The Mini Tartlet Shells filled with Lemon Curd should be kept in the fridge for up to 24 hours. The Meringue Topping should be added just before serving the Mini Lemon Meringue Tarts for the best results. That's because the meringue will start to melt when placed in the fridge.
Made this recipe?
Let us know if you liked it by leaving a comment below, and tag us on Instagram @a.baking.journey with a photo of your creation!
Recipe

Mini Lemon Meringue Tartlets
Ingredients
Mini Tart Shells
- 250 gr (1 2/3 cup) Plain / AP Flour
- 50 gr (1/2 cup) Icing Sugar, or powdered sugar - sifted
- 1 pinch Salt
- 120 gr (1/2 cup) Unsalted Butter, very cold
- 1 Egg, at room temperature
Lemon Curd
- 4 Egg Yolks
- 100 gr (1/2 cup) Caster Sugar, or fine white granulated sugar
- 125 ml (1/2 cup) Lemon Juice, about 3 Lemons, plus zest to taste
- 75 gr (5 tablesp.) Unsalted Butter
Meringue
- 1 Egg White
- 1 pinch Salt
- 25 gr (2 tablesp.) Caster Sugar, or fine white granulated sugar
Instructions
Mini Tart Shells
- Place the Flour, Icing Sugar and Salt in the bowl of your Food Processor and pulse to combine (see note 1 if making by hands). Add the cold Butter cut into small cubes, then blend until get very small crumbs.
- Add the Egg (optionaly prewhisked separately) and slowly pusle until a dough starts to come together (see note 2).
- Assemble the pastry into a large ball, place between two sheets of baking paper and roll into a large disk about 2 to 3mm (1/16 to 1/8 inch) thick. Place on a flat tray and leave in the fridge to chill and rest for at least 1 hour, or up to 24 hours.
- Using a Round Cookie Cutter, cut out small disks of pastry at least as wide as the openings of the mini muffin tin. Gently slide the pastry inside the mini muffin tin and press on the bottom/edges to remove any air bubbles. Dock the pastry (poke the bottom with a fork) then place back in the fridge to rest for at least 1 hour, or up to 24 hours.
- Preheat your oven on 160'C/325'F and place the pastries in the freezer in the meantime. Line each patry with a small piece of crunched up baking paper and fill with baking weights, dried beans or rice. Bake for 10 minutes, then remove the weights and baking paper and bake for an additional 10 minutes or until fully baked (see note 3). Set aside to cool down.
Lemon Curd
- Place the Egg Yolks, Sugar and Lemon Juice& Zest in a small pot. Whisk to combine then turn on low heat. Whisk for a few minutes or until the liquid starts to slightly thicken and the sugar has dissolved - about 3 to 5 minutes.
- Slowly add the very Cold Butter cut into small cubes, a little bit at the time. Whisk until melted and combined before adding more.
- Cook on low heat for 5 to 15 minutes or until the curd has thickened, making sure to continuously whisk (see note 4). Taste and adjust the level of sweetness if required. Pour through a thin-mesh sieve to remove any lumps.
- Pour straight away inside the cooled down pastry shells (see note 5) then place in the fridge to set for at least 2 hours, or up to 24 hours before serving.
French Meringue
- Place the Egg White and Salt in the clean bowl of your Mixer (or a large mixing bowl if using a hand mixer). Whisk on medium low to medium speed until you reach very soft peaks, slowly increasing the speed.
- When the egg white resembles the consistency of shaving cream, slowly add the Sugar a little bit at the time while whisking, then increase the speed to high and keep whisking until you reach stiff peaks (see note 6).
- Transfer the Meringue into a Piping Bag fitted with a small Star-Shaped Nozzle (or the piping nozzle shape of your choice) and pipe over each mini tart.
- With a kitchen blowtorch, toast each meringue until lightly golden and serve straight away (see note 7).
Would you like to save this recipe?
Notes
- If making by hands, follow the same instructions but cut the butter into the dry ingredients either by hands (rubbing the butter and dry ingredients between your palms/fingers until you get fine crumbs) or with a pastry blender.
- Stop mixing as soon as part of the pastry comes together to avoid overworking the dough. If you press some lumps of pastry together, they should stick. If too dry, add a little bit of very cold water. If very sticky, add a little bit more flour.
- Depending on your oven and the thickness of the pastry, it could take more or less time for the shells to be fully baked. They should feel dry to the touch, be slightly golden and come easily out of the pan.
- The time it will take for the curd to be cooked will depend on the heat of your stove. You should always cook a curd on very low heat to avoid burning it or getting lumps. To know the curd is cooked, dip the back of a spoon in and draw a line in it with your finger (be careful, it will be hot). Tip the spoon down; if the line stays clear, the curd is ready. If the curd drips down over the line, it needs to cook for longer. You can also check the temperature of the curd to know if it is cooked. It should be around 80 to 82'C / 175 to 180'F.
- Alternatively, place in a clean jar and store in the fridge. When ready to use, slightly reheat the curd in the microwave for a few seconds to make it more fluid. It will be easier to fill the shells.
- The meringue should look shiny and glossy. If you rub a little bit of meringue between your fingers, you shouldn't feel any grains of sugar anymore.
- The meringue should be added last minute as it will start to slowly melt quickly (and especially if put in the fridge). If you don't have a kitchen blowtorch, you can place the tartlets under the broiler of your oven for 2 to 3 minutes - but make sure to keep an eye on it to check they are not burning or melting.