

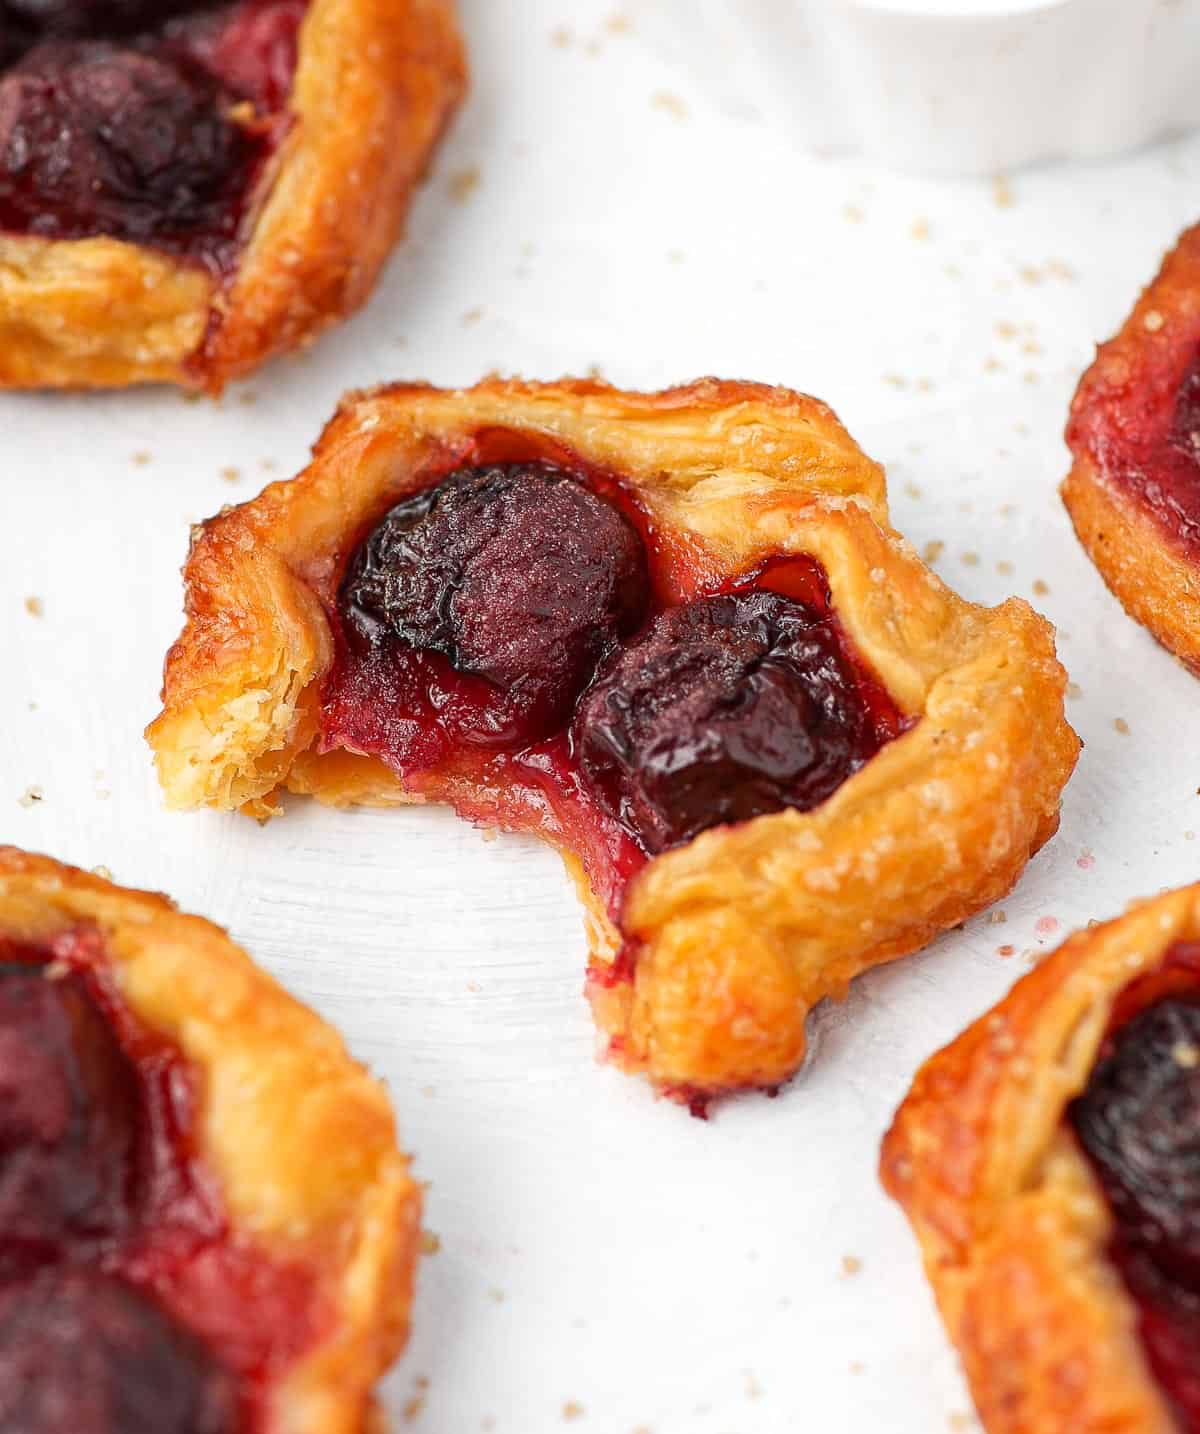
These rustic Cherry Tartlets made with Puff Pastry are super quick and easy little pastries that are perfect for afternoon tea or a party. They are made from 5 simple ingredients only and will be ready in less than 50 minutes!

Jump to:
Why we love this recipe
These Mini Cherry Tarts are a deliciously fresh, buttery and crunchy little pastry that is super easy to prepare. They simply combine a homemade cherry filling made from fresh cherries and frozen puff pastry. Easy peasy!
Perfect for a party or as a sweet snack, these mini cherry desserts are a simple yet flavourful way to use fresh cherries when in season! These little pastry are simply bursting with cherry flavours!
This recipe is awesome because:
- It uses frozen puff pastry for convenience - and for a delicious crunch!
- The cherry filling can be prepared in advance.
- No tartlet pans or molds are required here; they are free-formed tartlets.
- No chill or resting time - these easy cherry tartlets are ready to bake straight away! The cherry filling can also be used straight away and does not required to be pre-cooked in a saucepan like other cherry pie fillings.
Ingredients
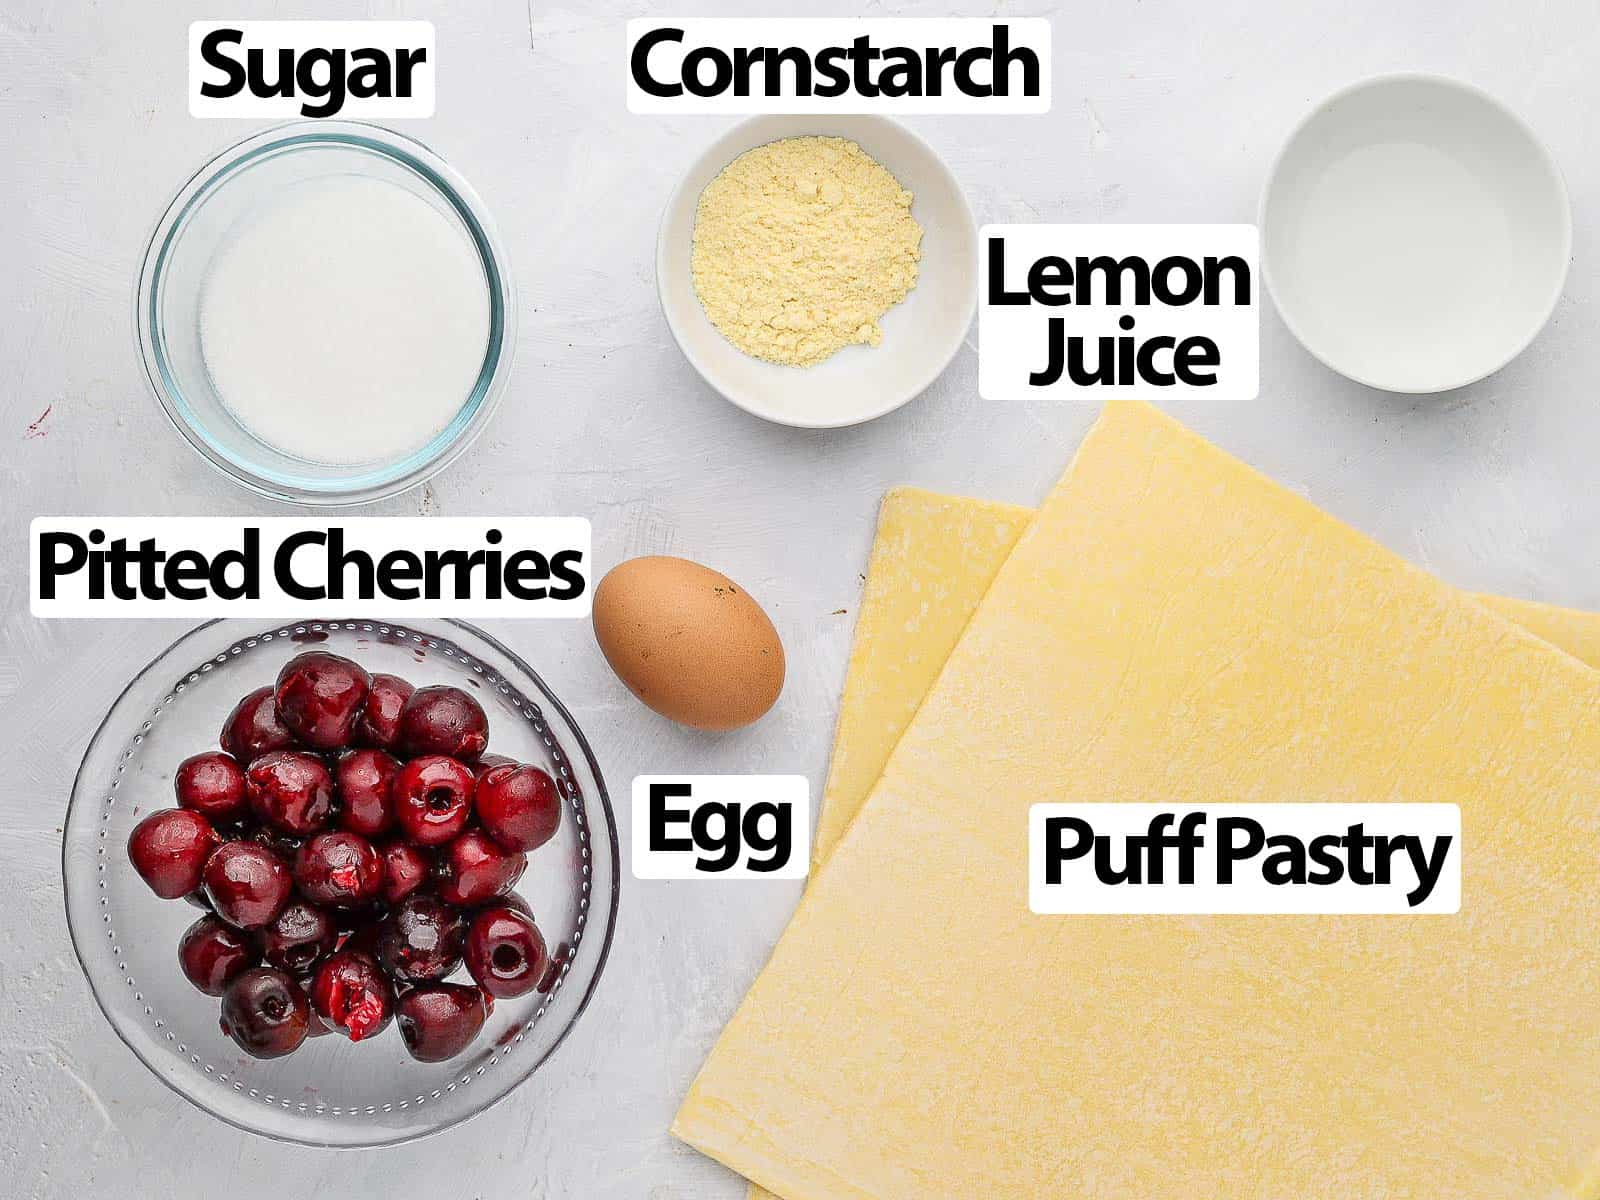
These Bite-Size Cherry Tartlets are made with 5 simple ingredients - plus two optional ones (scroll down to recipe card for all quantities):
- Cherries: preferably fresh, pitted - but frozen pitted cherries will work too. Just make sure they are fully thawed and well drained to remove any excess liquid.
- Lemon Juice: just a tablespoon to balance the sweet fruit flavours. Fresh lemon juice is always recommended.
- Sugar: Caster Sugar or fine white granulated Sugar.
- Cornstarch: use to thicken the juice that the fruits will release while baking. You could use plain / all-purpose flour as a substitute, or other starches like tapioca starch.
- Puff Pastry: I highly recommend using good quality, all-butter puff pastry for the best results. I used 2 thawed sheets of frozen puff pastry.
Optional:
- Egg: used for the egg wash of the pastry. It will give a beautiful golden shine to the cherry tartlets!
- Raw Sugar or Demerara Sugar: sprinkled over the puff pastry crust just before baking for a delicious extra crunch. You could also use some flaked almonds over the pastry for a different crunch!
Other delicious additional ingredients: a little bit of sea salt, some orange or lemon zest or some vanilla.
How to make Mini Cherry Tarts
There are two main steps in making these cherry galettes: prepare the cherry filling, then assemble the tartlets with rounds of puff pastry.
Instructions:
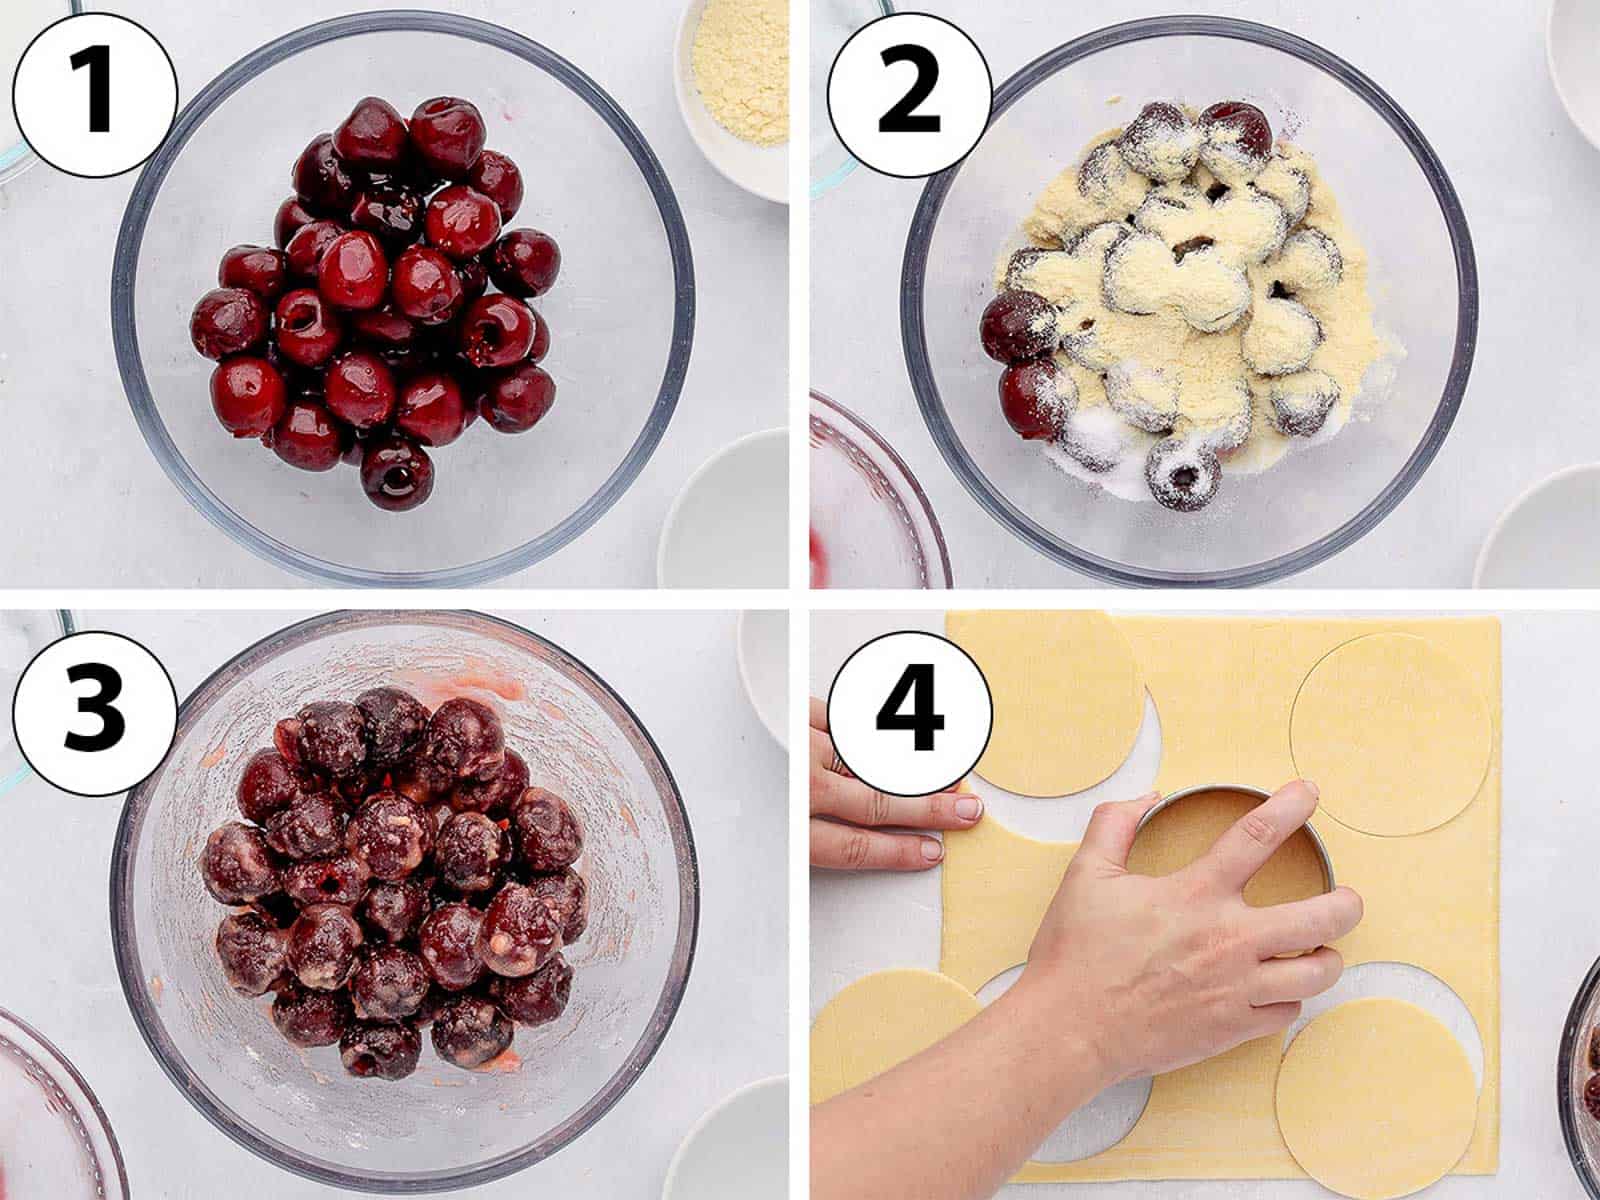
- Photo 1: Wash then pit the fresh Cherries. Place them in a mixing bowl.
If using frozen cherries, make sure they are fully thawed and well drained of any extra liquid before preparing the filling. Too much added liquid will make the tartlets soggy.
- Photo 2: Add the Lemon Juice, Sugar and Cornstarch.
Would you like to save this recipe?
- Photo 3: Mix with a spatula until all the cherries are evenly covered with the other ingredients. Set aside.
- Preheat your oven on 180'C/350'F. Prepare a large baking tray with baking paper or a baking mat. I used a perforated baking mat that will insure the bottom of the pastries are well baked.
- Photo 4: Take the sheets of puff pastry out of the freezer and leave at room temperature for 5 to 10 minutes, or until thawed / soft. Using a large cookie cutter (about 10 cm / 4 inch wide), cut out 5 disks of dough per sheet.
I used 25x25cm puff pastry sheets (10x10inch).
I don't recommend cutting out the puff pastry in smaller disks than 10 cm (4 inch) wide or you will get very small tartlets that are hard to shape.

No need for tart pans here, the tartlets are simply free-formed over a baking sheet.
- Photo 5: Place the disks of puff pastry on the baking tray. Spoon out some of the cherry filling mixture at the centre of each puff pastry disks. I used 3 cherries per tartlets.
Tip: re-mix the filling before placing it over the pastries to make sure all the ingredients are evenly combined. The fruits should have released some juice and you want to insure there is enough cornstarch all around to thicken them.
- Photo 6: Fold the dough over the cherries, gently pressing on it so that it sticks together and create a sealed edge.
- Photo 7: optionally, brush the puff pastry edges with an egg wash (one egg lightly beaten).
- Photo 8: optionally again, sprinkle the pastry with Raw or Demerara Sugar for an extra crunch and touch of sweetness.
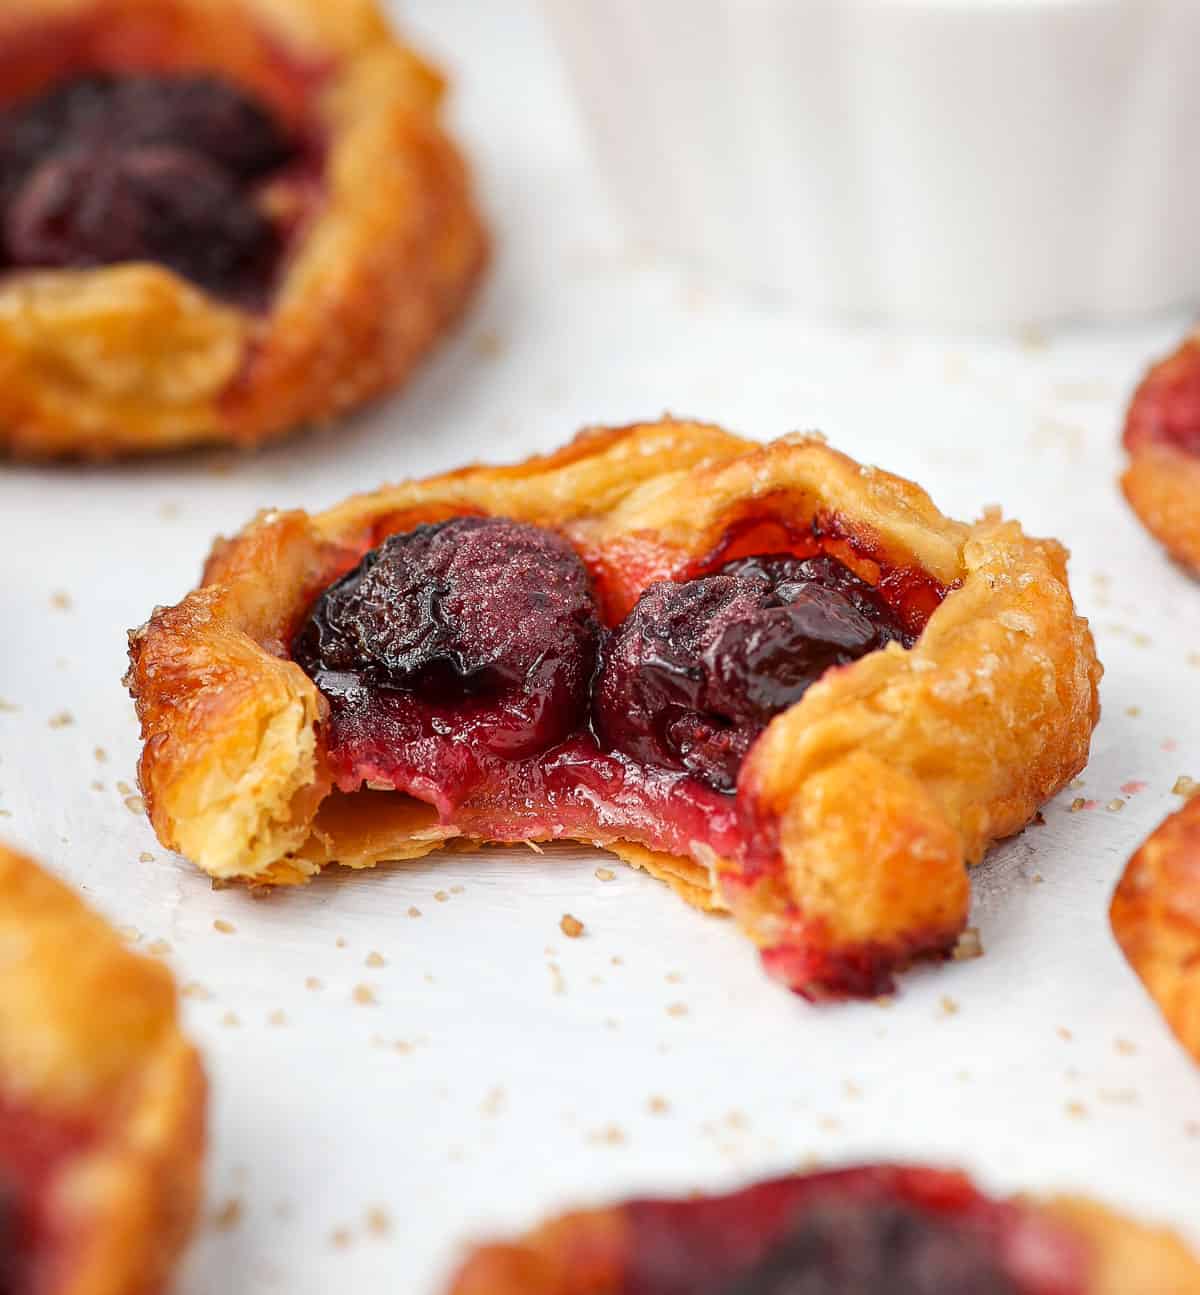
- Bake for 20 to 25 min or until the puff pastry pie crusts are golden brown and puffed.
- Transfer them over a wire rack to finish cooling. The mini cherry pies can be served while still lukewarm or cold.
Recipe FAQs
I have not tried this recipe with other cherries than fresh sweet ones. If using canned cherries, make sure to drain them quite well (you might need a little bit more cornstarch too). The filling here is quite similar to Cherry Pie Filling but is uncooked.
If you do not have a cherry pitter, you could use a stiff straw (like a reusable plastic or metal straw). Simply press the straw through the top of the cherry (where the stem comes out) and push the pit out. Be careful not to have your finger under the cherry or you might poke yourself.
You can read more about different techniques to pit cherries here.
You could also bake the cherry tarts in a muffin pan if you wanted deeper tart shells. Simply press the disks of pastry inside the muffin pan then fill with cherries. You should't have to grease the pan if using a non-stick one and butter puff pastry, but if in doubt, it's better to grease it.
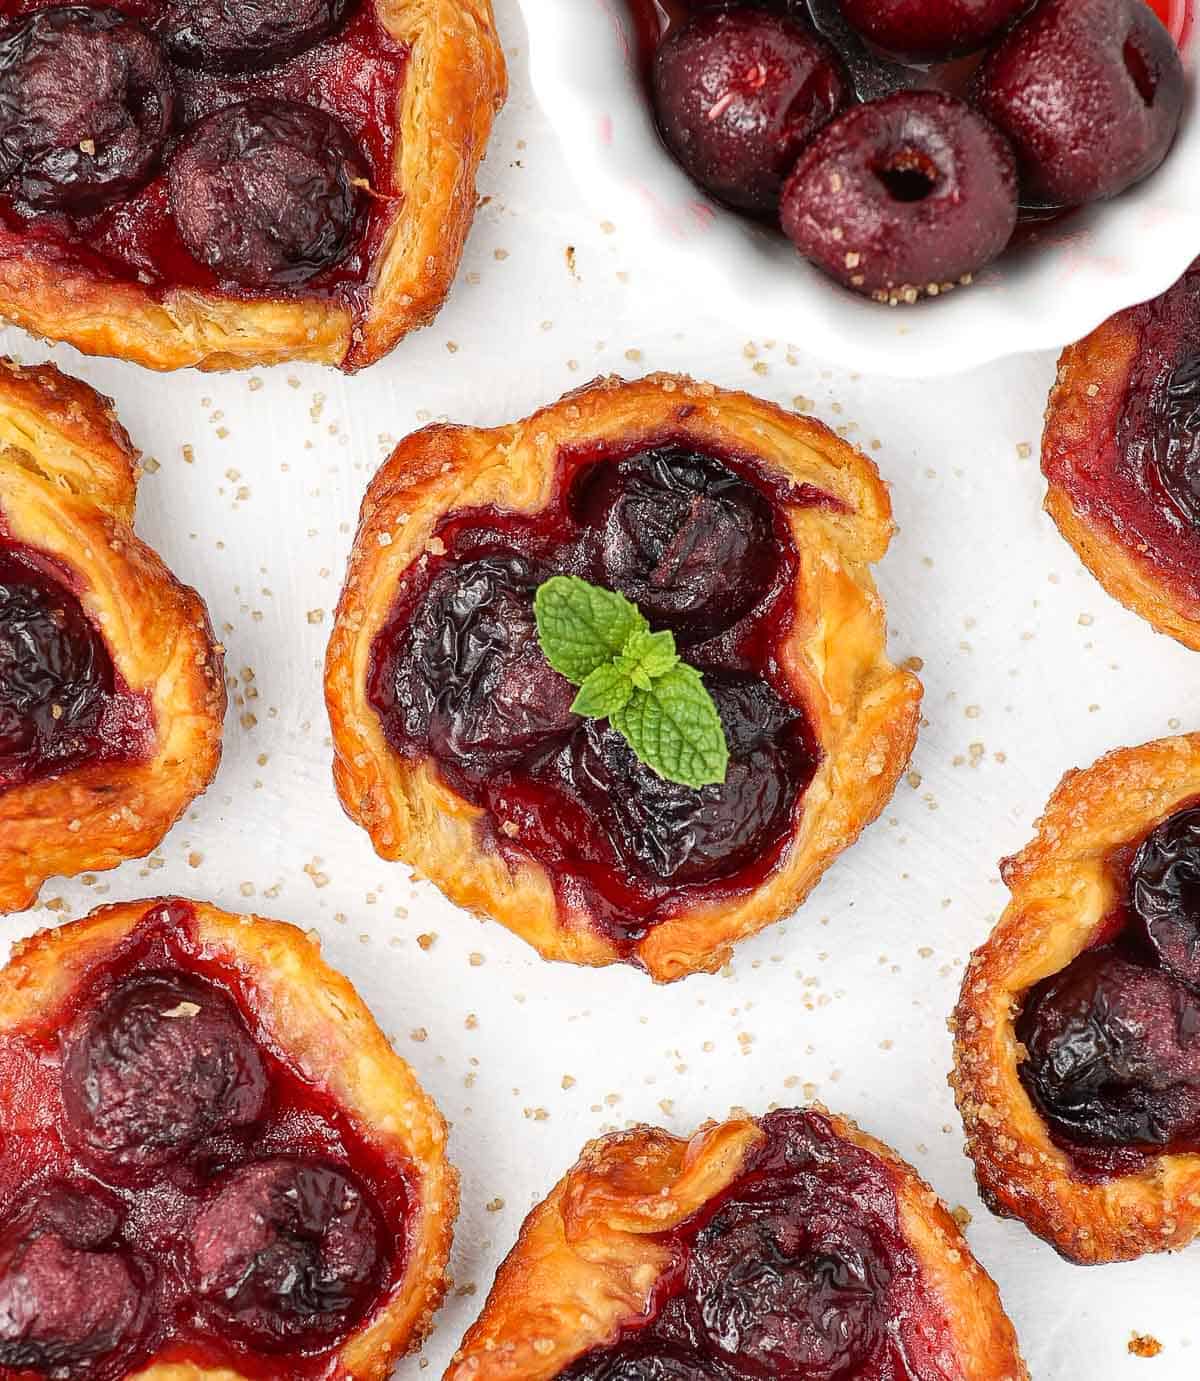
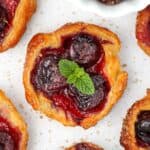
I simply topped the mini pies with fresh mint for an extra burst of freshness, but you could also finish them with some whipped cream (or chantilly cream), some homemade vanilla custard or even vanilla ice cream!
Tips for Success
- If you are making the cherry filling in advance, cover it with plastic wrap and store it in the fridge until ready to use (I recommend to store them for up to 24 hours). You might need to add a little bit cornstarch than recommended as the fruits will release some moisture during this time. Make sure to stir well before using.
- For pastries that are puff, golden and well baked all around (especially their bottoms), use a perforated baking mat and optionally a perforated baking tray as well. This will insure an even heat distribution around the cherry tartlets when they bake.
- For a different flavour, you could mix different berries to the filling like blueberries or raspberries.
Storing & Freezing
These tartlets are best served straight away if you want the pastry to remain crunchy and flakey. I recommend eaten them within 24 hours for the best texture (and can be kept at room temperature for that time).
They will still be ok to eat for a few days but after the first 24 hours, the cherry filling will start to soak the pastry and make it soggy. These cherry pastries are note meant to be frozen.
Made this recipe?
Let us know if you liked it by leaving a comment below, and tag us on Instagram @a.baking.journey with a photo of your creation!
Recipe
Easy Cherry Tartlets with Puff Pastry
Ingredients
- 200 gr (7 oz) Pitted Cherries, fresh or frozen thawed & drained
- 15 ml (1 tablespoon) Lemon Juice
- 50 gr (1/ 4 cup) Caster Sugar
- 10 gr (1 tablespoon) Cornstarch
- 2 sheets Frozen Puff Pastry, 25x25cm / 10x10inch
- 1 Egg, for egg wash, optional
- Raw Sugar, to taste, optional
Instructions
- Wash then pit the fresh Cherries (see note 1). Place them in a mixing bowl. Add the Lemon Juice, Sugar and Cornstarch and stir with a spatula until all the cherries are evenly covered with the other ingredients. Set aside.
- Preheat your oven on 180'C/350'F. Prepare a large baking tray with baking paper or a baking mat.
- Take the puff pastry sheets out of the freezer and leave at room temperature for 5 to 10 minutes or until thawed / soft. Using a large cookie cutter (about 10 cm / 4 inch wide), cut out 5 disks of dough per sheet (see note 2).
- Place the disks of puff pastry on the baking tray. Spoon out some of the cherry filling at the centre of each puff pastry disks (I used 3 cherries per tartlets) - (see note 3)
- Fold the dough over the cherries, gently pressing on it so that it sticks together and create a sealed edge.
- Optional: lightly beat the egg in a small bowl and brush it over the edges of the tartlets, then sprinkle over some raw sugar.
- Bake for 20 to 25 min or until the puff pastry pie crusts are golden brown and puffed. Transfer over a wire rack to cool down. Serve lukewarm or cooled down.
Video
Would you like to save this recipe?
Notes
- If you do not have a cherry pitter, you could simply use a stiff straw (like a reusable plastic or metal straw). Simply press the straw through the top of the cherry (where the stem comes out) and push the pit out. Be careful not to have your finger under the cherry or you might poke yourself.
- I don't recommend cutting out the puff pastry in smaller disks than 10 cm (4 inch) wide or you will get very small tartlets that are hard to shape.
- Re-mix the filling before placing it over the pastries to make sure all the ingredients are evenly combined. The fruits should have released some juice and you want to insure there is enough cornstarch all around to thicken them.


Ruth says
Perfect little bites of deliciousness…and the hint to use a chopstick to remove the pips from the cherries was very helpful…thanks for sharing.
Sylvie says
Glad you enjoyed the recipe Ruth!