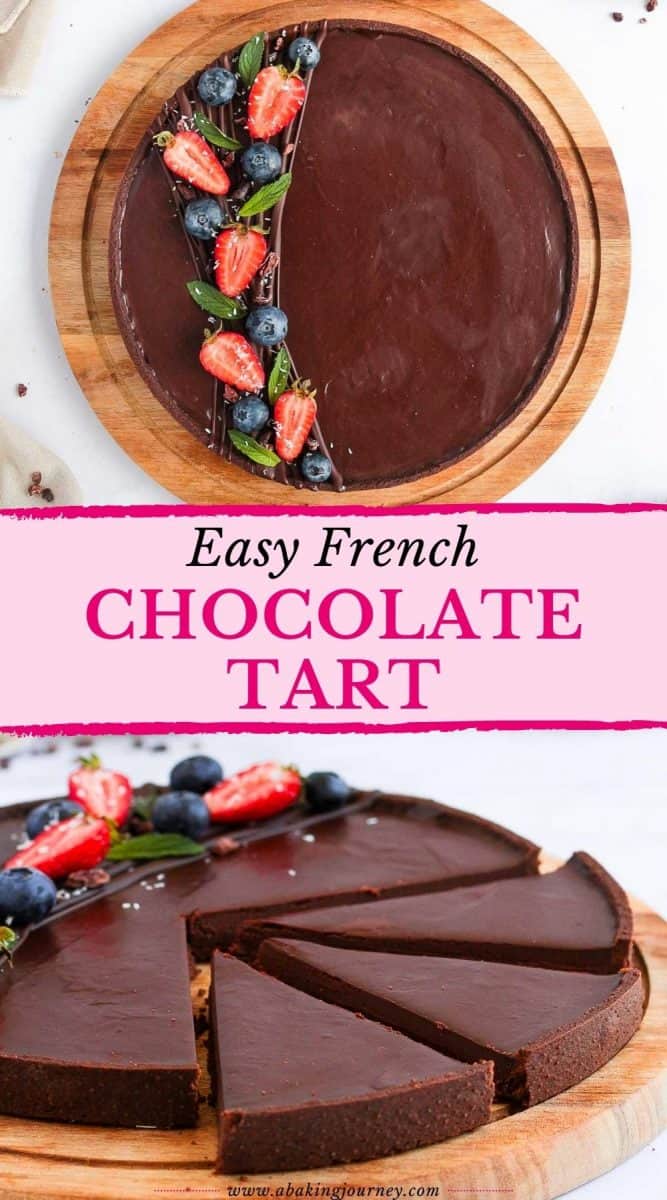
This Classic French Chocolate Ganache Tart is a Chocolate-lover dream dessert. It combines a crunchy Chocolate Tart Crust and a decadent Dark Chocolate Ganache Filling made from 2 ingredients only. Perfect as a fancy dessert or afternoon tea!
Jump to:
Why we love this recipe
Is there anything better than an all chocolate dessert? Not if you ask me... Well, it doesn't get more chocolatey than this Dark Chocolate Ganache Tart!
Just like its Mini Chocolate Tarts version made with mini tart shells, it has the perfect combination of a crunchy, crispy chocolate pasty crust and an intense chocolate ganache filling made with no added sugar. A deliciously decadent dark chocolate pastry.
This French Tart is like an easier (but just as delicious) version of my Baked Triple Chocolate Tart. But instead of a truffle-like filling, this dessert has an incredibly fudgey texture. And trust me, it's hard to resist it!
Ingredients
Cocoa Tart Crust
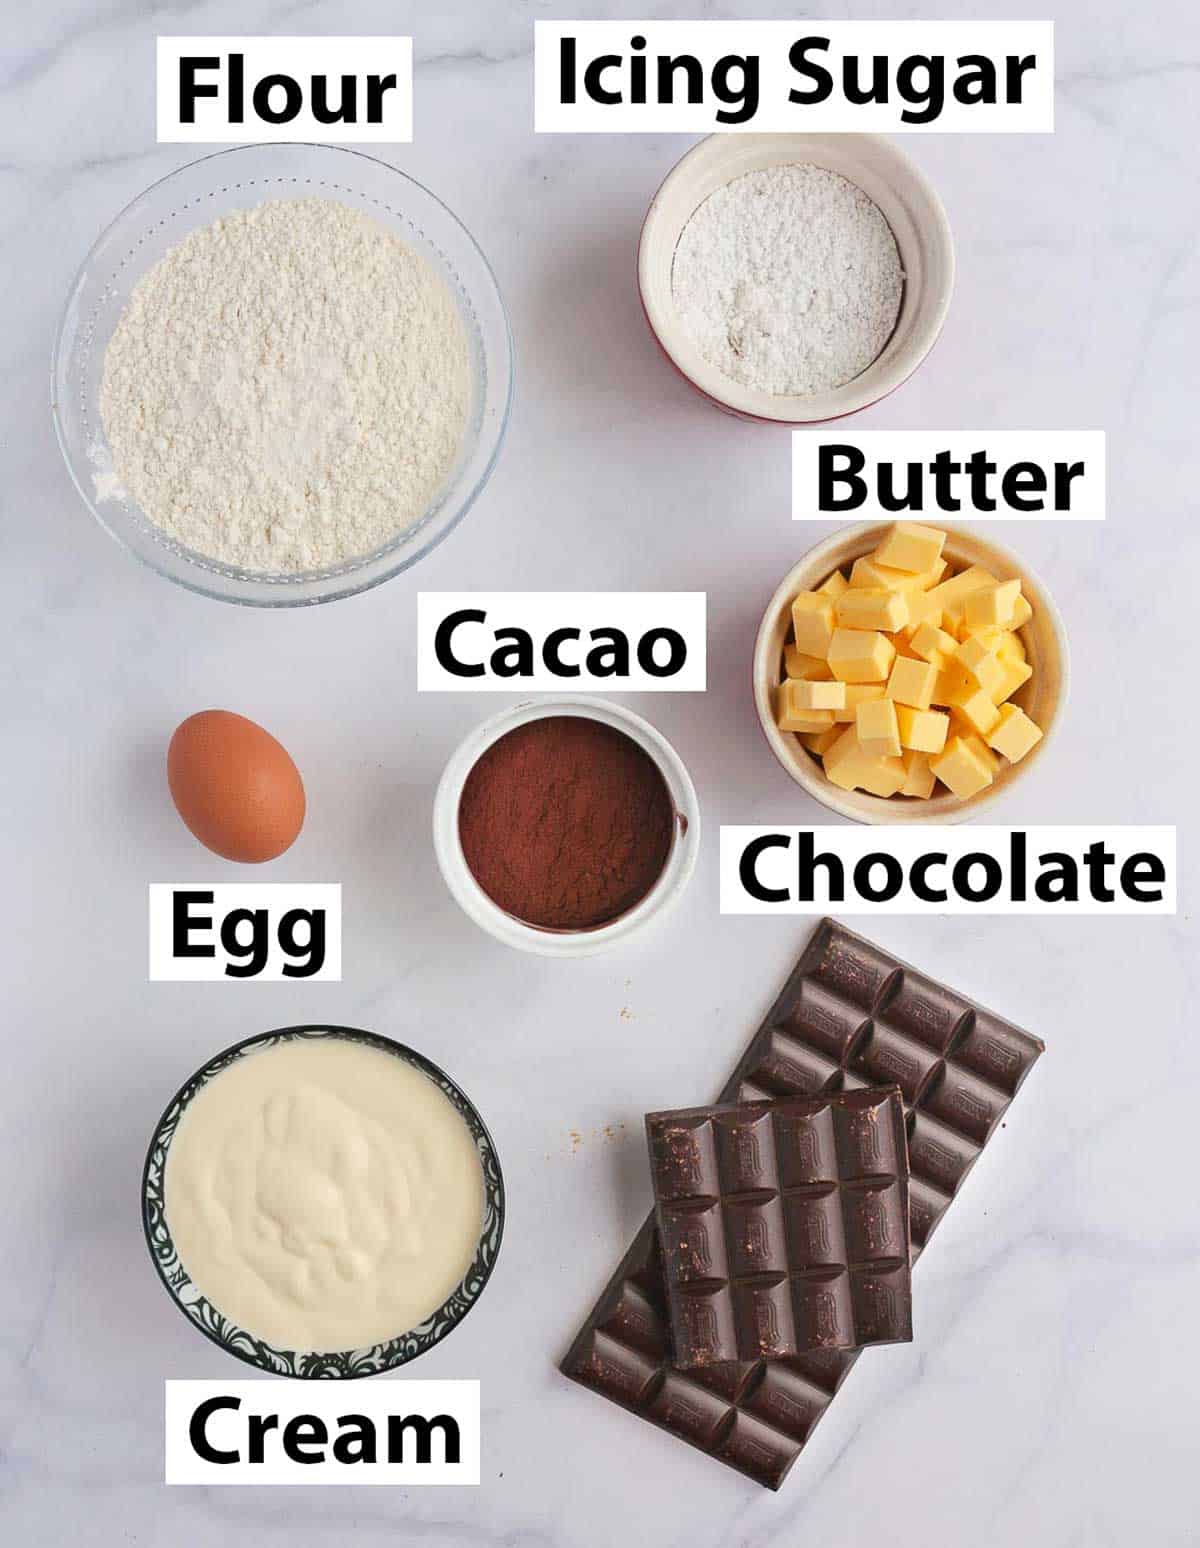
The Tart Crust is a classic French Shortcrust Pastry (Pâte Sablée) made with the addition of Cacao Powder. It is made by combining Dry Ingredients with Wet Ingredients:
- Dry Ingredients: Plain / All Purpose Flour, Icing Sugar (or Powdered Sugar), a pinch of Salt and Unsweetened Cacao Powder.
- Wet Ingredients: Cold Unsalted Butter and a medium sized Egg, at room temperature.
I do not recommend substituting any ingredients here. For the best results, I highly suggest to measure the ingredients in grams/ml instead of cups/spoons which is not always precise enough, especially when it comes to pastry.
Dark Chocolate Ganache Filling
The Ganache Tart filling is extremely easy to make with 2 ingredients only. A classic Ganache always uses the same quantity of Chocolate and Cream.
- Chocolate: I used a 70% Dark Chocolate (bittersweet chocolate), but you can use any of your preferred chocolate. Simply make sure you are using Cooking Chocolate - not eating chocolate (or chocolate chips). Eating Chocolate will not melt properly and might result in a grainy, unset ganache.
- Cream: Thickened / Heavy Cream. Do not use a Fat Free or Low Fat Cream, it would have an impact on both the taste and the texture of the ganache.
As you can see, there is no sugar added to the ganache filling so the sweetness will entirely rely on the strength of the Chocolate. If you like chocolate that is more on the sweet side, use a less intense Dark Chocolate or even Milk Chocolate.
If you want, you can also add a little bit of butter to your chocolate ganache for a shinier, silkier finish. You can also add a little bit of vanilla extract or coffee to your ganache.

How to make a Chocolate Tart Crust
The first step of the recipe is preparing and baking the Tart Crust. The filling does not need to be baked so you will need to fully bake the pastry on its own before adding the filling.
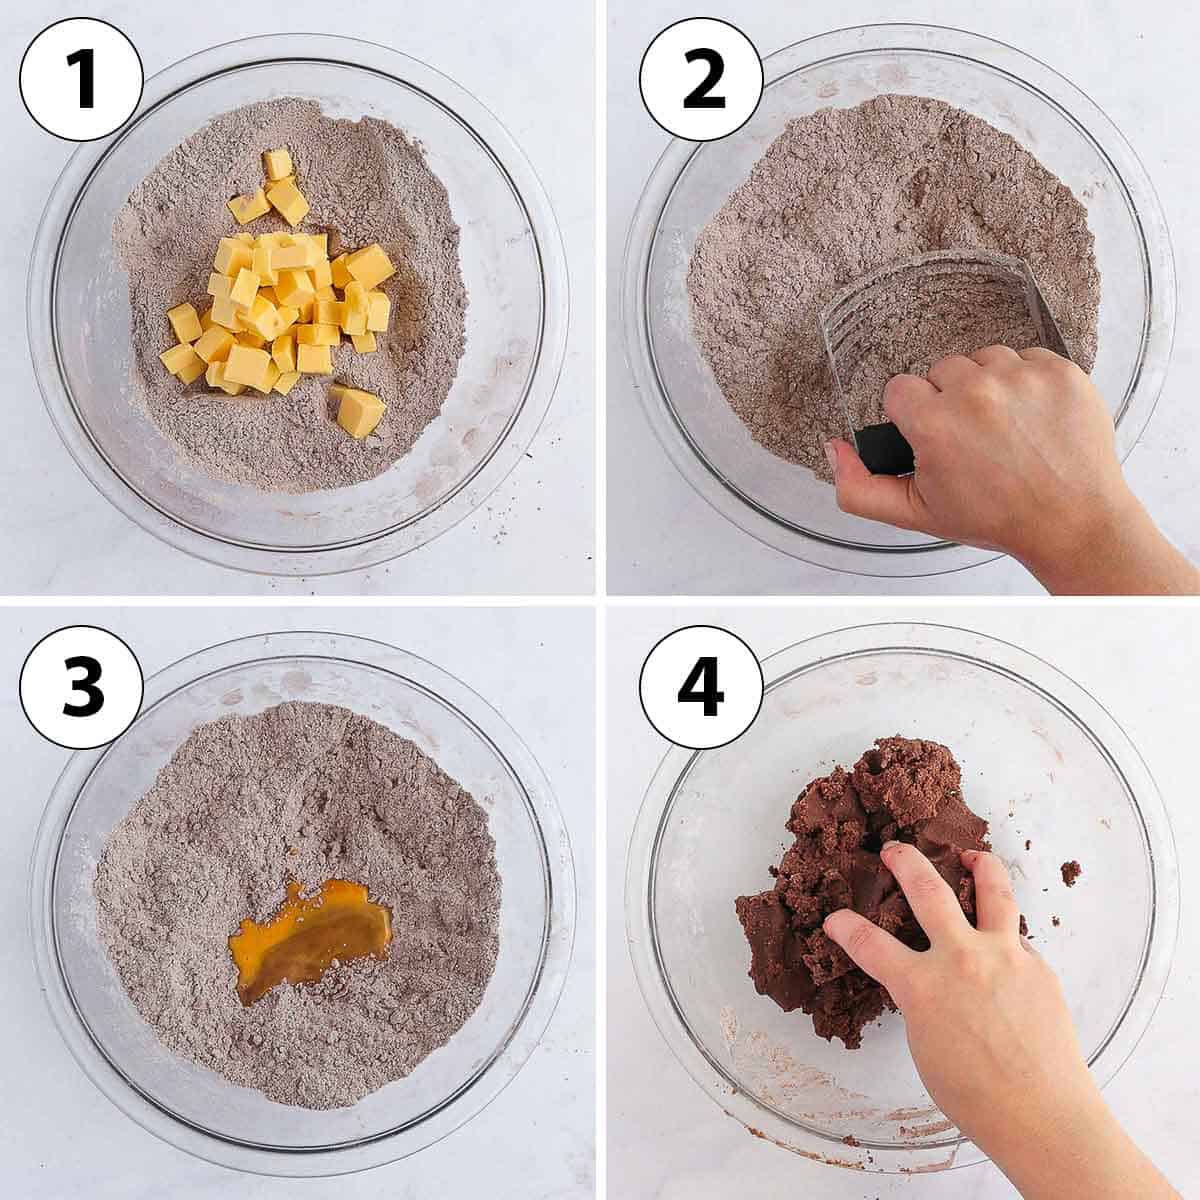
- Photo 1: Sift together the Flour, Salt, Icing Sugar and Cacao Powder and place in a large mixing bowl. Add the Cold Butter cut into small cubes.
- Photo 2: Using your fingers (or a Pastry Blender), cut the Butter into the dry Ingredients by rubbing and pressing them together until you get very small crumbs and you cannot see loose powders. If using a food processor, pulse until you get small crumbs.
- Photo 3 & 4: Add the Egg and mix with your fingers until a soft dough comes together. You can transfer the dough on your kitchen bench to knead it if easier, but make sure not to overwork the pastry.
- Place the mixture between two sheets of baking paper and roll it into a large circle with a rolling pin. I rolled the pastry to be about 3 mm or 1/8 inch thick. Place on a flat tray and keep in the fridge to rest for at least 1 hour.
- Line your Tart Pan - or Perforated Tart Ring like the one I used - then prick the bottom of the pastry with a fork. Place back in the fridge to rest for at least an hour.
- Preheat your oven on 160'C/325'F and place the pastry in the freezer while the oven is preheating. Bake the Pastry for 30 to 40 minutes, or until fully baked. Leave to cool down completely before making the filling.
Note that I used a Tart ring that is 2 cm high / 24 cm wide or 0.75" high/ 9.75" wide. This pastry recipe will make more crust than needed to fill this tart ring, so you could use a slightly larger, or higher tart pan with removable bottom as well.
Read more about how to make this Cacao Pastry, including instruction on how to make it in the food processor, tips and troubleshooting in my Chocolate Pie Crust recipe.
Dark Chocolate Ganache Filling
Once the Tart Pastry has been fully baked and had time to cool down on a wire rack, it is time to start making the No Bake Chocolate Tart Filling.
Would you like to save this recipe?
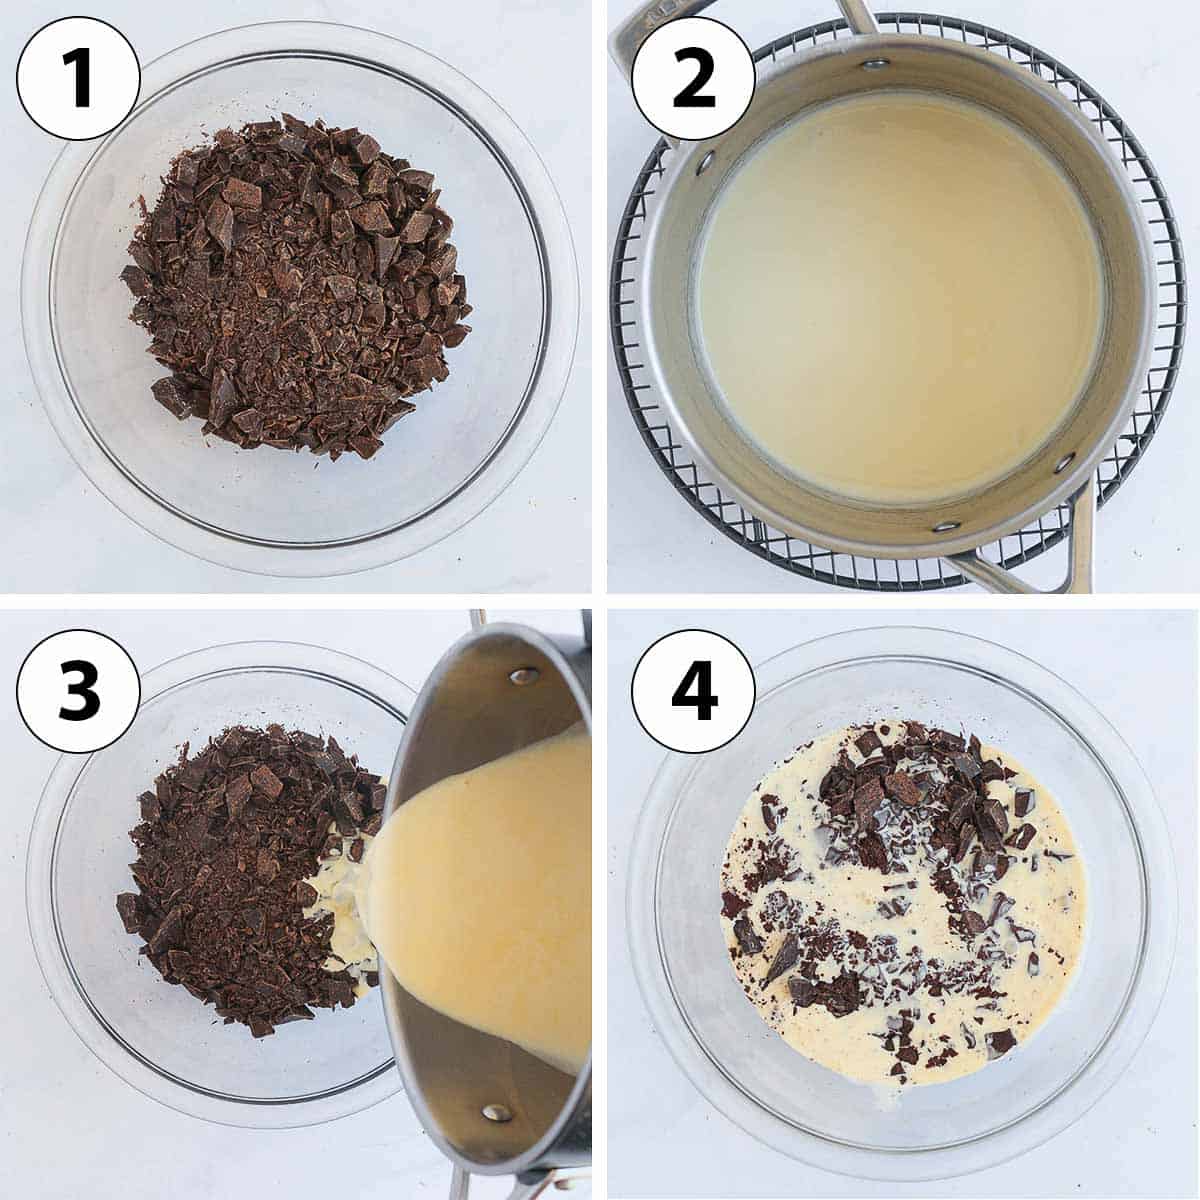
- Photo 1: If using a Cooking Chocolate in the form of a bar, finely chop it. You can use Cooking Chocolate in the form of Callets or Chips as well. Place them in a large heat-proof mixing bowl.
- Photo 2: Pour the Cream in a small Saucepan and place on the stove on low heat until it starts to simmer. It does not need to boil fully, but you should see some steam coming out of the pan.
- Photo 3 & 4: Pour half of the Cream over the Chopped Chocolate and leave without stirring for 2 to 3 minutes. The Chocolate will start to melt with the heat.
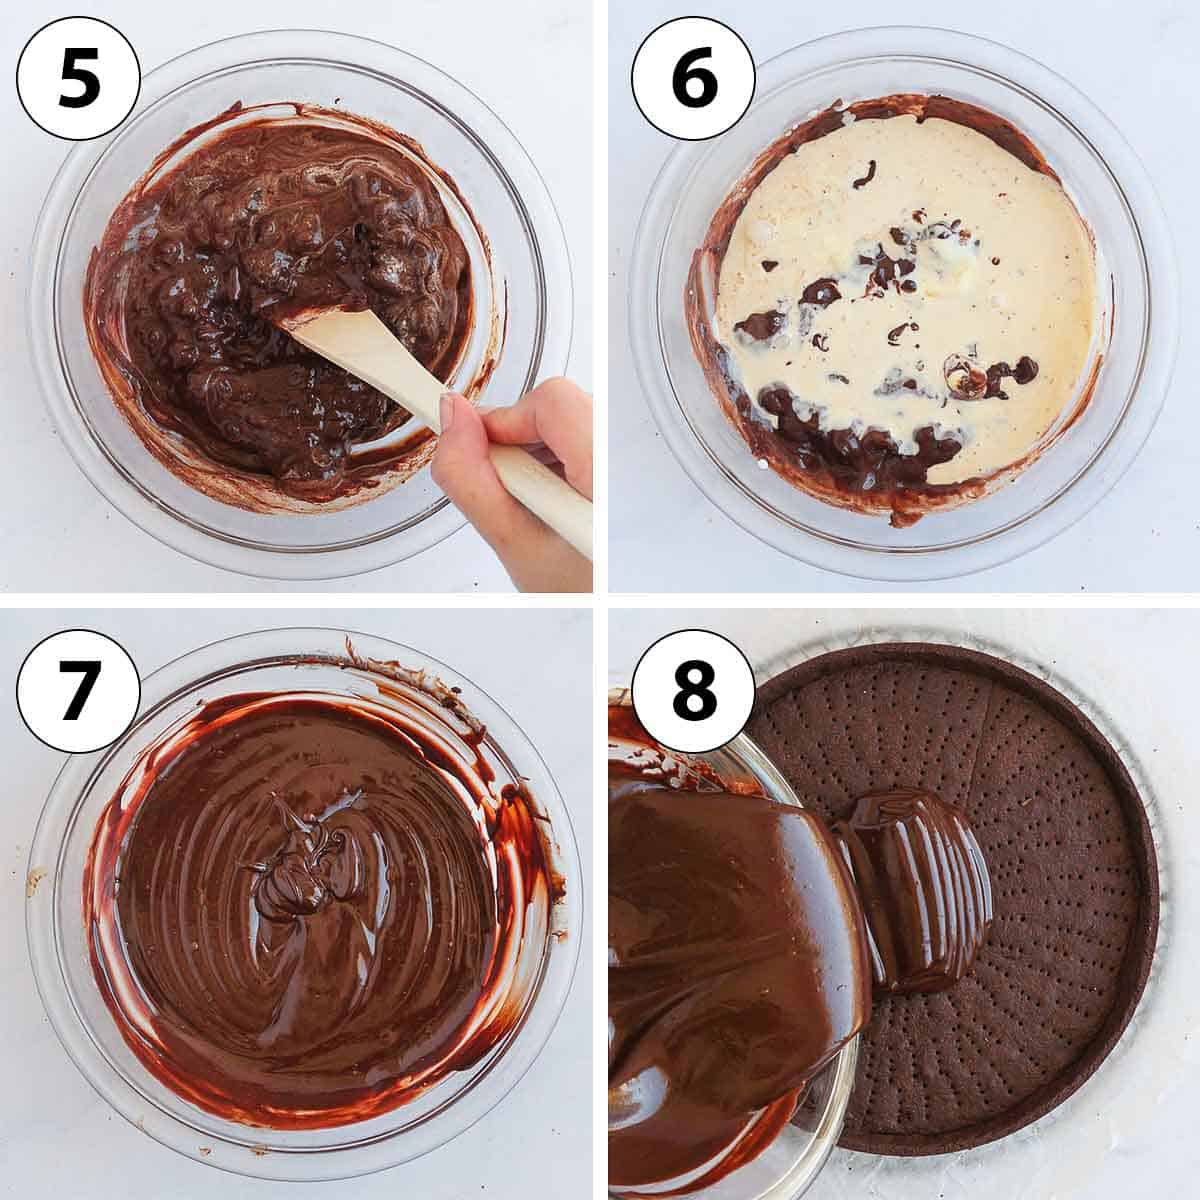
- Photo 5: Using a Stiff Spatula (or a silicone spatula), stir the Chocolate and Cream together in a circular movement, starting from the centre of the bowl and slowly making your way to the edges. You will still have chunks of unmelted chocolate - it's normal.
- Photo 6 & 7: Add the rest of the hot Cream over the Chocolate and stir again in the same movement until all the Chocolate has melted and you get a smooth ganache.
- Photo 8: Pour the warm Chocolate Ganache mixter into the fully baked Tart Crust. If needed, use a small offset spatula (or the back of a spoon) to spread it evenly.
- Place the Tart in the fridge to set for about an hour - or until the ganache has hardened. Don't forget to cover it with wrap so that the ganache does not dry out.
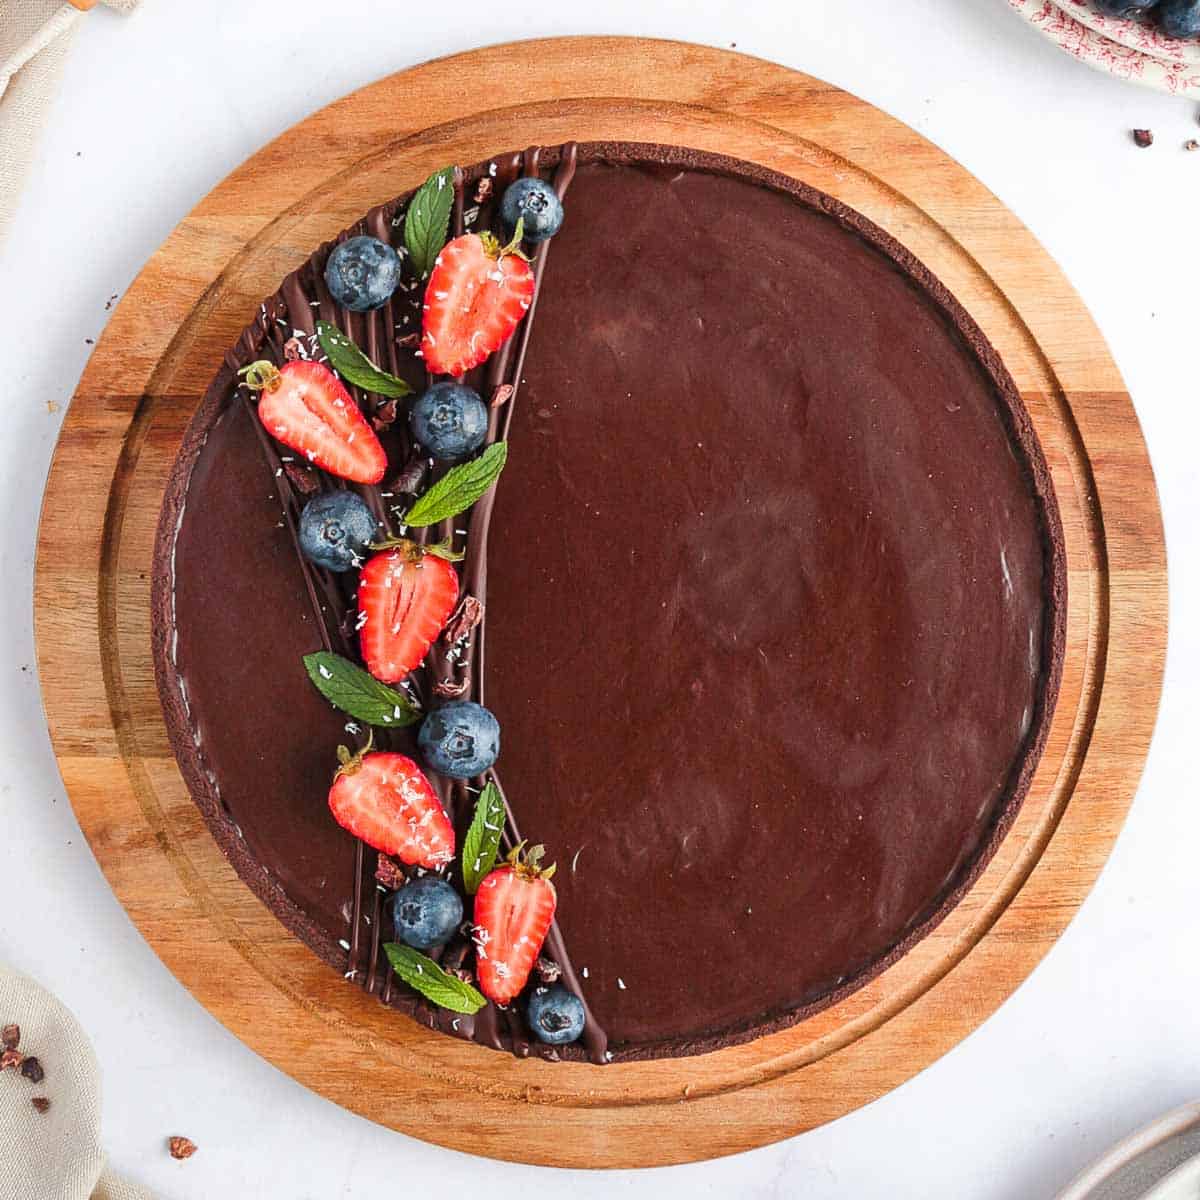
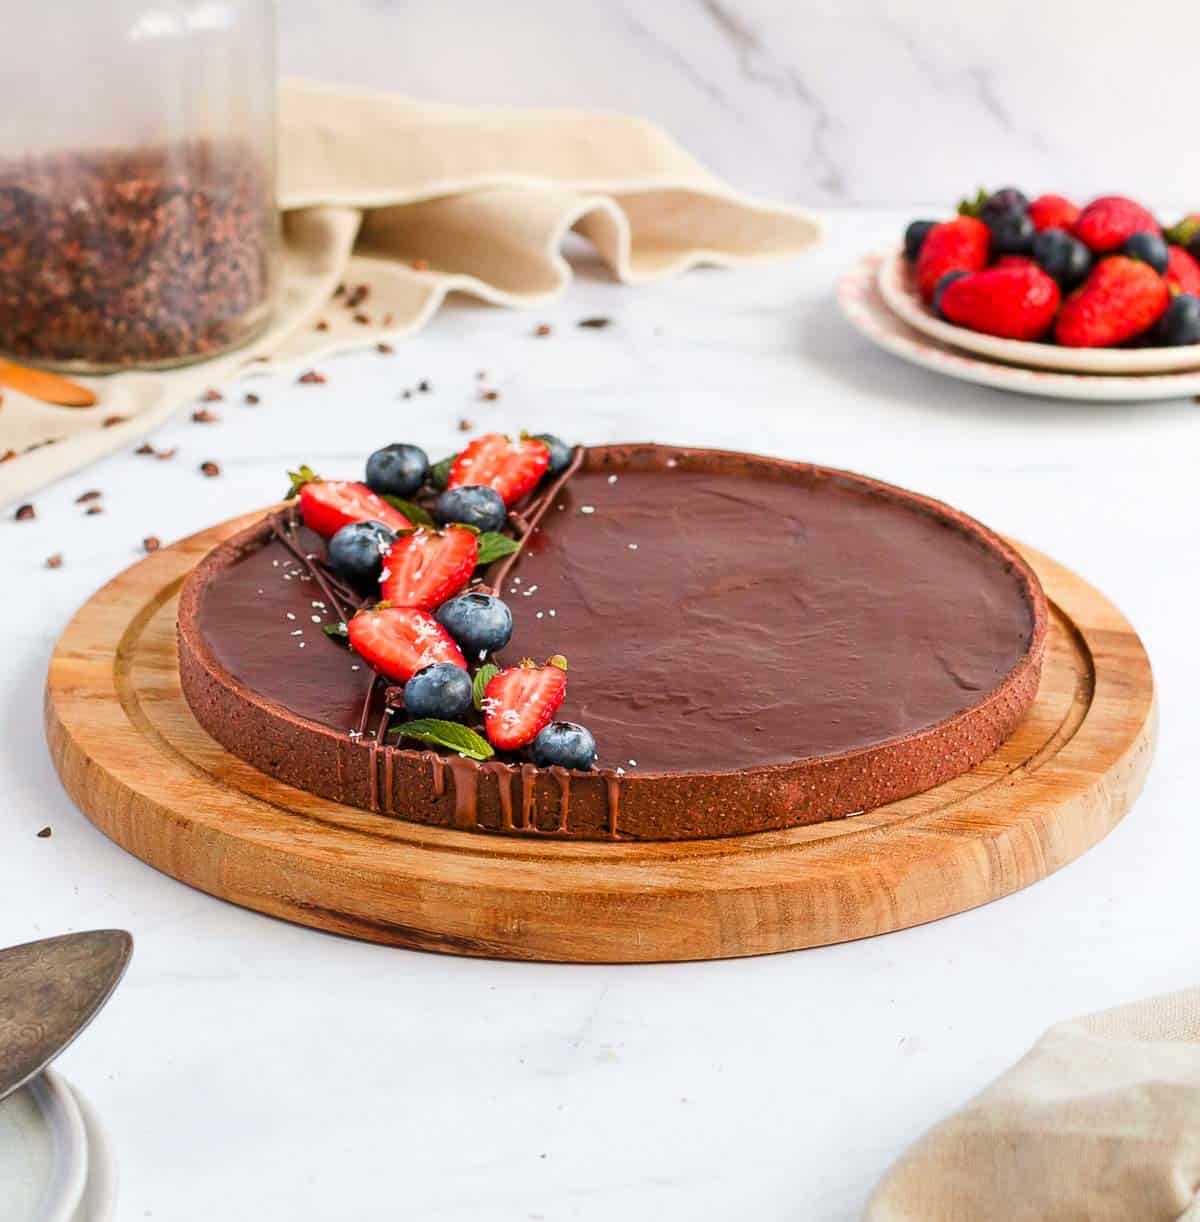
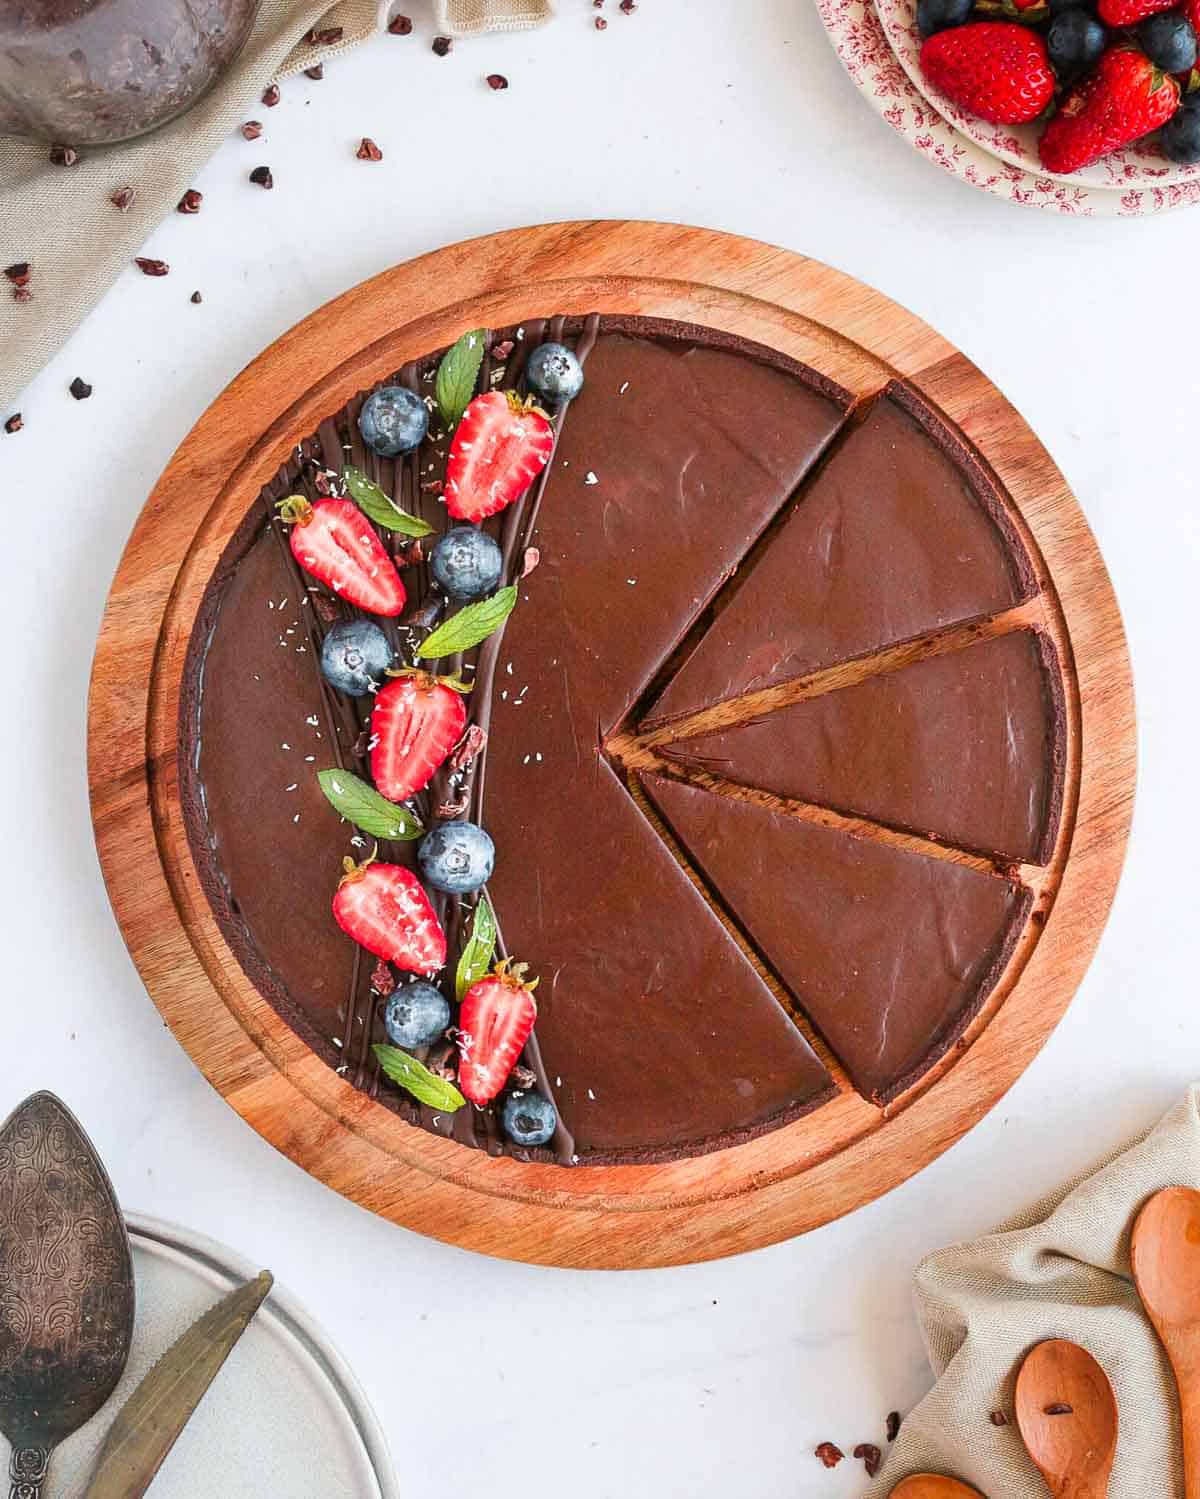
To finish the chocolate ganache tart, decorate with a drizzle of melted Chocolate, some fresh Berries, Cacao Nibs, Desiccated Coconut, flaky Sea Salt, Whipped Cream or any of your favourite toppings! Use a large, sharp knife to cut out slices.
Recipe FAQs
Absolutely - I love to make my own pastry but if you are looking for a super easy, no fuss chocolate ganache tart recipe, you could simply use a basic shortcrust pastry from the store and fill it with the homemade ganache.
The strength or percentage of Cacao in the Chocolate is completely up to you and your taste - but you need to make sure you use proper Cooking Chocolate. Not eating chocolate.
There is no sugar added into the ganache filling, so you will want to use a type of Chocolate you personally enjoy eating and that is sweet (or strong) enough for you!
I used a 70% Chocolate that created a very intense filling - but if you would like it to be a bit sweeter, use a Dark Chocolate that is not as strong, or even go for Milk Chocolate instead!
It depends if you keep it in the fridge or not. For a soft, fudgy texture, take the chocolate ganache tart out of the fridge for at least 1 hour before serving so that the chocolate can soften a bit.
For a harder ganache, keep it in the fridge until ready to serve.
The ganache will remain soft until properly chilled. If the ganache filling is still not set, simply leave it for longer in the fridge. A ganache that remains liquid after a few hours in the fridge could be caused by the wrong ratios of cream to chocolate. Too much cream will result in a runny ganache.
What to serve with this Chocolate Tart
I finished the Chocolate Ganache Tart with a drizzle of Melted Chocolate, some Fresh Berries, Mint Leaves, Cacao Nibs and some Desiccated Coconut. But you can really use any of your favourite toppings like a Whipped Ganache or ingredients to decorate it - or leave it plain!
To serve, you can also top each slice of chocolate tart with a berry sauce like a Strawberry Coulis or Raspberry Coulis, a scoop of Vanilla Ice Cream, a Hot Chocolate Sauce or a Crème Anglaise (Vanilla Custard).
Tips to make this recipe
- Finely Chopping the Chocolate before adding the cream is really important. It will help your chocolate melt much more quickly, and you won't need to add too much heat to it to fully melt it. Melting chocolate at a high temperature might result in a grainy ganache.
- You can re-heat the second half of the Cream before adding it to the Chocolate if it seems to have cooled down while you where mixing the first half. Simply bring it to a simmer again (no need for a boil).
- If some of the chocolate is still solid after adding all of the hot cream, you can either place the bowl in the microwave for a few seconds (don't leave it for more than 30 seconds at the time!), or over a Double Boiler.
- When making the Ganache, use a Spatula to mix the chocolate and the hot cream and not a Whisk. Using a whisk will add air bubbles to the ganache, and it won't be as smooth as if mixed with a spatula.
- Pour the Ganache into the Baked Crust straight away while still warm to get a smooth finish. If you leave it aside for too long, the ganache will start to harden.
Storing & Freezing
The tart will keep will in the fridge for 24 to 48 hours. I don't recommend making it earlier than that or you will loose the crunch of the Pastry.
The pastry itself can be made and baked 1 or 2 days ahead, and filled with the ganache up to one hour before serving (or the time required for the ganache to set in the fridge).
The unfilled Pastry can be kept at room temperature, wrap in foil or plastic. Once filled with the chocolate ganache, it needs to be stored in the fridge.
I do not recommend freezing this dessert.
More Tart Recipes
- French Orange Tart
- Rhubarb Custard Tart
- Easy French Apple Tart
- Strawberry Custard Tart
- Parisian Flan
- Lemon Curd Tart
- Peach Tarte Tatin
- Chocolate Raspberry Tart
- Pear Frangipane Tart
Made this recipe?
Let us know if you liked it by leaving a comment below, and tag us on Instagram @a.baking.journey with a photo of your creation!
Recipe

French Chocolate Ganache Tart
Ingredients
Chocolate Tart Crust
- 225 gr (1 1/2 cup) Plain / AP Flour
- 20 gr (2 tablesp.) Unsweetened Cacao Powder
- 50 gr (1/2 cup) Icing Sugar, or Powdered Sugar
- 1 pinch Salt
- 120 gr (1/2 cup) Unsalted Butter, Cold
- 1 Egg, at room temperature
Chocolate Ganache Filling
- 250 gr (9 oz) Dark Cooking Chocolate, (*)
- 250 ml (1 cup) Thickened / Heavy Cream
Instructions
Chocolate Tart Crust
- Sift together the Flour, Cacao Powder, Icing Sugar and Salt, place in a large mixing bowl and mix.
- Add the cold Butter cut into small cubes. Mix it with the dry ingredients by rubbing it between your fingers (or using a Pastry Blender) until you get very fine crumbs (see note 1).
- Add the Egg and mix it by hands in until you get a smooth, soft dough (see note 2).
- Place between two sheets of baking paper and roll into a large circle with a rolling pin, about 3 mm or 1/8 inch thick. Dust with a little bit of flour if very sticky. Place over a flat tray and leave in the fridge to rest for at least 1 hour - or up to 24 hours.
- Line your Tart Ring or Tart Pan (see note 3) and dock the bottom of the pastry by pricking it with a fork. Place back in the fridge for at least 1 hour - or up to 24 hours.
- Preheat your oven on 160'C. Put the Tart Ring/Pan with the Pastry in the freezer while the oven is preheating, then bake for 30 to 40 minutes or until fully baked. Set aside to cool down completely.
Chocolate Ganache Filling
- Finely chop the Cooking Chocolate (if using a chocolate bar and not chocolate callets/chips) and place it in a large heat-proof mixing bowl.
- Pour the Cream into a small saucepan and heat up on low heat until it starts to simmer. Pour half of the hot cream over the chopped Chocolate and leave for 2 to 3 minutes without touching it. Then using a stiff spatula or silicone spatula, stir together in small circular movements, starting from the centre of the bowl then making your way towards the edges (see note 4).
- Pour the rest of the hot cream over the ganache (see note 5) and repeat the process, stirring in gentle circular movements until all the chocolate has melted and the cream has been incorporated. You should get a smooth, shiny ganache.
- Directly pour the warm Ganache in the baked Tart Crust. If needed, use a small offset spatula or the back of a spoon to spread it out. Place in the fridge to set for at leat one hour, or until the ganache has hardened.
- Optionally: when fully set, decorate with your favourite toppings like a melted chocolate drizzle, fresh berries, cacao nibs, desiccated coconut etc,...
Would you like to save this recipe?
Notes
There is no added sugar to the ganache, but you can adjust the level of sweetness by choosing a sweeter type of chocolate. Instructions Notes:
- You should not see any loose powders anymore. You can also use a Food Processor to make the Pastry if preferred.
- You might find it easier to transfer the dough over your kitchen bench to mix in the egg and 'knead' it in. Try not to overwork the pastry at this point.
- You might need to leave it at room temperature for a few minutes if the pastry is very cold and hard to handle. Alternatively, if the pastry seem to become too soft, place it back in the fridge for a few minutes.
- The chocolate won't be fully melted at this point - it is normal. Gently mix until all the cream has been incorporated into the chocolate.
- If the cream seems to have cooled down, reheat it up to a simmer before adding the second half. If you still have some unmelted chocolate after adding the second half of the cream, either place the ganache in the microwave (for no longer than 30 seconds at the time, stirring well each time until fully melted) or preferably over a double boiler.