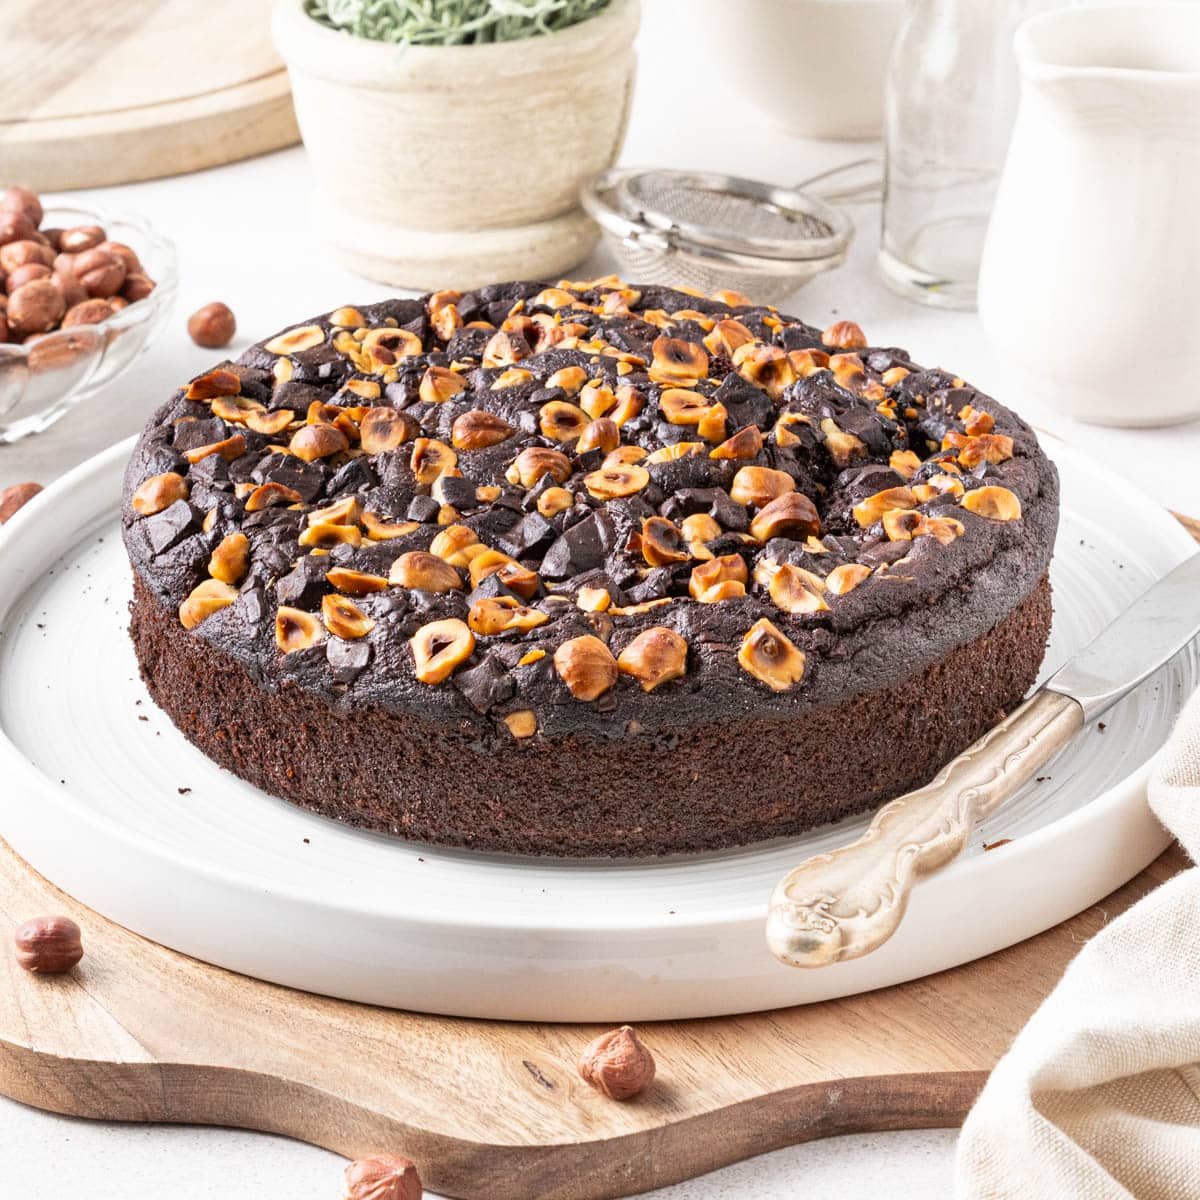
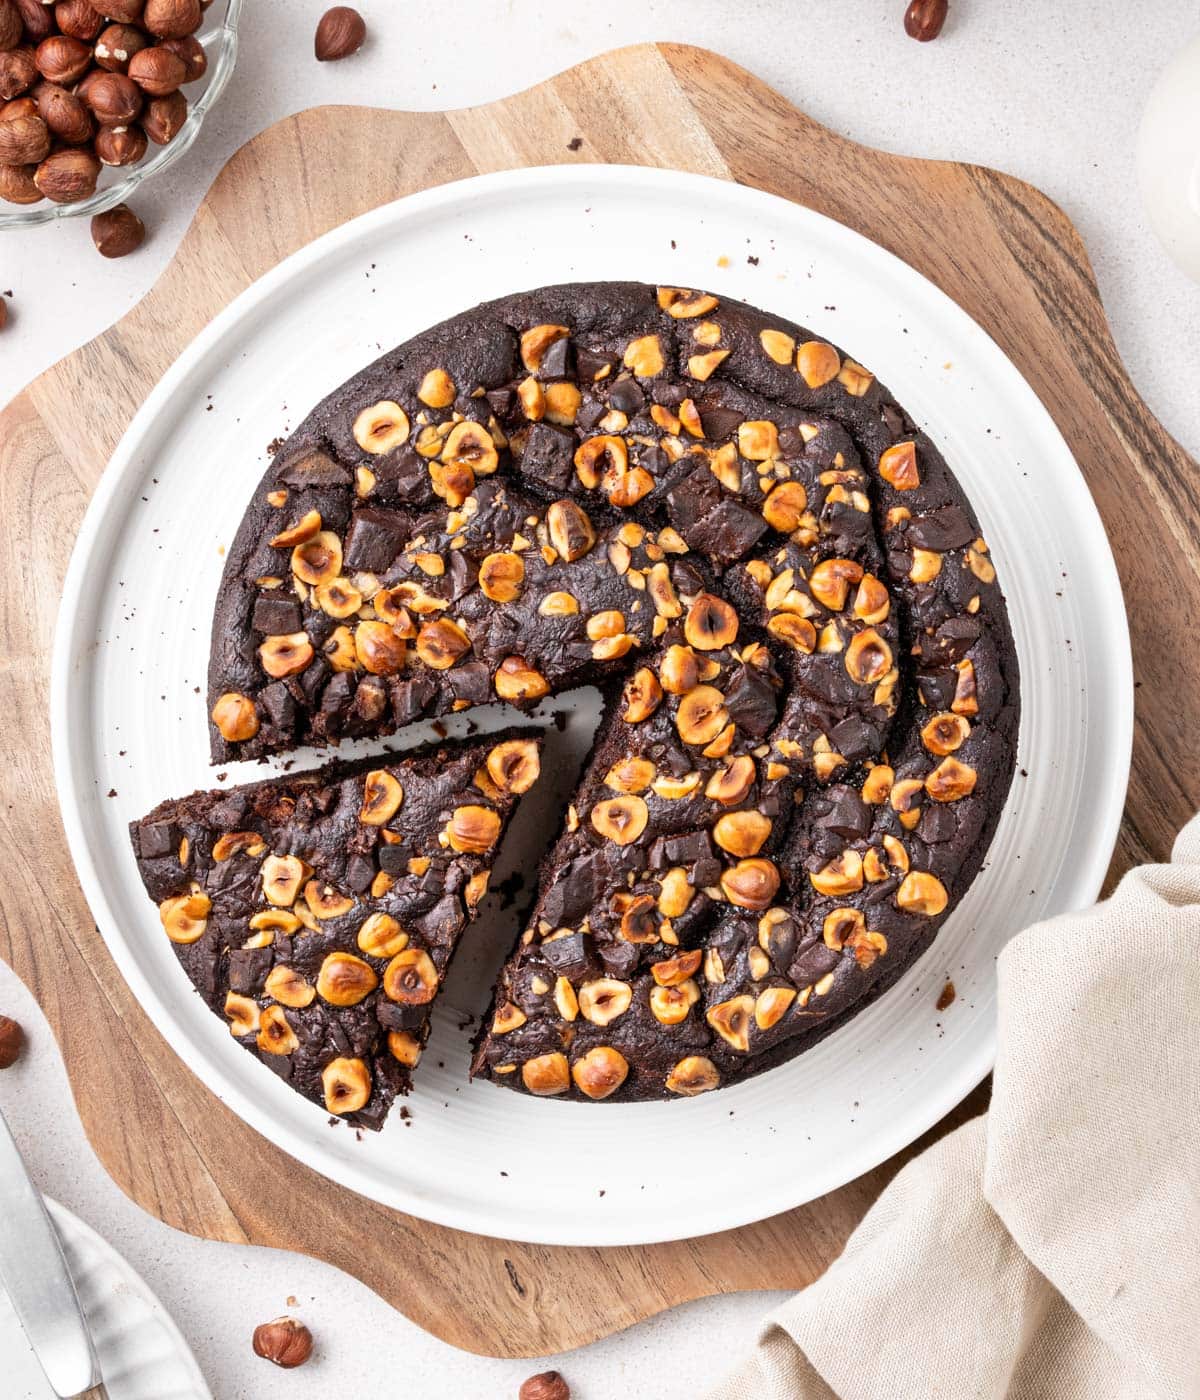
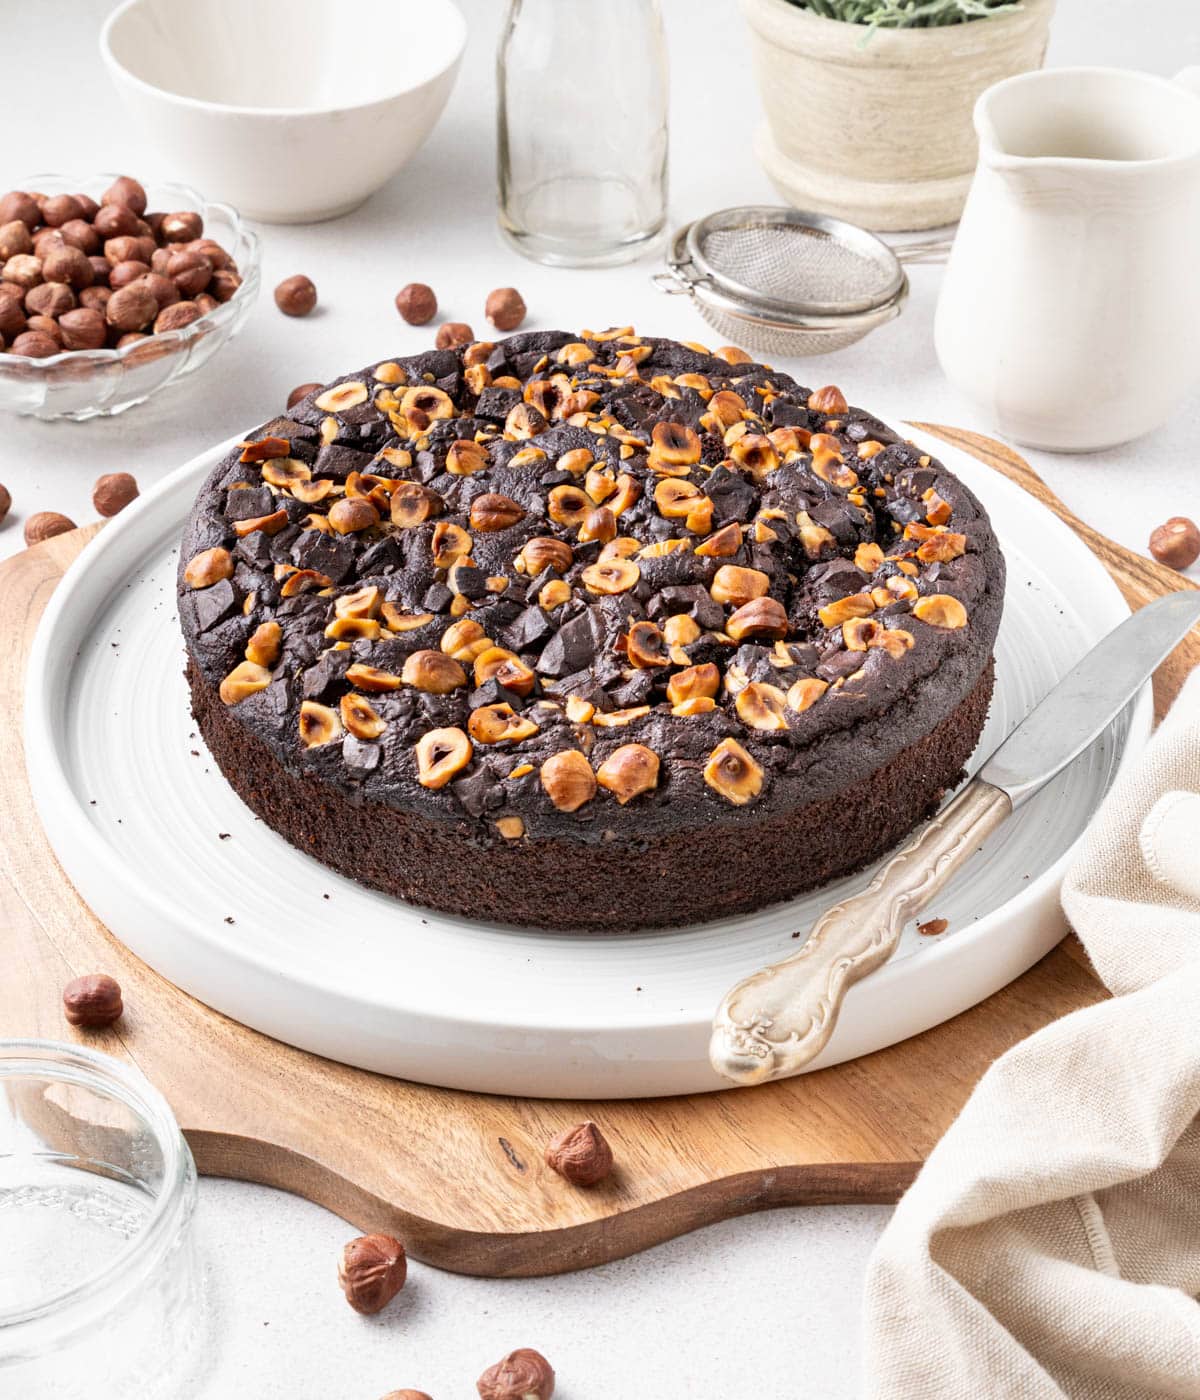
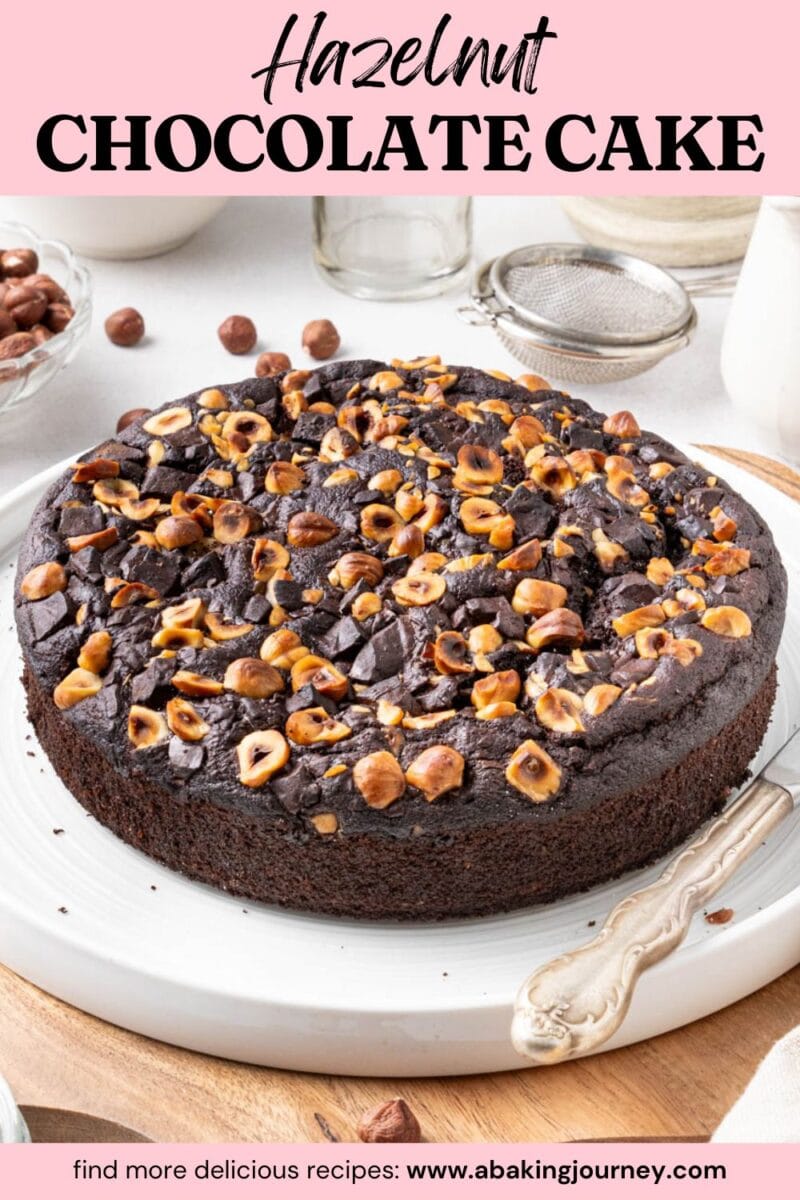
This simple one-layer Chocolate Hazelnut Cake is deliciously decadent and super easy to make in less than an hour. It is the perfect cake to serve for dessert or afternoon tea.
Jump to:
Why we love this recipe
If you love the flavour combination of intense chocolate and earthy hazelnut, this recipe is for you! This chocolate hazelnut cake is super quick and easy to make: no mixer needed + minimal prep time. And it will be out of the oven within an hour!
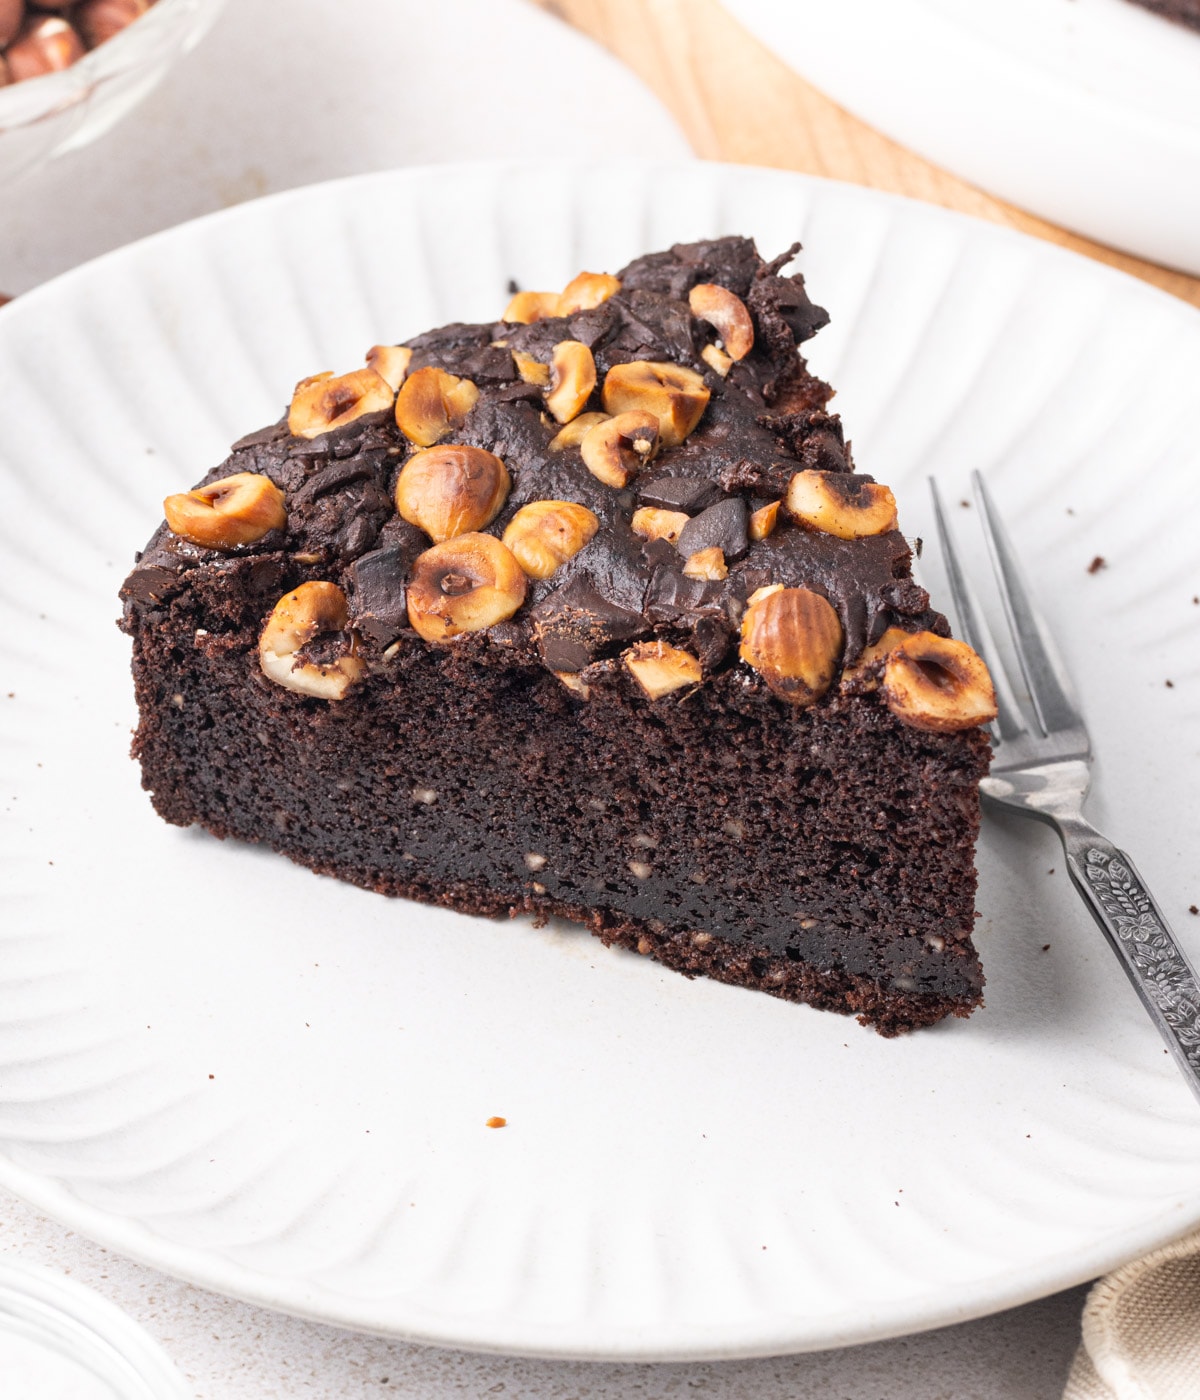
The cake is not overly sweet thanks to the deep flavours of natural cocoa powder and hazelnuts; no Nutella flavours here, sorry! The crumb is light and moist with a slight crunch thanks to the hazelnut present both inside the batter and roasted on top.
More chocolate + hazelnut recipes to try: Chocolate Hazelnut Shortbread Cookies.
Ingredients Notes
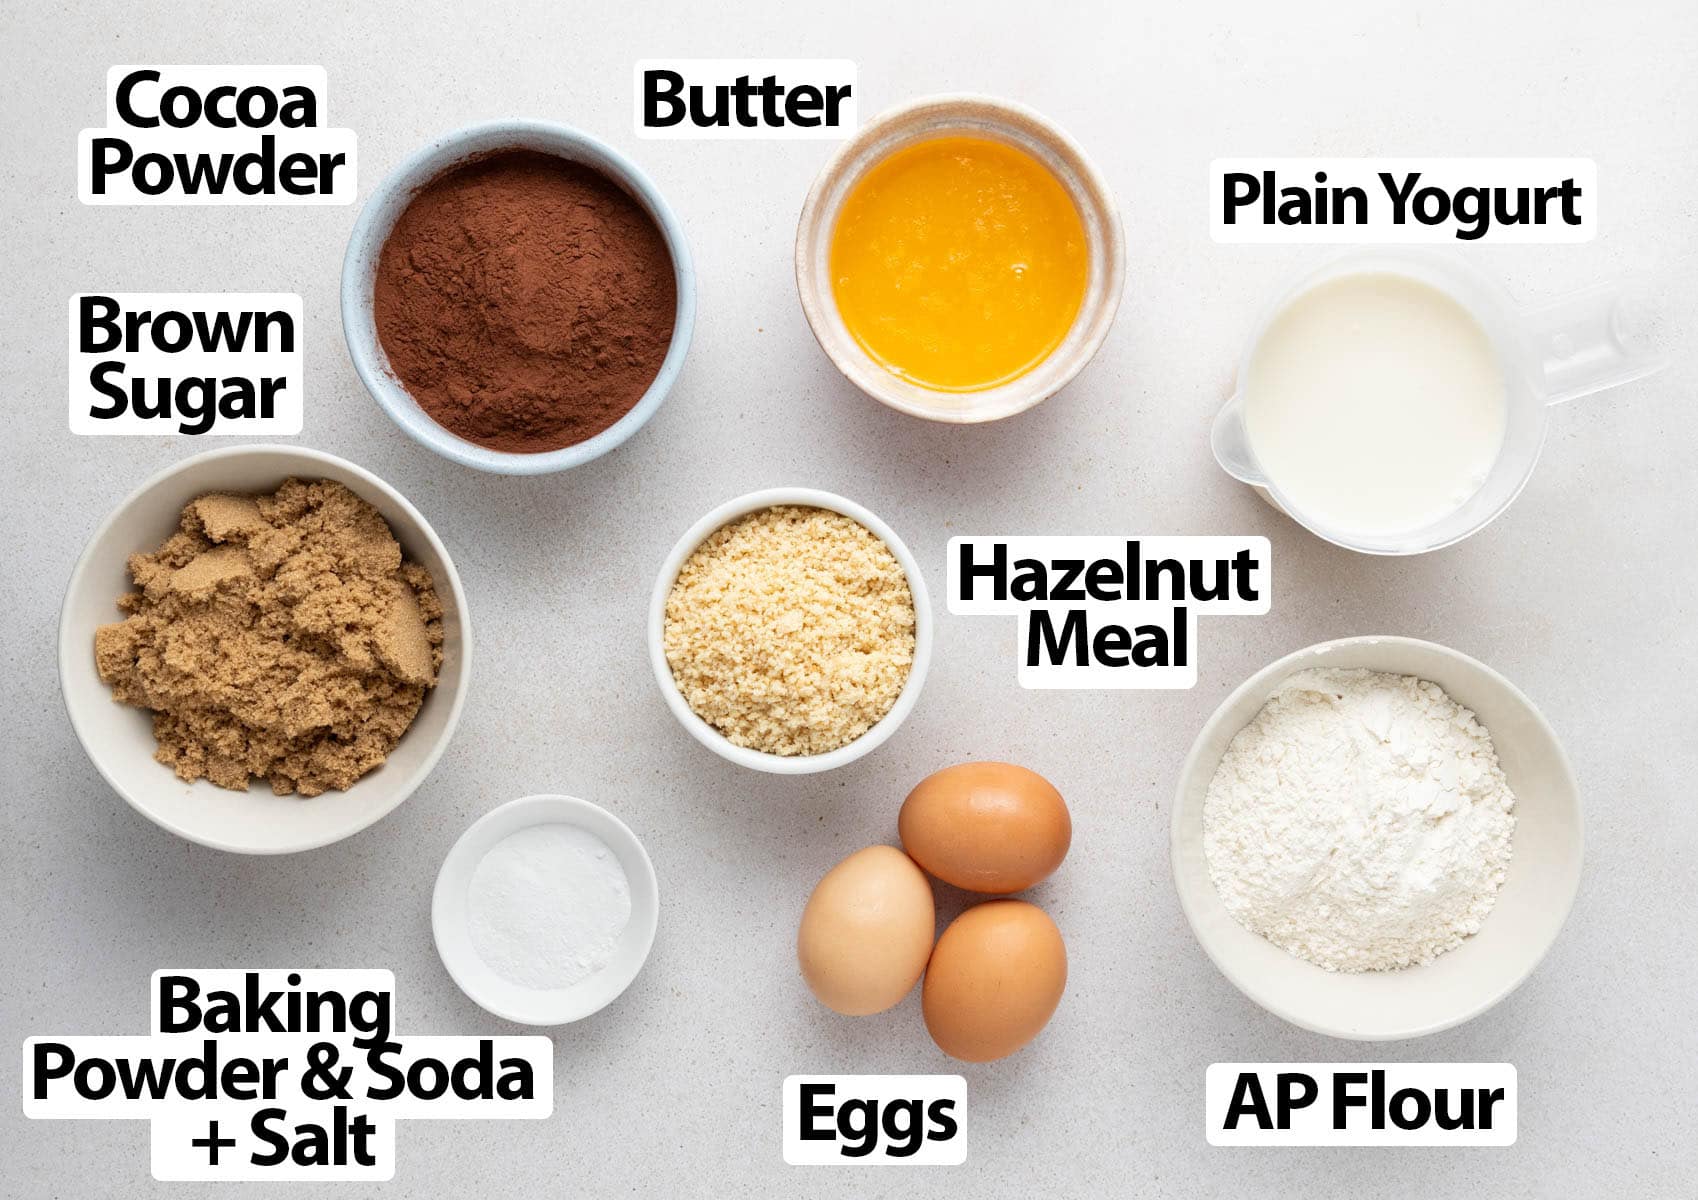
Scroll down to recipe card below for all quantities
What is chocolate hazelnut cake made of:
Dry Ingredients
- Cocoa Powder: use unsweetened, natural cocoa powder. I don't recommend using dutch-process powder as it is a neutral ingredient that won't react to the baking soda and make the cake rise even more.
- Hazelnut Meal: sometimes called hazelnut flour. You can usually find some from your supermarket or simply make it yourself at home by grinding roasted hazelnuts (skinned or not skinned). Scroll down the page for instructions on how to make hazelnut meal.
Wet Ingredients
- Brown Sugar: you can use caster sugar or fine white granulated sugar if preferred. I personally always love the extra molasses flavour combined with chocolate.
- Eggs: large eggs at room temperature.
- Butter: unsalted butter, melted and cooled down. Make sure the butter isn't too hot or it might cook the eggs once incorporated into the batter. I have made this recipe with vegetable oil (canola oil) and it works fine as well.
- Yogurt: I used plain yogurt (sometimes called natural yogurt) that has a more runny, liquid consistency than Greek yogurt. Using yogurt instead of another dairy ingredient such as milk or cream will bring extra richness, tenderness and moist crumbs to your cake.
Optional Addition
- Hazelnut Chunks: added on top of the cake batter just before baking. The hazelnuts will roast in the oven to give your cake a delicious aroma and amazing extra crunch.
- Chopped Chocolate: for a more intense chocolate flavour. I used 70% dark cooking chocolate roughly chopped into chunks. You can substitute it with chocolate chips if preferred. If wanted, you could also use those chunks directly folded into the cake batter rather than spread out on top.
- Coffee: adding a shot of hot coffee is an always a great trick to boost the flavour of a chocolate cake!
- Vanilla Extract or Essence.
How to make Chocolate and Hazelnut Cake
If using whole hazelnuts (instead of hazelnut meal), start by making your own flour. Roast the blanched hazelnuts in the oven for 8 to 10 minutes then once cooled down, grind in a food processor until you get a rough powder. I personally like to keep the flour slightly coarse for an added crunch.
- Preheat your oven on 180 degrees Celsius / 350 degrees Fahrenheit. Line the bottom of a 22 cm / 8-inch Springform Pan with a sheet of baking paper or parchment paper. Lightly grease the sides of the pan with neutral oil.
- Prep all the ingredients: melt the butter in a microwave-safe bowl or in a small saucepan on the stove. Set aside to cool down. Chop the hazelnuts and chocolate used as a topping and keep aside.
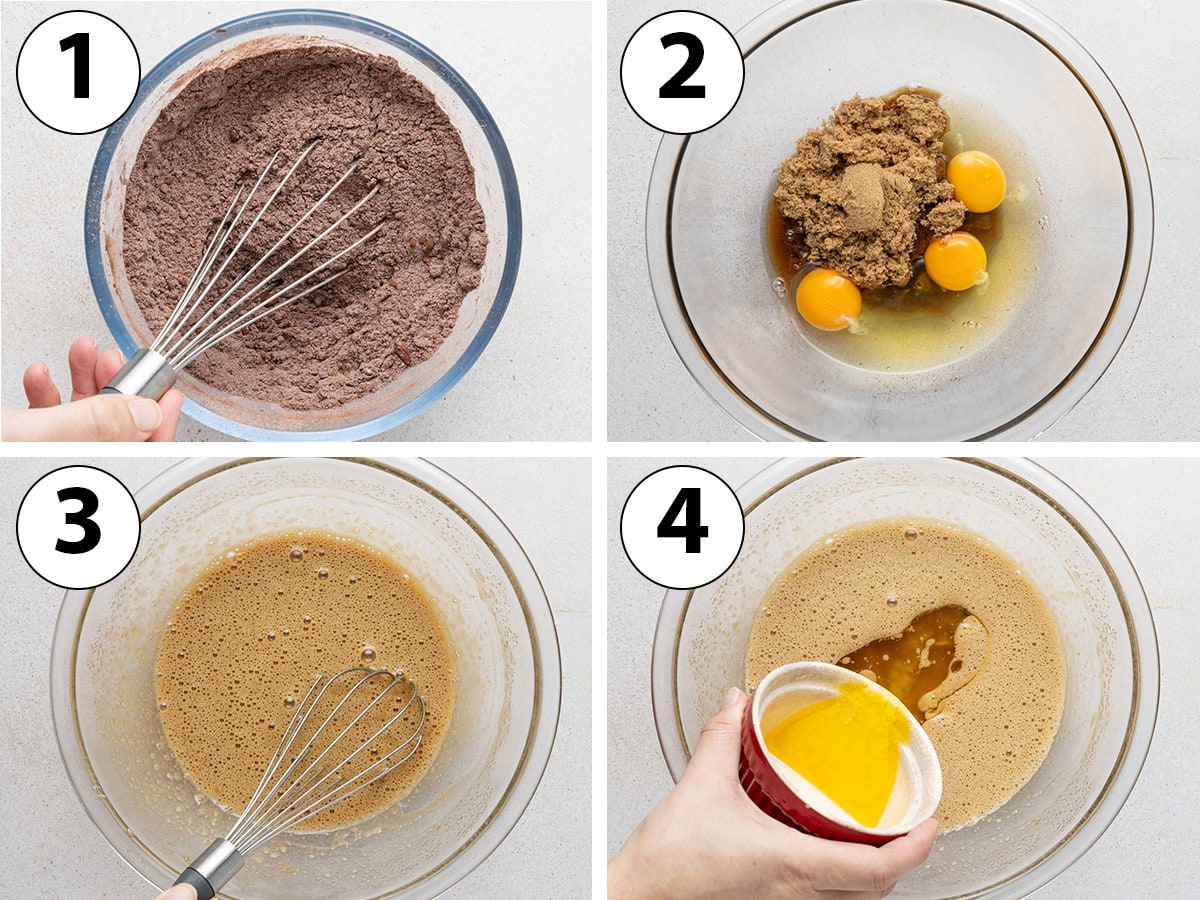
- Photo 1: In a medium bowl, combine all your dry ingredients: plain / all-purpose flour, hazelnut meal, sifted cocoa powder, baking powder, baking soda and salt. Mix then set aside.
- Photo 2 & 3: In a separate large mixing bowl, whisk the eggs and brown sugar for 3 to 4 minutes or until it has slightly thickened, increased in volume and looks bubbly.
You can use an electric hand mixer here, a stand mixer fitted with the either the whisk attachment or the paddle attachment or simply make the cake by hand with a whisk like me.
- Photo 4: Add the cool melted butter to the mixture and whisk to combine.
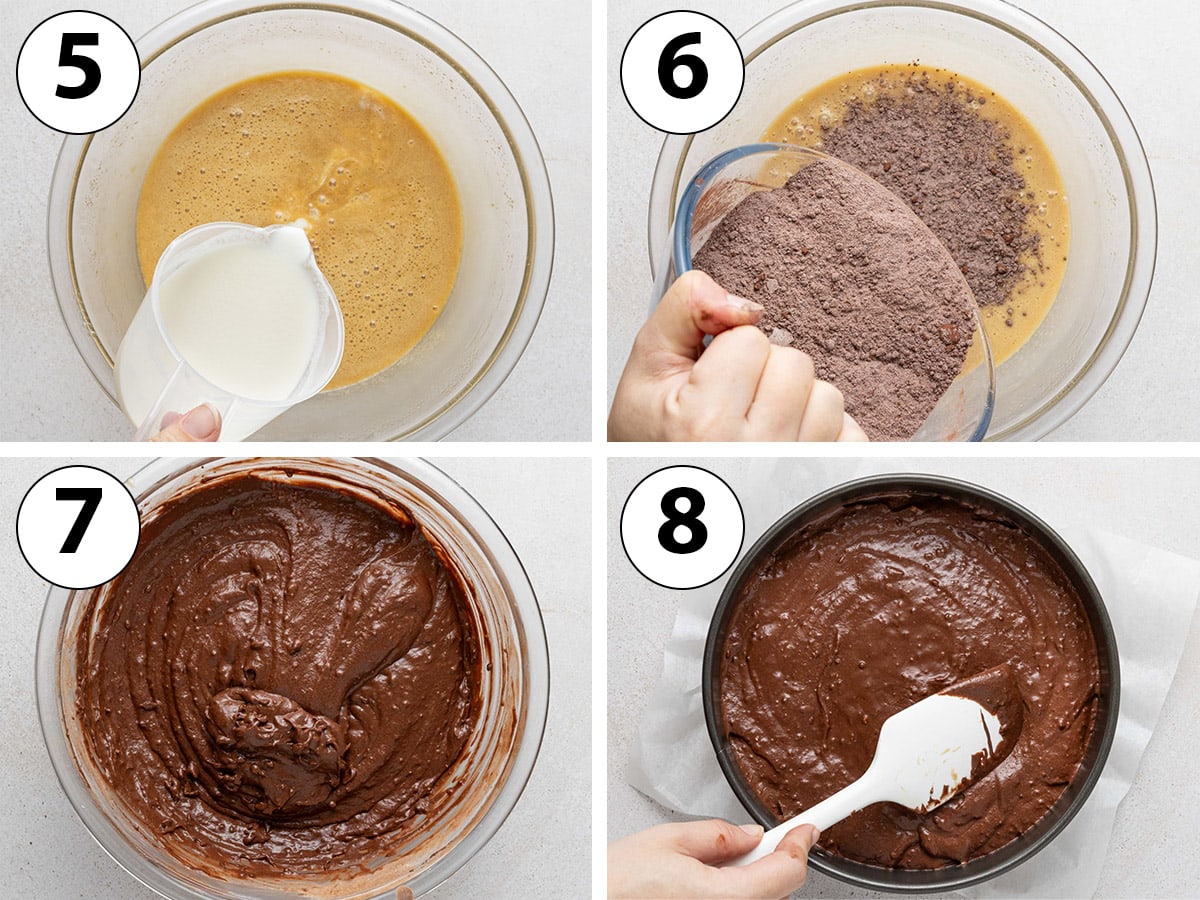
- Photo 5: Pour in the natural yogurt and stir until you get a smooth mixture.
- Photo 6: Add all the dry ingredients. If you find that the combined dry ingredients have lumps, make sure to sift them first.
- Photo 7: Gently mix until fully combined, stopping as soon as you can't see the dry ingredients. The cake batter will be relatively thick and may appear a bit lumpy - but the small lumps are usually just larger chunks of hazelnut meal.
- Photo 8: Pour the cake batter into the prepared pan and gently spread it into an even layer with a spatula.
- Optionally, generously top the cake with some roughly chopped hazelnuts and chocolate chunks.
- Bake for 40 to 45 minutes or until a toothpick inserted into the cake comes out clean.
- Place the cake pan on a cooling rack and leave to cool down completely before removing from the pan. You cake sprinkle the cake with a bit of powdered sugar just before serving for extra sweetness.
Recipe FAQs
Yes, you can substitute the AP Flour with a 1:1 gluten-free flour mix to make this recipe flourless. This swap will only work with a proper GF mix - not just a singular gluten-free flour such as rice flour or cornflour.
I have tried this recipe with Buttermilk (same quantity) and it works just as well. I simply prefer the richness and extra moisture the plain yogurt adds to the cake over the lighter result given by buttermilk.
Yes, I have used the same cake batter for cake layers in the past! You can decrease all quantities (following the same ratios) and bake the cake in a few different batches. Alternatively, use this exact recipe and slice the cake in half. Spread your choice of buttercream or frosting over the bottom layer then top with the second layer.
I served this cake plain but if you are after a more decadent dessert, you could top the cake with some chocolate ganache, whipped ganache frosting, chocolate glaze or your preferred frosting.
And for a non-chocolate option, try some vanilla ice cream, a dollop of Chantilly Cream, Crème Anglaise custard or even some Hazelnut Praline Paste!

Tips & Tricks
- To boost the hazelnut flavours, simply spread the ground hazelnuts on a flat tray lined with baking paper or a baking mat and bake for 6 to 8 minutes on 180 degrees Celsius (350 degrees Fahrenheit) or until lightly golden. Allow to cool down completely before using.
- If making your own hazelnut flour, don't grind the nuts too fine. Keeping some larger chunks is a great way to add a slightly crunchy texture to your cake!
- For a more decadent chocolate taste, fold the chocolate chunks directly into the batter rather than on top of the cake.
How to make Hazelnut Meal
- Preheat your oven on 180 degrees Celsius / 350 degrees Fahrenheit. Prepare a flat baking tray with baking paper or a baking mat.
- Spread the hazelnuts into an even layer over the tray. Bake for 8 to 10 minutes or until the nuts start to turn lightly golden. If using hazelnuts with skin on, the skin should have started to crack.
- To remove the hazelnuts skin (optional / if necessary), rub the hazelnuts against each other inside a clean tea towel while still hot. The skins should peel straight off.
- Allow to cool down completely then grind in a food processor to turn into a coarse (or fine) powder.
Note that the oven roasting part is optional and you could process the raw hazelnut straight away. But roasting the nuts first will not only enhance their flavour, it will also draw their natural moisture out - making the grinding process easier.
Storing & Freezing
The chocolate hazelnut cake can be kept at room temperature for 24 hours (well covered or in a sealed box) - or in the fridge for up to 3 days.
It will freeze well too - simply make sure to properly wrap the cake in a couple of layers of plastic wrap and freeze on a flat surface. Simply leave at room temperature for a few hours (or overnight in the fridge) to thaw.
Made this recipe?
Let us know if you liked it by leaving a comment below, and tag us on Instagram @a.baking.journey with a photo of your creation!
Recipe
Easy Chocolate Hazelnut Cake
Ingredients
Dry Ingredients
- 100 gr Plain / All-Purpose Flour
- 80 gr Hazelnut Meal - or hazelnut flour (see note 1).
- 60 gr Unsweetened Cocoa Powder - sifted
- 1 1/2 teaspoon Baking Powder
- 1/2 teaspoon Baking Soda
- 1 pinch Fine Table Salt
Wet Ingredients
- 3 large Eggs - at room temperature
- 150 gr Light Brown Sugar
- 120 gr Unsalted Butter - melted, cool
- 240 ml Natural / Plain Yogurt
Optional Toppings
- 50 gr Skinned Hazelnuts - roughly chopped
- 50 gr Dark Chocolate Chunks - or chocolate chips
Disclaimer
I highly recommend using the measurements in grams & ml (instead of cups & spoons) for more accuracy and better results.
Instructions
- Preheat your oven on 180 degrees Celsius / 350 degrees Fahrenheit. Line the bottom of a 22 cm / 8-inch Springform Pan with a sheet of baking paper or parchment paper. Lightly grease the sides of the pan with neutral oil.
- In a medium bowl, mix all your dry ingredients: plain / all-purpose flour, hazelnut meal, sifted cocoa powder, baking powder, baking soda and salt. Set aside.
- In a separate large mixing bowl, whisk the eggs and brown sugar for 3 to 4 minutes or until the mixture has slightly thickened, increased in volume and looks bubbly.
- Whisk in the cool melted butter then the yogurt.
- Add the pre-mixed dry ingredients (pre-sifted if needed) and gently stir until fully combined. Stop as soon as you can't see any dry ingredients; you should get a slightly thick batter (see note 2).
- Pour the cake batter into the prepared pan and gently spread it into an even layer. Optionally, generously top the cake with the roughly chopped hazelnuts and chocolate chunks.
- Bake for 40 to 45 minutes or until a toothpick inserted into the cake comes out clean. Place the cake pan on a cooling rack and leave to cool down completely before removing from the pan.
Tried this recipe? Make sure to leave a comment and star rating below!
Notes
- To make your own hazelnut meal: roast the blanched hazelnuts in the oven (180'C / 350'F) for 8 to 10 minutes then once cooled down, grind in a food processor until you get a rough powder. I personally like to keep the flour slightly coarse for an added crunch.
- The cake batter may appear a bit lumpy - but the small lumps are usually just larger chunks of hazelnut meal.

Comments
No Comments