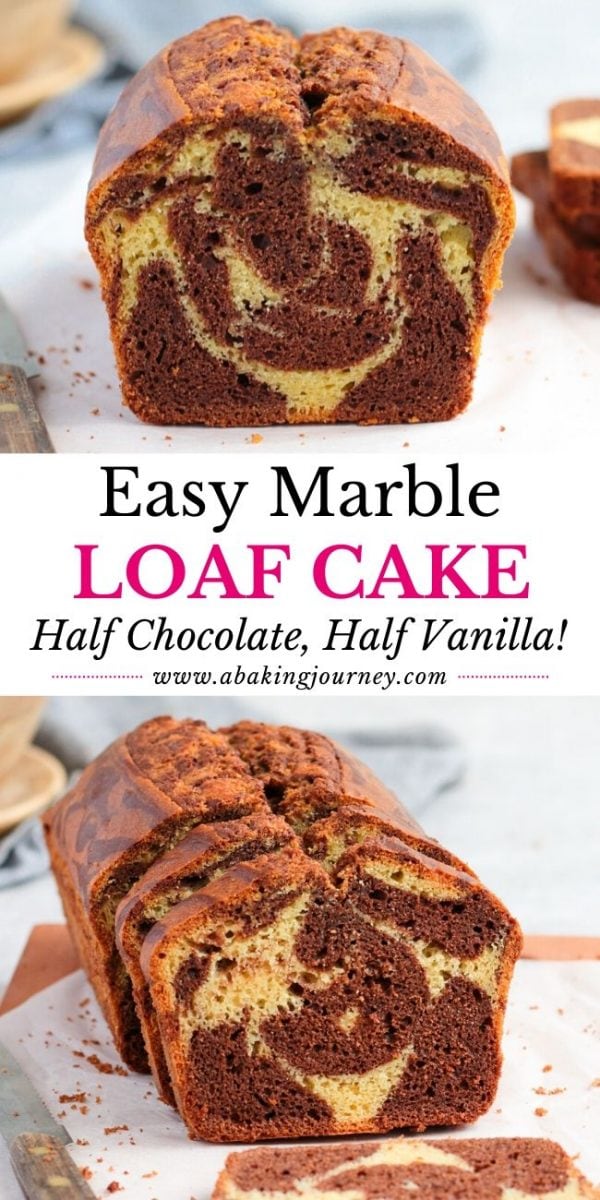
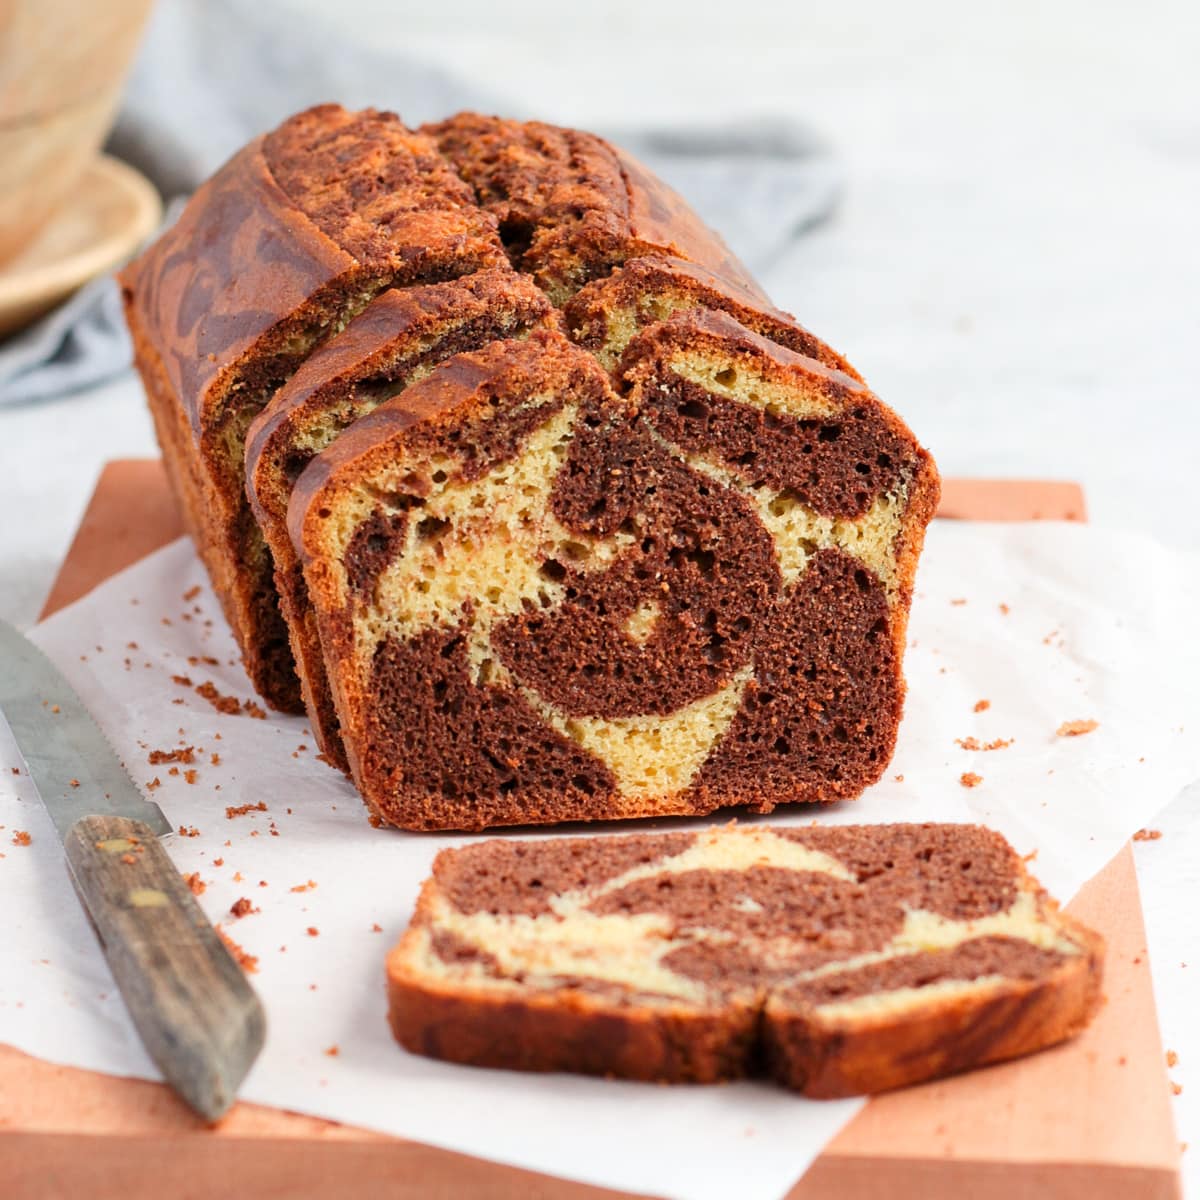
This Vanilla and Chocolate Marble Loaf Cake is always perfect for afternoon tea, breakfast or dessert. The Half Vanilla Half Chocolate Cake made with Yogurt is a classic childhood dessert you never get tired of eating!
Jump to:
Why we love this recipe
Novelty Cakes are great, but you simply cannot beat a Childhood Classic like this Vanilla and Chocolate Loaf Cake.
It is always the perfect cake to enjoy with your morning or afternoon tea, although I could personally eat it with every meal!
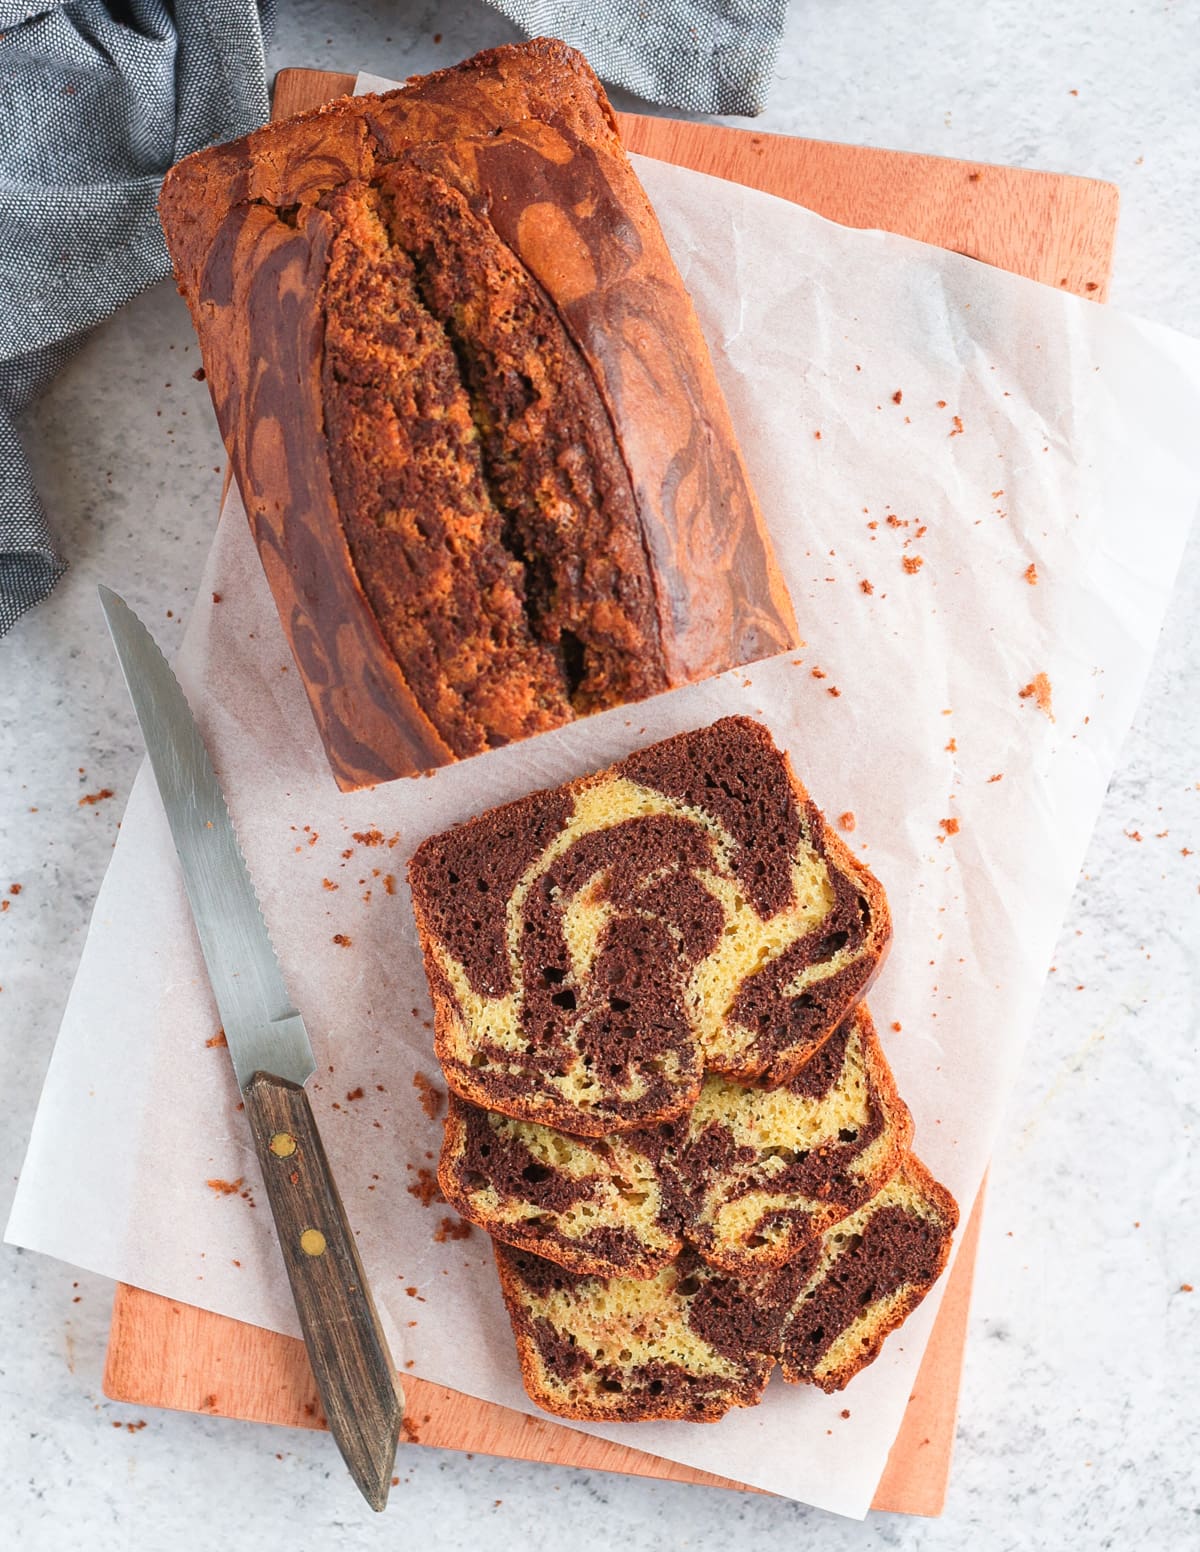
The marble effect is created by combining a Vanilla and Chocolate Cake Batter into one pan. And it is always so fun to discover the marbled result once you get to slice the cake.
If you can never choose between making a Chocolate Loaf Cake or a vanilla cake, and want to make something a bit more fancy than my Chocolate Chip Loaf, this recipe might be just what you need!
Ingredients

This super moist marble cake is fairly basic and easy to make. I could only describe it as a mix between a classic Pound Cake and a traditional French Yogurt Cake.
The use of Yogurt in the batter is what gives this cake a super light and fluffy texture. It is also a great ingredient to boost flavours!
To make this cake, you will need (Scroll down to recipe card for all quantities):
- Eggs - make sure they are at room temperature
- Sugar - I used Caster Sugar (aka fine granulated white sugar)
- Butter - unsalted & melted, preferably cooled down to room temperature
- Vanilla Extract - or Essence / Paste if preferred
- Greek Yogurt - what will make this loaf cake so light and moist!
- Flour: All Purpose / Plain
- Baking Powder, Baking Soda & Salt
- Cacao Powder: make sure it is an unsweetened one
Optional: to boost the chocolate flavour, you can also add some chocolate chips or chunks of chocolate in the chocolate batter!
How to make Marble Cake
This cake is fairly easy to prepare and is entirely made in a Stand Mixer. That being said, you can absolutely use a hand mixer instead - or just make it by hands if you don't have a mixer.
You won't need to prepare two separate cake batter either - this is a one bowl recipe that is split in half, with cacao powder being added to one of the two batters. Super easy!
Before starting to make the marble loaf cake, make sure to preheat your oven on 180'C/350'F and prepare your Loaf Pan by greasing AND flouring it (*).
For this recipe, I used a 25 cm / 10 inch Loaf Pan.
- Melt the Butter in the microwave or on the stove and set aside to cool down - it needs to get back to room temperature before you add it to the batter.
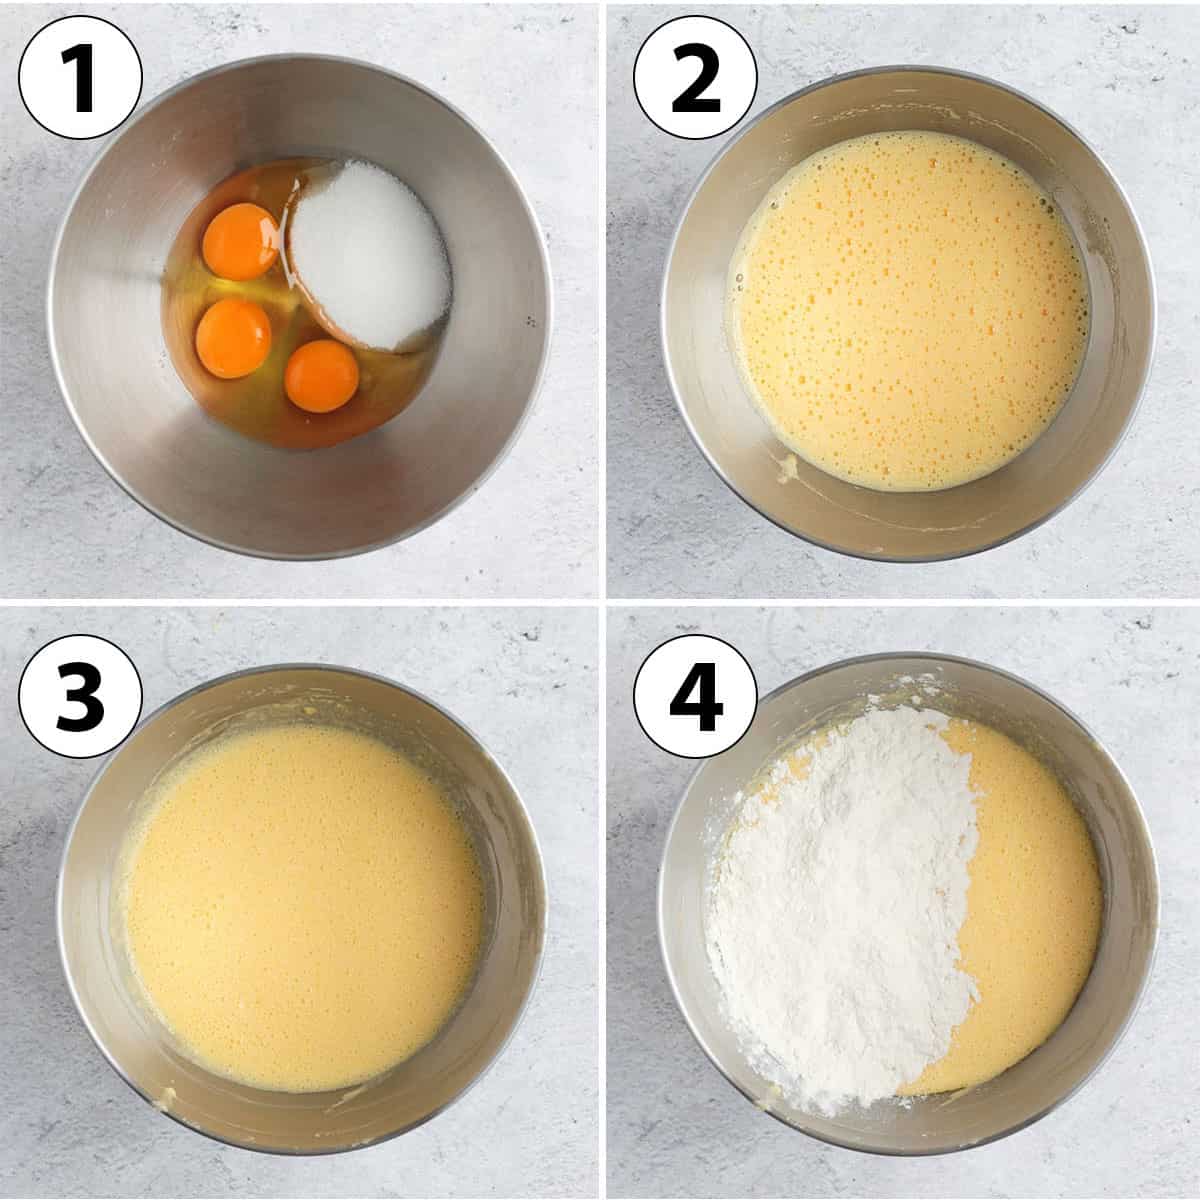
- Place the Sugar and Eggs in the bowl of your mixer with the whisk attachment. Whisk on medium/high speed for 3 to 5 minutes, or until it has doubled in volume and gets a paler colour. This will add lots of air to the batter and give it a light texture. - photo 1 & 2
- Reduce the speed to low and add the Melted Butter, then Vanilla Extract and Greek Yogurt. Whisk until combined, stopping to scrap the edges of the bowl with a spatula if needed. You might also want to scrap the bottom of the bowl where heavier ingredients tend to fall before they can get mixed in. - photo 3
- In a separate bowl, stir together the Flour, Baking Powder, Baking Soda and Salt. Mixing the dry ingredients together before adding them to the batter is the best way to insure the cake rises evenly in the oven.
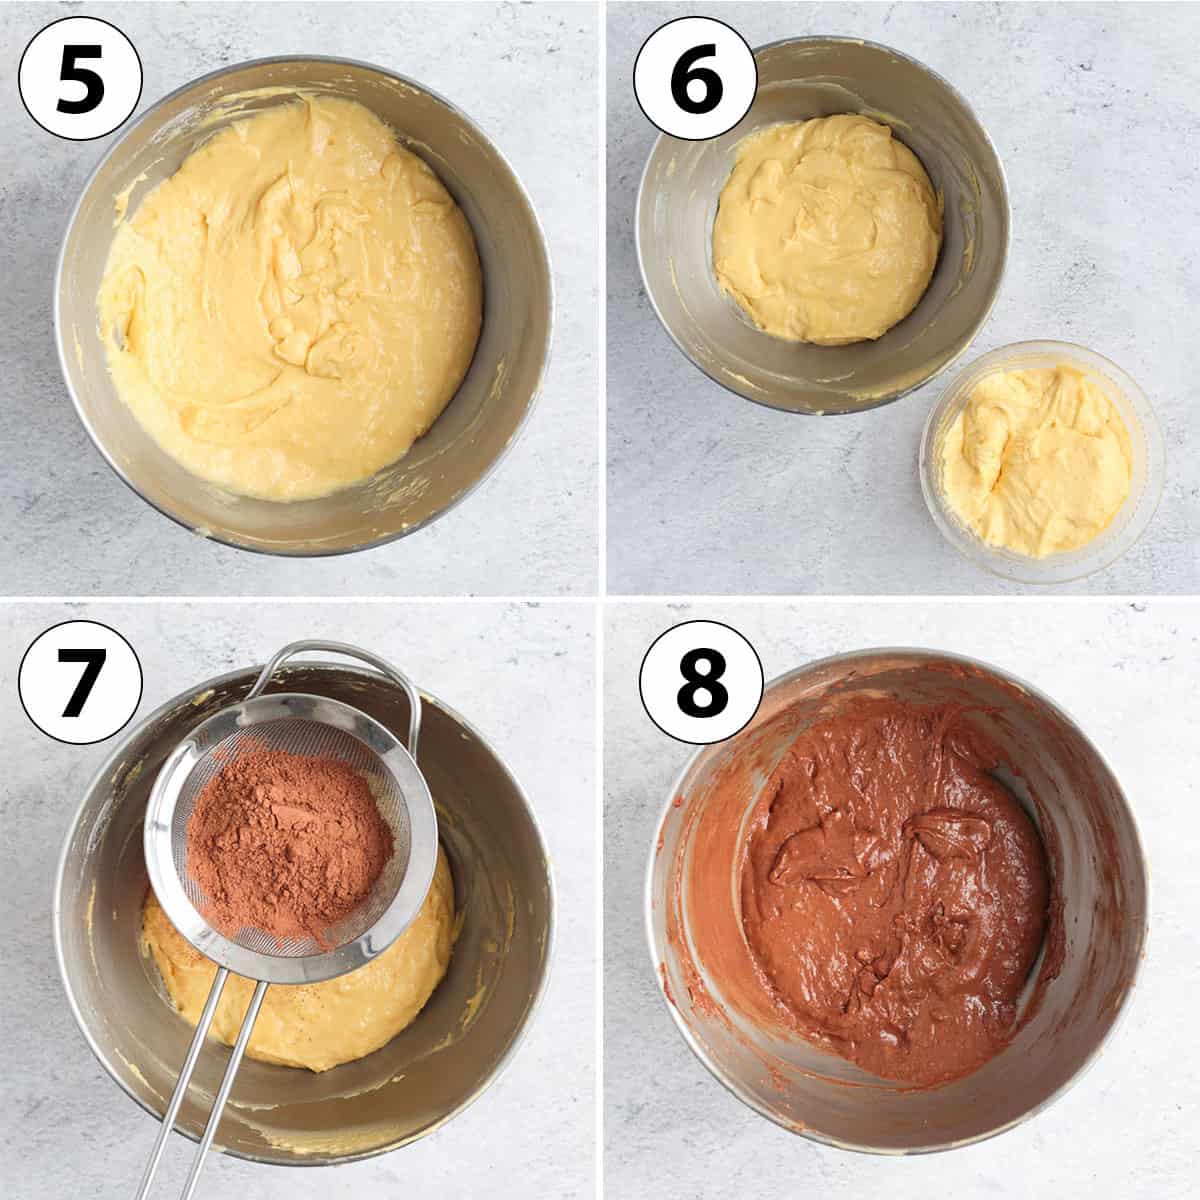
- Add the Dry Ingredient Mix to the rest of the batter and whisk in on low speed, stopping as soon as combined. I like to add the dry ingredients in two time to avoid creating lumps; and insure the flour does not go flying off! - photo 4 & 5
(*) For a quick and easy release, it's really important to both grease and flour the cake pan. I used an Oil Spray (you could use oil or melted butter and a paper towel instead) to generously grease the pan, then dusted it with Flour.
Move the pan around to evenly coat it with the flour - it should stick to the oil. Then flip the pan upside down and tap it against your kitchen bench to remove any excess.
Alternatively, you can also line the pan with baking paper.
The second step is splitting the cake batters in two and adding cacao into one half to create the chocolate cake batter.
- Pour about half of the Batter into a separate bowl and set aside - this will be the Vanilla batter. - photo 6
- Sift in the Cacao Powder into the second half of the batter and slowly mix it in until combined. It is important to sift cacao powder as it tends to lump up when stored. - photo 7 & 8
How to create the Marble Effect
Now that our two cake batters are ready, it is time to combine them to create the marble bread! Creating the marble look is always the fun part of the recipe, just like for my Vanilla and Chocolate Marble Cookies.
There are two ways to create a marble effect: by piping the batters using Piping Bags, or by dropping dollops of batters into the loaf pan with a spoon or ice cream scoop.
- With Piping Bags: this is the technique I used here as I find it less messy and quicker. Simply pour the cake batters into two separate piping bags and cut off the tip to create a large opening. Pipe strips of batter into the Loaf Pan, alternating between the two flavours. - photo 9
- With a Spoon/Ice Cream Scoop: scoop out small dollops of batter into the loaf pan, alternating between the two batters to create a polka dot effect. Make sure to alternate batter between layers too.
Once the batters are placed into the Pan, the last step is to create a swirl to mix them together. To do so, dip a small knife into the batter on one side of the pan, pushed all the way down.
Then move down the knife towards the other side of the pan in a zigzag or "s" movement. - photo 10 & 11
The marble loaf cake is now ready to be baked for 35 to 40 minutes, or until a skewer comes out clean (*). Leave the cake to cool down for at least 15 to 20 minutes before releasing it from the pan.
(*) Note that every oven is different so the cake might take longer to bake in yours. Always check with a knife or a skewer poked into the cake to see it the batter is still raw or baked.

Recipe FAQs
This cake has a vanilla and chocolate flavour, but there are many other flavours you could combine to make a marbled cake!
Instead of using just Vanilla in the second batter like here, you could also add some Orange Zest or Coffee Extract - both will be delicious with the Chocolate!
Or go for more original flavour combos like Chocolate and Strawberry, Berry and Vanilla, Chocolate and Peanut Butter, Banana and Chocolate,... I mean, as long as you have two cake batters, it is super easy to combine them into a marble loaf!
You can use any Plain Natural Yogurt (unflavoured and unsweetened) instead of Greek Yogurt. You could also substitute it with Sour Cream, but I recommend using Greek Yogurt for a lighter crumb when possible.
Yes, Self-Rising Flour can be used instead of the Plain/AP Flour, Baking Powder and Salt. Don't forget to add a little bit of Baking Soda though as usually Self-Rising Flour does not have that ingredient in the mix.
Storing & Freezing
Once cooled down, the marble loaf cake will keep fresh for up to 3 days. It can be stored at room temperature in an air-tight container, or in the loaf pan covered with wrap or foil.
I do not recommend storing this cake in the fridge or it will become dry.
This Marble Loaf Bread will do quite well with freezing, which is always a great plus! You could freeze it whole, but I prefer to freeze loaf cakes in individual slices. It makes it much easier and quicker to thaw.
To freeze it whole, leave it to cool down completely then cover in a layer of plastic wrap and a layer of aluminium foil. Or place in a freezing bag.
If freezing individual slices, make sure to separate each slice with some baking paper so that they don't stick together. Leave to thaw at room temperature for a few hours when ready to eat.

Made this recipe?
Let us know if you liked it by leaving a comment below, and tag us on Instagram @a.baking.journey with a photo of your creation!
Recipe

Marble Loaf Cake
Ingredients
- 3 Eggs
- 110 gr (1/2 cup) Caster Sugar
- 120 gr (1/2 cup) Unsalted Butter - melted
- 1 1/2 tsp Vanilla Extract
- 120 gr (1/2 cup) Greek Yogurt - or natural plain yogurt
- 200 gr ( 1 1/3 cup) Plain / All Purpose Flour -
- 1 1/2 tsp Baking Powder
- 1/2 tsp Baking Soda
- 1 pinch Salt
- 20 gr (2 tbsp) Unsweetened Cacao Powder
Disclaimer
I highly recommend using the measurements in grams & ml (instead of cups & spoons) for more accuracy and better results.
Instructions
- Preheat your oven on 180'c / 350'f. Grease and flour your Loaf Pan (1) and set aside.
- Melt the Butter in the microwave and set aside to cool down.
- In the bowl of your stand mixer (2), whisk the Eggs and Caster Sugar on a medium-high speed for 3 to 5 minutes, or until doubled in size and lighter in colour.
- With the mixer on low, slowly add the Melted Butter then the Vanilla Extract and Greek Yogurt. Whisk until combined, using a spatula to scrap the edges if needed (3).
- In a separate bowl, mix the Flour, Baking Powder, Baking Soda and Salt. Add it to the wet ingredients in two times (4) on low speed, mixing just until combined. Try not to overwork the batter or it will deflate.
- Pour about half of the batter into a separate bowl and set aside.
- Sift in the Cacao Powder into the first bowl and slowly whisk until combined, scrapping the edges of the bowl with a spatula if needed.
- Pour small parts of the batters into the Loaf Pan, alternating between the Vanilla and the Chocolate batter (5).
- To create the Marble Effect, dip a knife all the way down the bottom of the pan (without scratching it) and do a zigzag movement along the pan to mix the two batters together.
- Bake for 35 to 40 minutes, or until a skewer comes out clean.Optional: to get a clean 'crack' in the centre of the loaf, remove the pan from the oven after about 10 minutes of baking and slash the centre of the cake with a sharp knife. Place back in the oven to finish baking.
Tried this recipe? Make sure to leave a comment and star rating below!
Notes
- Use a Cooking Spray (or oil / melted butter) to heavily grease the pan, then dust it with Flour. Rotate the pan to make sure there is flour everywhere, then flip the pan and tap it against your kitchen bench to remove any excess.
- You can use a hand mixer too - or do it by hands with a whisk but you might not get as much air in the batter as with a mixer.
- I often find that some of the heavier ingredients fall down the bottom of the bowl before getting mixed in, so it is important to bring them back up with a spatula.
- You can add it all at once, but it tends to create less lumps when added in two times. It also avoids getting any powders flying out of the mixer.
- To do it more cleanly, I placed the two batters in two Piping Bags then piped rows of vanilla and chocolate batter next to each other, alternating the two between each layers . You can also just use a large spoon and drop dollops of batters next to each other, alternating between the two.

