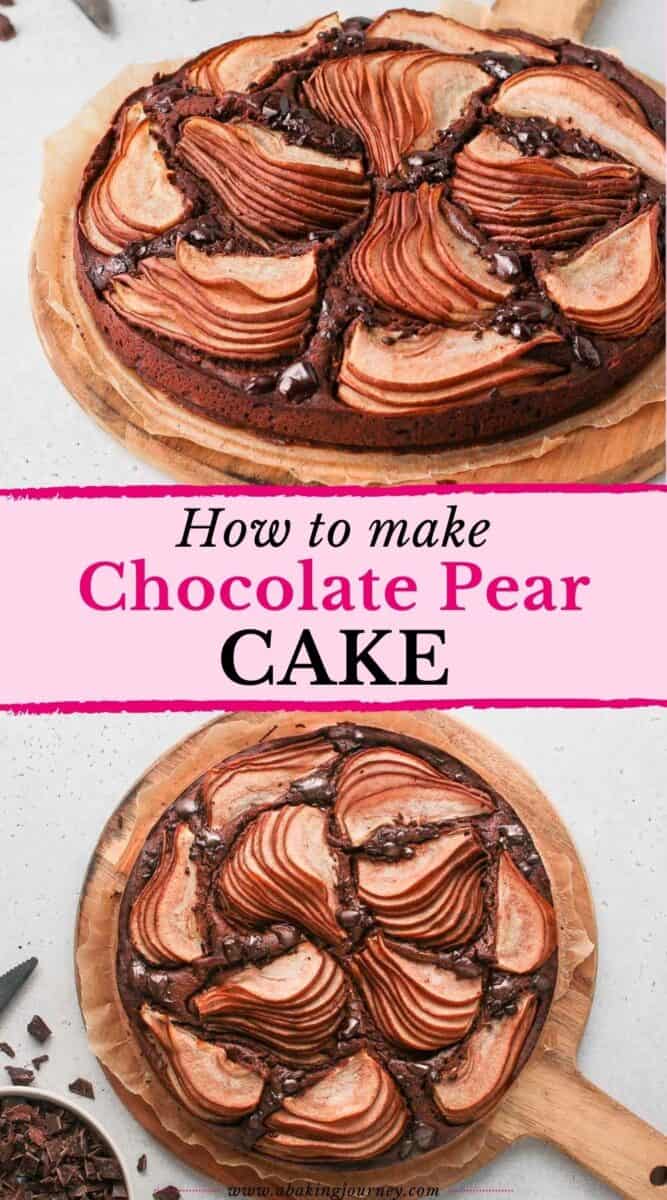
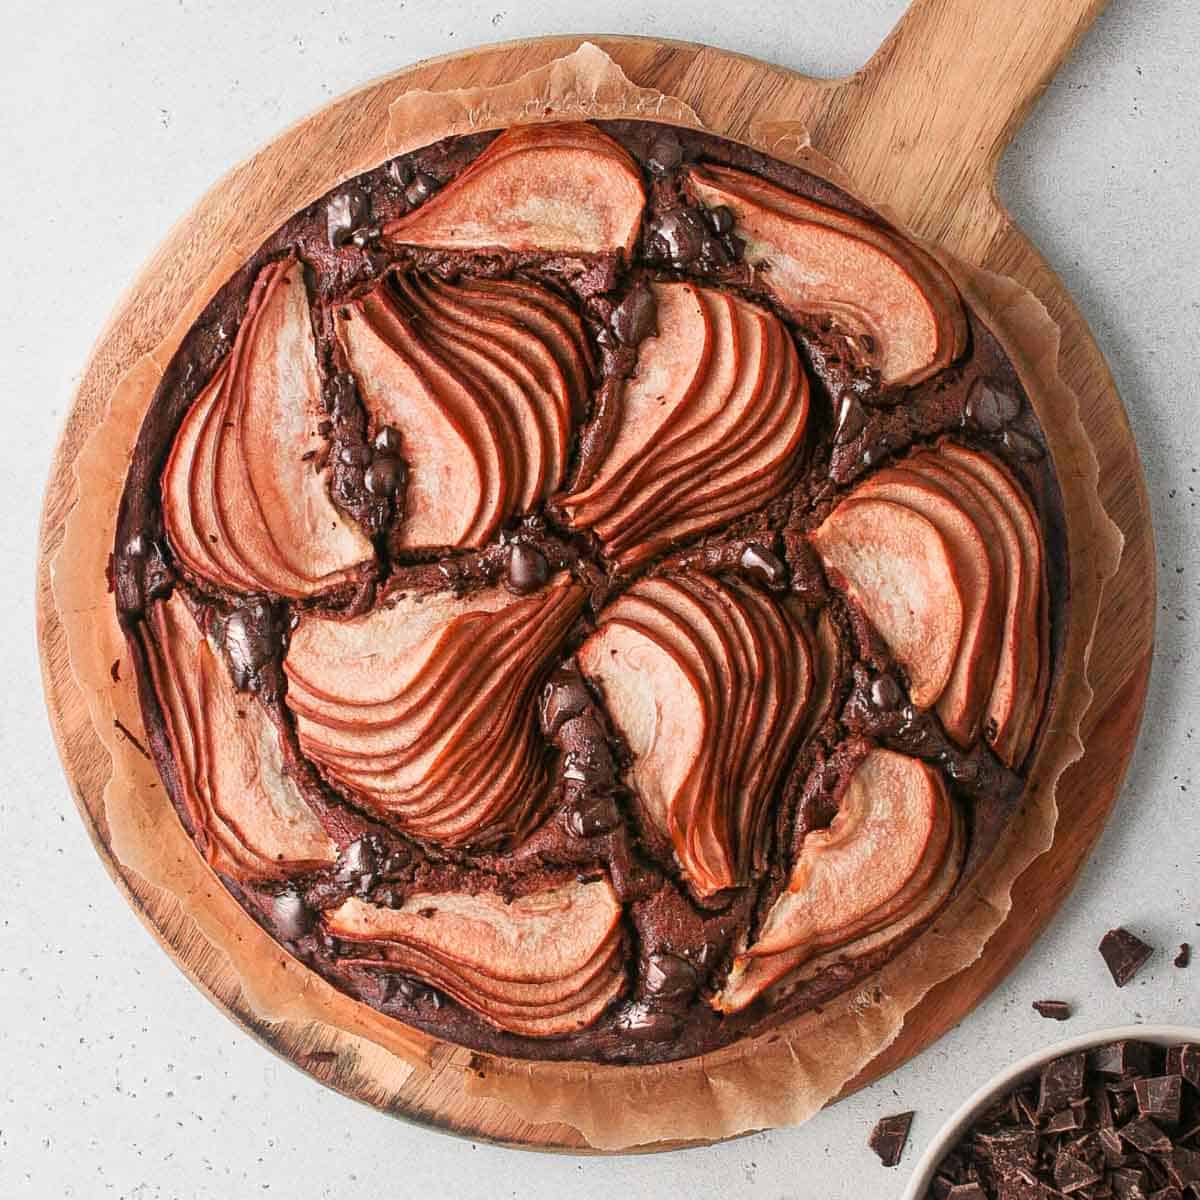
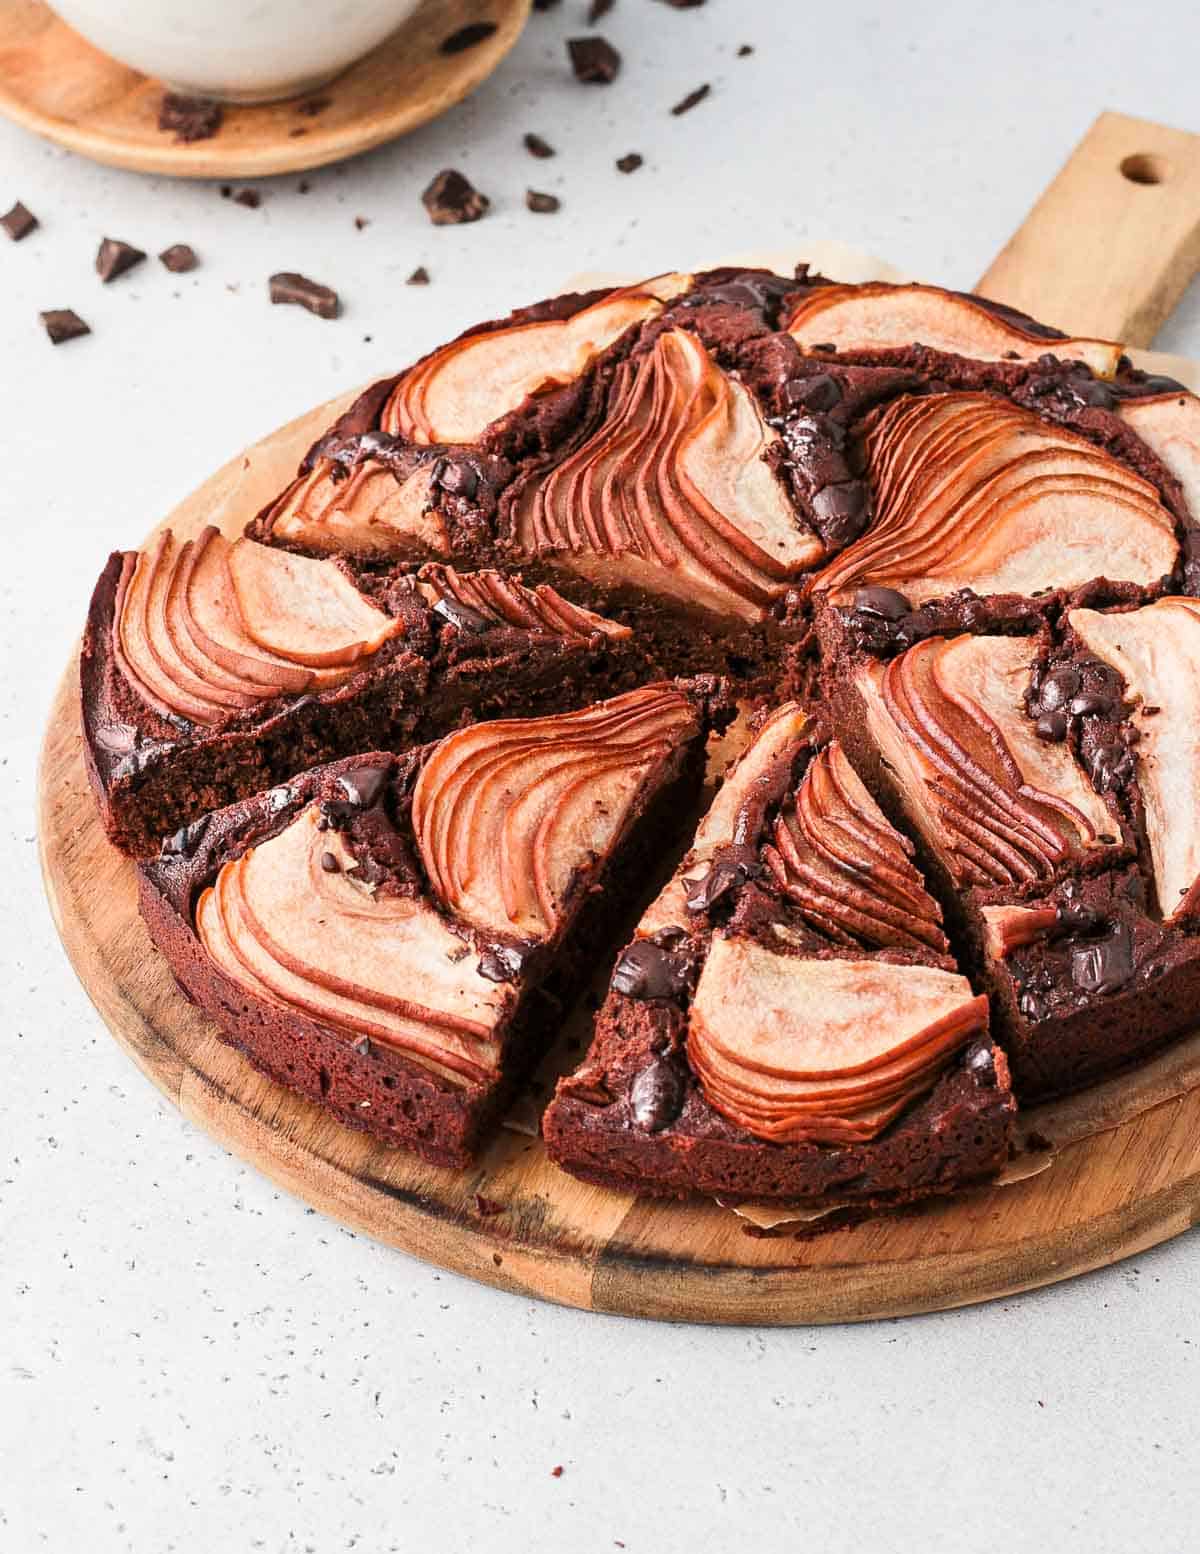
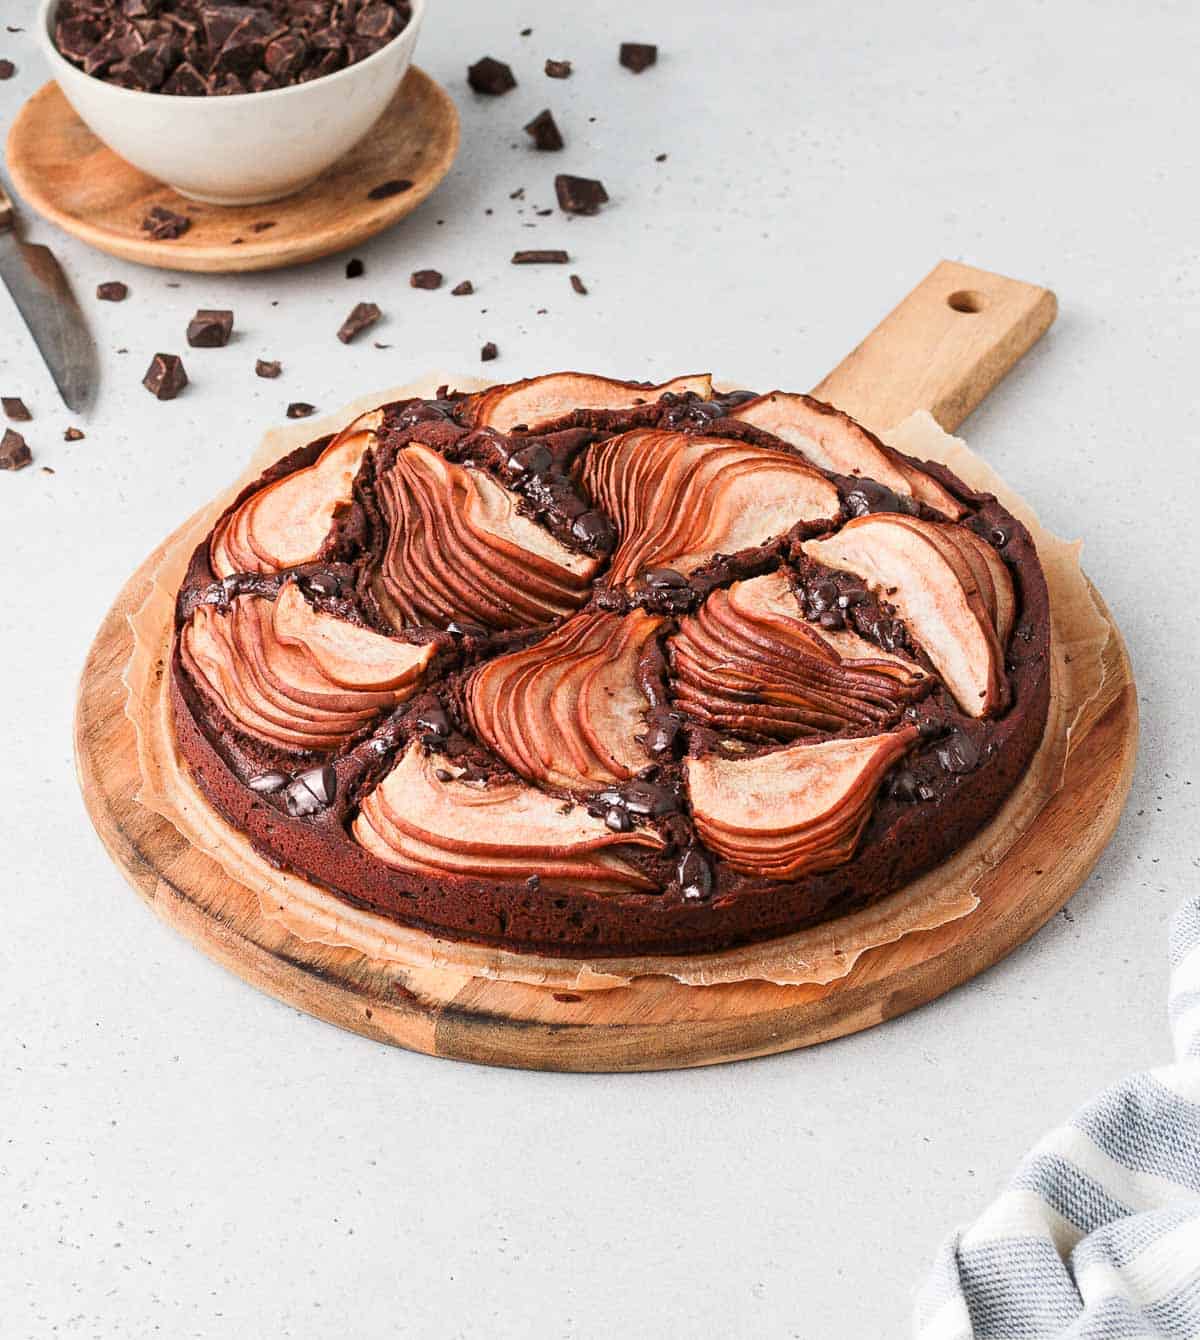
This Pear and Chocolate Cake combines a fudgy chocolate cake topped with fresh pear slices and chocolate chunks. It is a great easy and comforting cake that will be perfect for the Holidays or to enjoy for dessert in Winter.
This post was first published in July 2018 and was updated in August 2021.
This cake was inspired by the classic French dessert "Poires Belle Hélène", which are poached pears served with a chocolate sauce.
Jump to:
Why we love this recipe
Pear and Chocolate is such a delicious combination of flavours and textures. And what a better way to mix them but inside a delicious Pear and Chocolate Cake!?
This cake recipe is both fudgy and decadent yet fresh and crunchy thanks to the fresh pear slices. The chocolate cake is made from melted dark chocolate so you get an intense cocoa flavour.
It is super quick and easy to make (you could even make it by hands with just a whisk!) but it looks impressive enough to be served on your Thanksgiving or Christmas table.
Love baking with pears? Try one of these cakes:
Ingredients
Scroll down to recipe card below for all quantities.
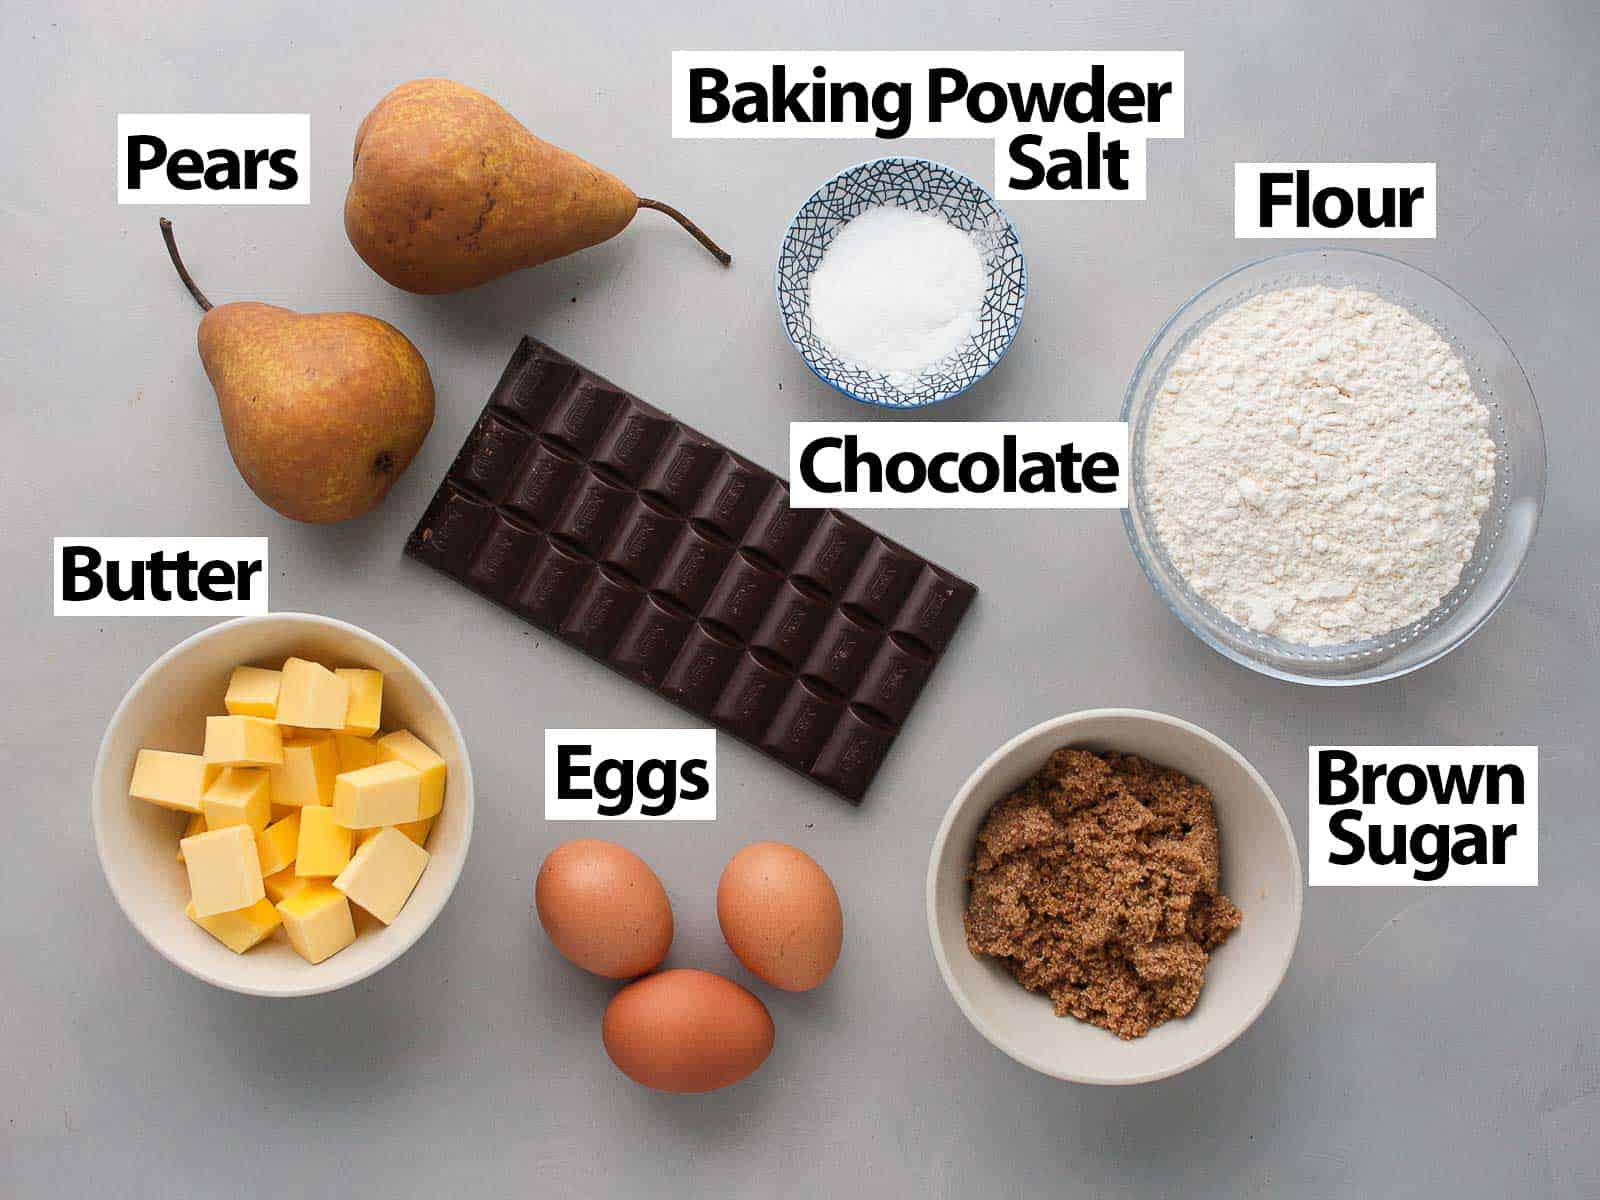
This Pear Chocolate Cake is made from 8 simple ingredients:
- Chocolate: Dark Cooking Chocolate, which usually comes in the form of a chocolate bar that you can finely chop. Don't use eating chocolate or chocolate chips that will not melt properly and turn grainy. If preferred, you could also use a Milk Chocolate. No cocoa powder required here!
- Butter: Unsalted Butter, melted.
- Pears: Use fruits that are still slightly firm (not too ripe) so that you can easily slice them thinly. I kept the peels, but you can peel them if preferred. See FAQs section below for the best pear variety.
- Eggs: medium to large size eggs, at room room temperature.
- Flour: Plain / All-Purpose Flour. I recommend mixing all the dry ingredients together separately (flour, baking powder, salt) and sifting it together so that they are evenly distributed.
Flavour Variation
- Spices: Cinnamon or Ground Ginger will make a great addition to the winter cake.
- Fruits: add some orange zest or substitute some of the pears for apples.
- Coffee or Vanilla: both coffee (add coffee granules to the melted chocolate) and vanilla will help boost the flavours of the cake.
How to make Chocolate Pear Cake
I used a stand mixer to prepare the chocolate cake batter but it can absolutely be made by hands with a whisk in a large bowl as well.
- Preheat your oven on 180 degrees Celsius / 350 degrees Fahrenheit. Line the bottom of a 25 cm / 10 inch Springform Pan with baking paper (parchment paper) and lightly grease the edges.
- Finely chop the Dark Chocolate. Place it in a heat-proof bowl and add the butter.
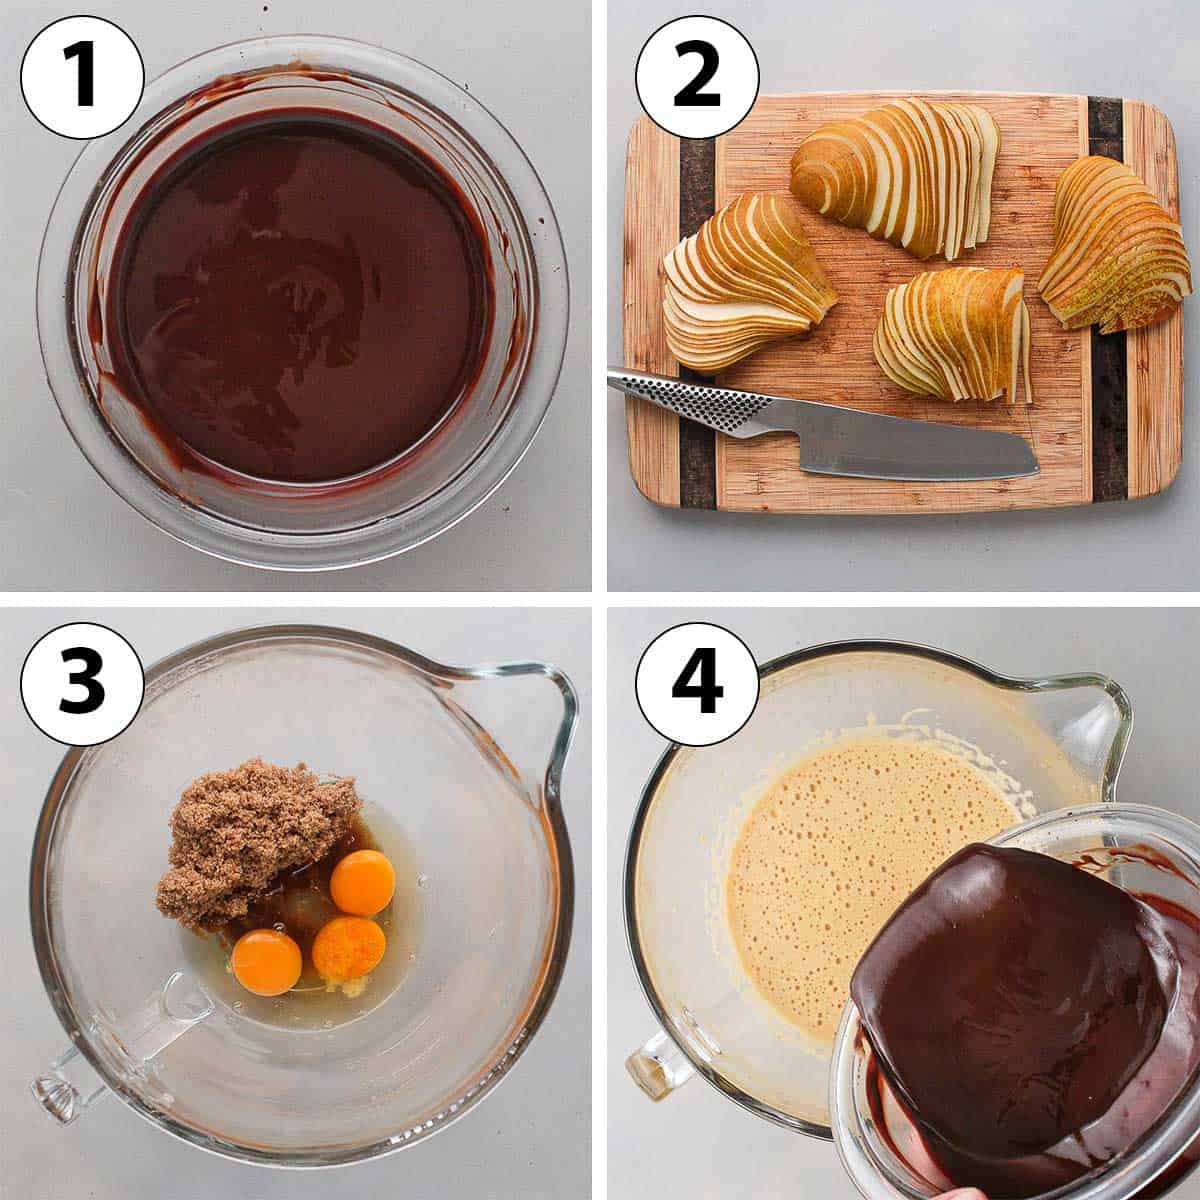
- Photo 1: Melt in the microwave in 30 seconds increments, stopping to stir each time, or over a double boiler. When completely smooth, set aside to cool down.
Would you like to save this recipe?
- Photo 2: cut the Pears in half, core them and slice them thinly in their length. Set aside.
If preferred, you can peel the pears first as well.
- Photo 3: place the Brown Sugar and Eggs in the bowl of your mixer (or a large mixing bowl if doing it by hands / with a hand mixer). Whisk together on medium to medium high speed for about 5 minutes, or until very bubbly and almost doubled in volume.
- Photo 4: Add the cooled down melted chocolate & butter.
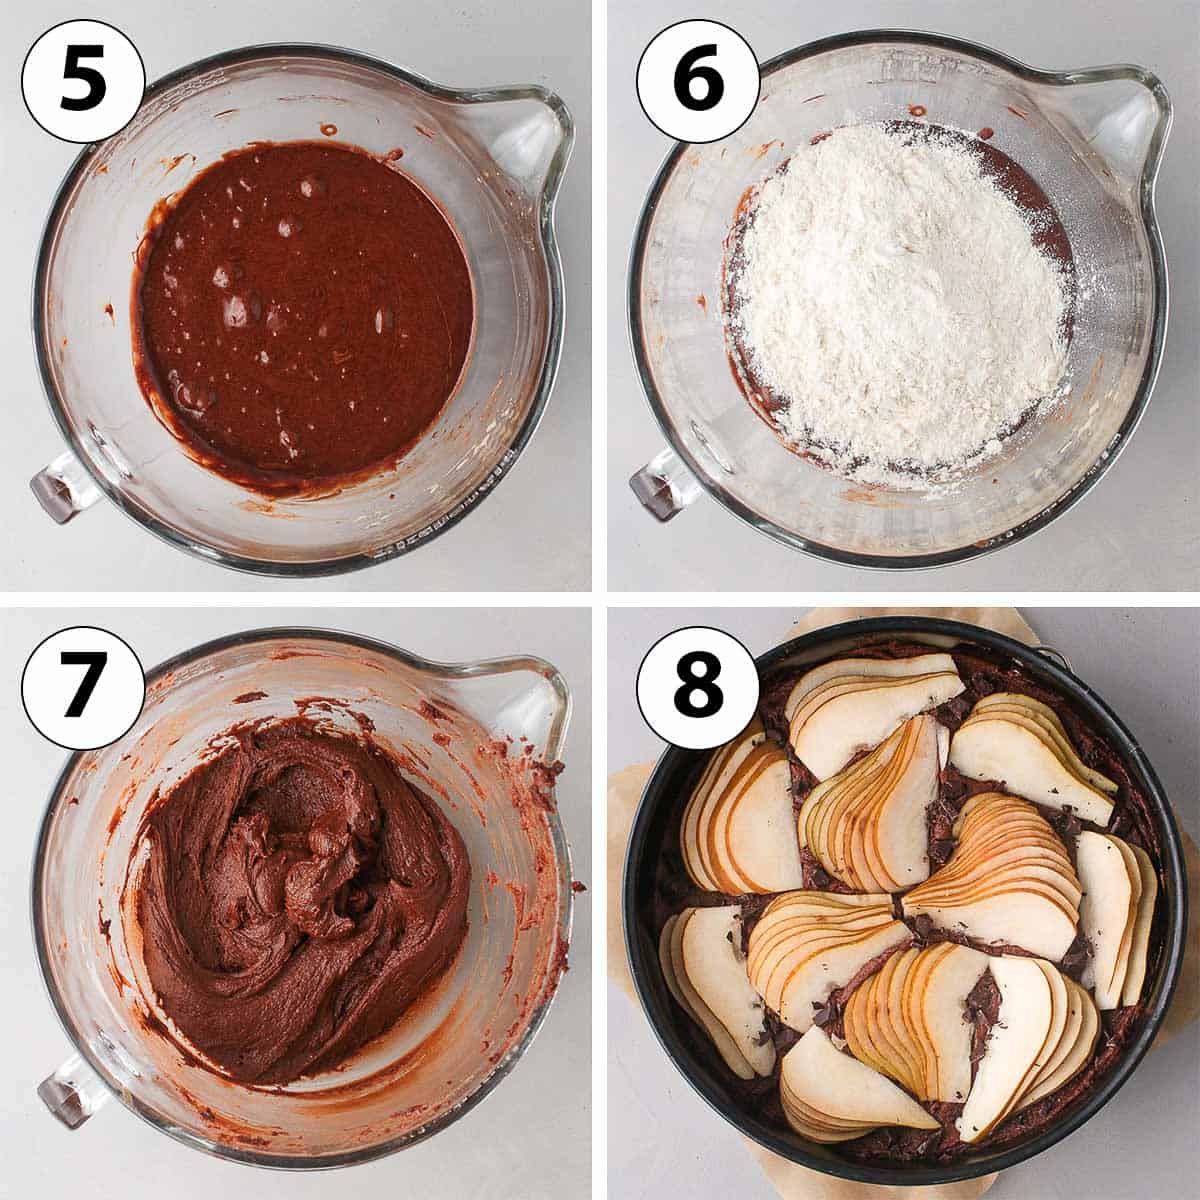
- Photo 5: slowly mix until combined, stopping to scrap the sides/bottom of the bowl if required. To avoid deflating the air bubbles created during the first steps, you can also whisk in the chocolate mixture by hands.
- In a separate bowl, mix together the Flour, Baking Powder and Salt.
- Photo 6: Sift the flour mixture over the cake batter.
- Photo 7: Very slowly mix until just combined. Make sure not to over-mix the batter now to avoid deflating it. Again, scrap the sides and bottom of the bowl to make sure all the ingredients are properly incorporated.
This step can be done by hand with a spatula to make sure the batter is not mixed too much.
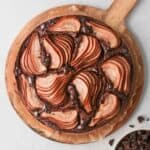
- Photo 8: pour the chocolate batter in the prepared cake tin. Use a small offset spatula or back of a spoon to spread it around if required. Top with the thinly sliced pears.
- Optional: top with the Chocolate Chunks (or chips).
- Bake for 35 to 40 minutes, or until a skewer comes out clean. Transfer over a wire rack and leave to cool down completely before removing from the pan.
If using a smaller springform pan, adjust the baking time accordingly.
Recipe FAQs
Yes, that would be a delicious substitution for fresh pears! Just make sure to drain them as much as possible as you don't want them to leak too much water while they bake.
You could even use Red Wine Poached Pears for a truly decadent dessert!
For this recipe, I used Bosc Pears but you could also use Bartlett / Williams Pears, Anjou Pears or Concorde Pears. The fruits should be slightly firm (but not too firm) so that they are easy to thinly slice.
Make sure to use a good quality cooking chocolate for the best results.
I used a 70% Dark Chocolate for this recipe. The cake is not too sweet because of the intense chocolate flavours, but if you are after a sweeter dessert, simply use a chocolate with lower percentage of cacao.
This chocolate and pear cake is delicious enough to be served on its own, but would also be great with some whipped cream or vanilla ice cream. For more pear flavours, you can also serve it with a homemade Pear Compote or some Stewed Pears.

Tips for Success
- Make sure the melted Chocolate and Butter have cooled down before adding them to the Eggs/Sugar. If too hot, they might cook the eggs which could result in a grainy, unpleasant texture.
- The Eggs should be at room temperature. If too cold, they might make the melted chocolate and butter seize then harden.
- Mix in the dry ingredients by hands (instead of with a mixer) to insure you don't over-mix the batter and deflate the air added while whisking the eggs and sugar together.
Storing & Freezing
This cake can be kept at room temperature and will be best eaten within two days. The pear and chocolate cake is best served slightly warm, so I recommend re-heating individual slices for a few seconds before eaten it!
I don't recommend freezing this dessert as it will dry out the chocolate cake.
Made this recipe?
Let us know if you liked it by leaving a comment below, and tag us on Instagram @a.baking.journey with a photo of your creation!
Recipe
Chocolate and Pear Cake
Ingredients
- 200 gr (7 oz) Dark Cooking Chocolate
- 120 gr (1/2 cup) Unsalted Butter
- 2 Pears, slightly firm
- 3 Eggs, at room temperature
- 100 gr (1/2 cup) Brown Sugar
- 200 gr (1 1/3 cup) Plain / All-Purpose Flour
- 1 1/2 teaspoon Baking Powder
- 1 pinch Fine Table Salt
- 50 gr (1,5 oz) Chocolate Chunks, optional (or chocolate chips).
Instructions
- Preheat your oven on 180°C/350°F. Line the bottom of a 25 cm / 10 inch Springform Pan with baking paper.
- Finely chop the Cooking Chocolate. Place it in a heat-proof bowl with the Butter and melt it, either in 30 seconds increments in the microwave or over a double boiler. Set aside to cool down.
- Wash the pear, cut them in half and core them. Cut each pear halves in very thin slices. Set aside.
- Place the Eggs and Brown Sugar in the bowl of your mixer. Whisk on medium high speed for about 5 minutes, or until it has doubled in volume and is very bubbly.
- Add the cooled down melted Chocolate and Butter and mix to combine (see note 1).
- Add the sifted Flour, Baking Powder and Salt. Slowly mix and stop as soon as combined (see note 2).
- Pour the cake batter into the Springform Pan. Use a small offset spatula or spoon to spread it if needed. Top with the Pear Slices.
- Optional: finish by topping the cake with the Chocolate Chunks
- Bake for 35 to 40 minutes, or until a skewer comes out clean. Leave to cool down completely before removing from the pan.
Would you like to save this recipe?
Notes
- Chocolate: make sure to use Baking Chocolate (and not eating chocolate or chocolate chips that will not melt properly). If using a bar, finely chop it before melting it.
- I recommend stopping to scrap the bottom and sides of the bowl when mixing in the chocolate and butter to make sure it is all properly incorporated.
- You don't want to over-mix the batter after adding the flour to avoid deflating it and/or developing too much gluten, which might result in a denser cake. This part cake be done by hands with a spatula instead of the mixer to make sure you don't over-work the batter if preferred. Also make sure to scrap the bottom of the bowl where some of the ingredients might not have fully mixed.