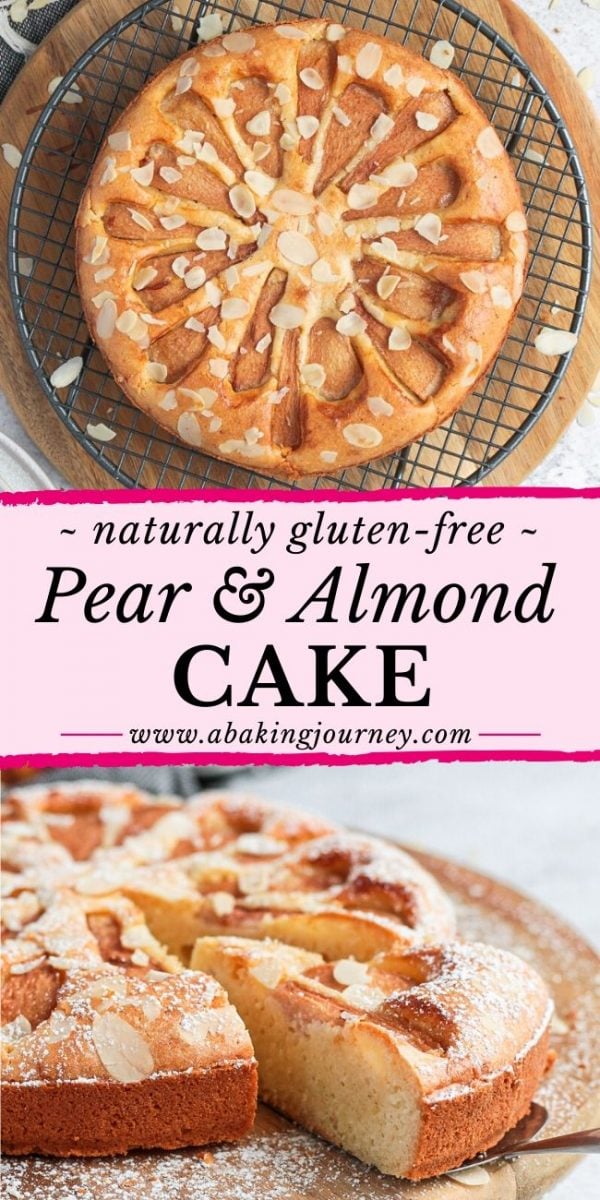
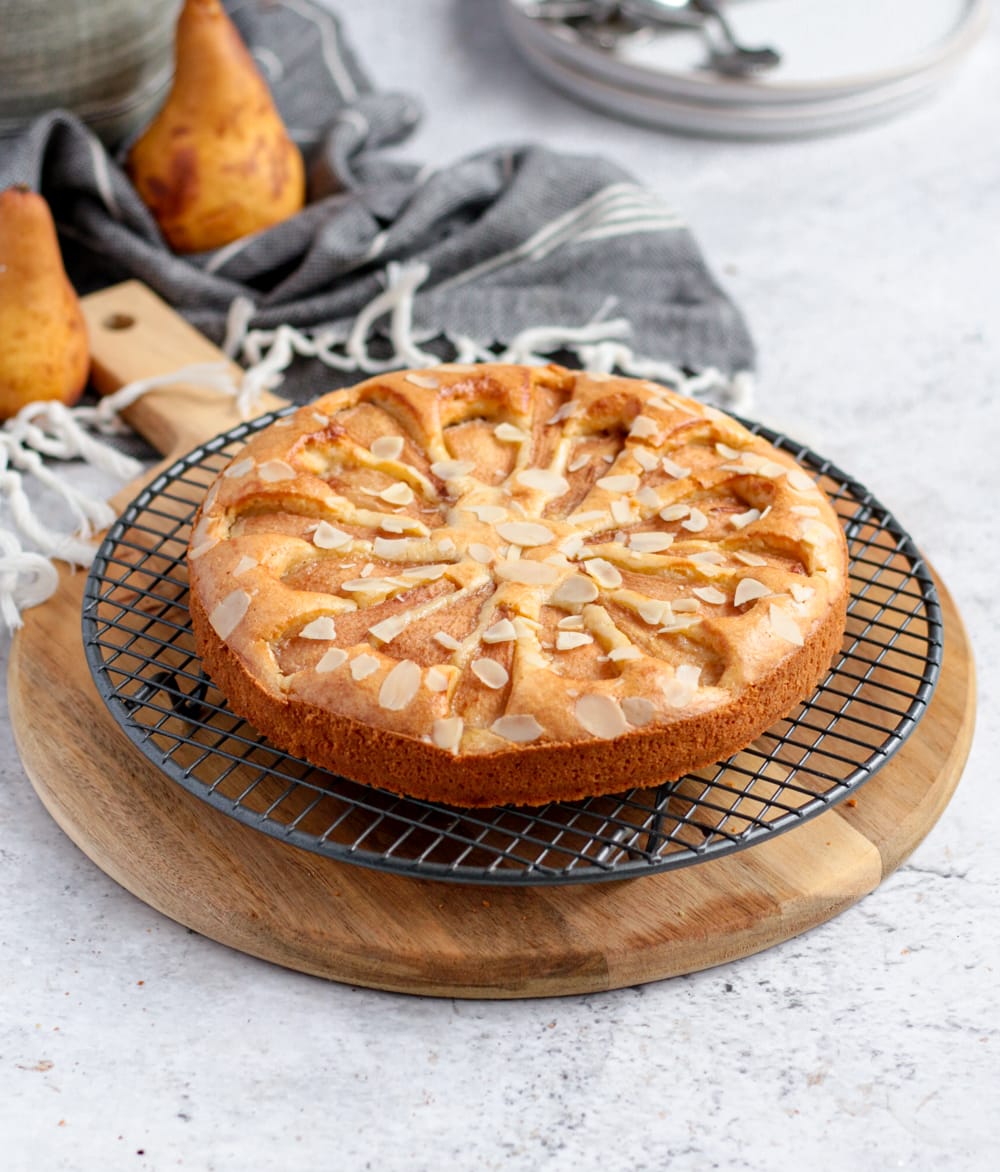
This Flourless Pear and Almond Cake is delicious light, fluffy and flavourful. The naturally gluten-free cake is perfect to enjoy for dessert and afternoon tea in the Fall and Winter!
Jump to:
Why we love this recipe
Looking for a delicious Gluten Free Pear recipe? Or maybe just a tasty Pear Cake? What about a super light Passover Cake Recipe? This Almond and Pear Cake recipe is all of the above!
There is always something so special about baking pears in a cake batter. Like for these Spiced Pears Muffins, the fruits become so soft in the oven and literally melt-in-your mouth!
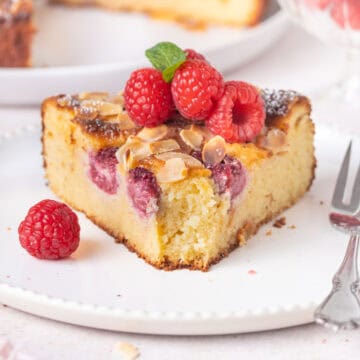
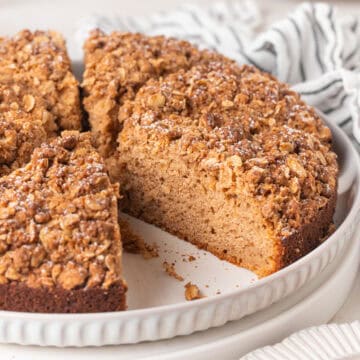
I simply love the flavours of pears and almonds together, just like in my Pear Frangipane Tartlets. The simple Almond Cake base is so light and fluffy, it works just as perfectly with fresh Pears than it does in an Orange Almond Cake, Almond Raspberry Cake or Apple Almond Cake.
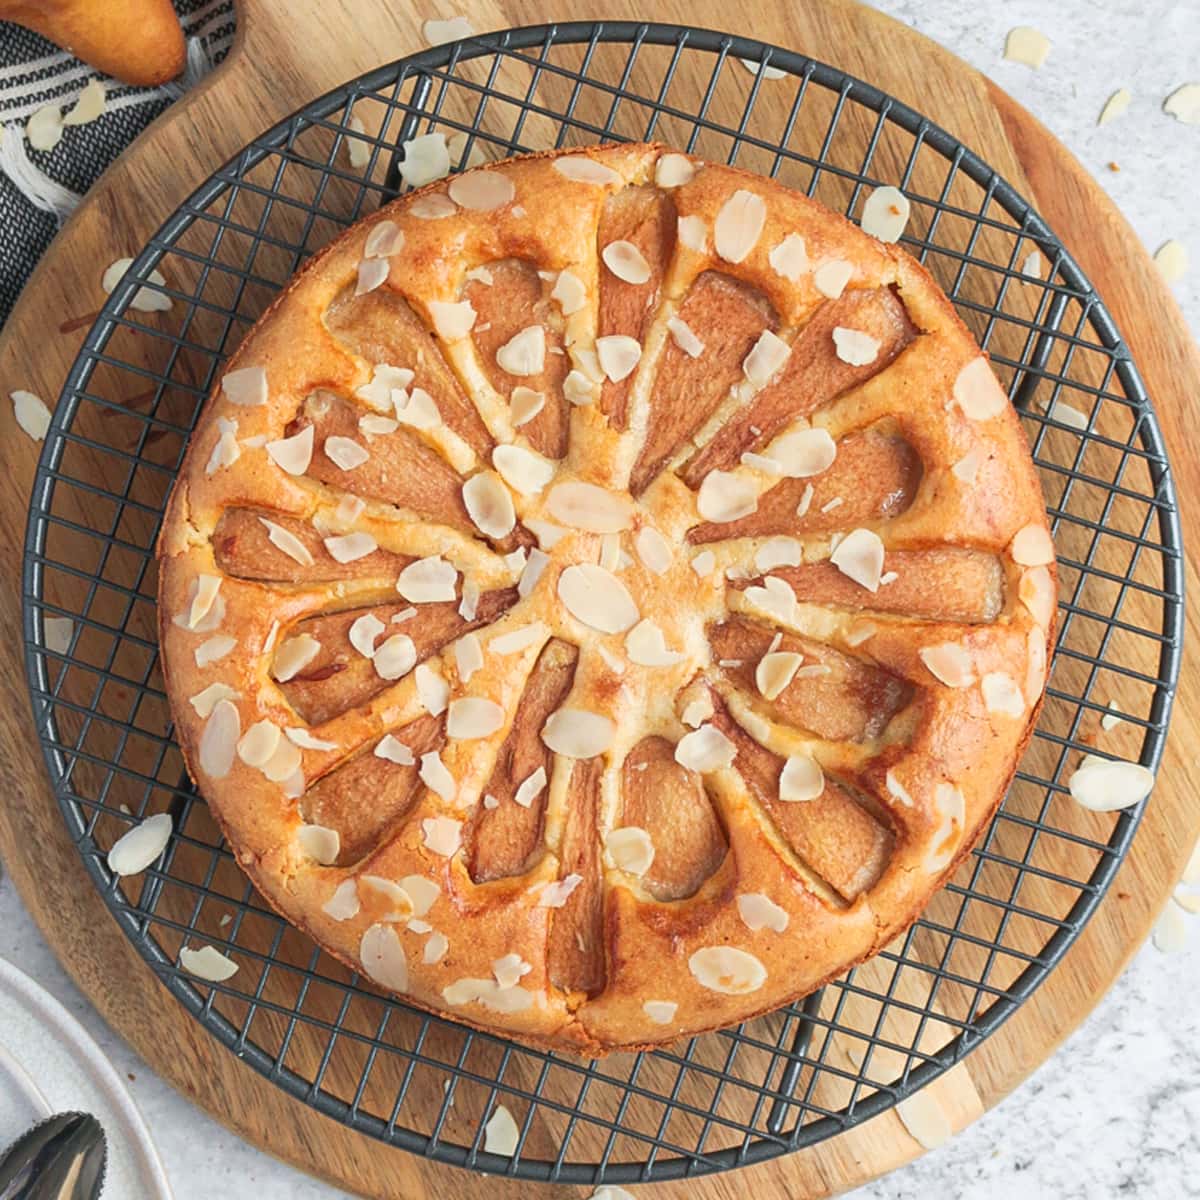
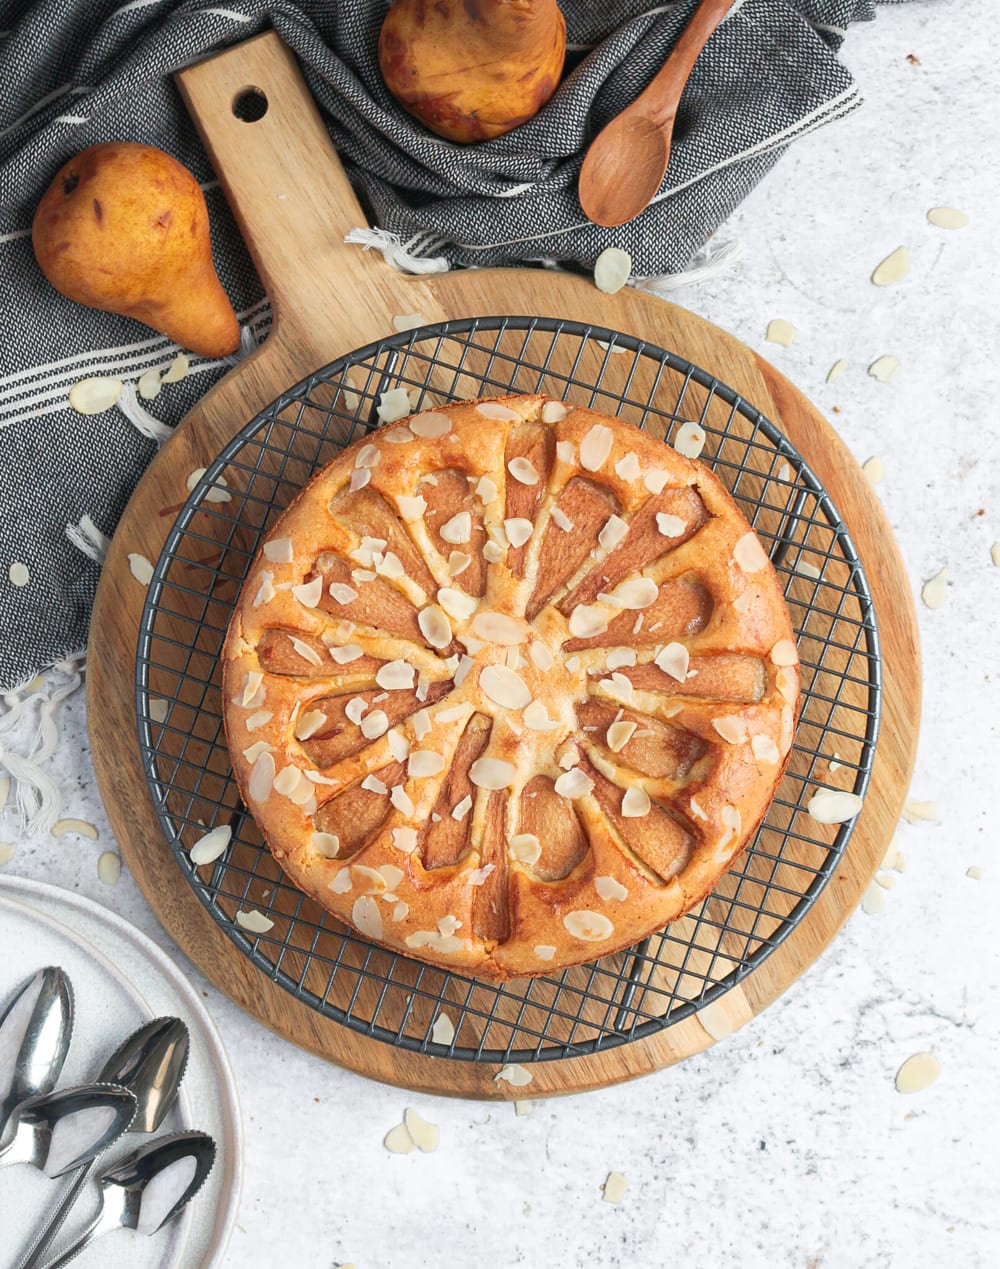
Topped with some flaked almonds for an extra crunch, this dessert is the ultimate Winter Comfort Cake if you ask me!
Cake Ingredients
Many ingredients can be used to make cakes or baked goods flourless. But for this recipe, the main ingredients (other than the fresh Pears) is Almond Meal.
To make this recipe, you will need (see all quantities in the recipe card below):
- Pears: make sure to use a variety of pears that bake well (see faqs section below).
- Eggs: this recipe does not use any baking powder or baking soda. It simply uses whipped Egg Whites which helps to create an extremely light crumb texture.
- Sugar: Caster Sugar or fine white Granulated Sugar.
- Vanilla Extract: optional, but a simple way to boost the flavours.
- Canola Oil: or your choice of neutral flavoured oil
- Cream: Heavy / Thickened Cream
- Almond Meal: can be store bought or homemade; the coarseness of the almond meal will change the texture of the cake.
- Salt: a fine Table Salt
- Flaked Almonds (optional) - or sliced almonds for more texture!
Optional Additions: you could also use a little bit of Almond Extracts if you want even more Almond flavours in your pear cake. The addition of spices like Cinnamon, Cardamon or Ground Ginger will also be delicious!
Ingredient Substitution
This cake is made with No Flour (making it Gluten-Free) and can easily be adapted to be made Dairy-Free as well if required.
A few ingredients can be substituted if needed:
- Pears: I have only ever used fresh pears to make this cake, but you could also used Canned Pears instead
- Vanilla Extract: can use Vanilla Paste instead - or omit if preferred.
- Canola Oil: can be substituted with any neutral flavoured oil or even melted unsalted butter - but the cake will dry out more quickly with butter.
- Cream: you can absolutely use a Plant-Based or Dairy-Free Cream alternative if needed. Again, I recommend using an alternative that is relatively flavour neutral to avoid altering the taste of the cake too much. A Soy Cream of example.
- Almond Meal: yes, Almond Flour will work just as fine. And you can grind your own almonds if needed - just make sure to dry out the powder in the oven so that it doesn't add too much moisture to the cake.
How to make Almond and Pear Cake
The process of making this cake can be separated into 4 main steps: prepare the pears, whisk together the wet ingredients, add the dry ingredients and fold in the whipped egg whites.
Would you like to save this recipe?
Let's look into each steps in detail.
- Photo 1: Prepare the Pears - peal, core and slice each pear into strips. I cut each pears into 8 slices. Set aside for now.
- Photo 2: Separate the Egg Yolks and Whites. Place the Egg Whites in the bowl of a stand mixer (or a large mixing bowl if using a hand mixer) and the Egg Yolks into a large mixing bowl. Set aside the Egg Whites.
- Photo 3 & 4: Add the Caster Sugar to the Egg Yolks and whisk for about a minute. The colour should start to get more pale and you should see a few bubbles.
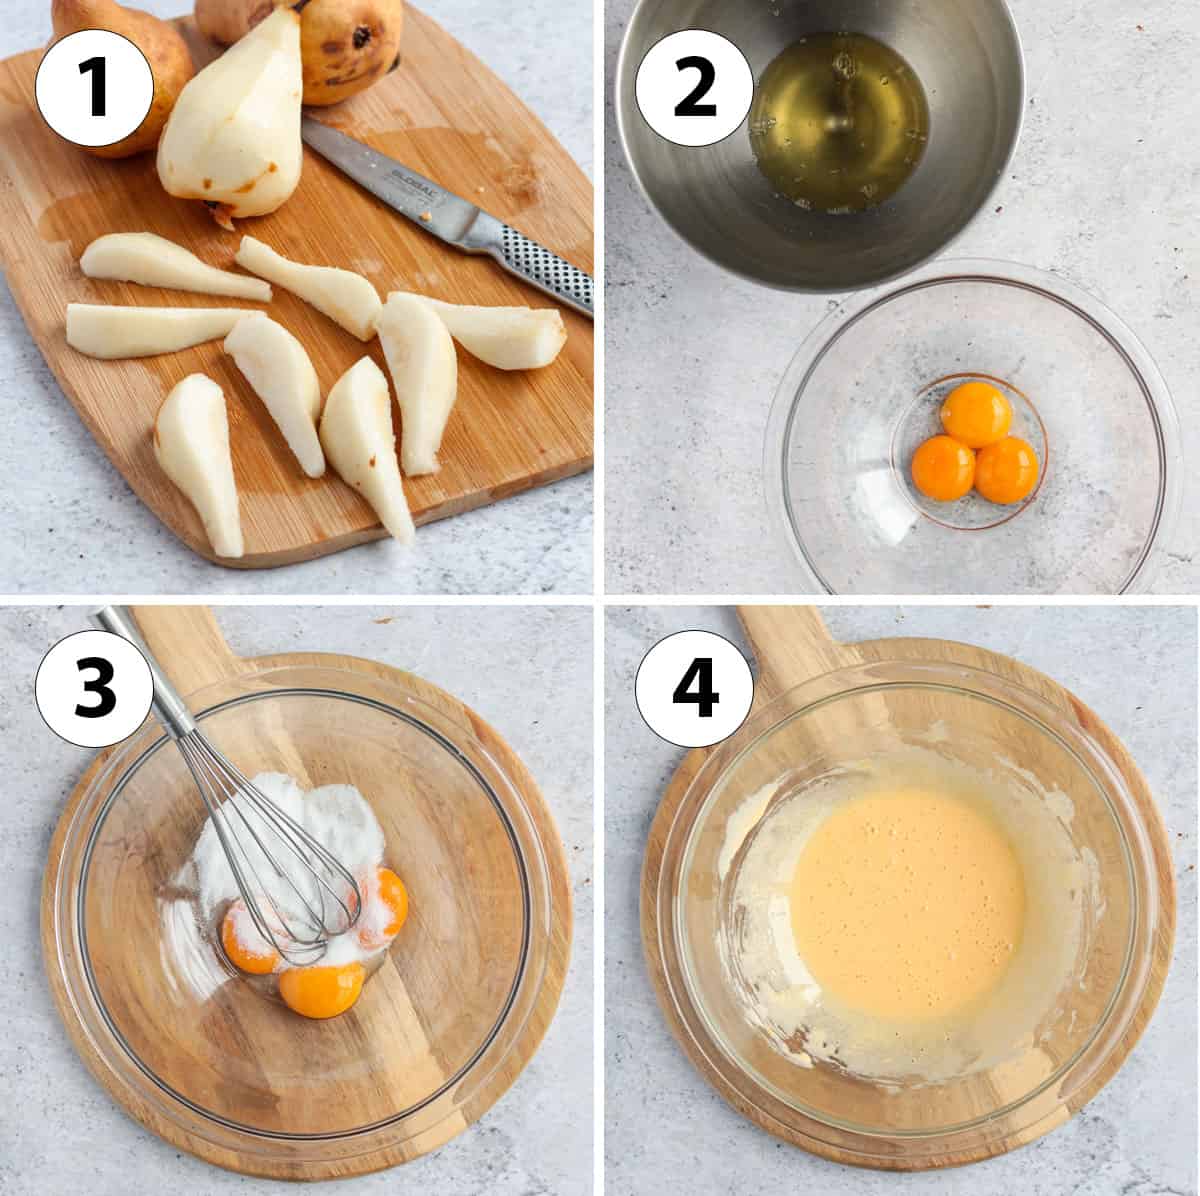
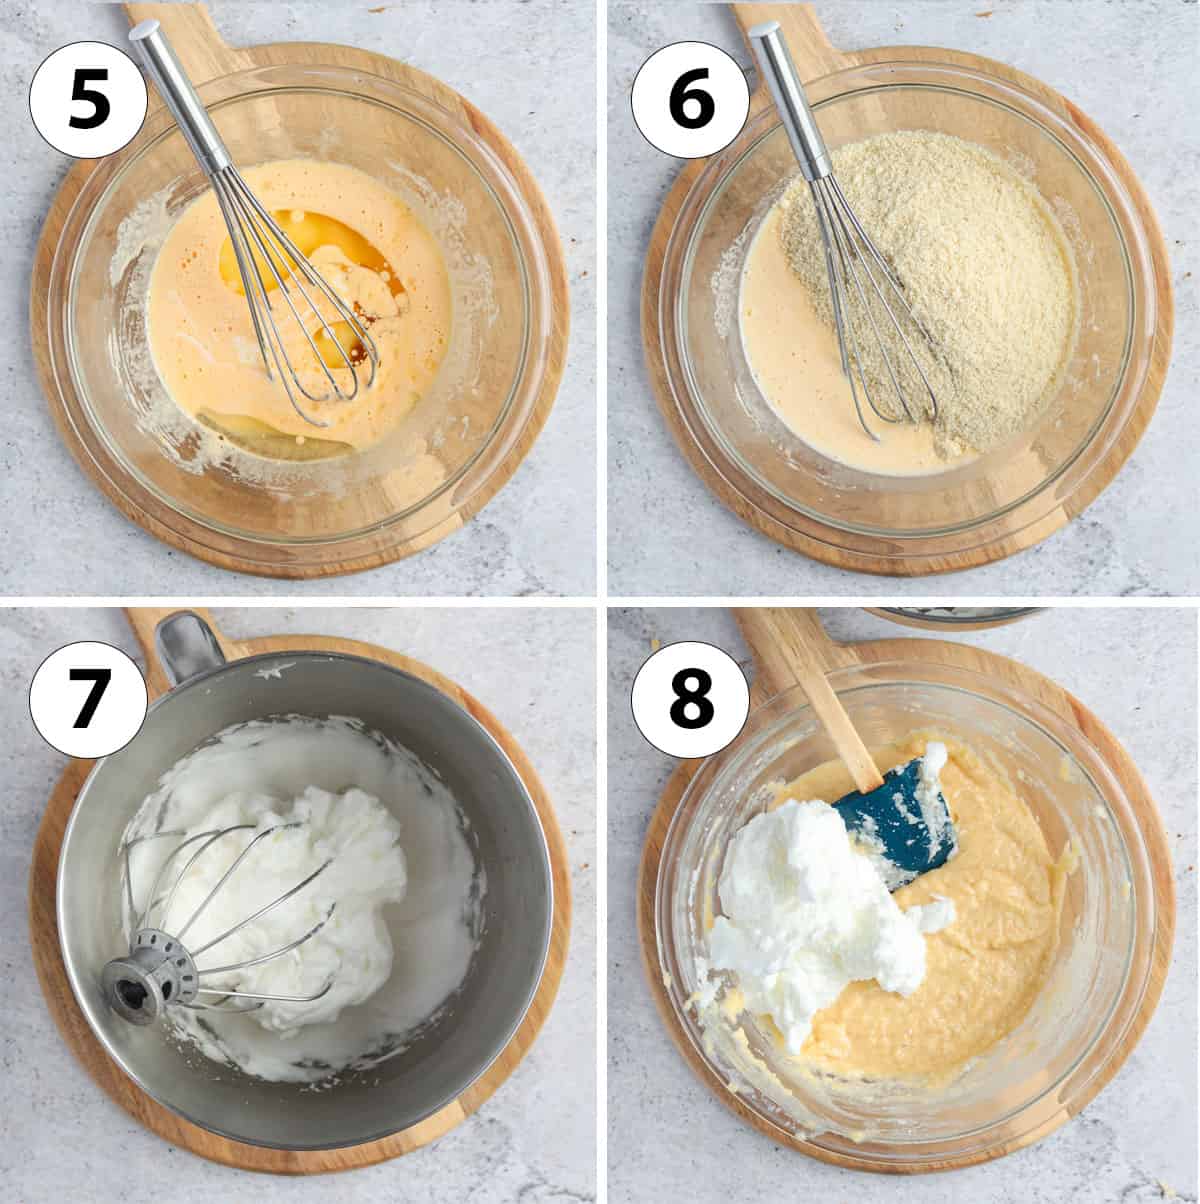
- Photo 5: Add the Wet Ingredients - pour the Oil, Cream and Vanilla into the Yolk/Sugar mixture. Whisk well to combine.
- Photo 6: Add the Dry Ingredient - Whisk in the Almond Meal to combine; the batter will get drier and thicker straight away, it's normal. Set aside the batter.
- Photo 7: Whip the Egg Whites with the Salt until you reach stiff peaks - about 5 minutes on a medium/high speed.
- Photo 8: Combine the two elements. Start by adding about a quarter to a third of the Whipped Egg Whites to the first batter and gently fold in to combine. It will seem a bit hard to combine at first, it's normal. Add the rest of the Egg Whites in 2 or 3 times, gently folding it into the cake batter with a spatula.
Try not to overwork the batter to avoid deflating the Egg Whites - both the texture and structure of the cake comes from the whipped egg whites so it's really important to keep them as stiff as possible!
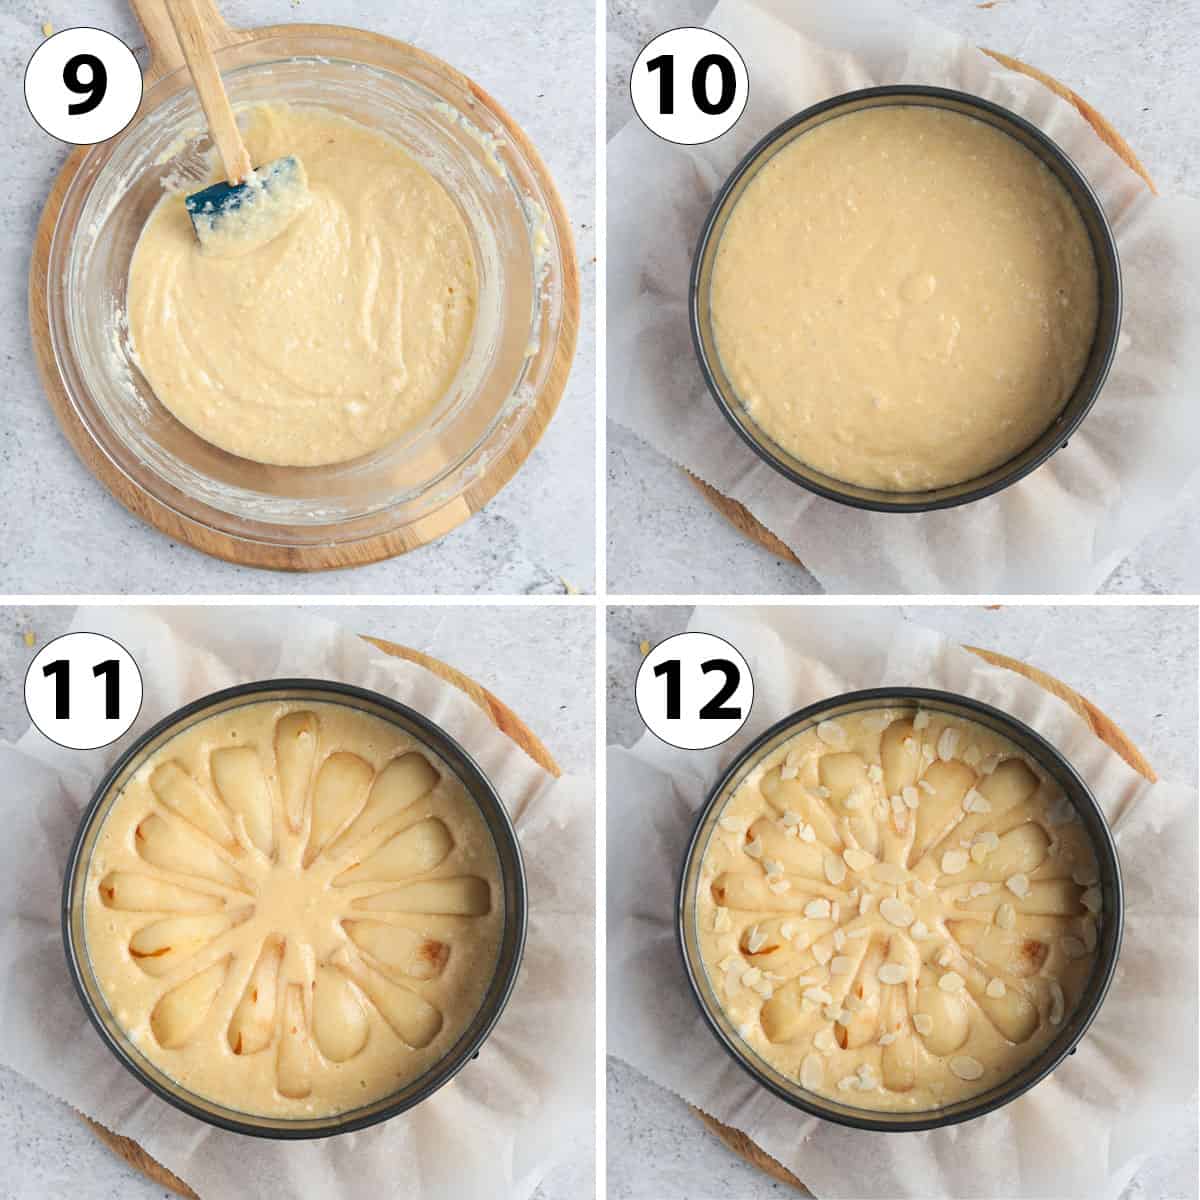
- Photo 9: The cake batter is ready when all the Egg Whites are incorporated and you cannot see big lumps of egg whites anymore.
- Photo 10: Pour the batter in a Springform Pan - it should have been greased in advance and I recommend using baking paper or parchment paper on the bottom as well. I used a 9" / 22cm Springform Pan.
- Photo 11: Place the Pears over the Batter. I made a circular pattern with the pears sliced side facing down, but you can dispose the pears the way you like.
- Photo 12: Optional: sprinkle the cake with Flaked Almonds
- Bake for 40 to 50 minutes at 160'C/325'F, or until golden and a skewer comes out clean.
Recipe FAQs
I recommend using Pears that are not too ripe, or they might disintegrate when cooked. But don't go for overly green pears either, as the sweetness and flavour of the fruits develops with time. The Pears should be slightly soft to the touch.
When it come to pear variety, I recommend using:
- Bosc Pears (the ones I used here)
- Bartlett / Williams Pears
- Anjou Pears
- Concorde Pears
You can read more about choosing the right pear for baking here.
I didn't pre-poach the pears to make this almond and pear cake - and simply used fresh pears. But you could absolutely poach the pears if you want! Poached pears is a great way to add many more flavours, spices and fragrance to your fruit.
This cake would work beautifully with some Red Wine Poached Pears for example - but you could also simply poach the pears in a spiced syrup.
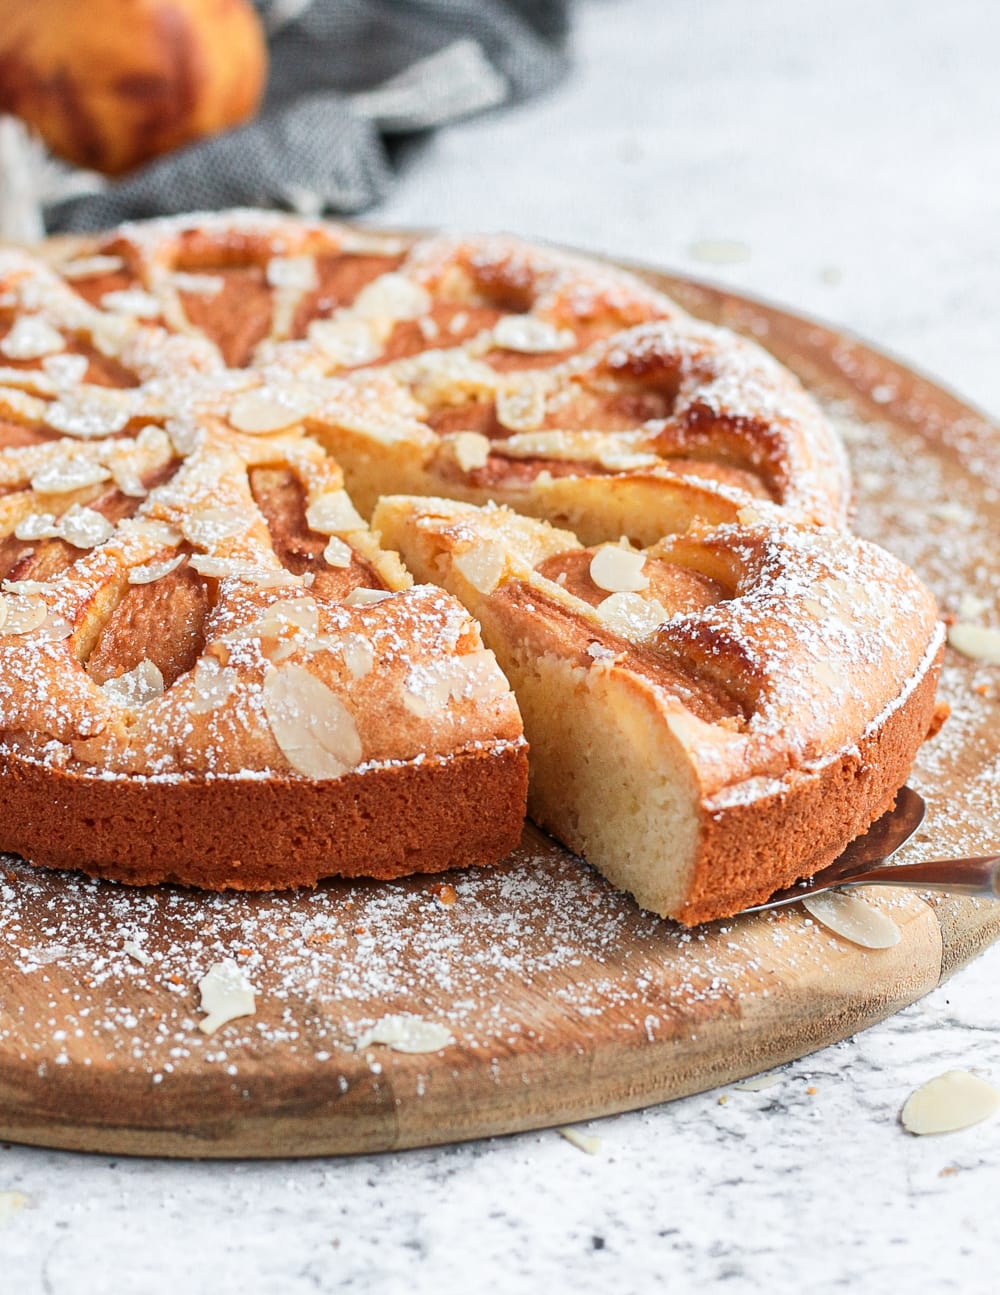
I served this pear almond cake on its own, but it will also be delicious with a simple Whipped Cream, some Vanilla Ice Cream or even some Stewed Pears or a homemade Pear Compote.
Tips for Success
- The whipped Egg Whites are essential for both the texture and structure of the cake. Make sure to fold it into the cake batter as gently as possible to avoid deflating them.
- Play with textures with Almond Flour instead of Almond Meal, or more coarsely ground Almonds. Both blanched or unblanched almond meal will work!
- Let the cake cool down completely before removing from the cake pan. The pear and almond cake will be very soft when it comes out of the oven and might break if you try to remove it from the pan too quickly.
Storing & Freezing a Flourless Cake
How to store this Flourless Pear Cake:
This cake can be kept at room temperature for up to 2 days when properly covered or kept in an air-tight container.
To keep this cake for longer, it can also be stored in the fridge for an additional 2 days. I recommend re-heating it up a bit after being in the fridge so that it remains moist.
Can I freeze this Pear Almond Cake?
Although you could technically freeze the cake, I do not recommend doing so for a few reasons. First, it is a rather delicate cake that might fall apart when thawed. Secondly, you will loose the extremely light and moist texture by freezing it. Lastly, thawed pears will start to release moisture that will damp the cake.
Made this recipe?
Let us know if you liked it by leaving a comment below, and tag us on Instagram @a.baking.journey with a photo of your creation!
Recipe

Almond and Pear Cake
Ingredients
- 2 large Pears
- 3 large Eggs, at room temperature
- 60 gr Caster Sugar,
- 1 teaspoon Vanilla Extract
- 90 ml Canola Oil, or Neutral Cooking Oil
- 90 ml Heavy /Thickened Cream,
- 200 gr Almond Meal, or Almond Flour
- 1 pinch Salt
- Flaked Almonds, to taste, optional
Instructions
- Preheat the oven on 160'C/325'F. Grease a 9inch/22cm Springform Pan and/or line the bottom with baking paper.
- Peal, core and cut each Pears into 8 slices. Set aside.
- Separate the Egg Yolks and Whites. Place the Whites in the bowl of your stand mixer (see note 1) and set aside. Place the Yolks in a large mixing bowl.
- Add the Caster Sugar to the Yolks and whisk for about a minute. It should start to look pale and bubbly.
- Pour in the Wet Ingredients: Vanilla Extract, Canola Oil and Cream. Whisk until combined.
- Stir in the Almond Meal and quickly mix (see note 2). Set aside.
- Add the Salt to the Egg Whites and whip until you reach stiff peaks - about 5 minutes on a medium/high speed.
- With a spatula, gently fold about a quarter to a third of the Whipped Egg Whites into the cake batter (see note 3). Add the rest of the Egg Whites in 2 or 3 times, gently folding it into the batter. Don't overwork the batter or it will deflate the egg whites.
- Pour the cake batter into the grease/lined Springform Pan.
- Arrange the sliced Pears over the cake Batter.
- Optional: sprinkle some Flaked Almonds over the cake.
- Bake for 40 to 50 minutes, or until golden and a skewer comes out clean. Leave to cool down completely before removing from the pan.
- Optional: sprinkle with a little bit of Icing Sugar before serving.
Would you like to save this recipe?
Notes
- or in a large mixing bowl if you are using a hand mixer.
- It will quickly become drier and thicker -it's normal.
- It will seem a bit hard to combine at first, it's normal. Just keep slowly adding more whipped egg whites until all folded in. You shouldn't see large lumps of egg whites anymore.