
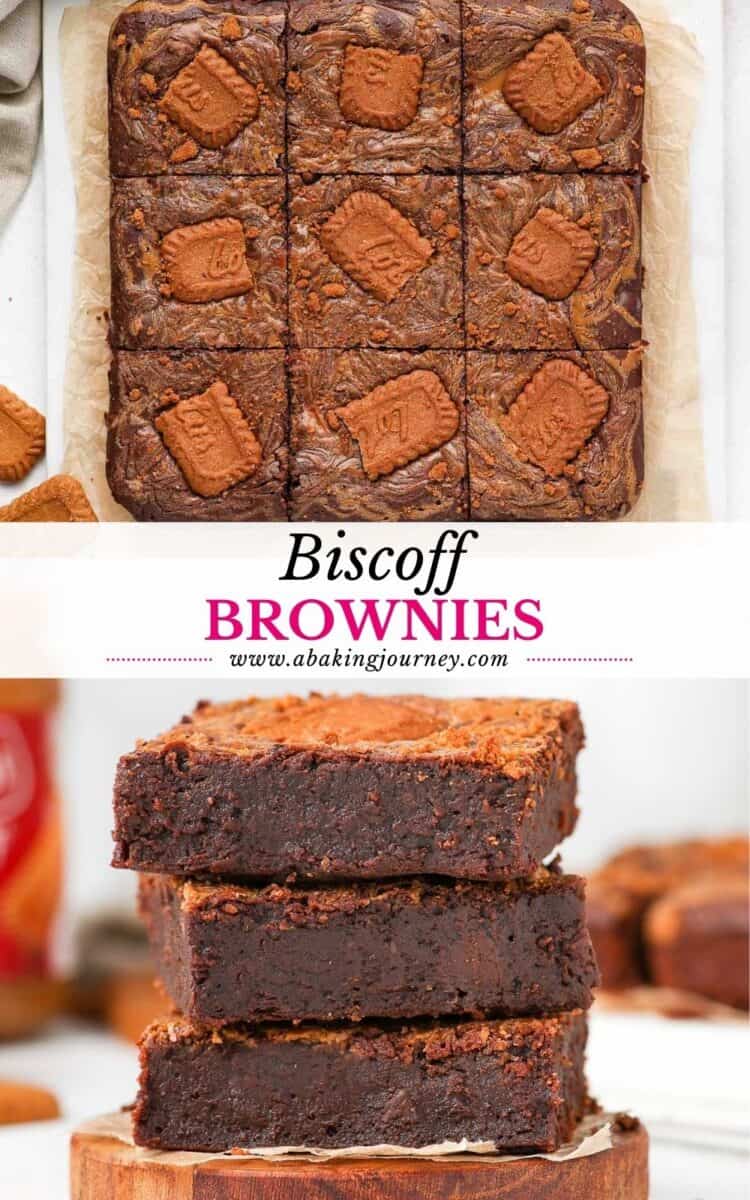
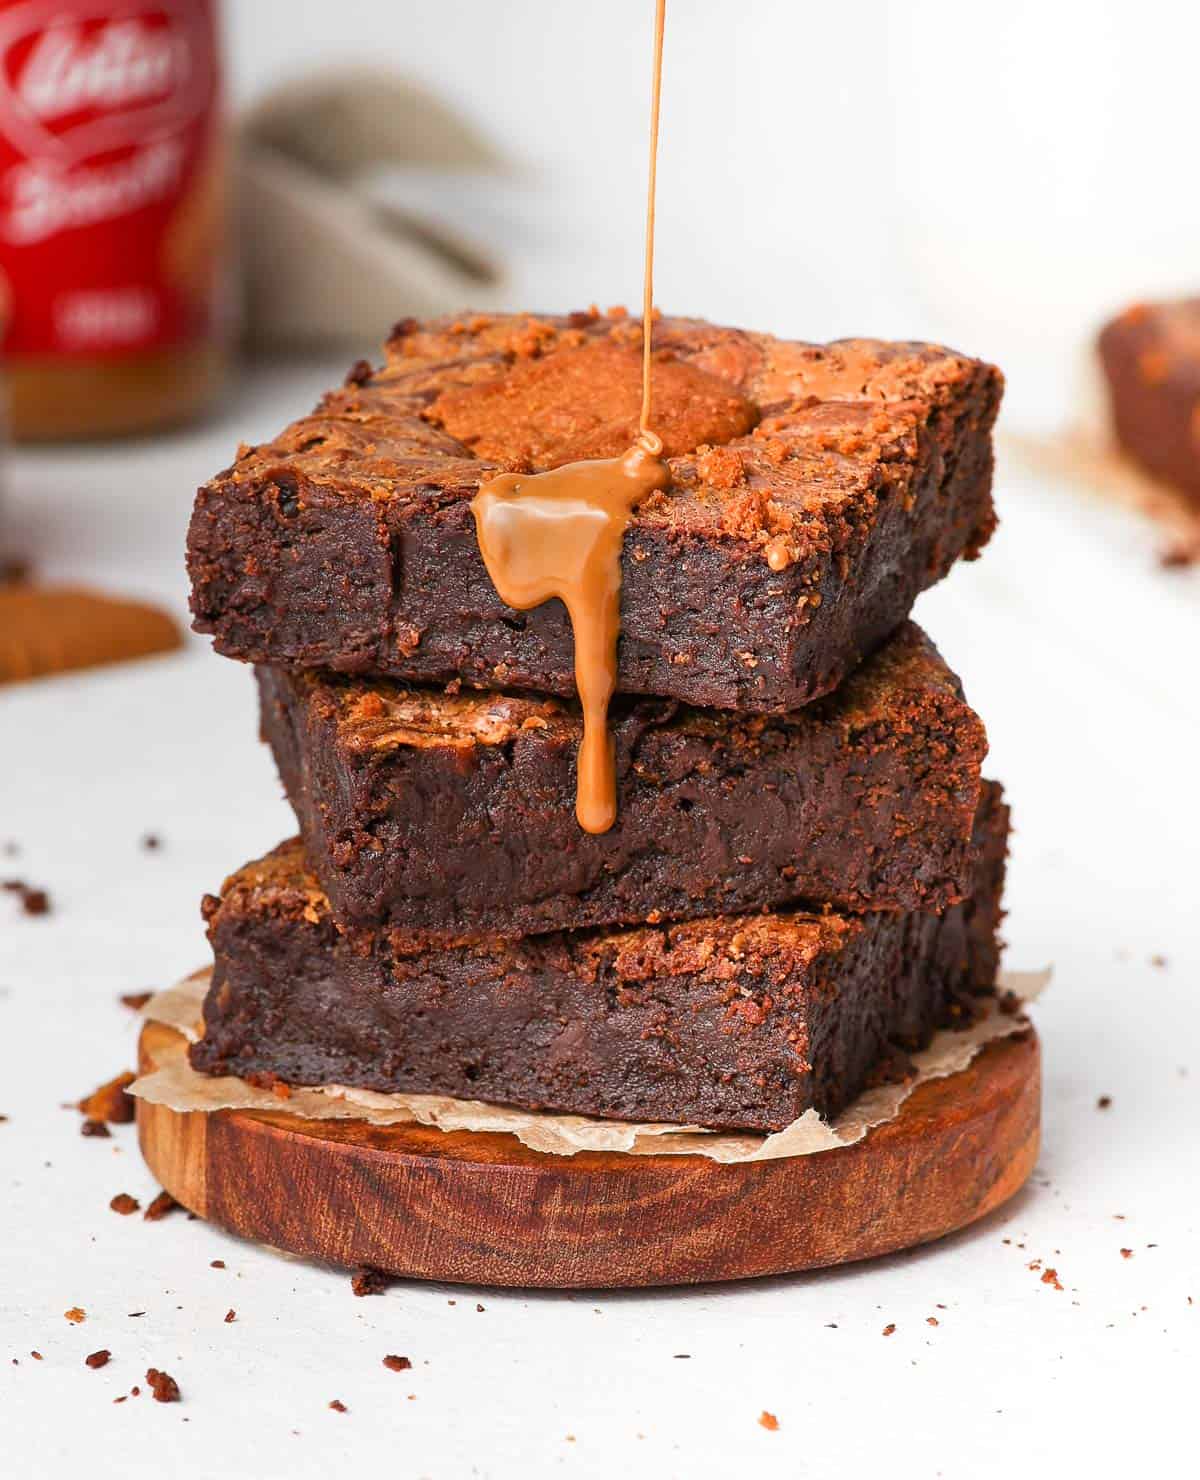
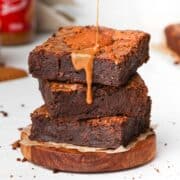
These dark chocolate Biscoff brownies are the most decadent and rich brownies, ever! The ultra fudgy brownies are packed with cookie butter spread and topped with a Biscoff swirl and cookies. They are super easy to make in 35 minutes only.
Jump to:
Why we love this recipe
Is there anything more decadent that a fudgy dark chocolate brownie? A fudgy dark chocolate brownie with biscoff spread and cookies of course! These cookie butter brownies are incredibly rich, decadent and fugy.
As a Belgian, Lotus Biscoff Cookies - or Speculoos as we call it - basically runs through my veins. Eating the sweet and distinctively spiced biscoff flavor always brings me straight back home - especially when mixed with super dark chocolate.
These brownies are so easy to make and will be ready in less about 35 minutes. And because they are made with dark chocolate instead of cocoa powder, they will stay super fudgy for days! The texture of the brownies will only improve with times, so they are perfect to make-ahead.
More Chocolate Cake Recipes:
- Chocolate Raspberry Brownies
- Orange Brownies
- Fondant Cakes for Two
- Easter Mini Egg Brownies
- French Chocolate Fondant Cake
Ingredients
What you will need to make this biscoff brownie recipe (scroll down to the recipe card below for all quantities):
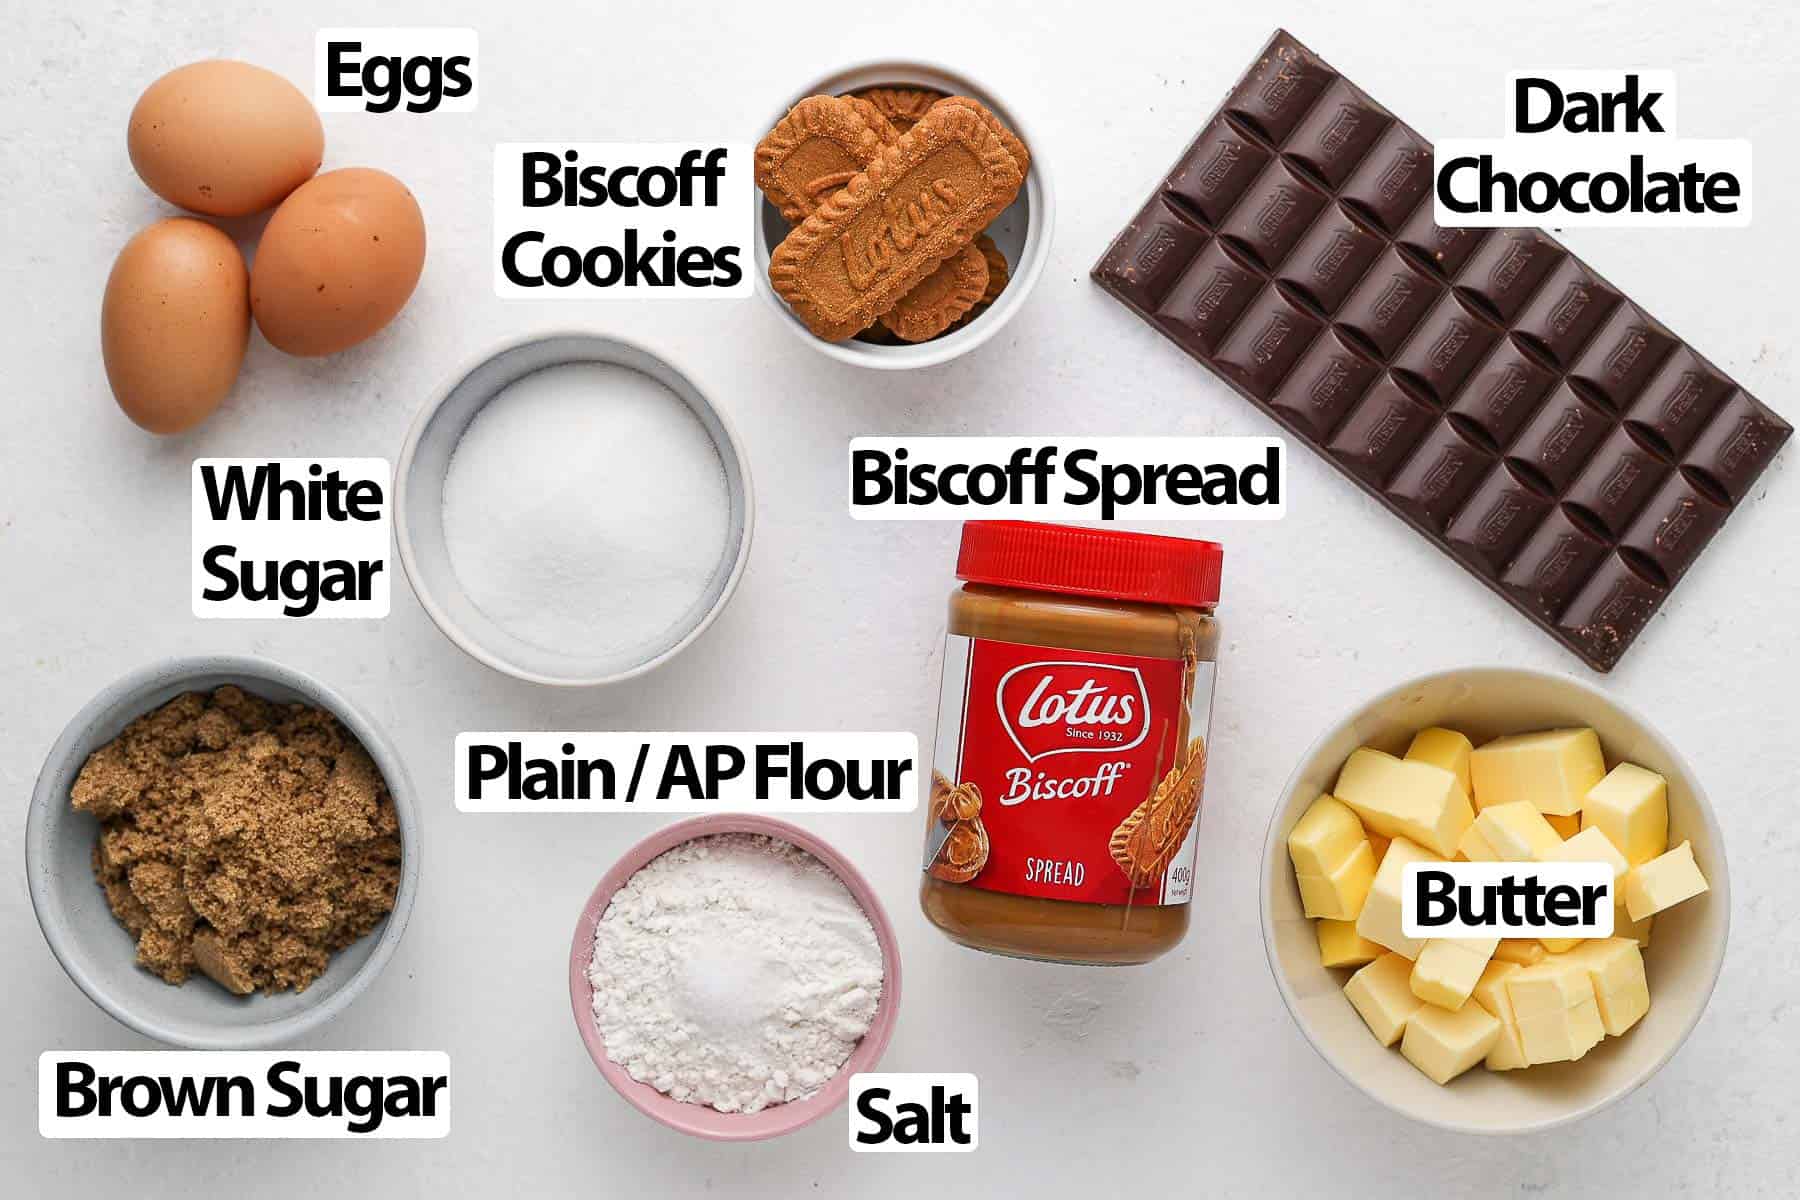
- Dark Chocolate: I used a 70% chocolate for that intense chocolate flavour. You can use a less strong chocolate but I don't recommend using milk chocolate here as the brownies are rather sweet on their own. Make sure to use proper cooking chocolate - not eating chocolate or chocolate chips.
- Butter: Unsalted Butter. Can be straight from the fridge as it will get melted anyway.
- Biscoff Cookie Spread: or Cookie Butter Spread / Speculoos Spread. It is used both inside the brownie batter and on top of it to create a nice swirl. If you store it in the fridge, you will need to reheat it up slightly in the microwave to soften it before creating the swirl.
- Eggs: medium size and at room temperature.
- Sugar: a mix of Brown Sugar and White Sugar (Caster Sugar). Mixing both types of sugar in a 50/50 ratio gives you a super fudgy brownie with a nice shiny top and slightly chewy edges. This recipe will work with all white or all brown sugar too - it will just change the texture slightly.
- Flour + Salt: Plain / All-Purpose Flour, preferably sifted, and some Fine Table Salt. You could also use some Sea Salt Flakes here if you'd like! The amount of flour is pretty low here to get super fudgy lotus biscoff brownies, but you could slightly increase it if you'd prefer a more cakey brownies.
- Biscoff / Speculoos Cookies: Used on top of the brownies. They are optional here but bring a nice little crunch. I've tried this recipe with chunks of crushed biscoff biscuits in the batter but you couldn't really taste it.
How to make Biscoff Brownies
These speculoos brownies are seriously super quick to make with these easy to follow instructions:
- Preheat your oven on 180'C / 350' F. Generously grease and line a 23 cm / 9 inch square pan with baking or parchment paper. Set aside.
- If using Cooking Chocolate in the form of a bar, finely chop it first. That will help the chocolate melt faster and avoid burning it. Also prepare the second part of the dark chocolate that will be used as chocolate chunks inside the batter.
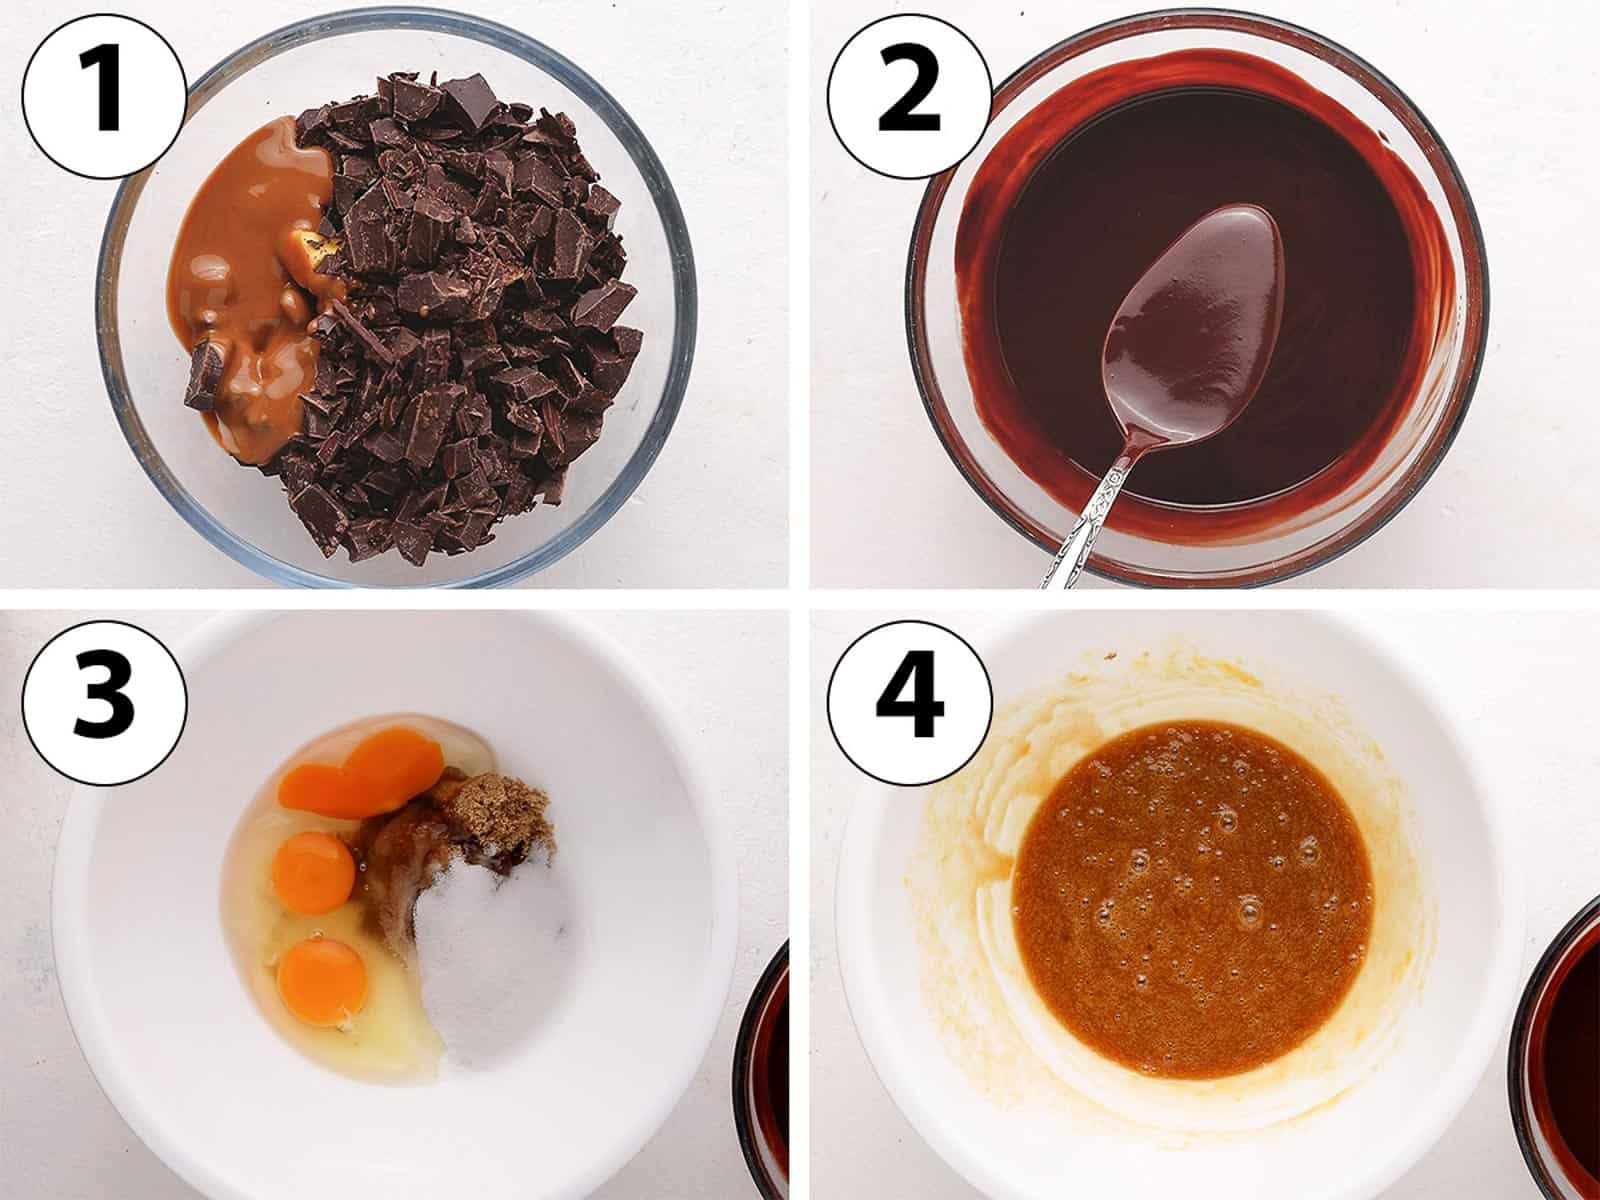
- Photo 1: Place the chopped Chocolate, Butter (I cut it in small cubes to melt faster) and the first half of the Biscoff Cookie Butter Spread in a heat proof bowl.
- Photo 2: Melt in the microwave in 30 seconds increments until completely smooth. Alternatively, you can melt it in a double-boiler. Set aside to cool down.
- Photo 3: In a separate large mixing bowl, place the Eggs, Brown Sugar and White Sugar.
- Photo 4: Whisk together for about a minute or until you start seeing small bubbles.
The more you whisk, the shiner the crust will be but I've found that it also makes the cake less fudgy as the air bubbles will make the brownies rise in the oven.
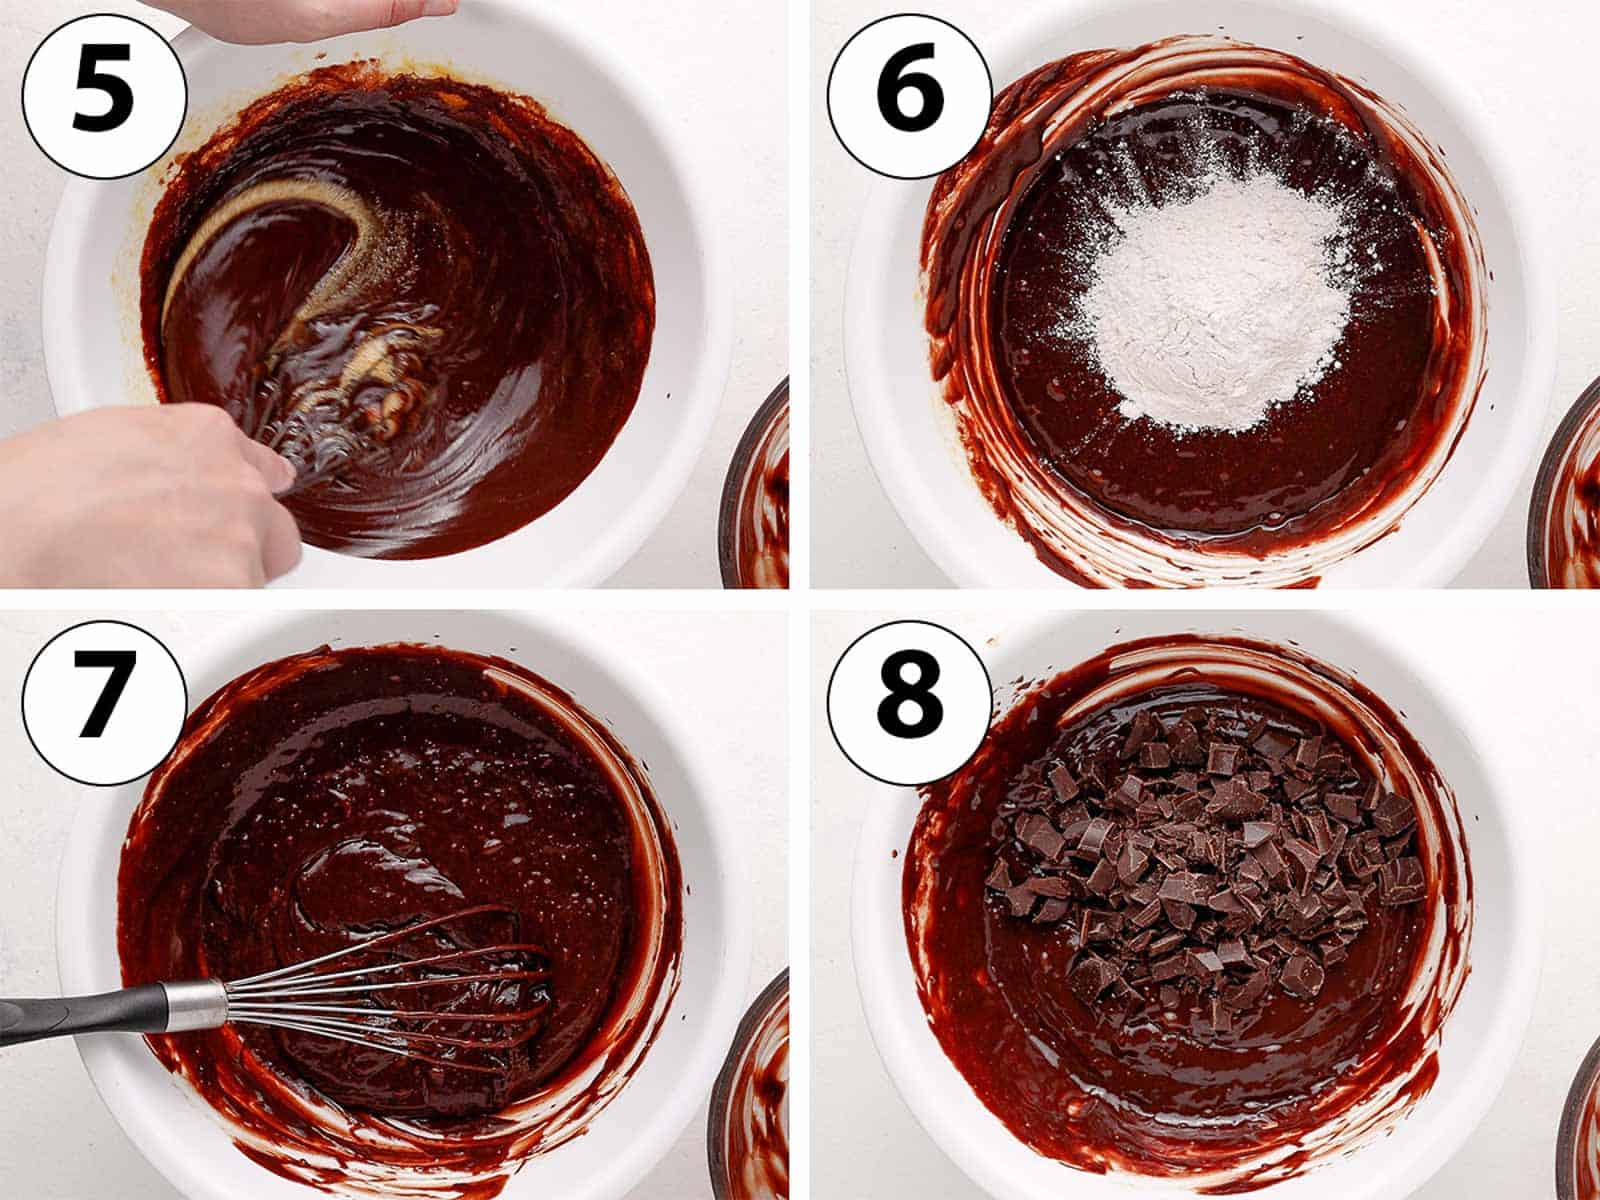
- Photo 5: Pour the Melted Chocolate / Butter mixture into the bowl with the Eggs and Sugar. Gently mix until just combined.
Would you like to save this recipe?
Make sure the melted chocolate isn't too hot before adding it to the eggs to avoid cooking the eggs.
- Photo 6: Add the Dry Ingredients (Flour + Salt), preferably sifted.
- Photo 7: Very gently mix it in and stop as soon as combined to avoid over-working the batter.
- Photo 8: Add the second part of the Chocolate Chunks and gently fold them in.
The last part of this recipe is to make the brownie toppings:
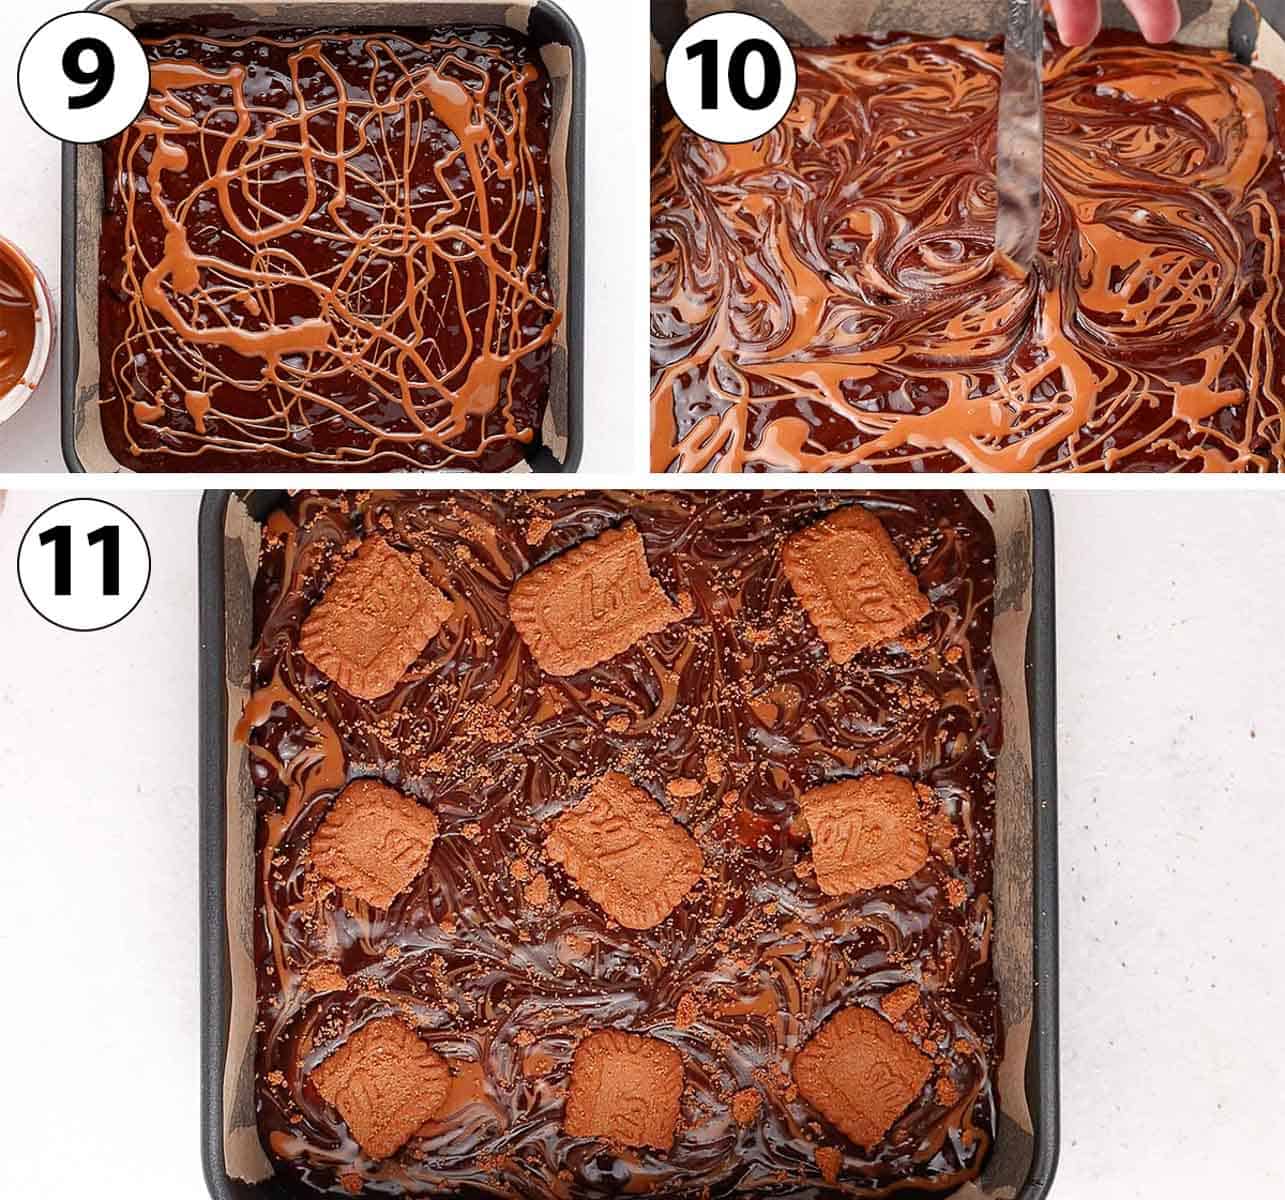
- Pour the brownie mixture into the prepared baking tin. Spread it around with a small spatula if needed (it does not need to be perfect, but about levelled).
- Photo 9: Drizzle the second part of the Biscoff / Cookie Butter Spread all over the brownies.
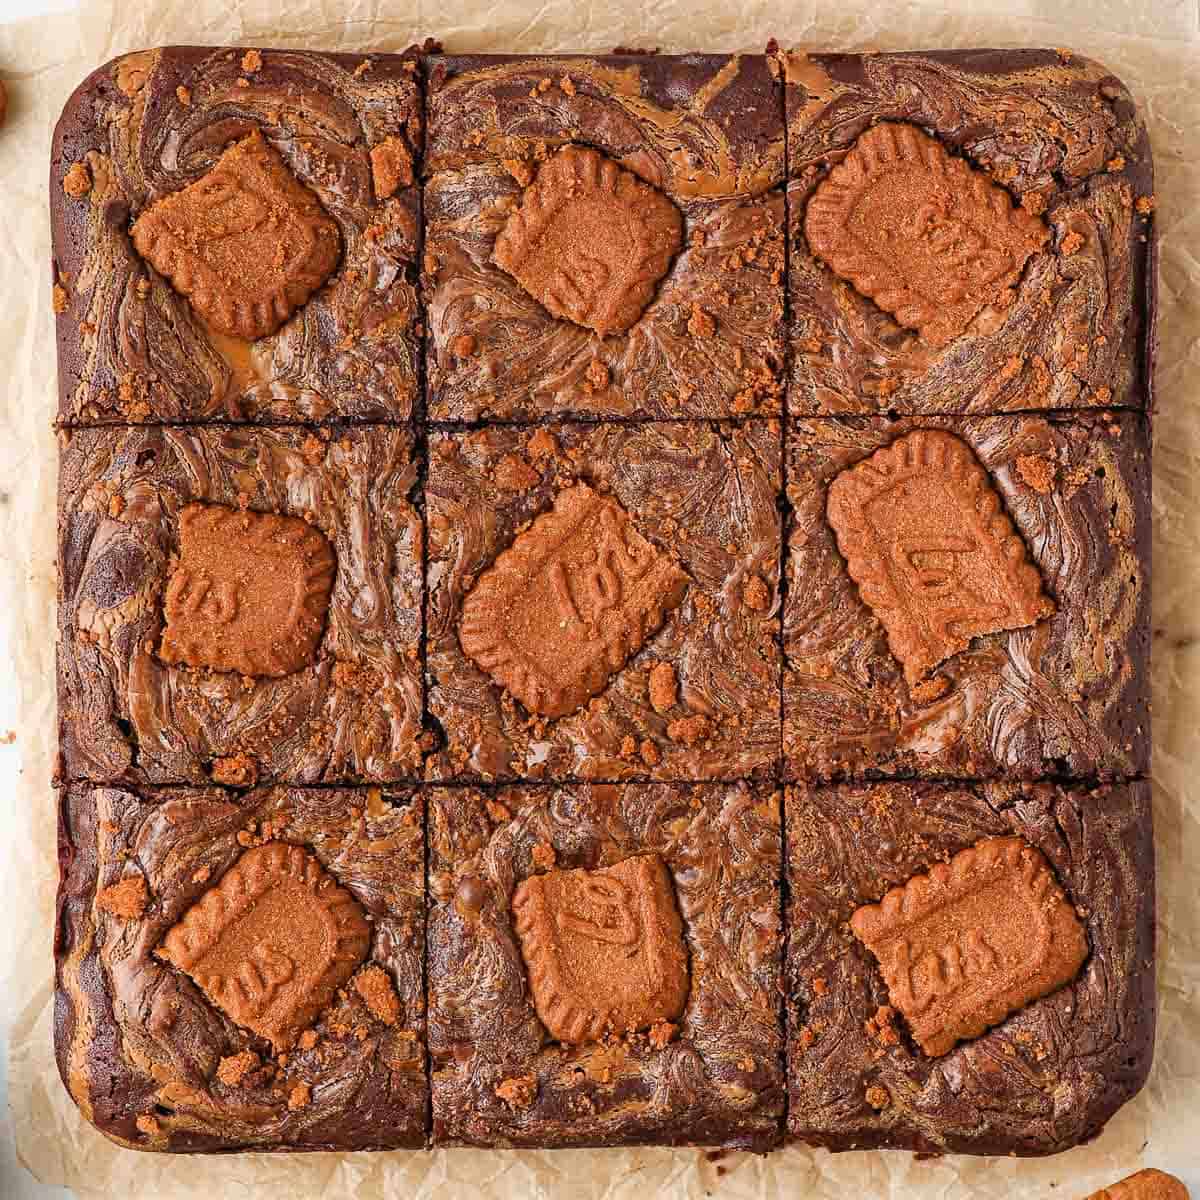
- Photo 10: using the tip of a knife, a toothpick or a skewer, swirl the cookie butter and brownie batter to create a nice pattern.
- Photo 11: Lastly (and optionally), place some Biscoff Cookies cut in half on top of the brownie batter. You can also crush a cookie and sprinkle the cookie crumbs around as well.
- Place in the oven for 20 minutes. Yes, it is a quick baking time, but that will get you perfectly fudgy biscoff brownies!
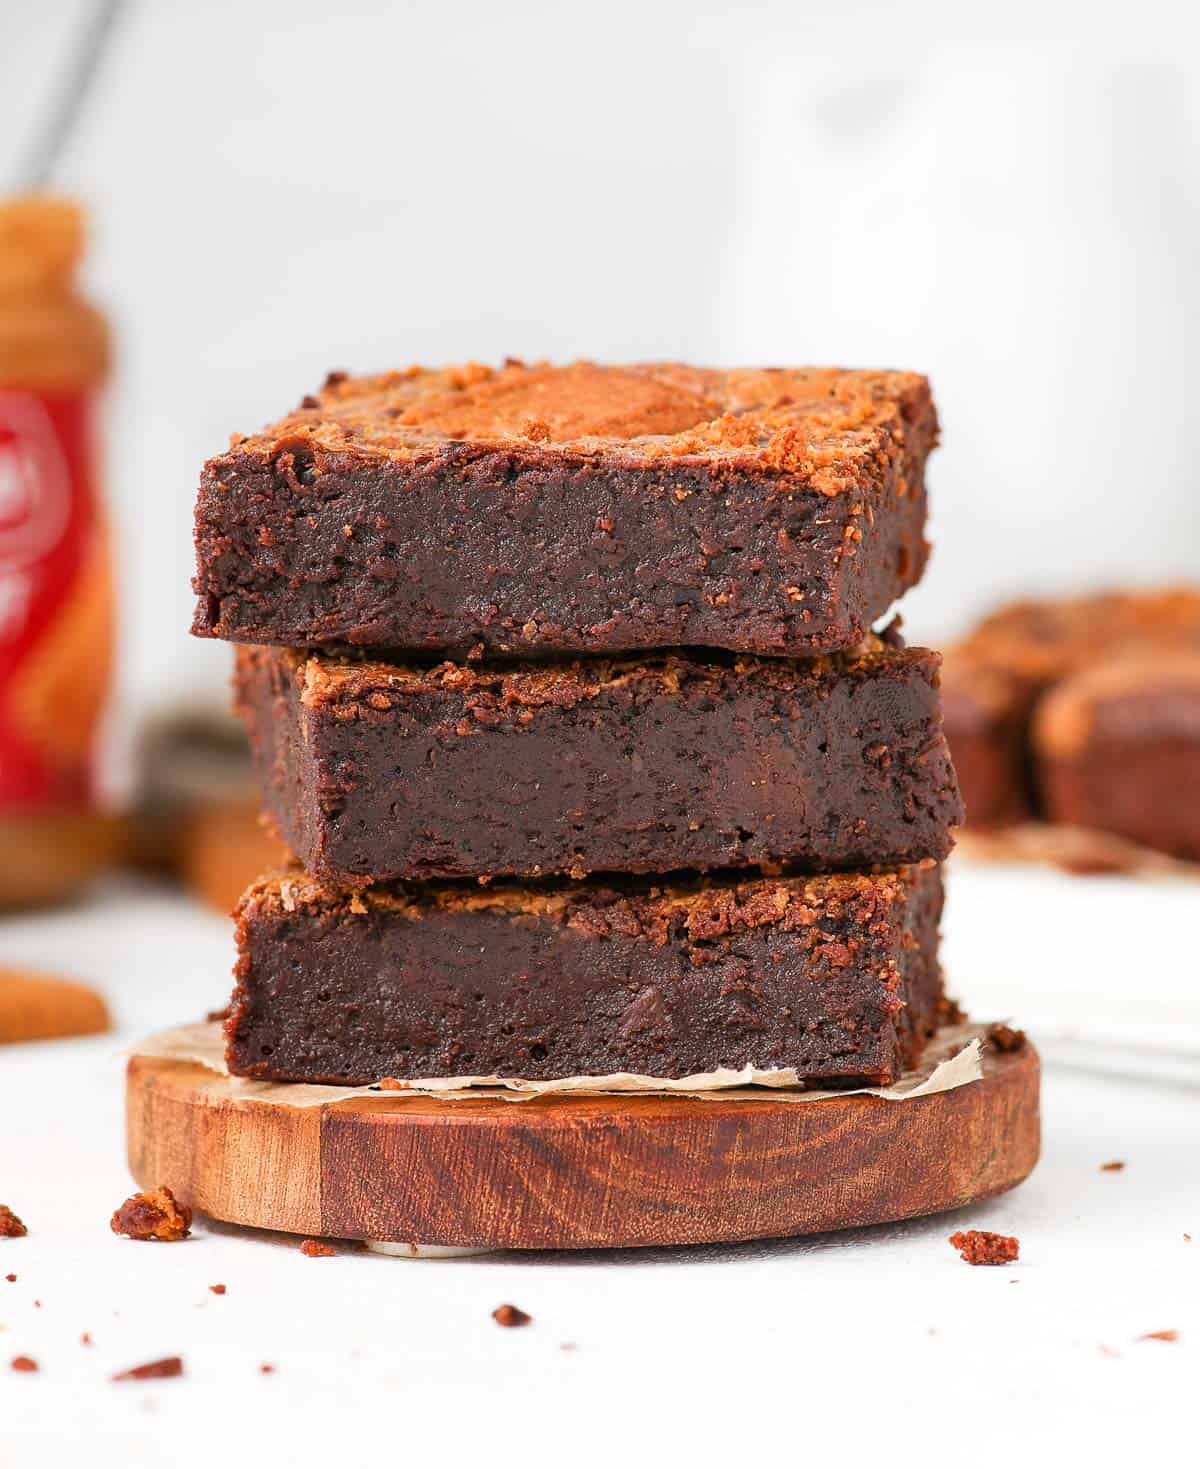
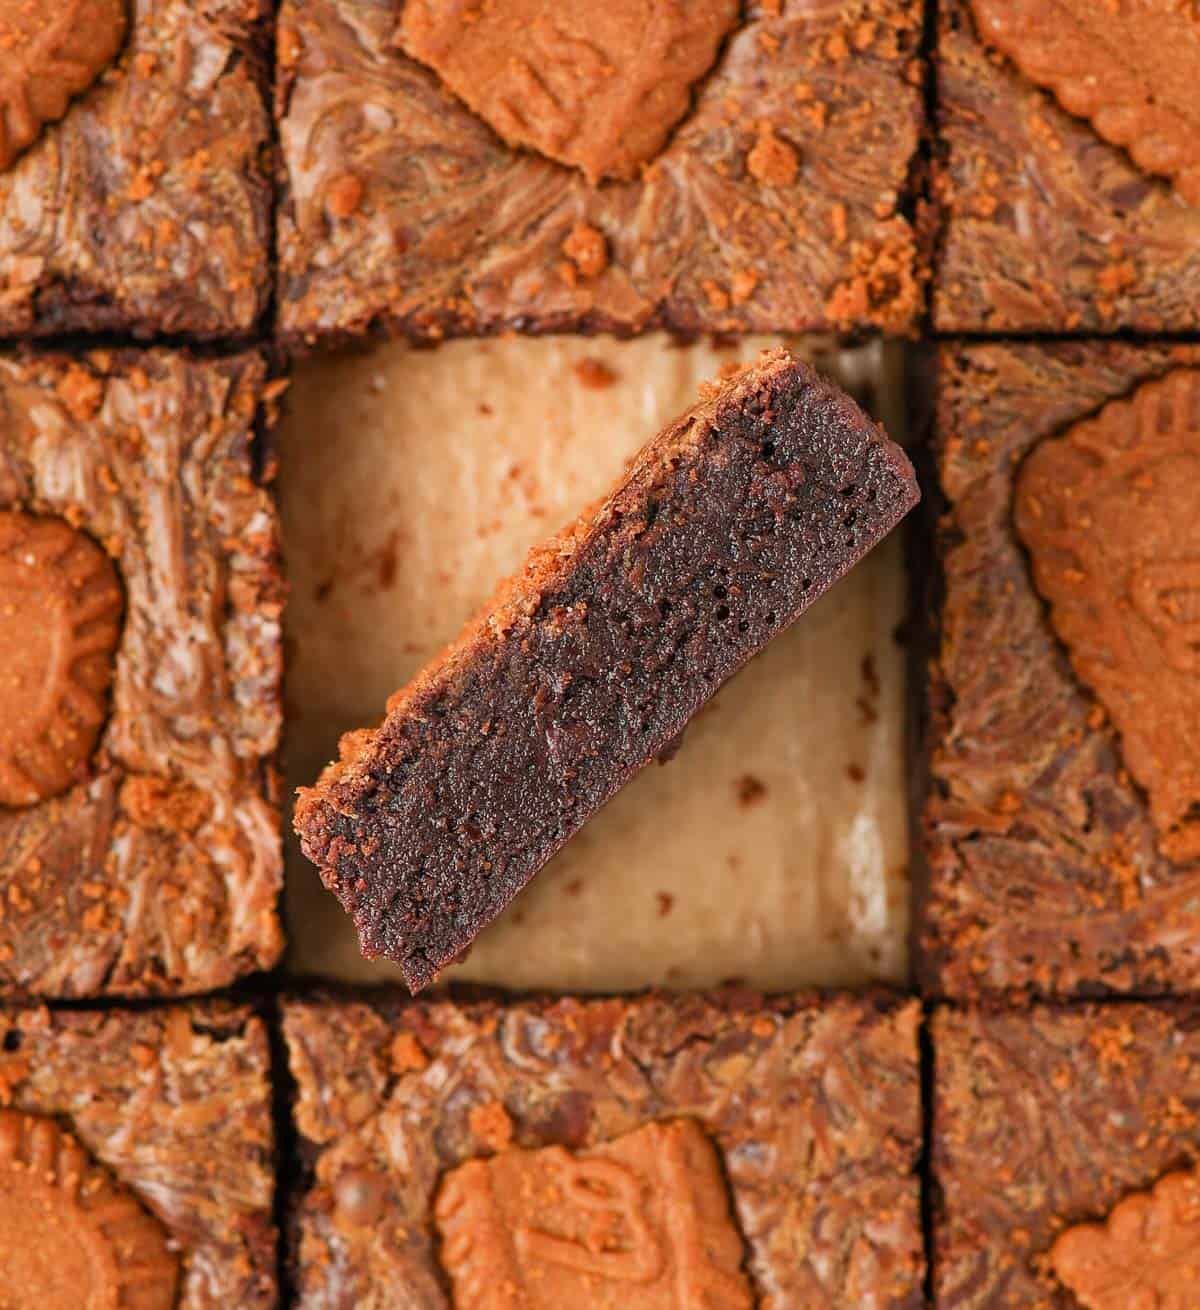
- Take out of the oven and leave to cool down completely before removing from the baking pan and / or slicing the brownies. I cut the brownies into 9 slices, but note that because they are very rich, you can absolutely cut them into smaller pieces too (trust me, that will be enough!).
It is very important to let the brownies cool down first. They will be quite soft and fragile when they just come out of the oven, so they might fall apart or break if you try to slice / move them when still warm.
Recipe FAQs
Biscoff are a type of spiced shortbread cookies called Speculoos in Belgium where they originate from (or sometimes Speculass / Spekulatius in the Netherlands and other parts of Europe for a similar biscuit).
Speculoos Cookies were traditionally handmade around St Nicholas (the Belgian/Dutch Christmas) and recognisable for their decorative patterns and shapes. These cookies are now usually served all year round with coffee.
"Biscoff" is the name given to Speculoos Cookies by the Belgian brand Lotus when they started to sell them internationally. So yes, Biscoff and Speculoos are the same. The only difference is that Biscoff is a branded name: all Biscoff are Speculoos, but not all Speculoos are Biscoff.
Fun fact: did you know that Biscoff stood for Bis (biscuit) - Coff (coffee), as in "a biscuit to have with coffee"?
Yes, you can absolutely substitute the soft cookie butter for a crunchy version for more texture in the brownies!
This Brownie recipe is made with Dark Chocolate and not Cacao Powder. Because most of the flavours (and texture) relies on the chocolate, try to use a good quality Cooking Chocolate when possible - with a high percentage of cacao. I used a 70% cacao Chocolate.
Also note that you should only use Cooking Chocolate - and not an eating chocolate bar or chocolate chips. These do not melt or bake as well and can create a grainy texture in your brownies.
Tips for Success
- This speculoos brownie recipe uses both white sugar and brown sugar. This gives you a great mix of chewy yet fudgy brownie. For a super super fudgy brownie, use all brown sugar. For a more chewy biscoff brownie with a nice shiny top, use all white sugar.
- Use a good quality Cooking Chocolate with a high percentage of Cacao for the best flavours and texture. Using a proper cooking chocolate is also essential here!
- Make sure to let the brownies cool down completely before removing them from the pan and/or slicing them. They are quite soft and fragile when they just come out of the oven, so they will break if you move them before they are cool.
- The texture of these biscoff brownies will change as the day go by - which is one of the reason I love this recipe so much! They will become more and more fudgy, and the chunks of chocolate in the batter will harden to give you a nice bite.
Storing and Freezing
These brownies will stay fresh for 3 to 4 days. I personally keep them at room temperature, either in an airtight container or in the baking pan covered with plastic wrap.
You can keep them in the fridge but they will become more hard as the chocolate and butter set again. I recommend re-heating them slightly before eating them so they are nice and soft again.
I do not recommend freezing these brownies.
Made this recipe?
Let us know if you liked it by leaving a comment below, and tag us on Instagram @a.baking.journey with a photo of your creation!
Recipe
Biscoff Brownies
Ingredients
Brownies Batter
- 150 gr (10 tablespoons) Unsalted Butter
- 200 gr (7 oz) Dark Cooking Chocolate, 70% chocolate recommended
- 45 gr (3 tablespoons) Biscoff Cookie Spread, or cookie butter spread
- 3 medium Eggs, at room temperature
- 75 gr (1/3 cup) Brown Sugar
- 75 gr (1/3 cup) White Caster Sugar
- 60 gr (7 1/2 tablespoons) Plain / All-Purpose Flour
- 1/3 teaspoon Fine Table Salt
- 130 gr (4,5 oz) Dark Chocolate Chunks
Brownie Toppings
- 60 gr (1/4 cup) Biscoff Cookie Spread, or cookie butter spread
- 6 Biscoff Cookies, cut in half
Instructions
Brownies Batter
- Preheat your oven on 180'C / 350' F. Generously grease and line a 23 cm / 9 inch square pan with baking paper.
- Chop the two parts of Dark Chocolate into small chunks (the first part is to melt for the batter, the second part is kept as chocolate chunks inside the batter). Keep the two parts separate.
- Place the first part of the chopped Chocolate (200 gr / 7 oz) in a heat-proof bowl along with the Butter and Biscoff Spread. Melt in the microwave in 30 seconds increments or over a double-boiler until completely smooth. Set aside to cool down.
- In a separate large mixing bowl, whisk together the Eggs, Brown Sugar and White Sugar for about 1 minute or until small bubbles appear on the surface (see note 1).
- Pour the melted Chocolate / Butter mixture into the bowl with the Eggs and Sugar and mix until just combined.
- Add the Sifted Flour and Salt and mix it in until just combined to avoid over-mixing the batter.
- Gently fold in the second part of chopped Chocolate Chunks (130 gr / 4,5 oz).
- Pour the Brownie Batter into the prepare pan and spread it around until evenly distributed.
Brownie Toppings
- Drizzle the Biscoff Spread all over the brownies (see note 2). Using a knife or skewer, swirl it around to create a swirl pattern.
- Optional: Top with the Biscoff Cookies cut in half (or kept whole) and / or crushed into Crumbs.
- Bake for 20 minutes then let the brownies cool down completely before removing from the pan and slicing them (see note 3).
Video
Would you like to save this recipe?
Notes
- Chocolate: I used a 70% chocolate for that intense chocolate flavour. You can use a less strong chocolate but I don't recommend using milk chocolate here as the brownies are rather sweet on their own. Make sure to use proper cooking chocolate - not eating chocolate or chocolate chips.
- Sugar: this recipe uses both white sugar and brown sugar for a super fudgy brownie with slightly chewy edges and shiny top. For a super super fudgy brownie, use all brown sugar. For a more chewy biscoff brownie with a nice shiny top, use all white sugar.
- The longer you whisk the eggs and the sugars, the shiner the crust will be but I've found that it also makes the cake less fudgy as the air bubbles will make the brownies rise in the oven.
- If needed, melt it in the microwave first so that it is very fluid.
- It is very important to let the brownies cool down first. They will be quite soft and fragile when they just come out of the oven, so they might fall apart or break if you try to slice / move them when still warm.


Comments
No Comments