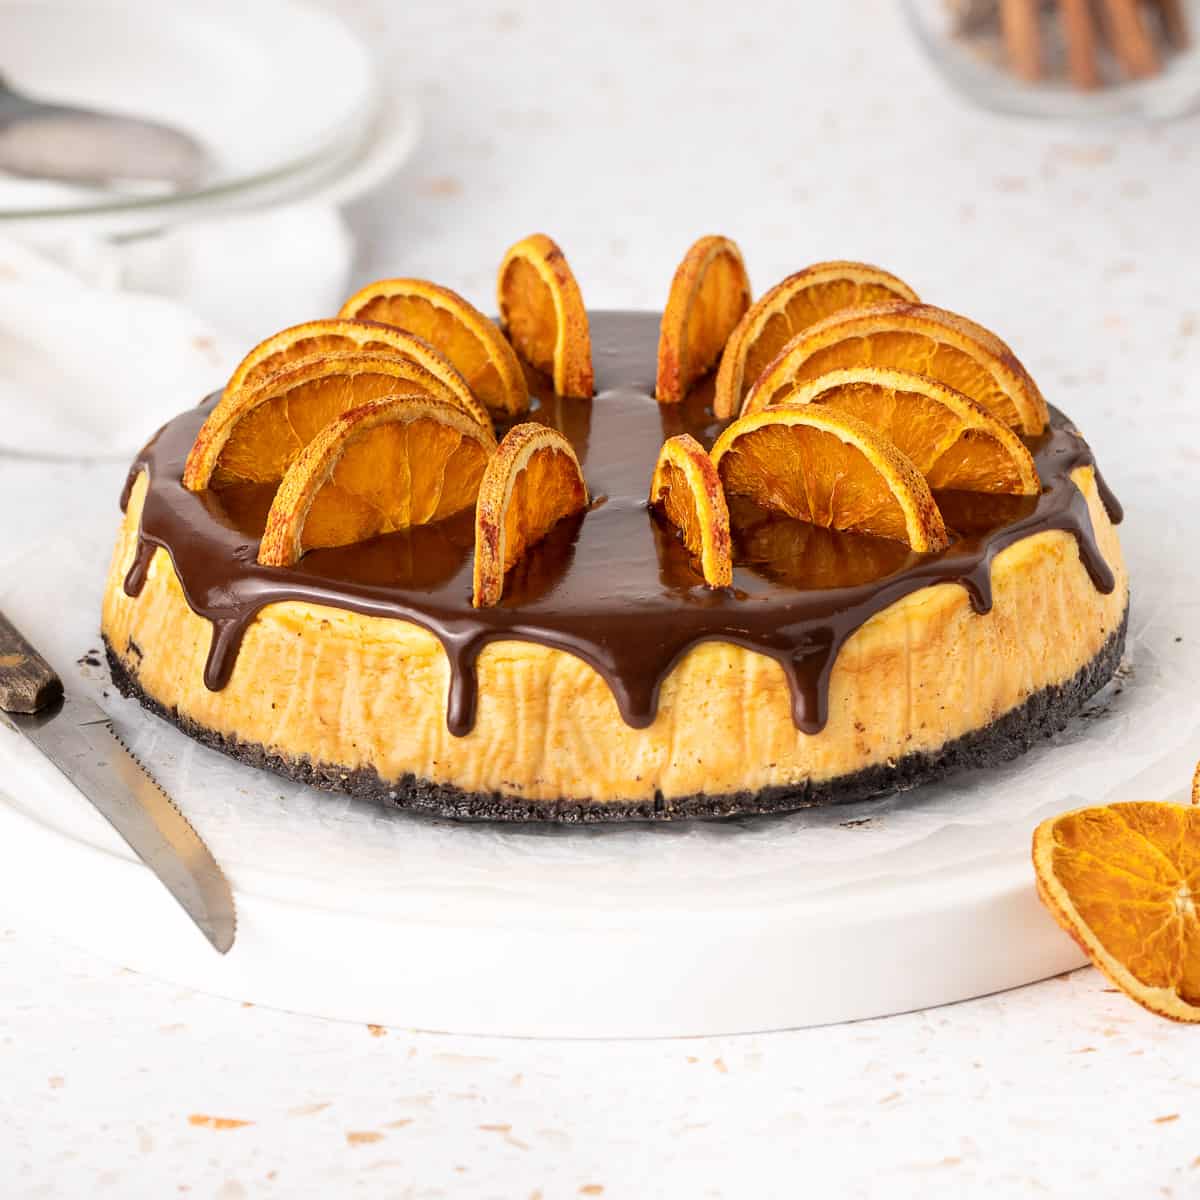
This Chocolate Orange Cheesecake recipe combines an Oreo Cookie Crust, a creamy Orange Cheesecake Filling and decadent Dark Chocolate Ganache Topping. It is the perfect dessert to serve for the Holidays or a special occasion!
Jump to:
Why we love this recipe
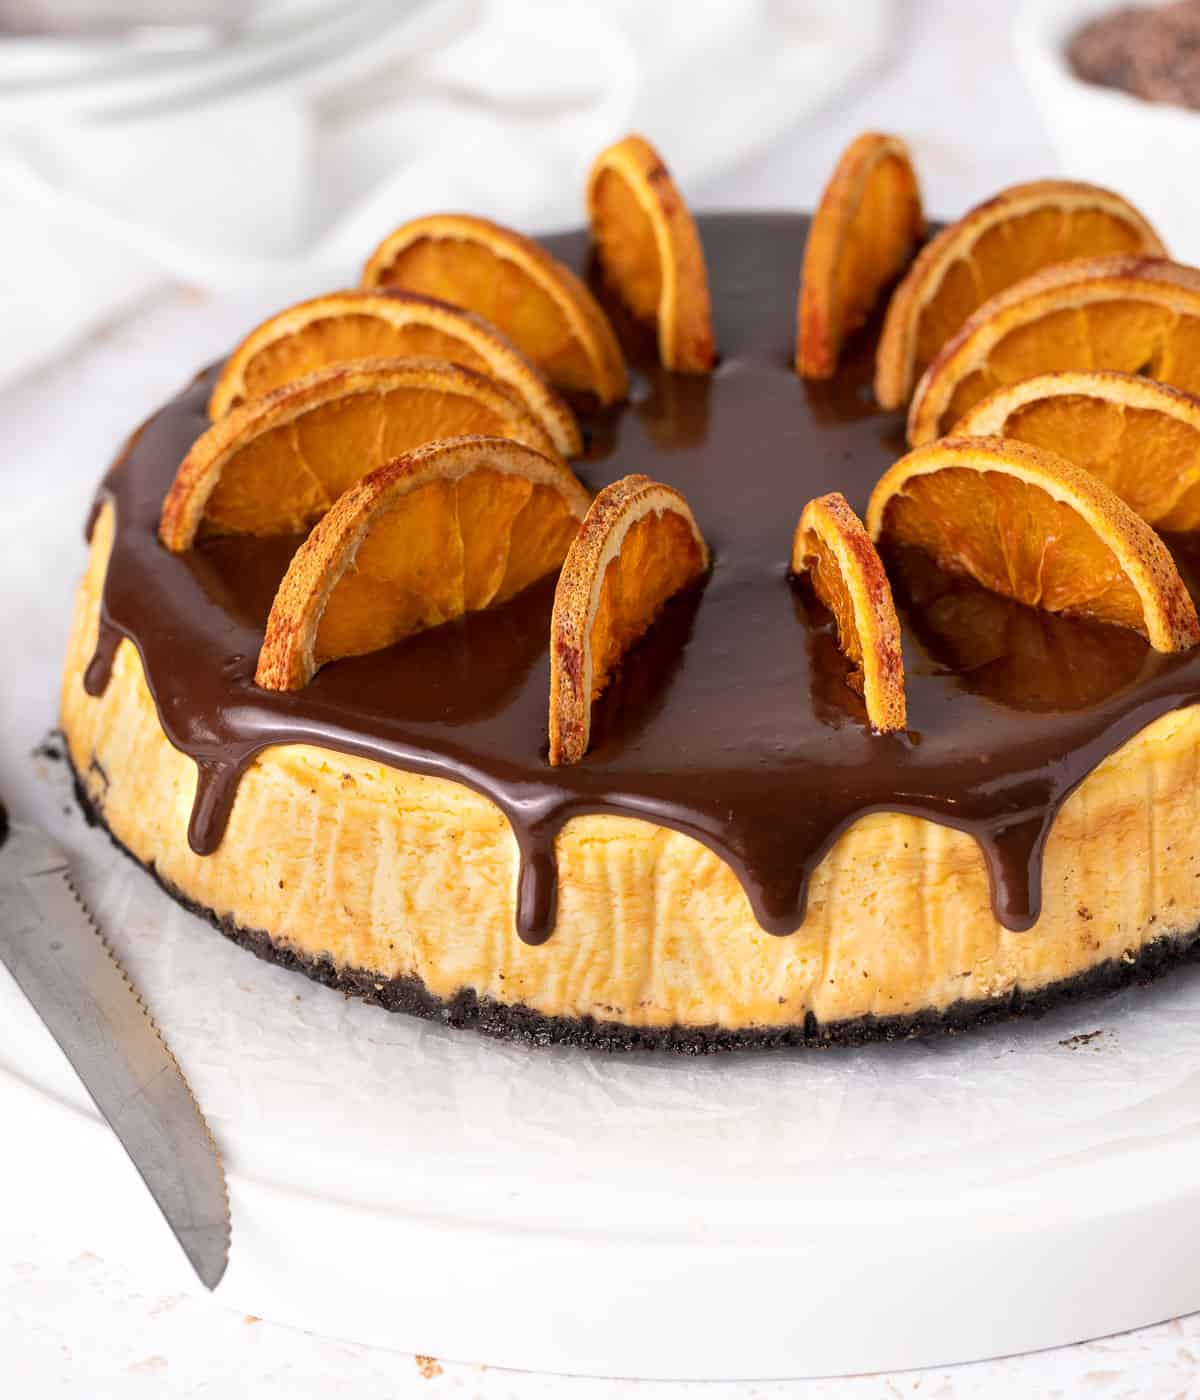
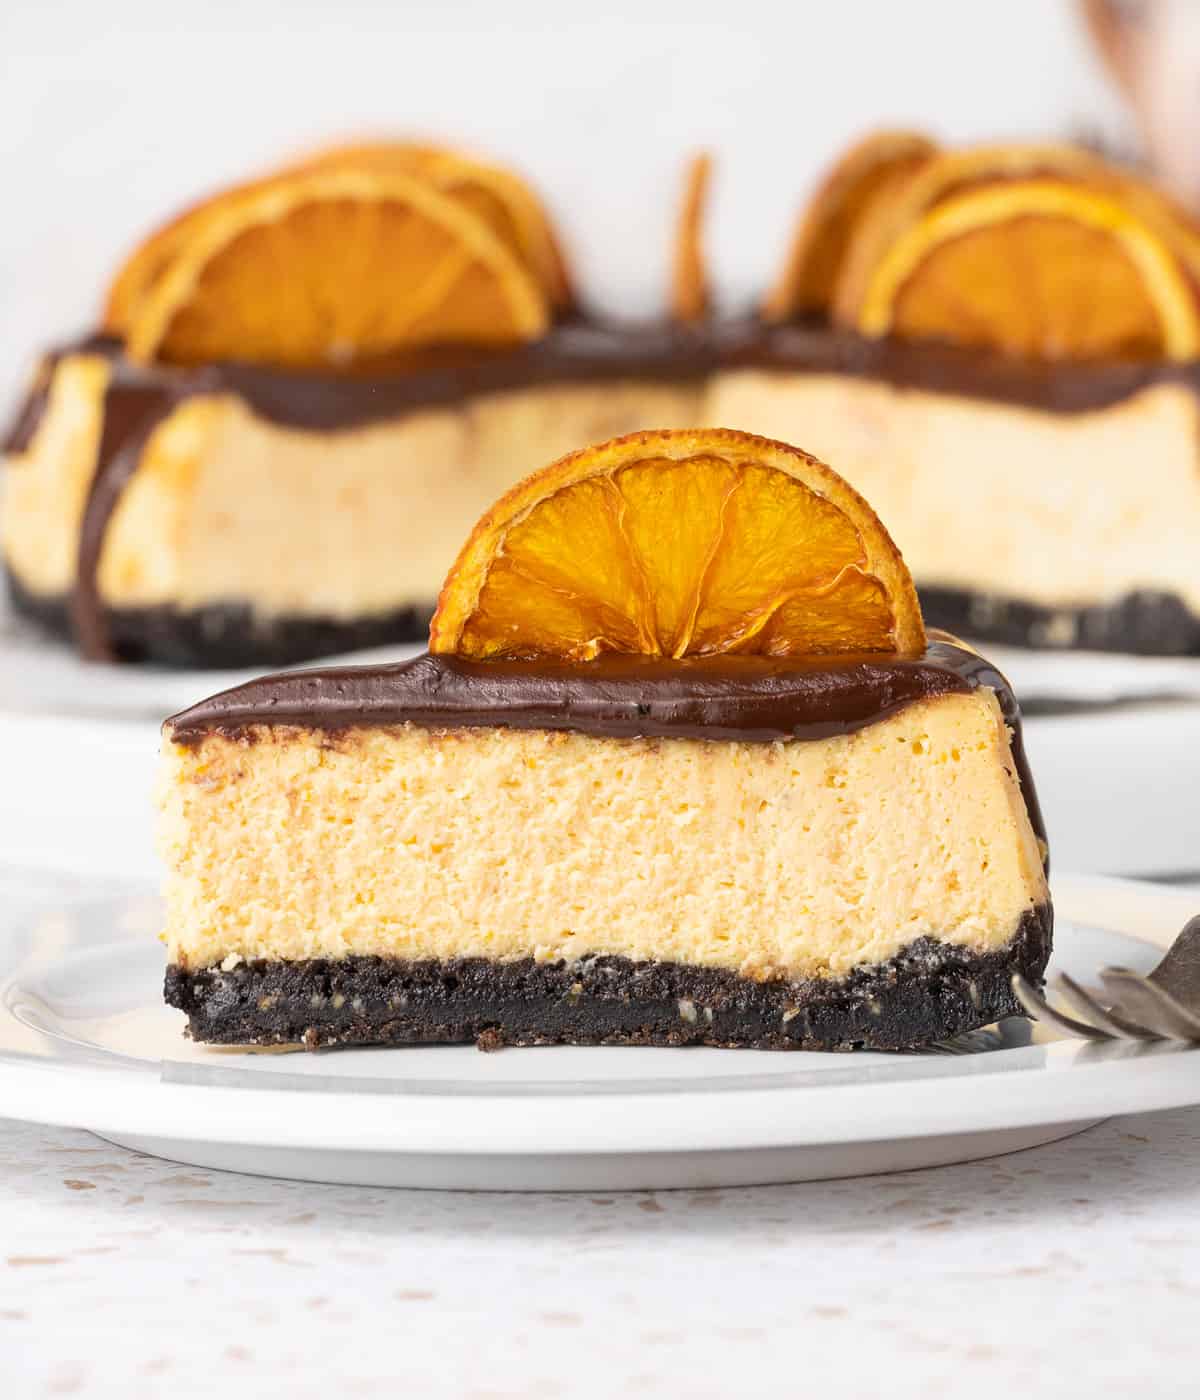
If you love the combination of intense Dark Chocolate and fresh Orange flavour, you will love this Chocolate Orange Cheesecake! The orange cheesecake is made with an Oreo cookie crust, topped with melted chocolate and finished with dehydrated orange.
This cheesecake is creamy and silky, fresh but decadent and has a delicious crunchy base. It is a great dessert to prepare for a special occasion, festive dinner and Holidays or just as a great every day dessert!
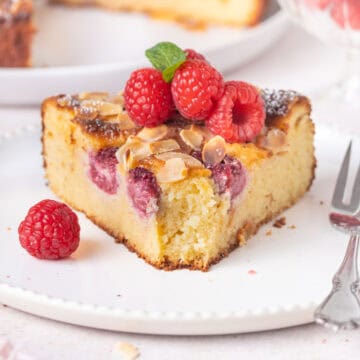
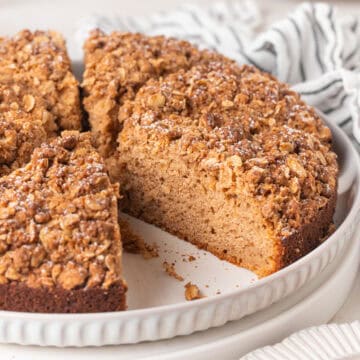
More Chocolate Orange Recipes
Ingredients
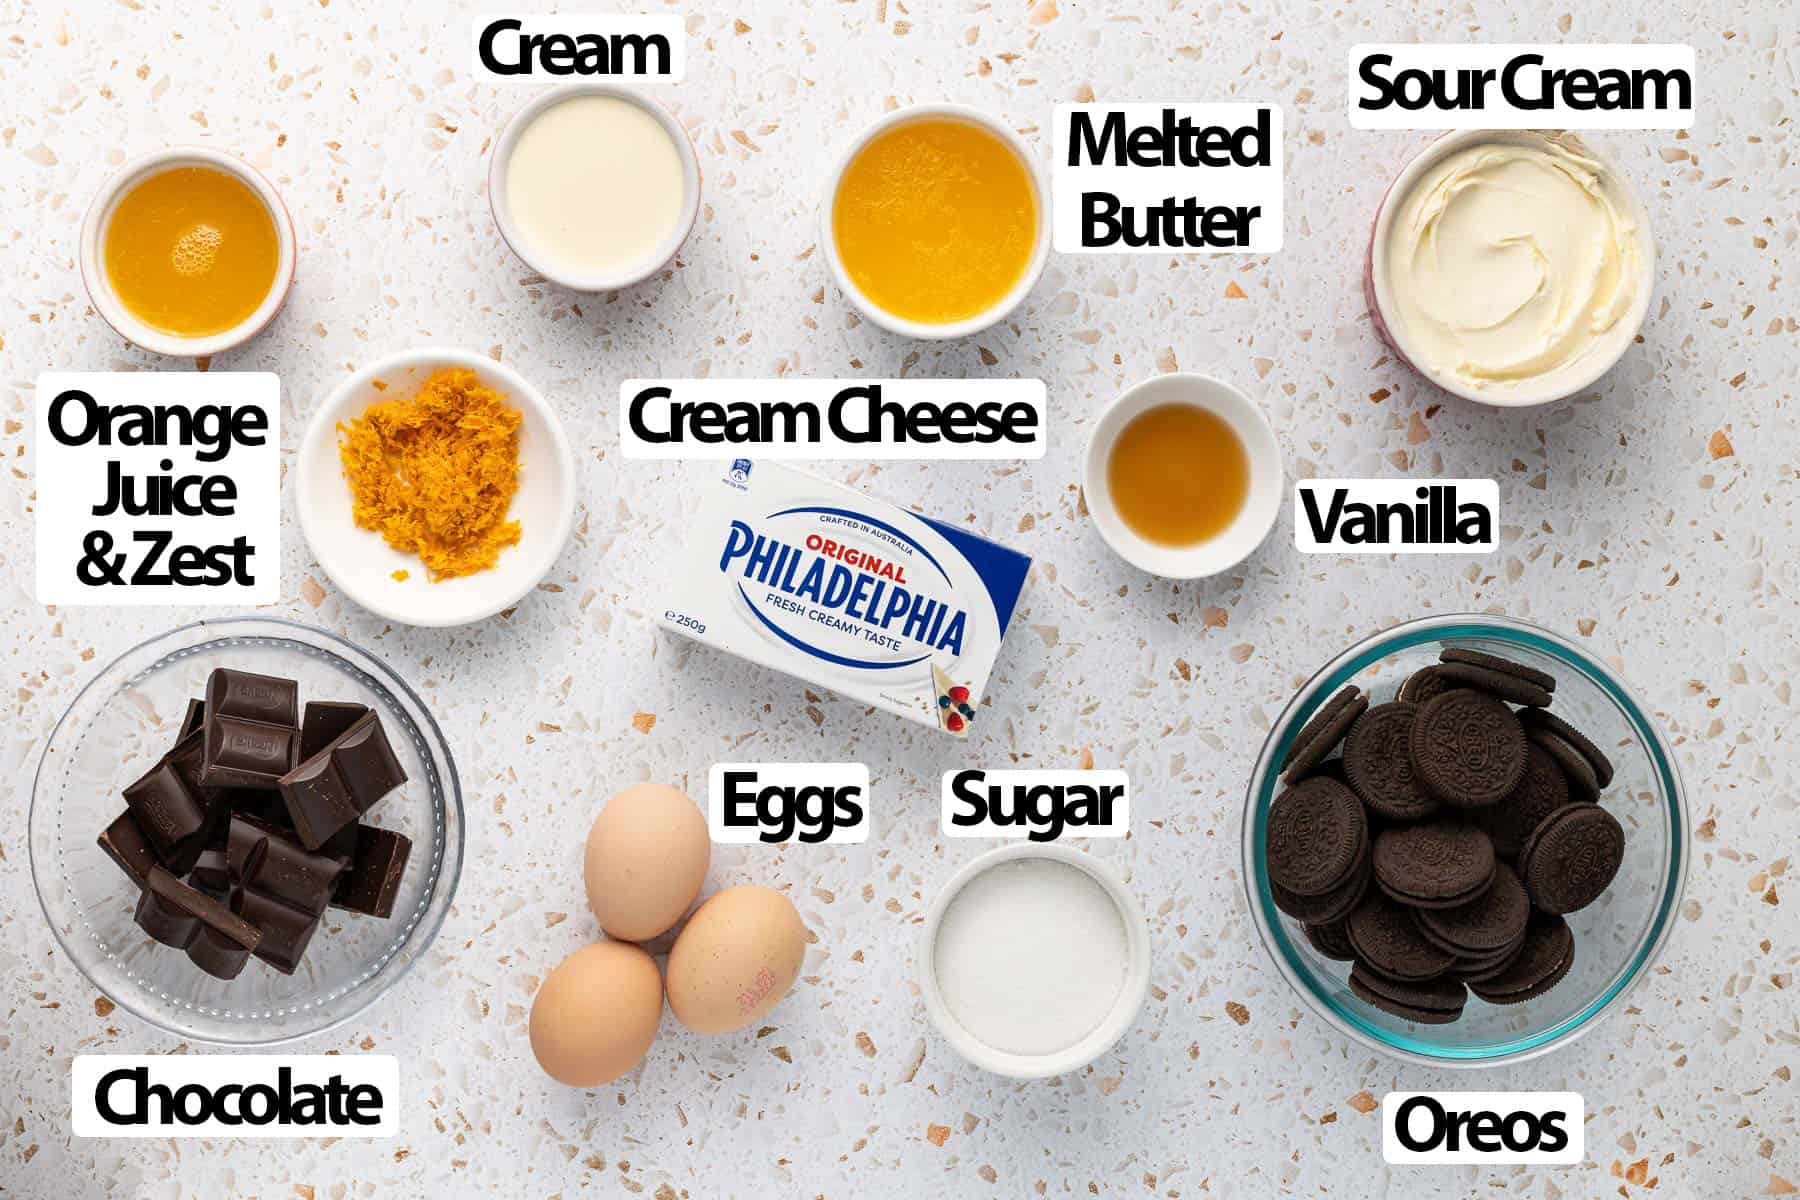
Scroll down to recipe card below for all quantities
For the Crust:
- A simple mix of crushed Oreo Cookies and Melted Butter. You can use graham cracker crumbs instead of Oreos if preferred but I personally love the additional chocolate flavour the Oreos bring.
For the Orange Cheesecake:
- Cream Cheese: use Full Fat Cream Cheese for the best flavours and textures. It is really important for the cream cheese to be soft and at room temperature.
- Sour Cream: soft and at room temperature.
- Eggs: Medium to large size egg, at room temperature. Make sure they don't come straight from the fridge.
- Orange: both the Zest and the Juice of fresh Oranges. Use organic orange (or well washed oranges) if you can since we are using a lot of zest here.
- Vanilla Extract: used for some extra flavours. You could also use some Orange Extract instead if preferred.
For the Chocolate Ganache:
- A classic mix of Dark Cooking Chocolate and Thickened / Heavy Cream (Double Cream). I also used a little bit of Honey for extra sweetness and smoothness in the ganache but that is optional, especially if using a chocolate that is not too strong.
How to make Orange Chocolate Cheesecake
Oreo Crust
The first step is to prepare the Oreo Biscuits Crust that will need to chill in the freezer.
- Melt the Butter until liquid and set aside to cool down.
- Prepare a 22 cm / 9-inch Springform pan. Line the bottom with baking paper / parchment paper. Lightly grease the sides and optionally line them with strips of baking paper.
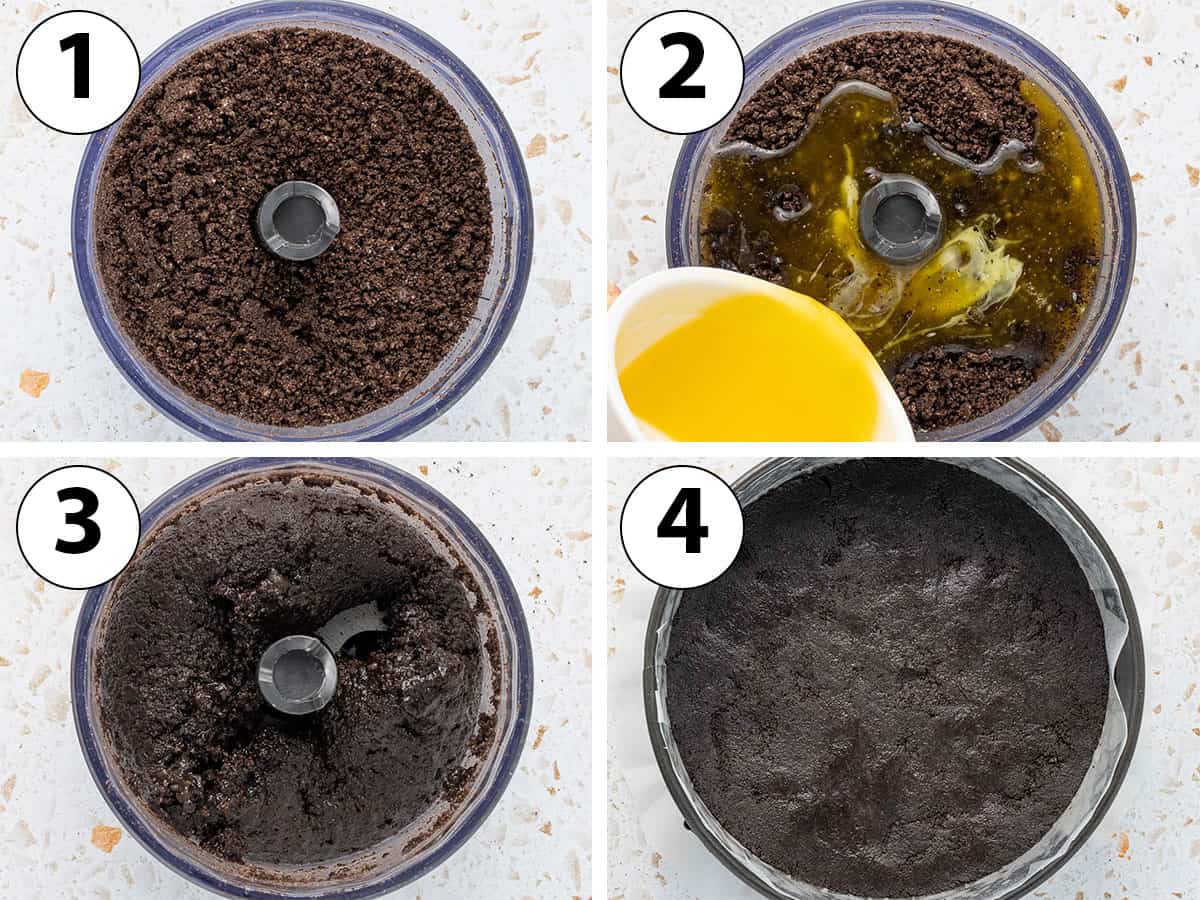
- Photo 1: Crush the Oreo Cookies until you get fine crumbs. I used a small blender / food processor, but you could also crush them inside a freezing bag or plastic bag with a rolling pin if preferred. Make sure no large chunks of cookies are left.
- Photo 2: Add the Melted Butter.
- Photo 3: Blend until you get a thick paste that resembles wet sand.
- Photo 4: Transfer the crumbs into the prepared Springform Pan. Using the back of a spoon or cup, firmly press to pack the crumbs into an even layer. Place in the freezer.
Orange Cheesecake Filling
Would you like to save this recipe?
While the crust is chilling, let's prepare the orange filling.
- Preheat your oven on 140 degrees Celsius / 285 degrees Fahrenheit.
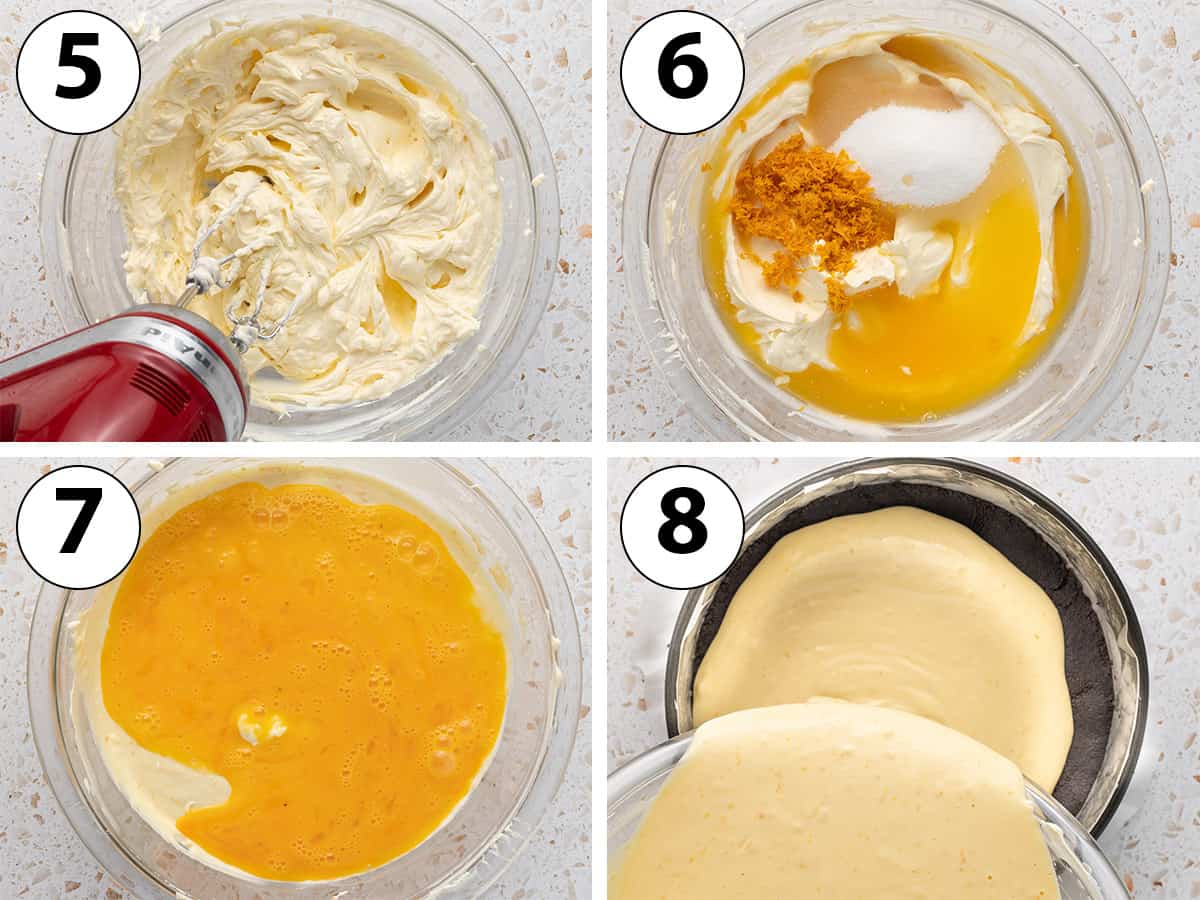
- Photo 5: Place the Cream Cheese and Sour Cream (both soft and at room temperature) in a large bowl if using a hand-held electric mixer or the bowl of a stand mixer fitted with the paddle attachment. Mix for a few minutes until completely smooth and no lumps remain at all. Stop to scrape the bowl if required.
- Photo 6: Add the Sugar, Orange Zest and Orange Juice. Slowly mix to combine.
- Photo 7: Add in the Eggs (preferably pre-whisked together) and very slowly stir until you get a smooth mixture. Make sure to not over-mix the batter to avoid creating air bubbles.
- Photo 8: Take the Springform Pan out of the freezer and pour the Cream Cheese Mixture over it.
- Tap the springform pan over a hard surface a few times to pop any air bubbles.
- Place on the lowest rack of your oven and bake for 60 to 70 minutes. The centre of the cheesecake should will still be very slightly jiggly but the edges should be fully set.
No water bath is required here! If the cheesecake seems to be browning too quickly, lower the temperature or cover the tin with aluminium foil.
- Turn off the oven, slightly open the oven door (I use a wooden spoon to keep the door slightly open) and leave to cool down inside the oven for 1 hour.
- Take out of the oven and continue to cool down at room temperature for 1 hour, then in the fridge for at least 2 hours or preferably overnight.
Slowly cooling down the orange chocolate cheesecake is key to avoid any cracks.
Chocolate Ganache Topping
Once the orange cheesecake has fully set is chilled, you can start preparing the ganache topping.
- Remove the chilled cheesecake from the springform tin and place on a serving plate.
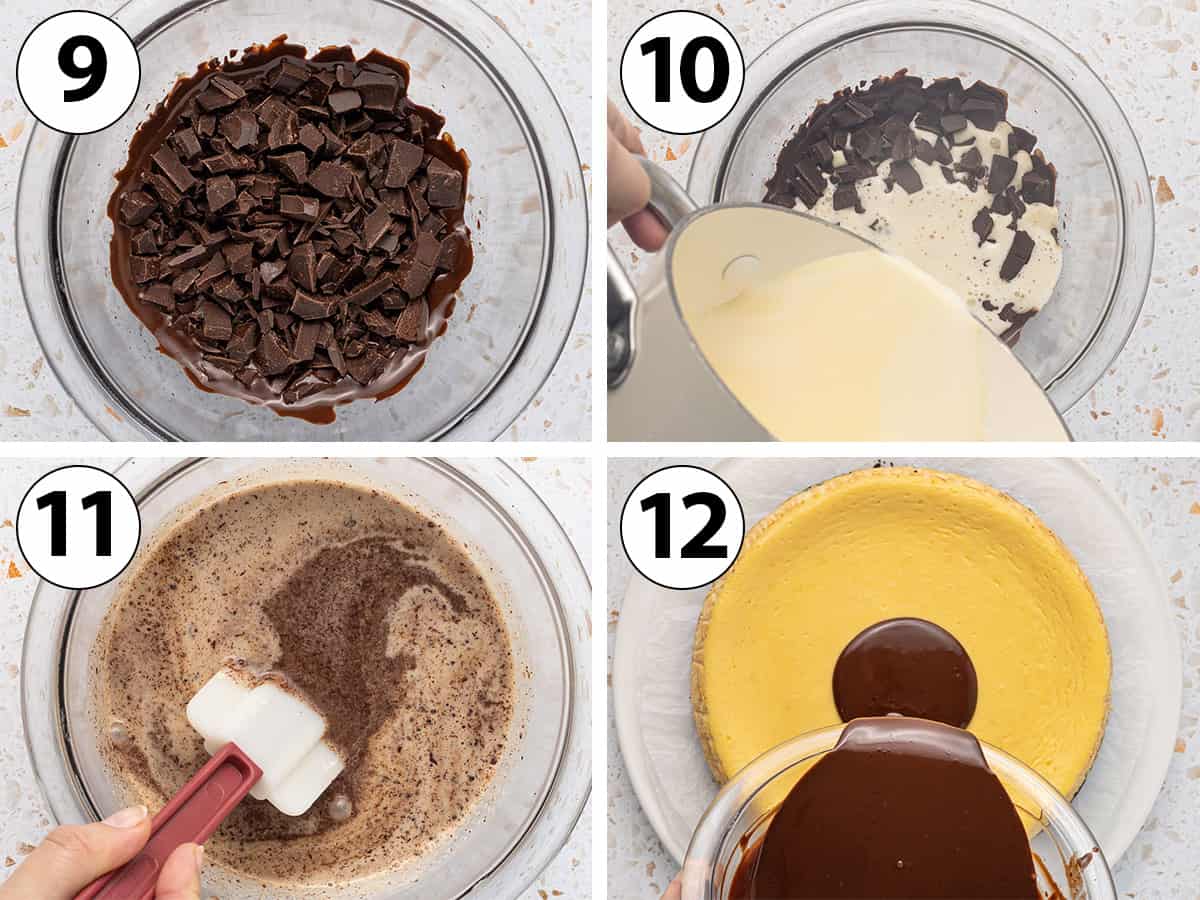
- Photo 9: Finely chop the Dark Chocolate and place it in a medium bowl that is heat-proof. Place in the microwave for 30 seconds to 1 minutes or until the bottom of the chocolate has started to melt. No need to fully melt it here.
- Photo 10: Put the Cream and Honey in a small saucepan. Stir in low heat until the honey has melted and the mixture starts to simmer.
- Photo 11: Pour the hot cream over the semi-melted chocolate. Leave for a couple of minutes then gently stir with a heat-proof spatula. Continue to stir in a circular motion until you get a completely smooth, shiny ganache.
- Photo 12: Directly pour the warm, fluid ganache over the orange cheesecake. Slightly spread it around using the back of a spoon or small offset spatula to bring it towards the edges of the cake. Optionally, slightly push the ganache off the side to create a drip effect.
- Before the chocolate has started to set, decorate with your favourite garnish.
- Keep in the fridge until ready to serve.
Recipe FAQs
Using a good quality Cooking Chocolate (usually in the form of a bar) or Couverture Chocolate will give you the best results. Avoid using eating chocolate bar or chocolate chips that will not melt smoothly. I used an intense 70% Chocolate but you can choose any of your favourite chocolate here.
This recipe was designed to be baked without a water bath, which I personally find much easier! The trick is to bake the cheesecake at a very low temperature on the lowest part of your oven to get a delicious creamy texture without the use of a water bath.
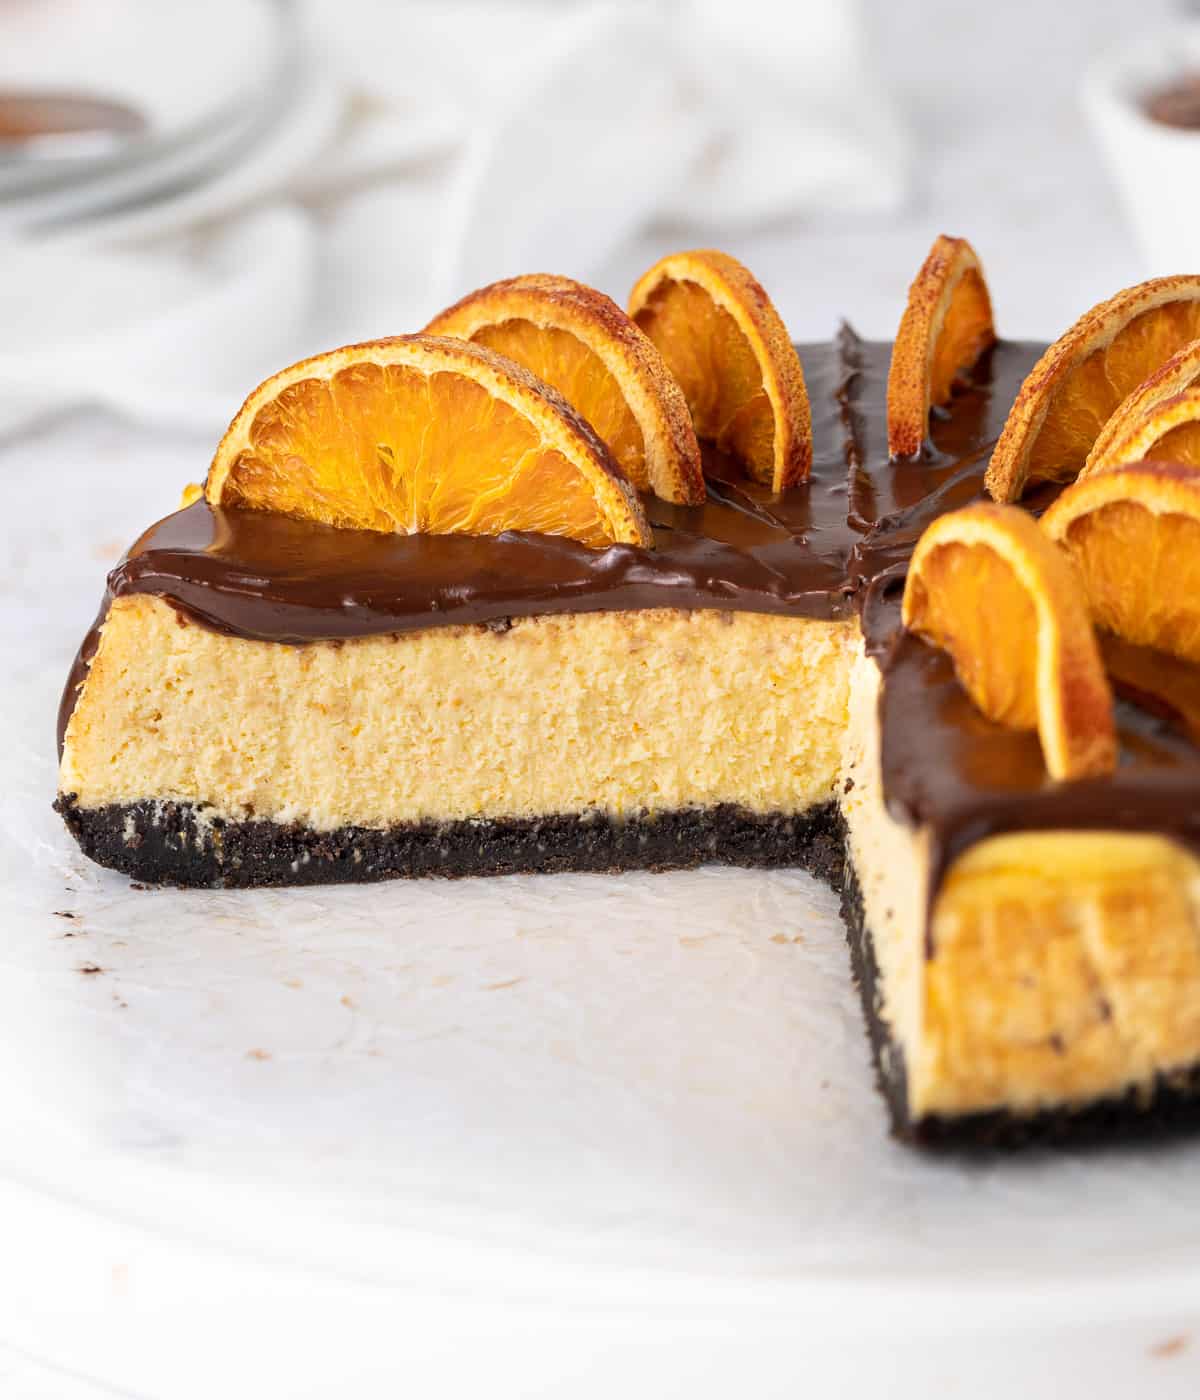
I used dehydrated oranges slices to finish the chocolate orange cheesecake. They can be found in the store or simply made by slowly baking orange slices in the oven.
Alternatively, you could also finish the cheesecake with some Orange Zest, fresh Orange Slices / Segments or even some Terry's Chocolate Oranges.
Tips to make the perfect Baked Cheesecake
- Make sure all the ingredients for the cheesecake filling are at room temperature. It is especially important for the cream cheese, sour cream and eggs. If too cold, you will find lumps of unmixed cream cheese in the cheesecake.
- Don't over-mix the Eggs. Mixing the eggs into the cream cheese mixture will create air bubbles that will make the cake rise in the oven then collapse, creating cracks.
- Bake low and slow. Because we are not using a water bath, it is important to use a low baking temperature, bake on the lowest rack of the oven and for a long time. This will allow for the cheesecake to bake completely without any cracks or browning on the surface.
- Gradually cool down the cheesecake, first in the turned off oven, then at room temperature and finally in the fridge. An abrupt change of temperature will make the cheesecake sink and crack.
Storing & Freezing
This orange and chocolate cheesecake is best served within 24 hours but can be kept in the fridge for up to 3 days. Cover the cheesecake with plastic wrap to keep it fresh, or store individual slices in an airtight container.
The base of the cheesecake (without the ganache topping) can be frozen although I recommend serving it fresh for the best texture.
Made this recipe?
Let us know if you liked it by leaving a comment below, and tag us on Instagram @a.baking.journey with a photo of your creation!
Recipe

Chocolate Orange Cheesecake
Ingredients
Oreo Crust
- 200 gr (7 oz) Oreo Cookies, about 20 cookies
- 75 gr (5 tablespoons) Unsalted Butter, melted
Orange Cheesecake Filling
- 500 gr (18 oz) Cream Cheese, soft, at room temperature
- 80 gr (1/3 cup) Sour Cream, soft, at room temperature
- 120 gr (1/2 cup) Caster Sugar
- 1 tablespoon Orange Zest, about 2 large oranges
- 80 ml (1/3 cup) Orange Juice
- 1 1/2 teaspoon Vanilla Extract
- 3 large Eggs, at room temperature
Chocolate Ganache
- 120 gr (4 oz) Dark Cooking Chocolate, finely chopped
- 150 ml (1/2 cup + 2 tablespoons) Heavy / Thickened Cream
- 15 gr (1 tablespoon) Honey, optional
Instructions
Oreo Crust
- Line the bottom of a 22 cm / 9-inch Springform pan with baking paper / parchment paper. Lightly grease the sides and optionally line them with strips of baking paper.
- Place the Oreo Cookies in a small blender / food processor and blend until you get very fine crumbs and no large chunks remain. Alternatively, crush them inside a freezing bag or plastic bag with a rolling pin.
- Add the Melted Butter and blend until you get a thick paste that resembles wet sand.
- Transfer the crumbs into the prepared Springform Pan. Spread the crumbs around then firmly press with the back of a spoon or cup to pack the crumbs into an even layer.
- Place in the freezer.
Orange Cheesecake Filling
- Preheat your oven on 140 degrees Celsius / 285 degrees Fahrenheit.
- In a large mixing bowl (if using a hand mixer) or the bowl of a stand mixer fitted with the paddle attachment, mix the very soft room temperature Cream Cheese and Sour Cream (see note 1) until completely smooth and no lumps remain.
- Add the Sugar, Orange Zest, Orange Juice and Vanilla. Slowly mix to combine, stopping to scrape the bowl when required.
- Add in the Eggs (preferably pre-whisked together) and very slowly stir until you get a smooth mixture. Stop as soon as combined to avoid creating air bubbles (see note 2).
- Take the Springform Pan out of the freezer and pour the Cream Cheese Mixture over it. Tap the pan over a hard surface a few times to pop any air bubbles.
- Place on the lowest rack of your oven and bake for 60 to 70 minutes. The centre of the cheesecake should will still be very slightly jiggly but the edges should be fully set (see note 3).
- Turn off the oven, slightly open the oven door (use a wooden spoon to keep it open) and leave the cheesecake to cool down inside the oven for 1 hour. Take out of the oven and leave at room temperature for 1 hour, then transfer in the fridge for at least 2 hours or overnight (see note 4).
Chocolate Ganache
- Remove the chilled cheesecake from the springform pan and place on a serving plate.
- Finely chop the Cooking Chocolate and place in a heat-proof bowl. Place in the microwave for 30 seconds to 1 minutes or until the bottom of the chocolate has started to melt slightly.
- Place the Cream and Honey (optional) in a small saucepan and heat on low until the honey has melted and the cream starts to simmer.
- Pour the hot cream over the partially melted chocolate and leave for 2 minutes. Using a silicone spatula, gently stir in a circular motion to mix the chocolate and cream until you get a smooth, shiny ganache (see note 5).
- Directly pour the warm ganache over the cheesecake. If required, use the back of a spoon or small offset spatula to spread it around towards the edges of the cheesecake. Optionally, slightly push the ganache off the side of the cake to create a drip effect.
- Before the chocolate has started to set, decorate with your favourite garnish such as dehydrated oranges, orange zest or Terry's Chocolate Oranges.
- Keep in the fridge until ready to serve.
Would you like to save this recipe?
Notes
- It is very important for the ingredients to be at room temperature. If too cold, you will find lumps of unmixed cream cheese in the cheesecake.
- Over-mixing the eggs into the cream cheese mixture will create air bubbles that will make the cake rise in the oven then collapse, creating cracks.
- If the cheesecake seems to be browning too quickly, lower the temperature or cover the tin with aluminium foil.
- Gradually cool down the cheesecake, first in the turned off oven, then at room temperature and finally in the fridge. An abrupt change of temperature will make the cheesecake sink and crack.
- If you had not chopped the chocolate, it is possible that you will still find small chunks of unmelted chocolate. If this happens, place the heat-proof bowl over a double-boiler or in the microwave for 30 seconds to finish melting the chocolate.