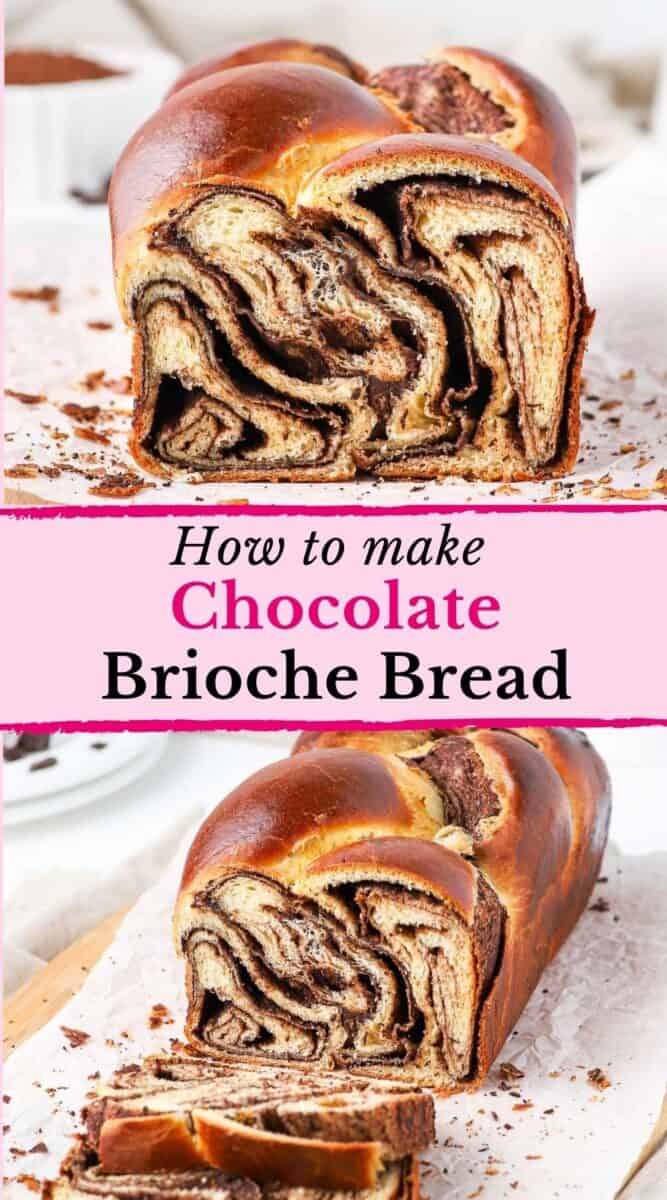
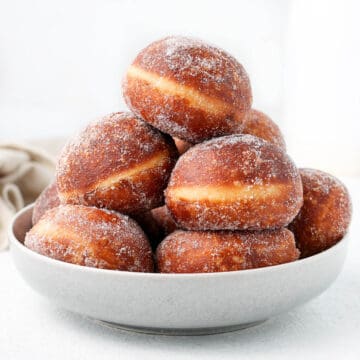
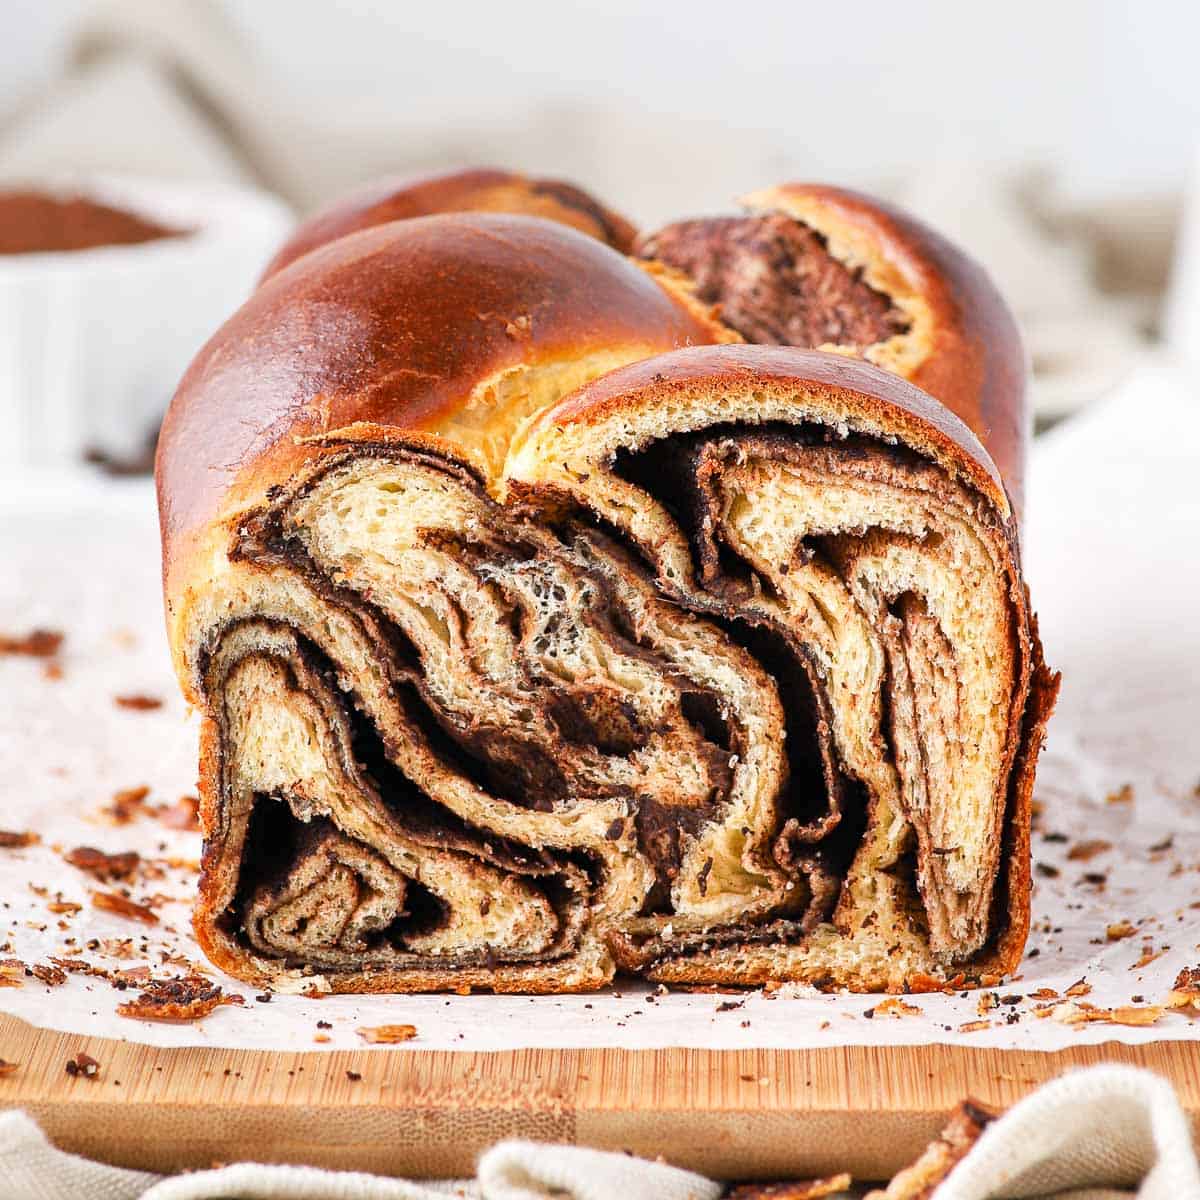
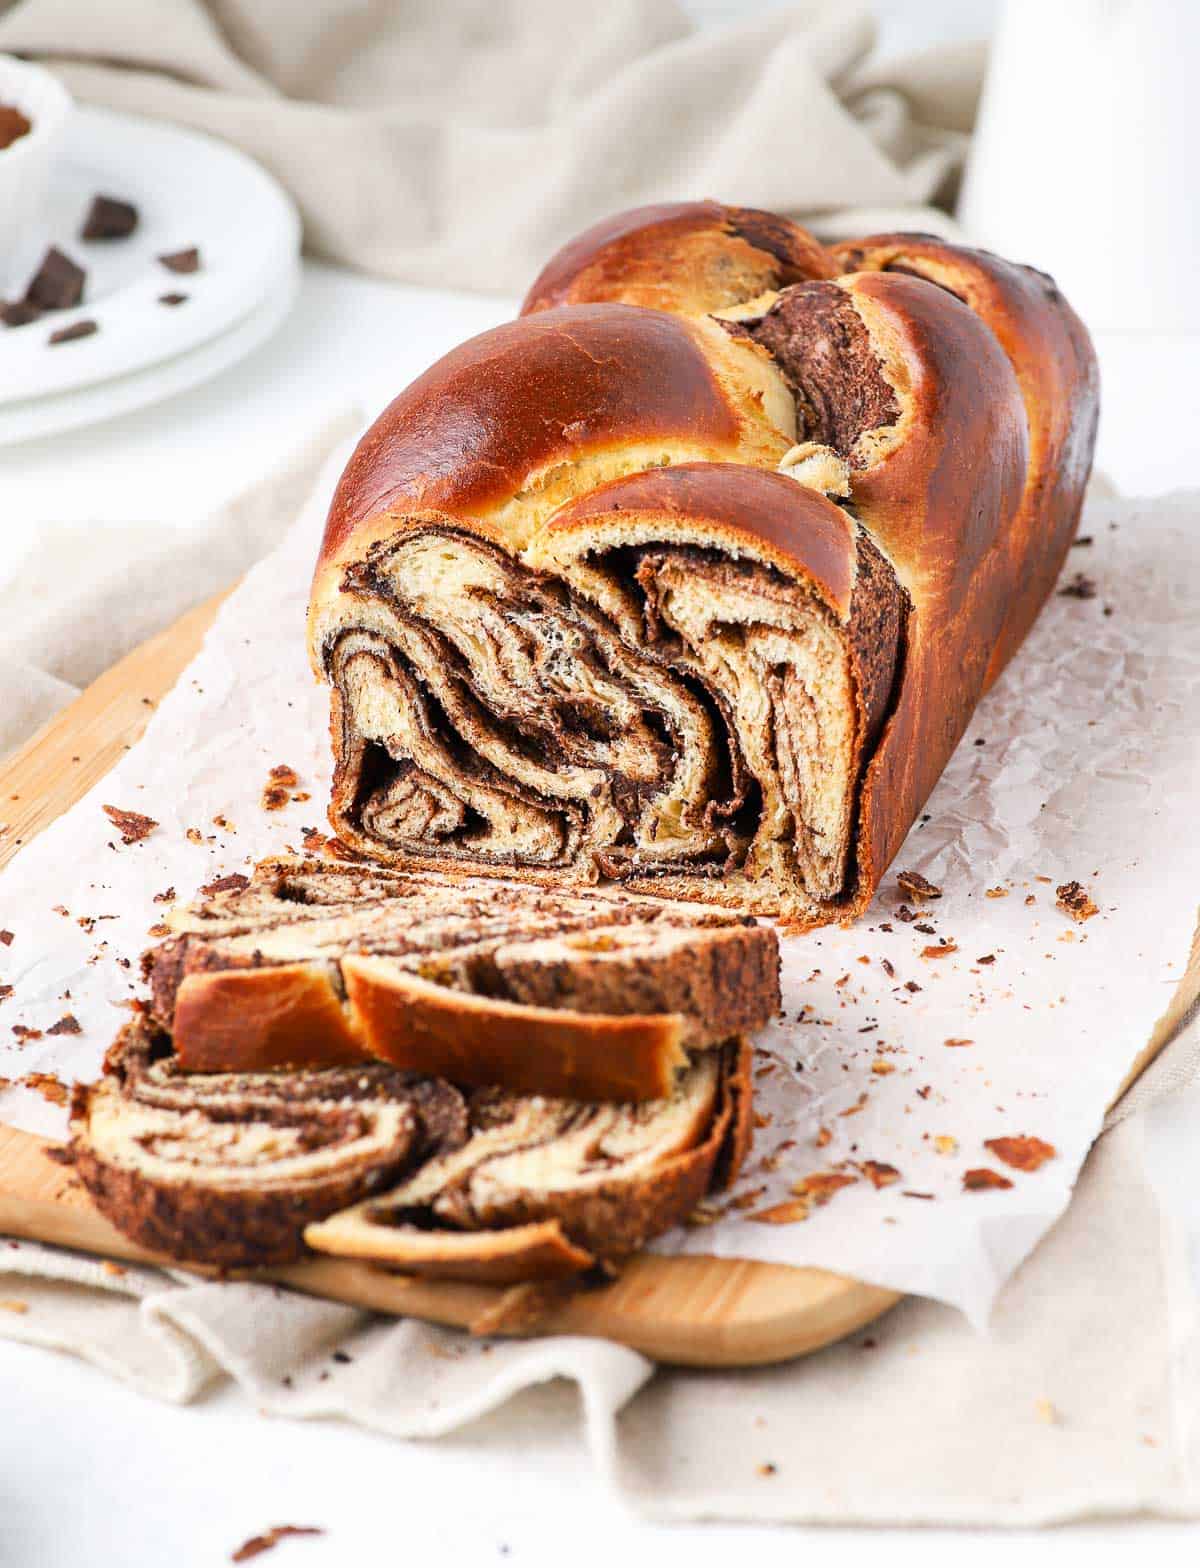
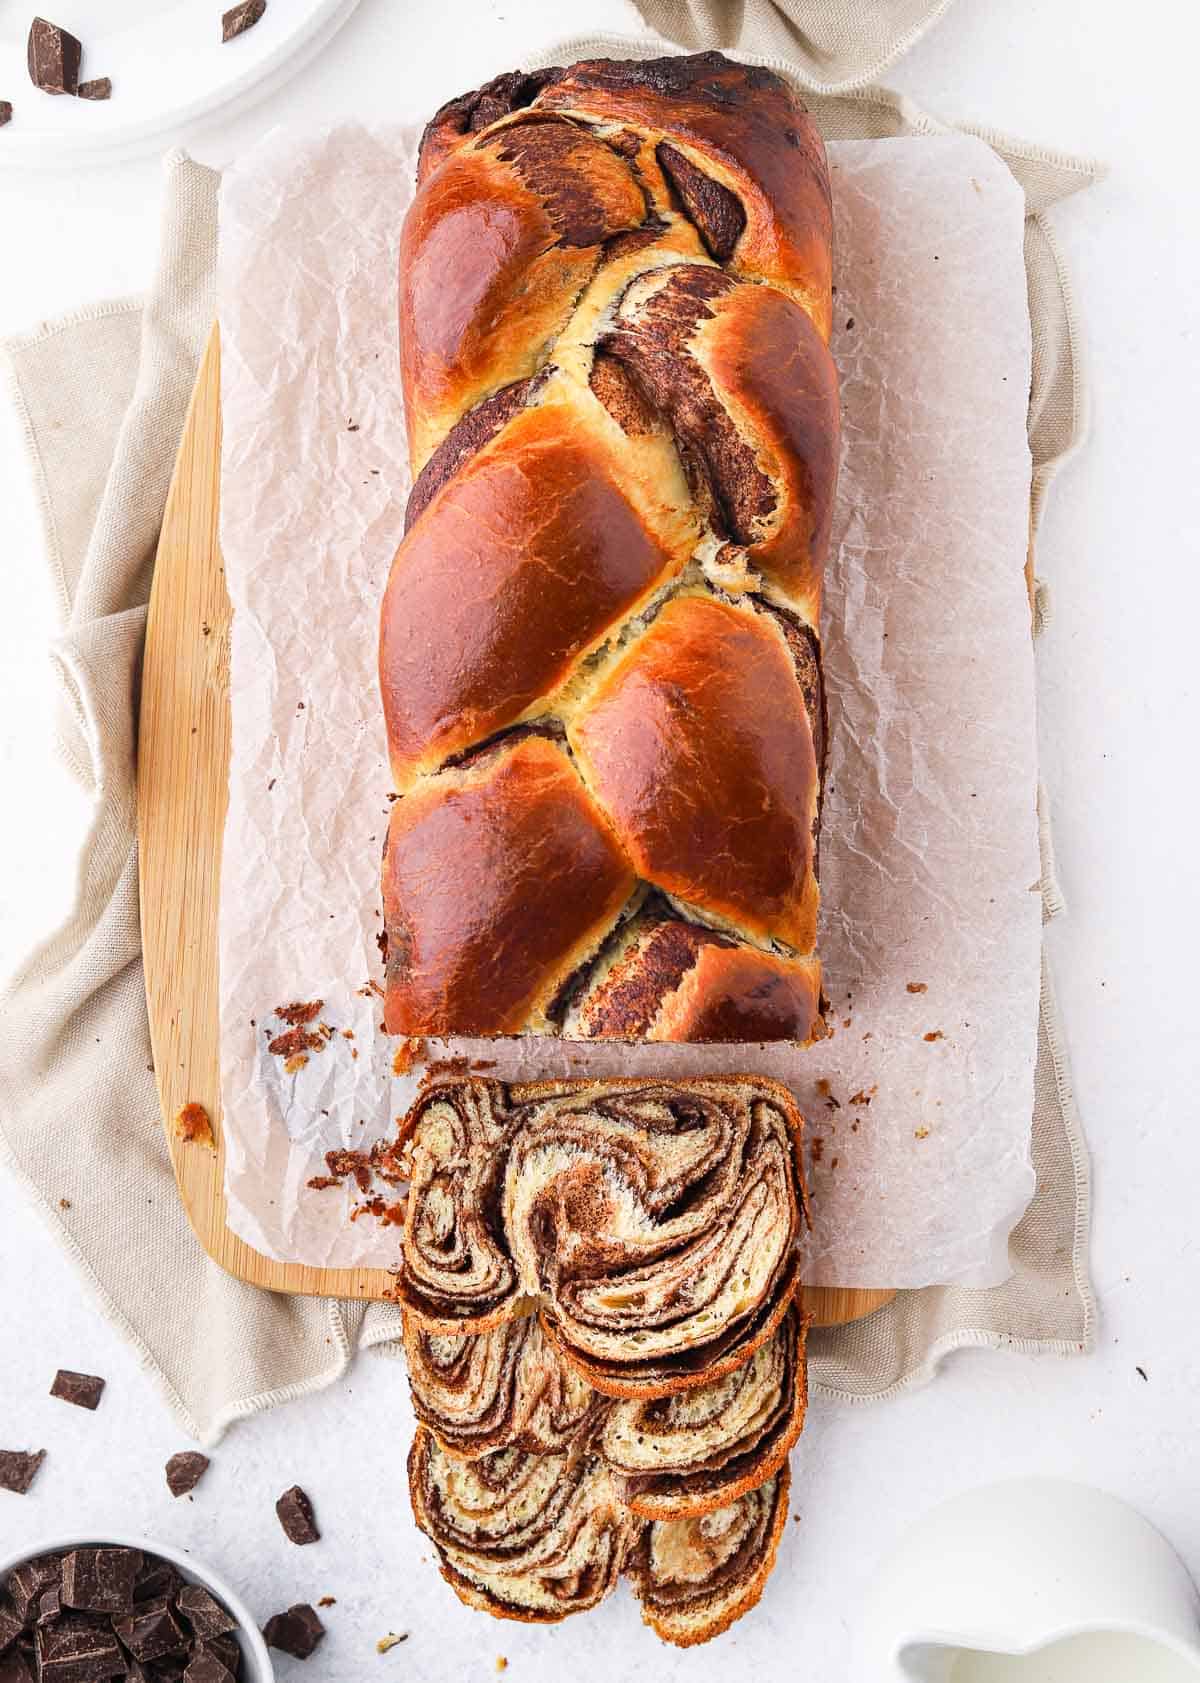
This Chocolate Brioche Bread is deliciously buttery, chocolatey and indulgent. The classic buttery French Brioche is filled with a decadent Chocolate Filling then braided to create beautiful swirls of chocolate.
Jump to:
Why we love this recipe
Is there any ways to make a buttery Brioche bread better than it already is? Fill it with layers and layers of dark chocolate, of course! This Brioche with Chocolate Swirl Filling is incredibly indulgent and morish.
This sweet bread is a delicious mix between my Chocolate Chip Brioche, my Chocolate Cinnamon Rolls and this Cinnamon Babka: a classic Brioche Dough thinly rolled and filled then braided to get a beautiful swirl of chocolate.
Don't be intimidated by this recipe - this chocolate brioche is actually easier to make than you think! It is perfect for a decadent breakfast (think Christmas breakfast!) or afternoon tea. It can be made ahead and will stay fresh for a few days.
Ingredients
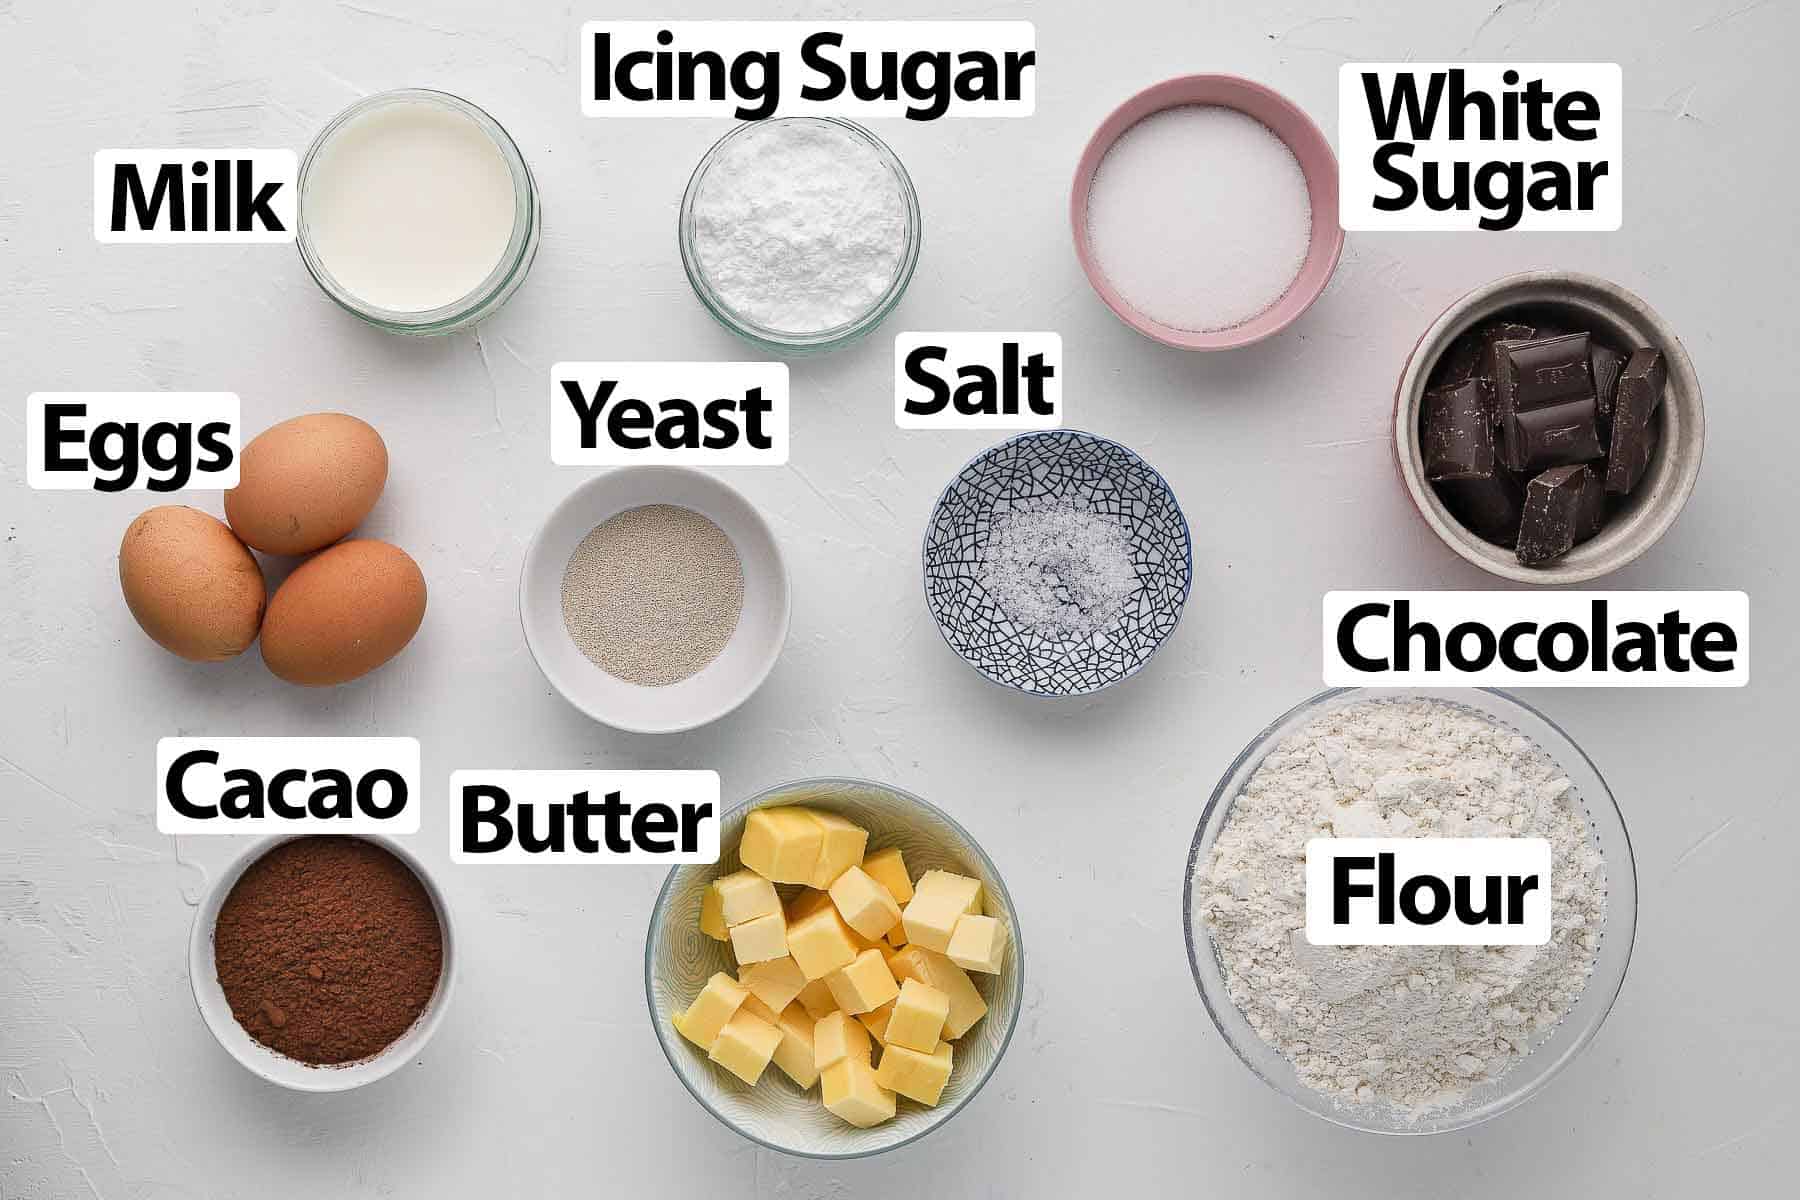
This chocolate brioche loaf combines two separate elements: the classic Brioche Dough and the Chocolate Filling (scroll down to recipe card for all quantities).
For the Brioche Dough:
- Milk: use Full Cream / Whole Milk for the best flavour and texture. The milk needs to be lukewarm to help the yeast develop. Make sure it is not too hot though or it might kill the yeast.
- Sugar: Caster Sugar (or fine white granulated sugar). It is divided in two - the first part goes in the milk and the second part with the flour.
- Yeast: I used Instant (dry) Yeast, which technically does not require to be bloomed (rehydrated) first. You could use Active Dry Yeast instead since we are rehydrating the yeast with the milk first anyway.
- Eggs: medium size, at room temperature.
- Flour: Plain / All Purpose Flour. This is one of the particularity of brioche bread, it can be made with plain flour instead of bread flour for a more tender result. It will also work with bread flour.
- Butter: Unsalted, very soft and cut into small cubes. If not soft enough / at room temperature, it will be hard to incorporate into the dough.
For the Chocolate Filling:
- Chocolate: I used a 70% Dark Chocolate, but you could use a less dark one if preferred. Make sure to use proper cooking chocolate and not eating chocolate or the filling might get grainy when baked.
- Butter: unsalted.
- Icing Sugar: well sifted to avoid lumps.
- Cacao Powder: Unsweetened Natural Cocoa Powder, also sifted.
You can also customise the filling with the addition of a little bit of cinnamon, some chocolate chunks or even orange zest for example!
How to make Braided Chocolate Brioche step-by-step
Preparing the Brioche Dough
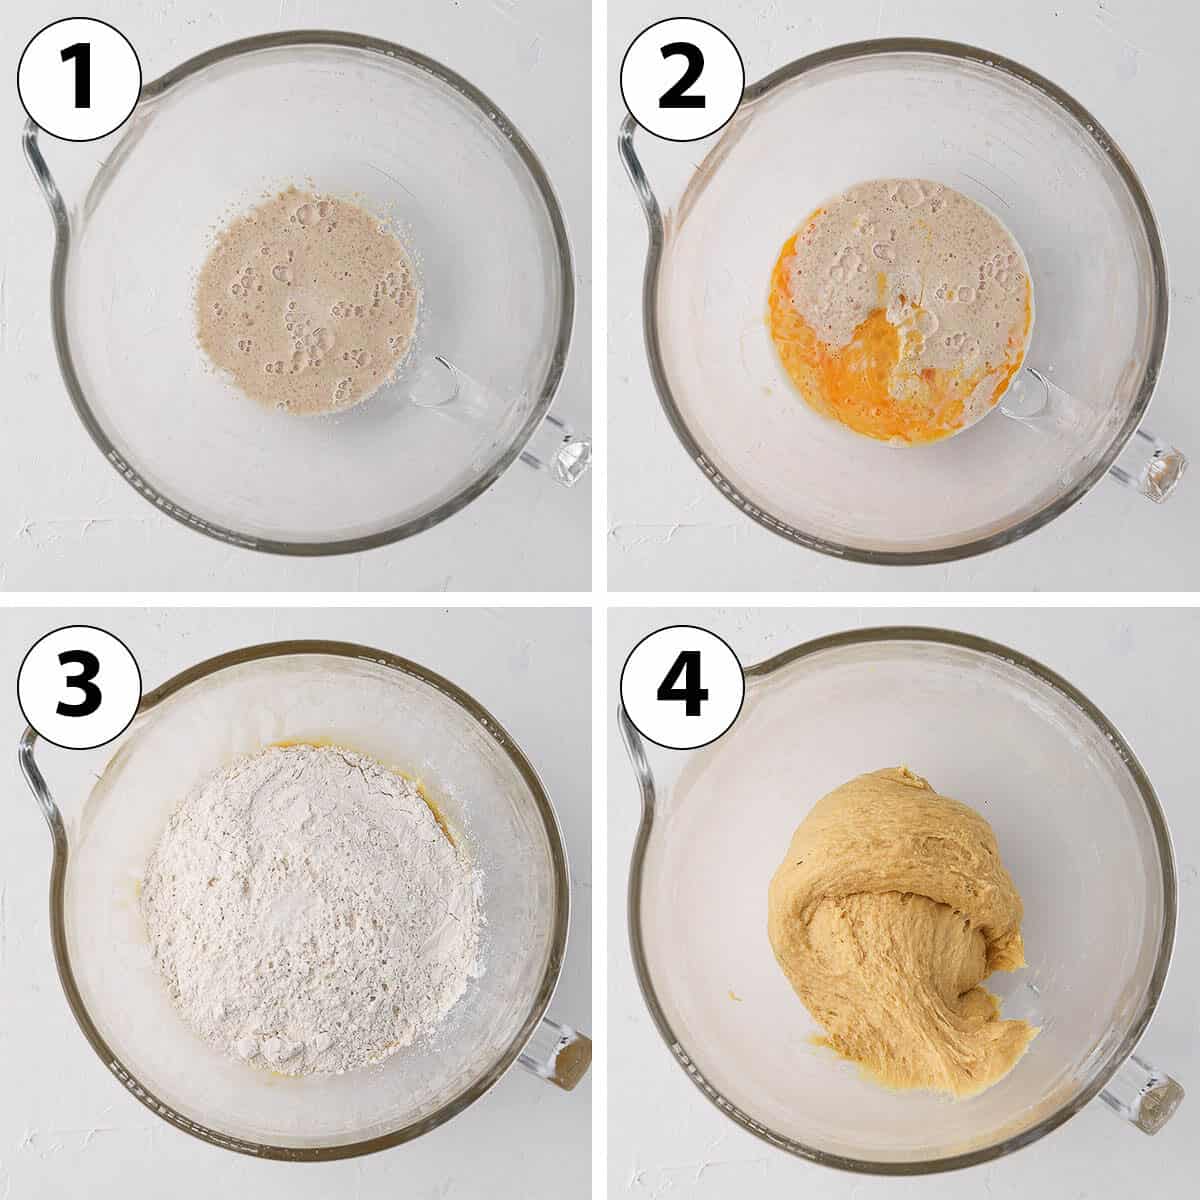
- Photo 1: Place the Lukewarm Milk (make sure it is not too hot - if you touch it with your finger, you shouldn't feel its warmth), half of the Sugar and Yeast in the bowl of your stand mixer. Mix to combine then let it sit for about 10 minutes or until small bubbles/froth appears on the surface (which means the yeast is alive).
Note that if using instant yeast, you technically do not need to activate it in a liquid but I like to do this step to insure the yeast is alive.
- Photo 2: Add the Eggs, preferably pre-whisked, to the yeast mixture and stir to combine.
- Photo 3: Add the rest of the Sugar, Flour and lastly the Salt.
Make sure to add the Salt last as you do not want it to come into direct contact with the yeast (it could kill it).
- Photo 4: Slowly knead with the dough hook attachment until a sticky dough comes together.
I personally like to mix all the ingredients together with a stiff spatula first then start kneading with the hook.
Kneading & Proofing
- Knead for 2 to 3 minutes until all the ingredients are combined.
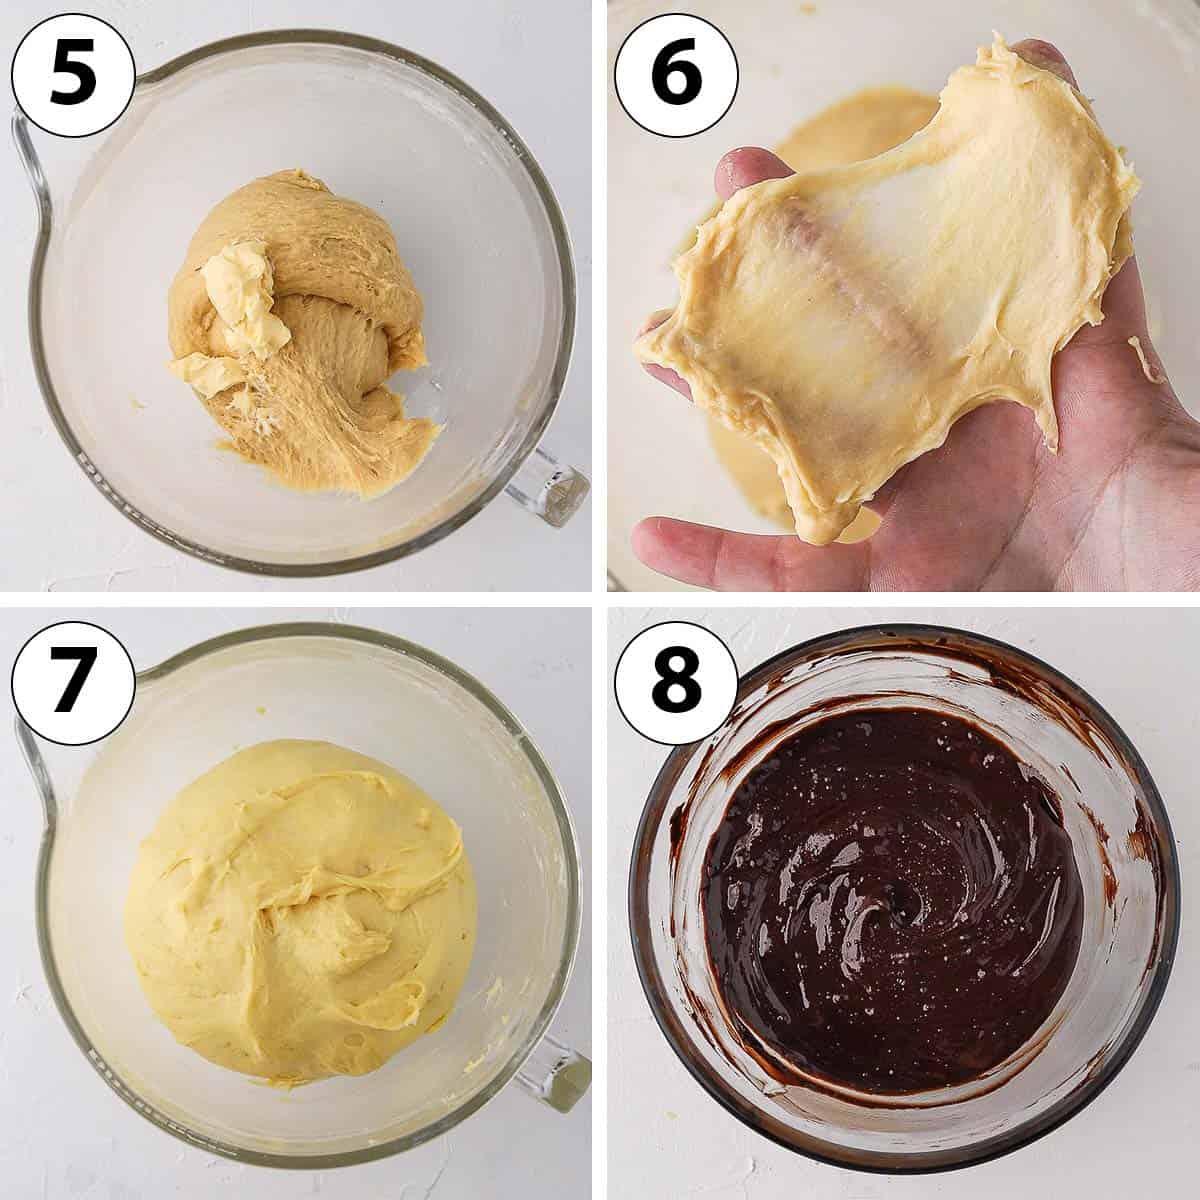
- Photo 5: while slowly kneading, add the very soft unsalted butter cubes a little bit at the time (about one tablespoon at the time). Slowly knead until the butter has been incorporated before adding more.
If the bowl gets greasy and struggle to mix, simply scrap the side of the bowl with a spatula.
- Once all the butter has been added, increase the mixer speed to medium high to high and knead for about 20 minutes or until very soft, stretchy and elastic. Yes, it's a long kneading time but the enriched dough requires longer to develop gluten.
The dough will still be slightly sticky, that's normal.
Tip (Photo 6): do the "windowpane test" to check that the dough has been kneaded enough. Pull a small piece of dough and gently stretch it between your fingers. If the dough breaks quickly, it needs to be kneaded for longer. If it stretches easily without breaking and you can see light coming through it, it has passed the windowpane test.
- Photo 7: Cover the bowl with a tea / kitchen towel (or plastic wrap) and place it in a warm spot. Let it proof for 1 to 1,5 hours or until it has doubled in size (it could take longer if the ambient temperature is too cold).
Alternatively, you can proof the chocolate brioche dough overnight in the fridge (see FAQs section below for more information on overnight proofing).
When the dough has finished its first proofing (called "bulk fermentation" stage), you can start preparing the Chocolate Filling.
- Photo 8: Finely chop the Dark Chocolate and place it in a heat-proof mixing bowl along with the Butter. Melt them together until smooth - either in the microwave in 30 seconds increments or over a double boiler.
- Mix in the sifted Icing Sugar and Cacao Powder. Set aside.
Filling the Dough
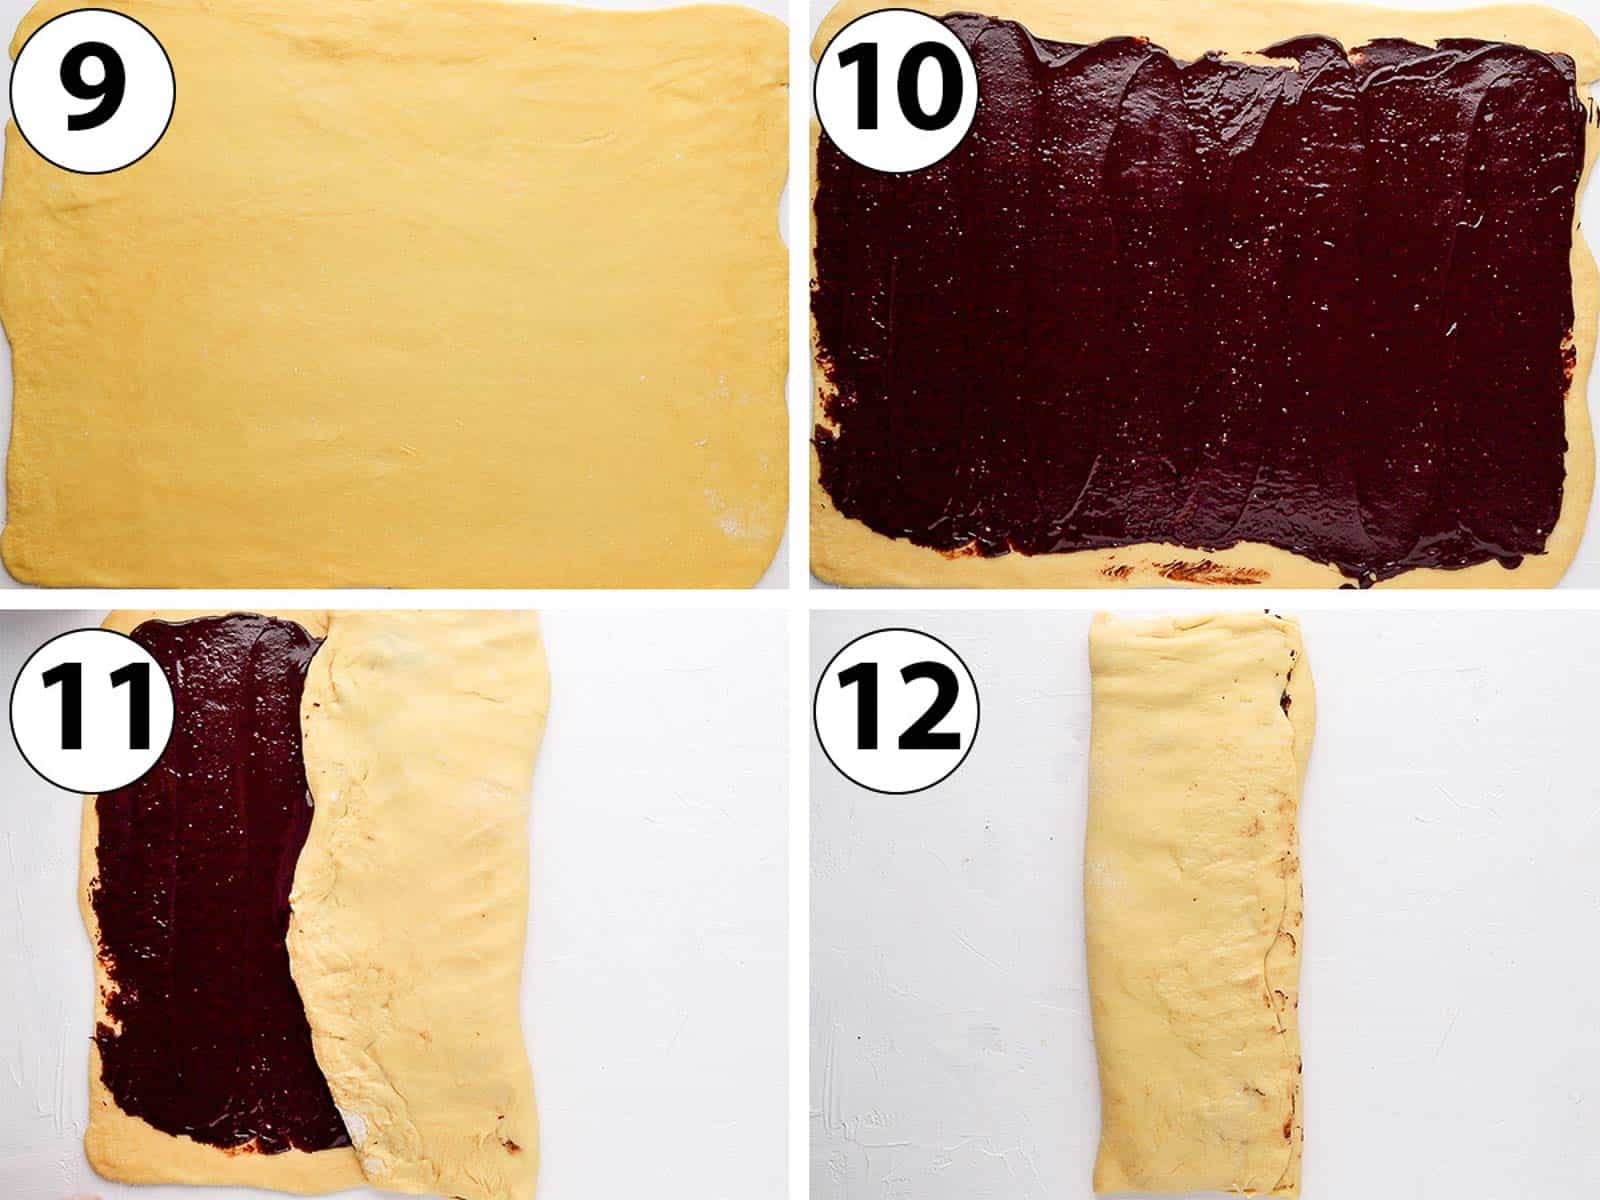
- Photo 9: Punch the air out of the proofed dough and transfer over a lightly floured surface. Using a rolling pin (also lightly floured), roll the dough into a large rectangle that is about 30 x 50 cm (12 x 20 inch).
The dough will be slightly sticky and quite soft - that's normal. You can read about overnight proofing in the FAQs section below for a dough that is a bit firmer and easier to handle.
- Photo 10: Spread the Chocolate Filling over the rolled brioche dough, leaving the edges clear.
The filling shouldn't be too warm or it will be too liquid to spread. If it seems very liquid still, place it for a few minutes in the fridge.
- Photo 11: Fold one third of the dough (either the right or the left side from the longer side of the rectangle) towards the centre. The dough will be quite soft so be careful when pulling it over.
- Photo 12: Fold the other third of the dough towards the centre (the part of the dough where you can still see the chocolate filling), going over the first fold. You shouldn't see the chocolate filling anymore.
Shaping the Chocolate-Filled Brioche into a Braid
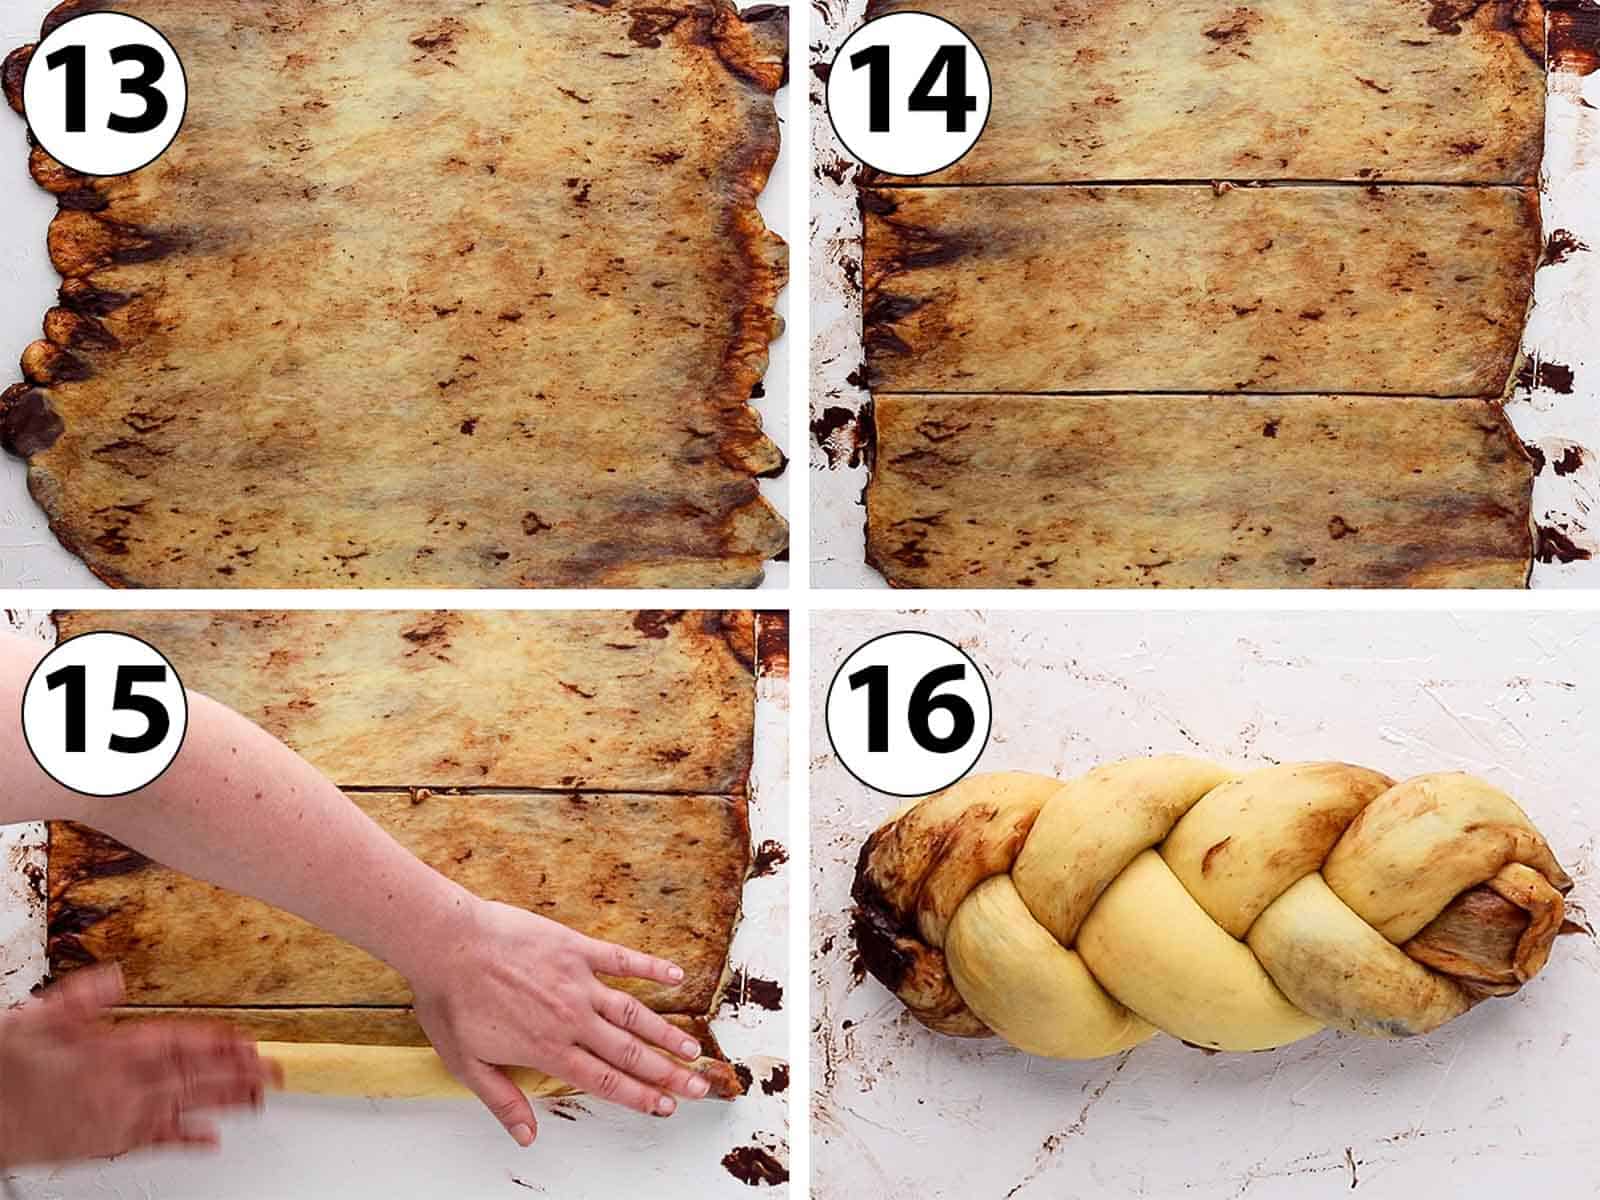
- Photo 13: Gently roll the dough with the rolling pin again. It could get a bit messy as some of the chocolate might escape from the dough - that's normal. Roll the dough into a 30 x 40 cm rectangle (approx) (12 x 15 inch).
- Photo 14: With a large knife, cut the dough in three long strips (cutting horizontally).
- Photo 15: Roll each strip on itself to get a log shape (like you would when making Cinnamon Rolls). You should get 3 long logs.
- Photo 16: Braid the three logs and gently seal the two edges by pressing them together.
- Place the braided brioche into a loaf pan that is lined with baking paper (I used a 11,5x30cm / 4,5x12 inch loaf pan). You can slightly grease the loaf pan first so that the baking paper / parchment paper sticks to it.
- Brush the Brioche with an Egg Wash (one egg pre-whisked), then cover the loaf pan and let the dough rise again for about 30 to 45 minutes.
- Preheat your oven on 180'C/350'F then bake the Chocolate Brioche Bread for 25 to 30 minutes, or until risen and golden brown. Take it out of the oven and let it cool down completely before taking it out of the pan.
Recipe FAQs
Brioche bread is known as an "enriched bread dough"; a bread dough that is enriched with fat. In this case, the fat is contained in the eggs, the butter and the milk. It is a similar dough that is used to make a babka for example.
Brioche are much softer, tender and richer than regular bread. Brioche are often referred to a dessert rather than a bread.
I used a 70% Dark Chocolate for a very intense chocolate flavour, but you can use a lighter dark chocolate for a sweeter taste. Make sure you are using cooking chocolate (in the form of a chocolate bar) and not chocolate chips or eating chocolate.
Absolutely, you will get a deeper flavour and the dough will be easier to work with (a bit more firm) if you proof it overnight in the fridge. Prepare the dough at night, cover the bowl and place in the fridge for 8 to 12 hours.
In the morning, punch the air out of the dough, let it come back to room temperature for about 15 / 20 minutes then roll it as instructed. It will be easier to fold the dough after proofing it overnight.
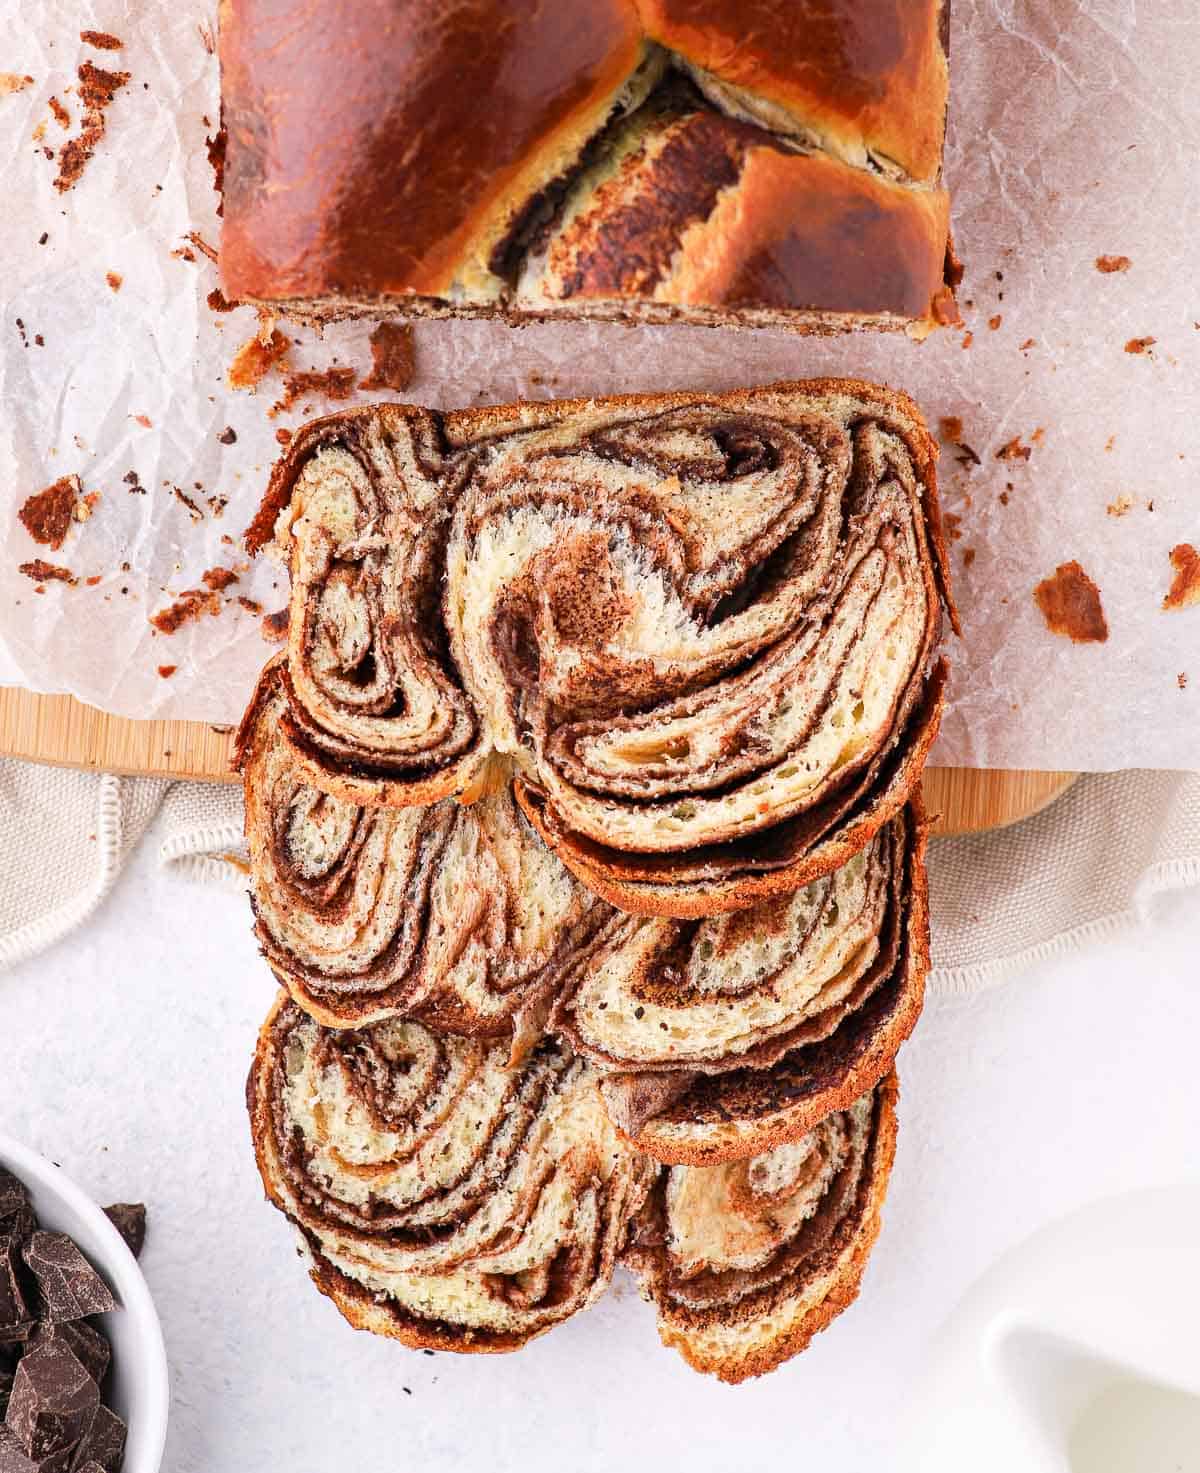
Rolling it twice does not affect the taste, only the look. It is because it is rolled twice that you get so many layers and swirls.
If you do not care about getting so many swirls of chocolate, you can absolutely only roll it once, spread the filling, cut it in three long strips, roll them then braid the bread.
Tips for Success
- Yeast: although not necessary when using instant yeast like here, I recommend "blooming" the yeast (re-hydrating it in a warm liquid) first as a way to insure it is alive. There is nothing worse than realising the yeast is dead after having made the dough!
- The "windowpane test" is the best way to check that the dough has been kneaded enough - which will insure a very soft, elastic bread. To do the test, pick up a small piece of dough and slowly stretch it between your fingers. If it breaks, the dough is not ready. If it stretches nicely to a point where you can start seeing light come through the dough, it's ready!
- For a dough that is easier to roll and deeper flavours, proof the chocolate brioche dough overnight in the fridge. Simply prepare the dough at night, cover it and let it proof in the fridge overnight or for 8-12 hours. In the morning, roll the dough and continue the process as written.
- Customise the filling with the addition of Cinnamon, some very finely chopped Chocolate (so that it does not rip the dough when you roll it the second time) or even some Orange Zest. Or use to make the most epic Brioche French Toast!
Storing & Freezing
This chocolate swirl brioche will stay fresh for 2 to 3 days and should be kept at room temperature in an air-tight container. It can be eaten cold or slightly re-heated (few seconds in the microwave or in the toaster).
It will freeze well, but because the slices are quite fragile, I recommend freezing it whole. Simply let it thaw at room temperature overnight when ready to eat.
Made this recipe?
Let us know if you liked it by leaving a comment below, and tag us on Instagram @a.baking.journey with a photo of your creation!
Recipe
Chocolate Brioche
Ingredients
Brioche Dough
- 75 ml (5 tablespoons) Full Cream / Whole Milk - lukewarm
- 80 gr (1/3 cup) Caster Sugar - or fine white granulated sugar
- 9 gr (2 teaspoons) Instant Yeast
- 3 Eggs - at room temperature
- 350 gr (2 1/3 cup) Plain / AP Flour
- 1/2 teaspoon Fine Salt
- 120 gr (1/2 cup) Unsalted Butter - soft
- 1 Egg for egg wash - optional
Chocolate Filling
- 100 gr (3,5 oz) Dark Cooking Chocolate - finely chopped
- 60 gr (1/4 cup) Unsalted Butter
- 75 gr (3/4 cup) Icing Sugar - sifted
- 15 gr (1 1/2 tablespoons) Unsweetened Cacao Powder
Disclaimer
I highly recommend using the measurements in grams & ml (instead of cups & spoons) for more accuracy and better results.
Instructions
Brioche Dough
- Mix the Lukewarm Milk, half of the Sugar and Yeast in the bowl of your stand mixer. Let it sit for about 10 minutes or until small bubbles/froth appears on the surface (see note 1).75 ml (5 tablespoons) Full Cream / Whole Milk, 80 gr (1/3 cup) Caster Sugar, 9 gr (2 teaspoons) Instant Yeast
- Mix in the Eggs, then add the rest of the Sugar, Flour and lastly the Salt (see note 2). Slowly knead with the dough hook attachment until a sticky dough comes together and all the ingredients have been incorporated.3 Eggs, 350 gr (2 1/3 cup) Plain / AP Flour, 1/2 teaspoon Fine Salt
- Slowly add the very soft butter, about 1 tablespoon at the time. Knead on slow until all the butter has been added and incorporated (see note 3).120 gr (1/2 cup) Unsalted Butter
- Once all the butter has been added, increase the mixer speed to medium high to high and knead for about 20 minutes or until very soft, stretchy, elastic and passes the "windowpane test" (see note 4). The dough will still be slightly sticky, that's normal.
- Cover the bowl with a tea towel or plastic wrap and place it in a warm spot. Leave it to proof for 1 to 1,5 hours or until it has doubled in size (see note 5).
Chocolate Filling
- Finely chop the Dark Chocolate and place it in a heat-proof mixing bowl with the Butter. Melt them together until smooth - either in the microwave in 30 seconds increments or over a double boiler. Mix in the sifted Icing Sugar and Cacao Powder. Set aside to firm up (see note 6).100 gr (3,5 oz) Dark Cooking Chocolate, 60 gr (1/4 cup) Unsalted Butter, 75 gr (3/4 cup) Icing Sugar, 15 gr (1 1/2 tablespoons) Unsweetened Cacao Powder
Rolling & Shaping
- Prepare a Loaf Pan (I used a 11,5x30cm / 4,5x12 inch loaf pan) by slightly greasing it and lining it with baking paper. Set aside.
- Punch the air out of the proofed dough and transfer over a lightly floured surface. Using a rolling pin, roll the dough into a large rectangle that is about 30 x 50 cm (12 x 20 inch).
- Spread the Chocolate Filling over the rolled brioche dough, leaving the edges clear.
- Fold one third of the dough (either the right or the left side of the dough) towards the centre (chocolate over chocolate). Fold the second third of the dough towards the centre (the part of the dough where you can still see the chocolate filling), going over the first fold. You shouldn't see the chocolate filling anymore.
- Gently roll the dough with the rolling pin again into a 30 x 40 cm rectangle (12 x 15 inch) approx. (see note 7). Cut the dough into 3 long strips, then scroll each strips into a long snail-like log. Braid the three logs and gently seal the two edges by pressing them together.
- Place the brioche braid into the prepared loaf pan and brush it with the whisked egg for the egg wash. Cover the pan and let it rise again for 30 to 45 minutes.1 Egg for egg wash
- Preheat your oven on 180'C/350'F then bake the Chocolate Brioche Bread for 25 to 30 minutes, or until risen and golden brown. Take it out of the oven and let it cool down completely before taking it out of the pan.
Tried this recipe? Make sure to leave a comment and star rating below!
Notes
- If you don't see froth or bubbles after 10/15 minutes, it could be because the milk is not warm enough (it should be about the temperature of your body - if you touch it with your finger, you shouldn't feel it) or because the Yeast is not alive. You might need a fresh pack of yeast.
- Make sure to add the Salt last as you do not want it to come into direct contact with the yeast; it could kill it.
- If the bowl gets greasy and the mixer struggle to mix, stop to scrap the side of the bowl with a spatula to help it.
- To do the windowpane test, pull a small piece of dough and gently stretch it between your fingers. If the dough breaks quickly, it needs to be kneaded for longer. If it stretches easily without breaking and you can see light coming through it, it has passed the windowpane test. The proofing time is quite long here, but that's because the high content of fat in the dough will make the gluten take longer to develop.
- Depending on the temperature of your kitchen, it could take longer to proof (if too cold). Alternatively, you can proof the bread in the fridge overnight or for 8 to 12 hours.
- If the filling is too soft/liquid, it will be a bit hard to spread over the dough and it will get messy when you roll it again (that's what happened with my filling). It should firm up at room temperature but you can also place it in the fridge for a few minutes if it is still too soft.
- It could get a bit messy as some of the chocolate might escape from the dough - that's normal. Using a filling that has set a bit will help.

