
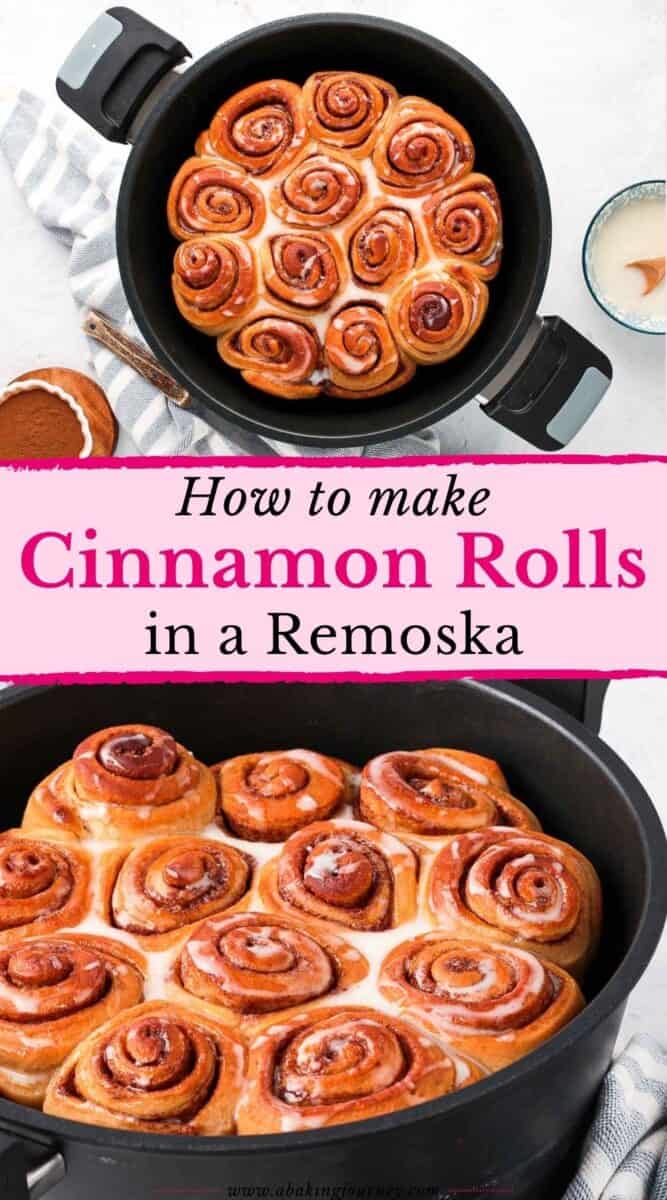
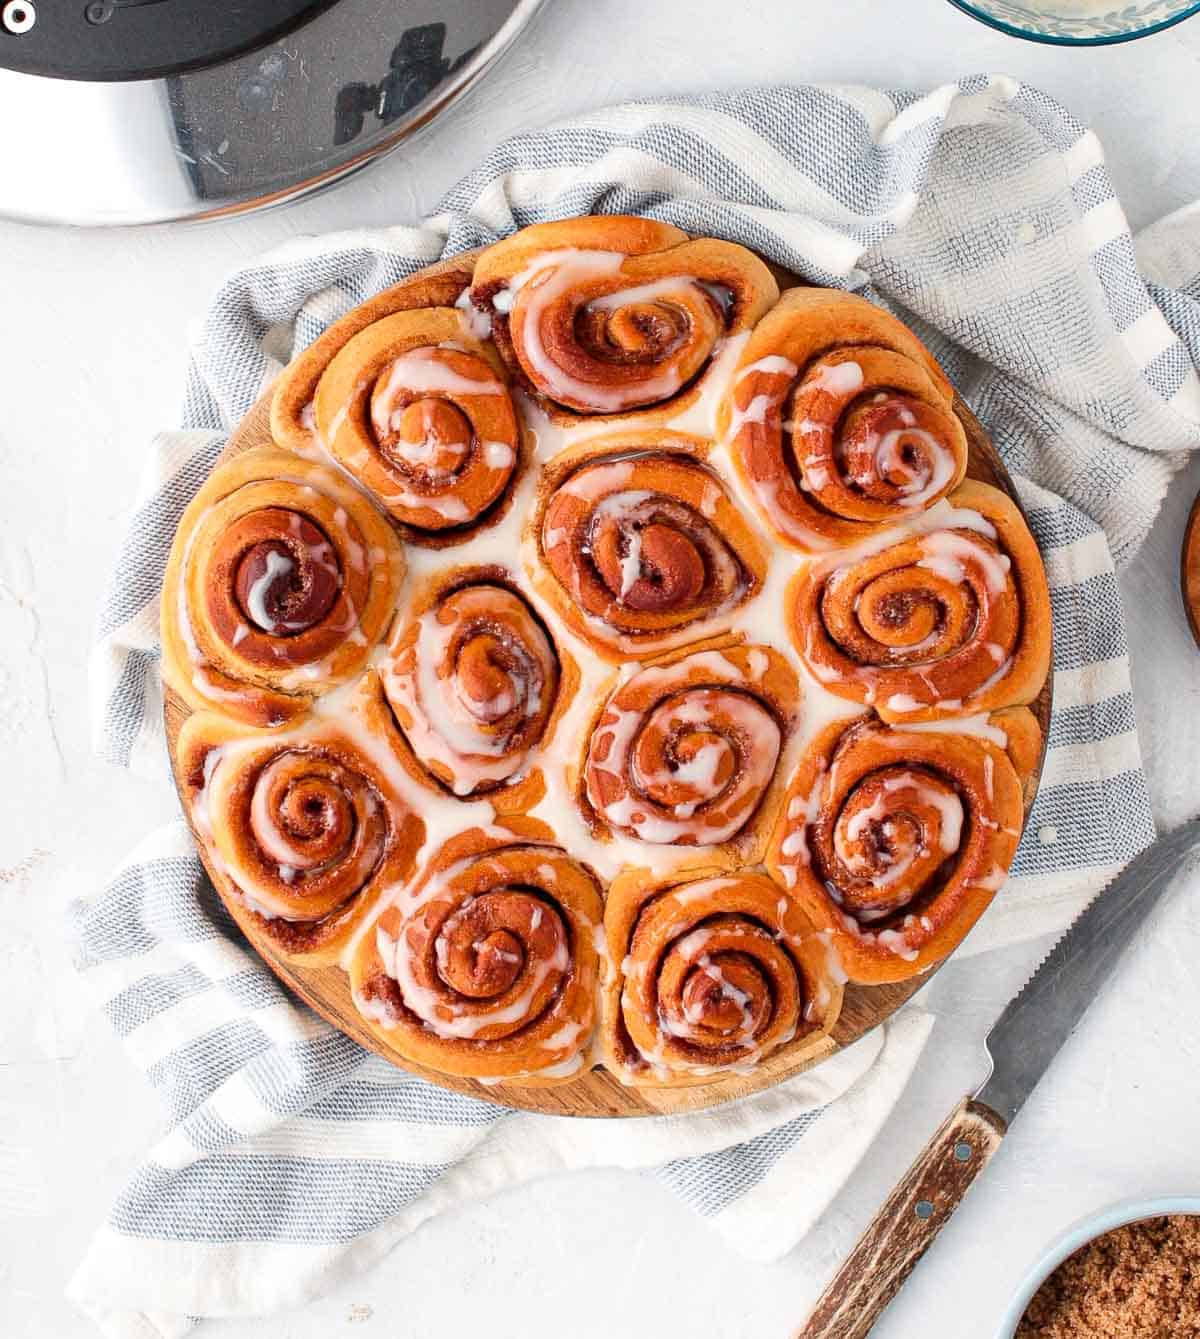
These Classic Cinnamon Rolls baked in the Remoska are perfectly light, fluffy and delicious. They make a great breakfast or sweet treat for morning and afternoon tea that can easily be prepared from anywhere - and without an oven!
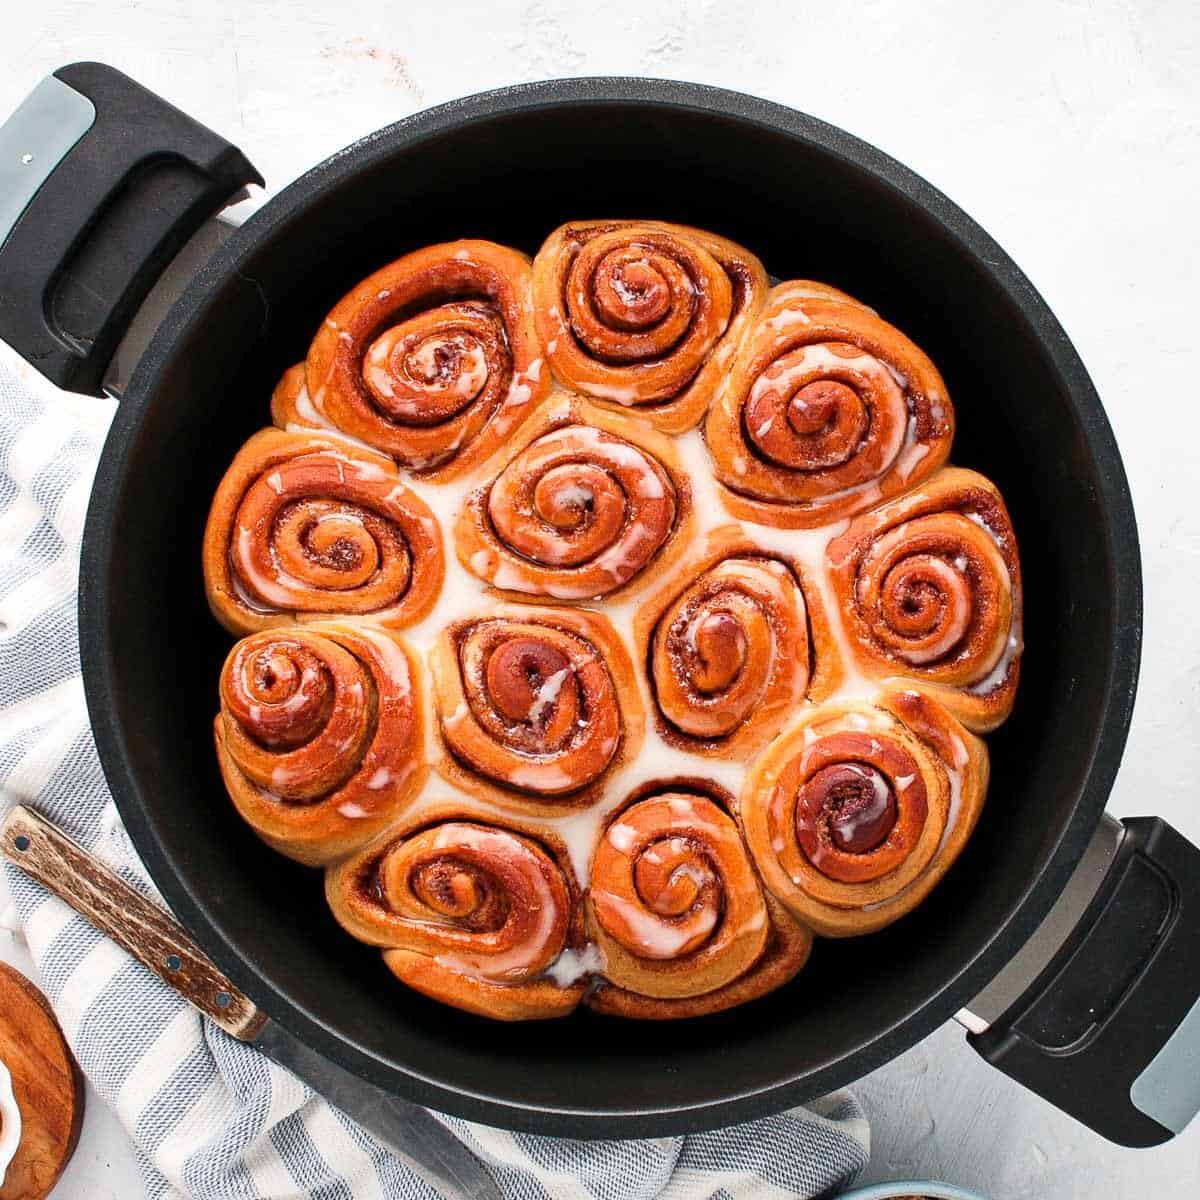
This recipe is sponsored by Remoska
Jump to:
Why we love this recipe
Who knew you could create the lightest, fluffiest cinnamon scrolls without a regular oven!? I probably wouldn't have believed it either, but after trying them in the Remoska, I might never make these cinnamon rolls in an oven again!
The Remoska Tria is an awesome three-in-one cooker that is super versatile. It has three different lids than can be interchanged for different functionalities: a glass lid to use the pot on the stove, with the soft-pressure lid to create a slow cooker/pressure cooker and plugged in with the baking lid to turn it into a portable oven.
As a result, you get the bake delicious baked goods like these Scones, Fresh Bread, Banana Cake or Baked Apples anywhere - from your caravan to camping site, boat, backyards or outdoors as long as you have power!
But even if you have access to a regular oven, choosing to bake the cinnamon rolls in the Remoska is a great energy efficient alternative, using only about a fifth of the electricity a standard oven would use.
You can see how the Remoska Tria works here.
You can now pre-order the Remoska Tria and get 25% off plus free shipping when using the code "BakingJourney" at checkout! (valid only in Australia and New Zealand).
Ingredients
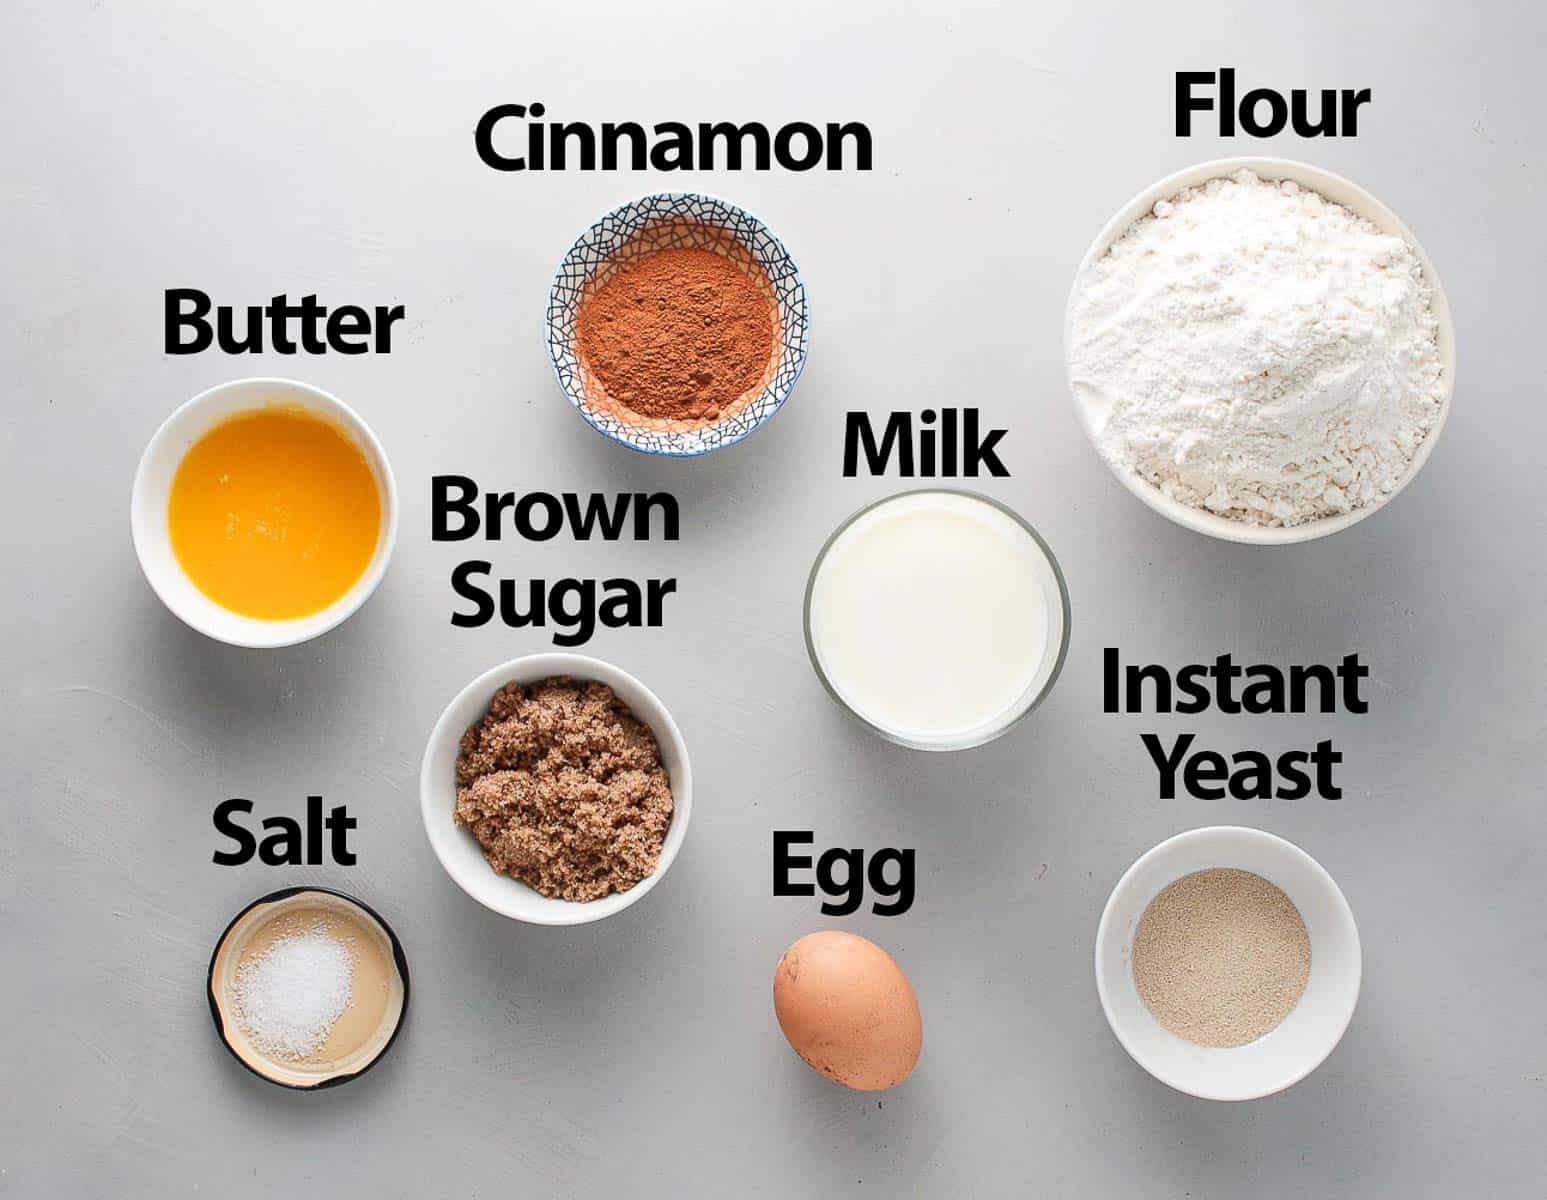
These cinnamon buns use the same ingredients as your regular Cinnamon Scrolls - nothing complicated here!
Scroll down to the recipe card below for all quantities.
- Flour: I used Plain /AP Flour, but you could also use Bread Flour for extra fluffy rolls.
- Sugar: I used Brown Sugar as I find that its flavours compliment cinnamon perfectly, but you could also use white granulated sugar if needed.
- Milk: Full Cream Milk (Whole Milk) preferred for the best flavour and texture. The milk should be lukewarm.
- Egg: at room temperature. It is used inside the dough - no need for an egg wash here, the Remoska will give them a perfectly golden top without it!
- Butter: very soft and unsalted butter
- Instant Yeast: a type of yeast that does not require to be bloomed (rehydrated) first, although I like to do it just to make sure the yeast is alive. You can substitute it with Active Dry Yeast, but you will need to bloom it first.
- Salt: a simple fine table salt.
I finished the cinnamon rolls with a classic Vanilla Icing, but that is optional. You could also make a Cream Cheese Frosting if you want!
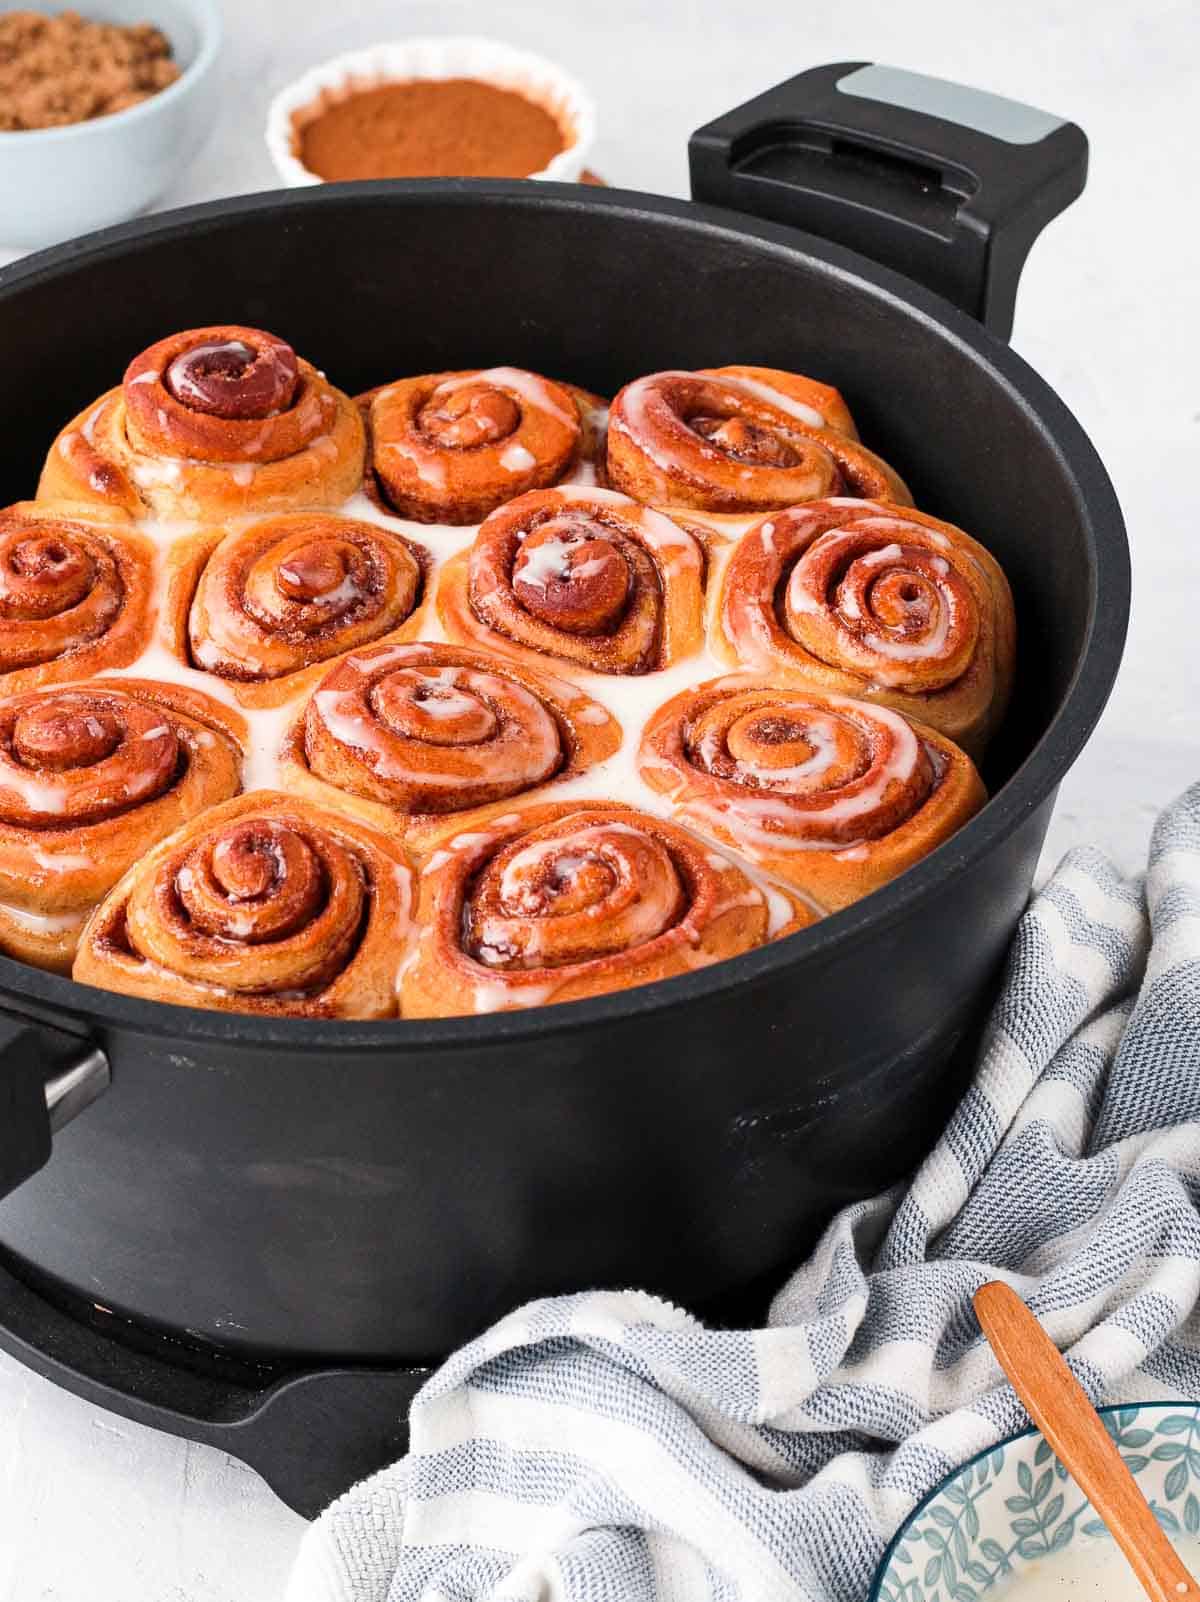
How to make Cinnamon Rolls in a Remoska
Making cinnamon rolls in the Remoska Tria is exactly the same as making them in a regular oven, but even easier as they will proof inside the Remoska pot.
Prepare the dough
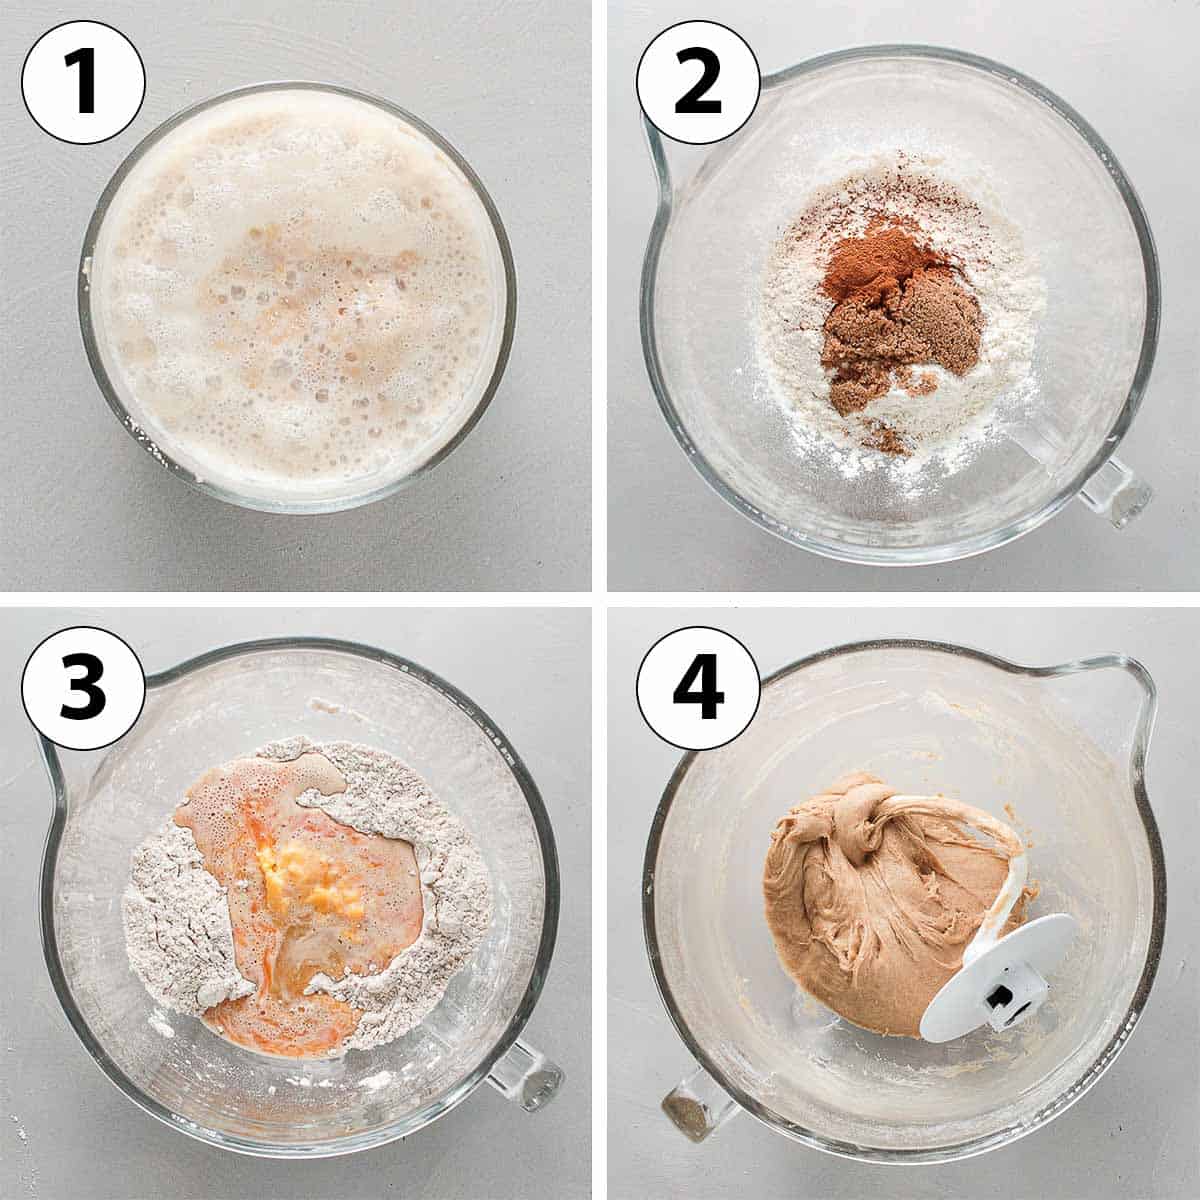
- Photo 1: place the lukewarm Milk (slightly re-heat it in the microwave, but make sure it is not too hot or it will kill the yeast) in a small bowl with one tablespoon Brown Sugar and the Yeast. Mix well, then set aside for 10 to 15 minutes or until you see froth/bubbles at the surface.
Note that if you are using Dry Yeast, this step is optional as you do not need to bloom (rehydrate) dry yeast, but I like to do it to make sure the yeast is alive before I start preparing the dough. If using Active Dry Yeast, it is imperative to do this step.
- Photo 2: in the bowl of your mixer (or a large mixing bowl if making it by hands), mix the Flour, rest of the Brown Sugar and Cinnamon.
- Photo 3: make a well in the centre of the dry ingredients and pour in the Milk/Yeast, Egg and soft Butter. Knead for a couple of minutes on medium speed until combined, then add the Salt.
Would you like to save this recipe?
- Photo 4: continue to knead on medium high speed for another 5 to 8 minutes, or until the dough is pulling from the edges, is very soft and stretchy. It should pass the "windowpane test".
- Cover the bowl with a tea towel and leave to proof in a warm place for about 1 to 1,5 hours, or until doubled in size (if you place it in a cold spot, it could take longer).
Prepare the filling:
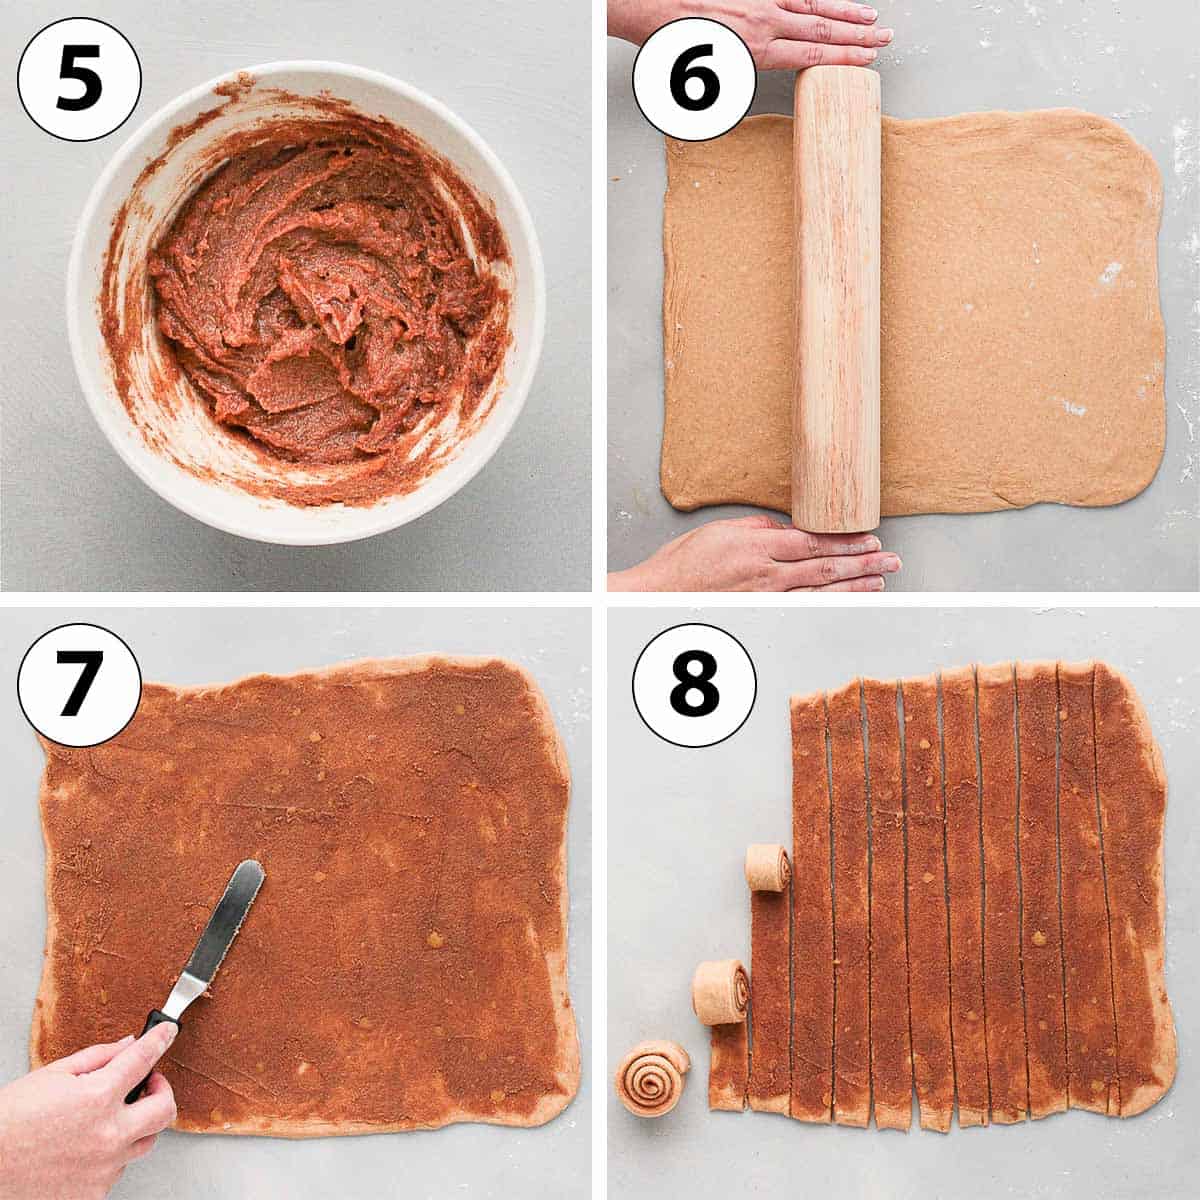
- Photo 5: in a small bowl, mix the soft Butter, Brown Sugar and Cinnamon to get a paste. Set aside.
- Photo 6: punch the dough to deflate it, then transfer it over a lightly floured surface. Roll into a large rectangle, about 30x40cm (12x15inch).
- Photo 7: spread the Cinnamon filling over the dough with a small offset spatula.
- Photo 8: cut the dough into 12 long strips, then roll each strip to create your cinnamon rolls (see FAQ section below for alternative method).
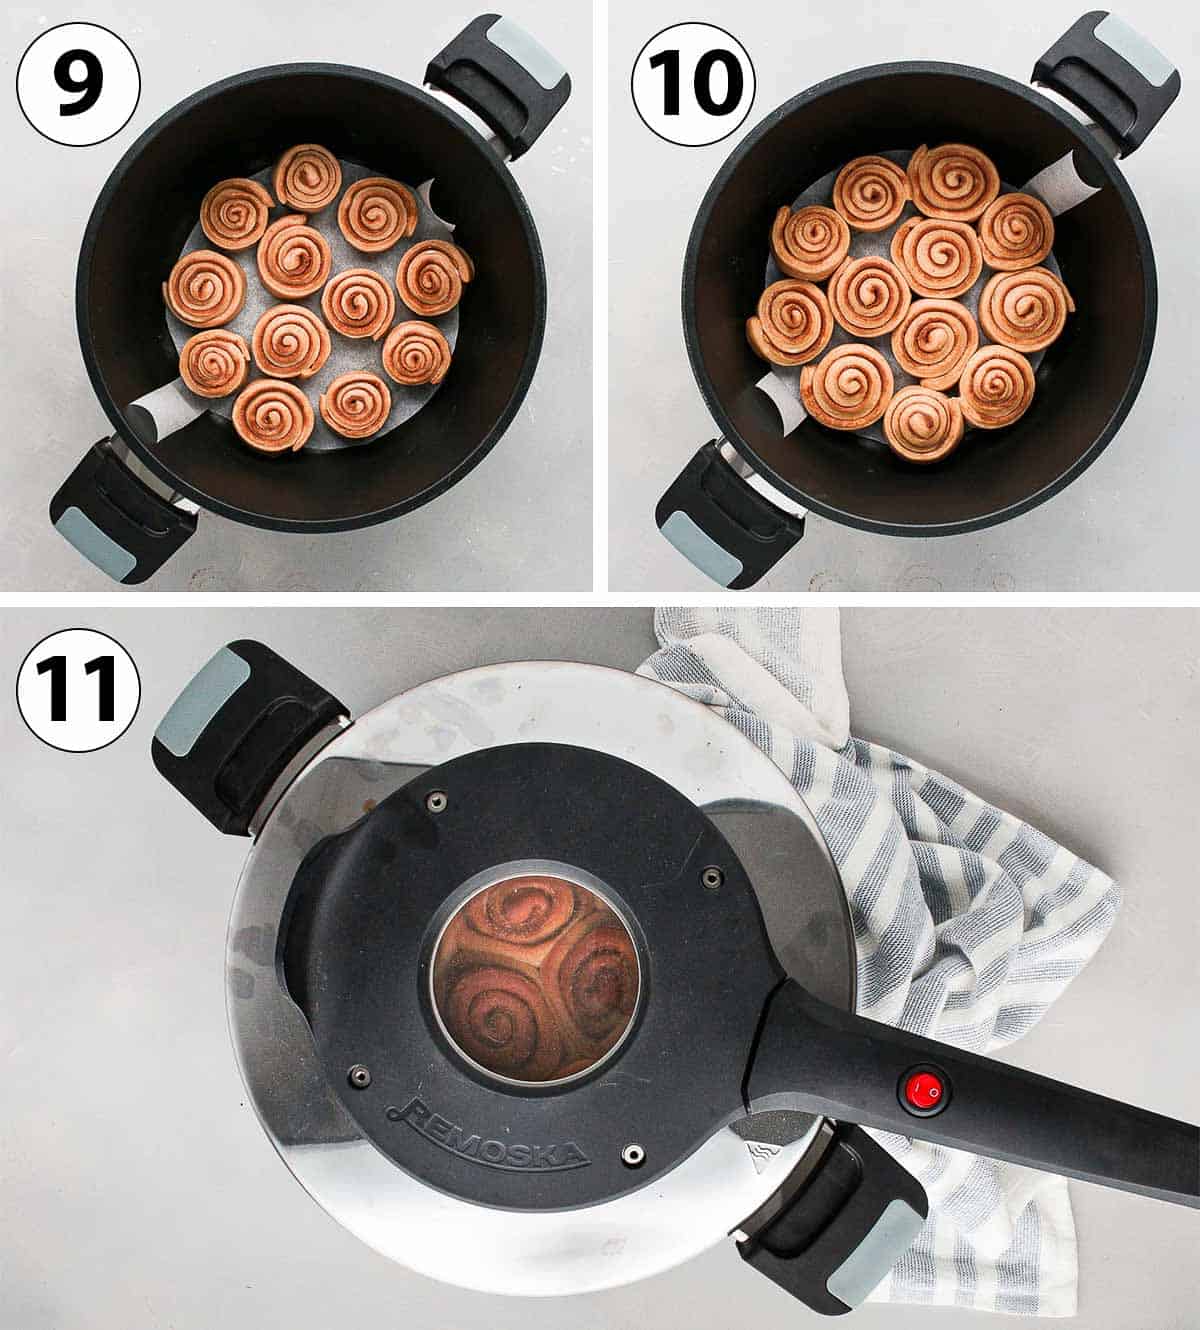
- Optional: line the Remoska Pot with baking paper. This is to help you lift them out of the pot more easily only; the pot is non-stick.
- Photo 9: place the cinnamon rolls inside the pot, leaving a little bit of space between each rolls.
- Photo 10: place the glass lid on to cover and leave to proof in a warm spot for about 1/2 hour, or until the rolls have risen again.
- Photo 11: replace the glass lid with the Baking Lid, plug it in and turn it on. Bake for 22 minutes, then turn off the lid. Leave covered with the (turned off) lid for another 5 minutes, then remove the lid. Leave to cool down slightly, then lift out of the pot.
- Enjoy warm straight away, or keep at room temperature until ready to be eaten.
Recipe FAQs
Absolutely, although you should allow for about twice longer to knead the dough by hands. Continue to knead until very soft, stretchy and passing the "windowpane test".
Yes! The way I roll the scrolls is a bit untraditional but gives you much neater rolls (and you don't have to worry about cutting through the filled dough). But if you preferred the more traditional way, simply roll the filled dough into a long log shape, then cut off 12 individual rolls.
It is optional only since the pot is non-stick, but allows you to lift the rolls out more easily.
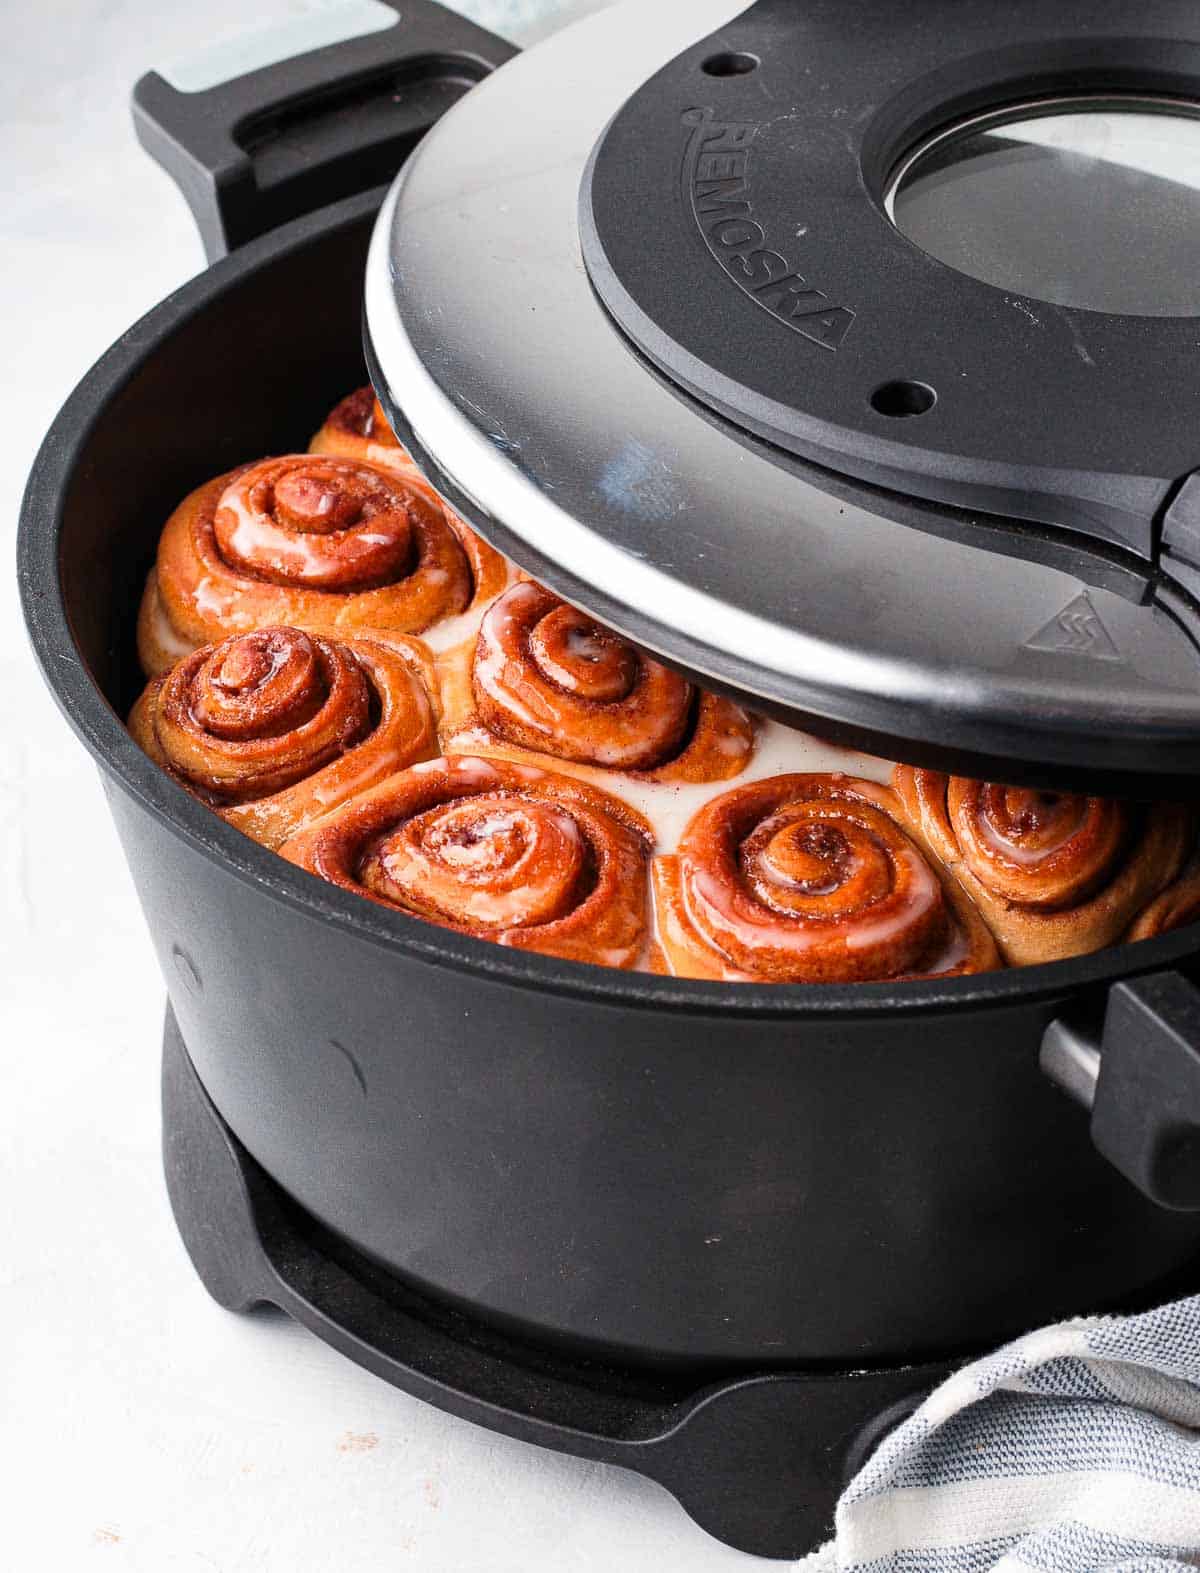
You can, although not necessary. As you can see, the rolls came out beautifully golden without the use of an egg wash here!
Tips for Success
- Always place the dough to proof in a warm place, or the process will be much longer.
- To make in advance, you can also prepare the dough and do the bulk fermentation (first proofing) overnight in the fridge.
- Try different flavours with additional ingredients like Chocolate Chips, different Spices or even fruits like Apple Chunks or Berries!
- If finishing the cinnamon rolls with Icing or Frosting, leave them to cool down completely first.
Storing & Freezing
These scrolls are best eaten fresh, just after baking. They will last for up to three days at room temperature, but I recommend slightly re-heating them up before serving to make them soft again.
They can be frozen (without icing/frosting) for up to 2 months. Leave at room temperature for a few hours to thaw, and/or finish defrosting in the microwave.
More sweet bread recipes
- Chocolate Chip Brioche Bread
- Red Bean Sweet Rolls
- Apple Cinnamon Pull Apart Bread
- Lemon Sweet Rolls
- No Yeast Cinnamon Rolls
- Chocolate Brioche Bread Wreath
- Chocolate Cinnamon Rolls
- Cinnamon Roll Bread
- Coffee Cinnamon Rolls
Made this recipe?
Let us know if you liked it by leaving a comment below, and tag us on Instagram @a.baking.journey with a photo of your creation!
Recipe

Cinnamon Rolls in the Remoska
Ingredients
Dough
- 125 ml (1/2 cup) Full Cream Milk (Whole Milk), lukewarm
- 40 gr (3 1/2 tablesp.) Brown Sugar
- 7 gr (3/4 teasp.) Instant Yeast
- 225 gr (1 1/2 cup) Plain / AP Flour, (plus a little bit more if needed)
- 1 teasp. Ground Cinnamon
- 30 gr (2 tablesp.) Unsalted Butter, very soft
- 1 Egg, at room temperature
- 1 pinch Table Salt
Cinnamon Filling
- 45 gr (3 tablesp.) Unsalted Butter, very soft
- 45 gr (4 tablesp.) Brown Sugar
- 2 teasp. Ground Cinnamon
Instructions
Dough
- In a small bowl, mix the lukewarm Milk, one tablespoon of Brown Sugar and Yeast. Set aside for 10-15 minutes, or until froth/bubbles appear on the surface (see note 1).125 ml (1/2 cup) Full Cream Milk (Whole Milk), 40 gr (3 1/2 tablesp.) Brown Sugar
- Place the Flour, rest of the Brown Sugar and Cinnamon in the bowl of your mixer (or a large mixing bowl of making by hands). Add the Milk/Yeast, Egg and soft Butter. Knead for a couple of minutes on medium speed until combined, then add the Salt.40 gr (3 1/2 tablesp.) Brown Sugar, 225 gr (1 1/2 cup) Plain / AP Flour, 1 teasp. Ground Cinnamon
- Continue to knead on medium high speed for another 5 to 8 minutes, or until the dough is pulling from the edges, is very soft and stretchy (see note 2). Cover the bowl with a tea towel and leave to proof in a warm place for about 1 to 1,5 hours, or until doubled in size30 gr (2 tablesp.) Unsalted Butter, 1 Egg, 1 pinch Table Salt
Cinnamon Filling
- Mix the soft Butter, Brown Sugar and Cinnamon in a small bowl to get a paste. Set aside.45 gr (3 tablesp.) Unsalted Butter, 2 teasp. Ground Cinnamon, 45 gr (4 tablesp.) Brown Sugar
- Punch the dough to deflate it, then transfer it over a lightly floured surface. Roll into a large rectangle, about 30x40cm (12x15inch).
- Spread the Cinnamon filling over the dough with a small offset spatula. Cut the dough into 12 long strips, then roll each strip to create your cinnamon rolls (see note 3).
- Optional: line the Remoska Pot with baking paper (see note 4).
- Place the cinnamon rolls inside the pot, leaving a little bit of space between each rolls. Cover with the glass lid and leave to proof in a warm spot for about 1/2 hour, or until the rolls have risen again.
- Replace the glass lid with the Baking Lid, plug it in and turn it on. Bake for 22 minutes, then turn off the lid. Leave covered with the (turned off) lid for another 5 minutes, then remove the lid. Leave to cool down slightly, then lift the rolls out of the pot.
- Enjoy warm straight away, or keep at room temperature until ready to be eaten (it is recommend it to reheat them up slighty before eating).
Would you like to save this recipe?
Notes
- Milk: should be lukewarm (about 40'C), but make sure it is not too hot or it will kill the yeast.
- Yeast: Instant Yeast can be replace with Active Dry Yeast (but make sure to do step 1 in this case).
- Flour: Plain/AP Flour can be substituted with Bread Flour for a lighter crumb.
- Note that if you are using Dry Yeast, this step is optional as you do not need to bloom (rehydrate) dry yeast. I like to do it to make sure the yeast is alive before I start preparing the dough. If skipping, add all the ingredients (except salt) directly in the bowl). If using Active Dry Yeast, it is imperative to do this step.
- To know the dough has been kneaded for long enough, do the "windowpane test": pull a little bit of the dough and stretch it between your fingers. The dough should easily stretch without reaping and you should be able to see light come through it (like a windowpane).
- This technique gives you much neater rolls, and you don't have to worry about cutting through the filled rolled dough. Alternatively, simply roll the filled dough into a long log shape, then cut off 12 individual rolls.
- This is to help you lift them out of the pot more easily only; the pot is non-stick.
SuW says
Thank you for the very straightforward recipe. I have just acquired a Remoska and am looking for interesting recipes to add to my repertoire. This one’s a keeper!
My cinnamon rolls turned out very well, though next time I will roll into a long sausage and then cut into individual rolls as I didn’t make a very good job of cutting into even strips.
They tasted scrummy though and I will definitely make again.
Sylvie says
Thanks Suw!