
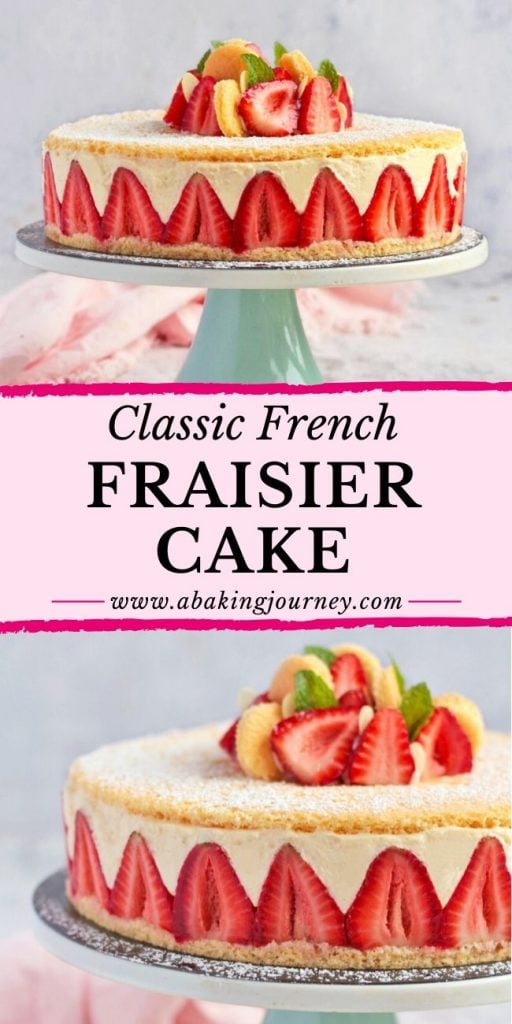
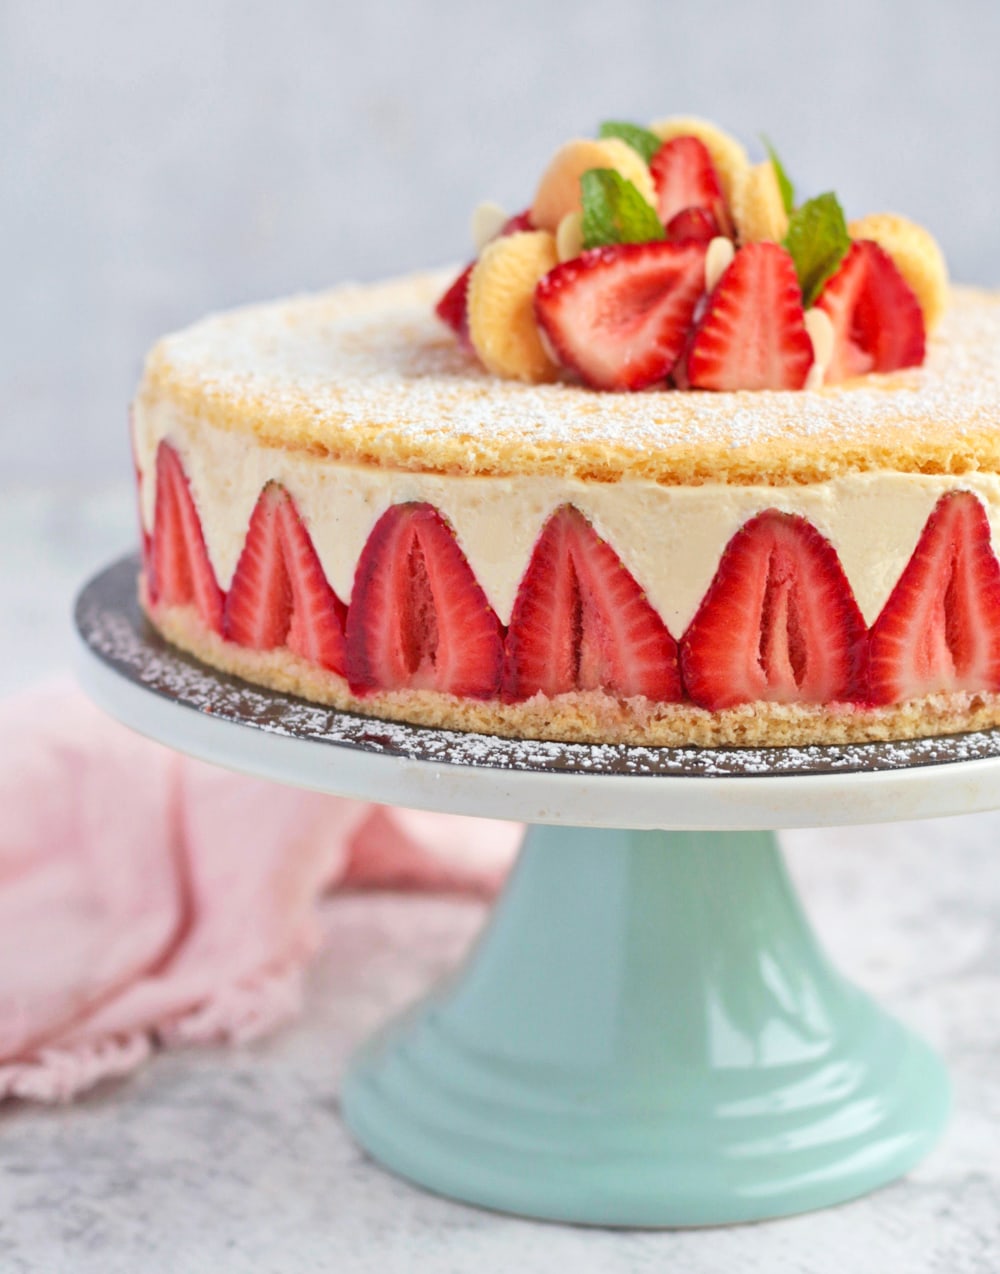
This traditional French Fraisier Cake made with two layer of Genoise Sponge, Diplomat Cream, a Strawberry Syrup and Fresh Strawberries makes the most delicious Summer Cake packed with fresh berries!
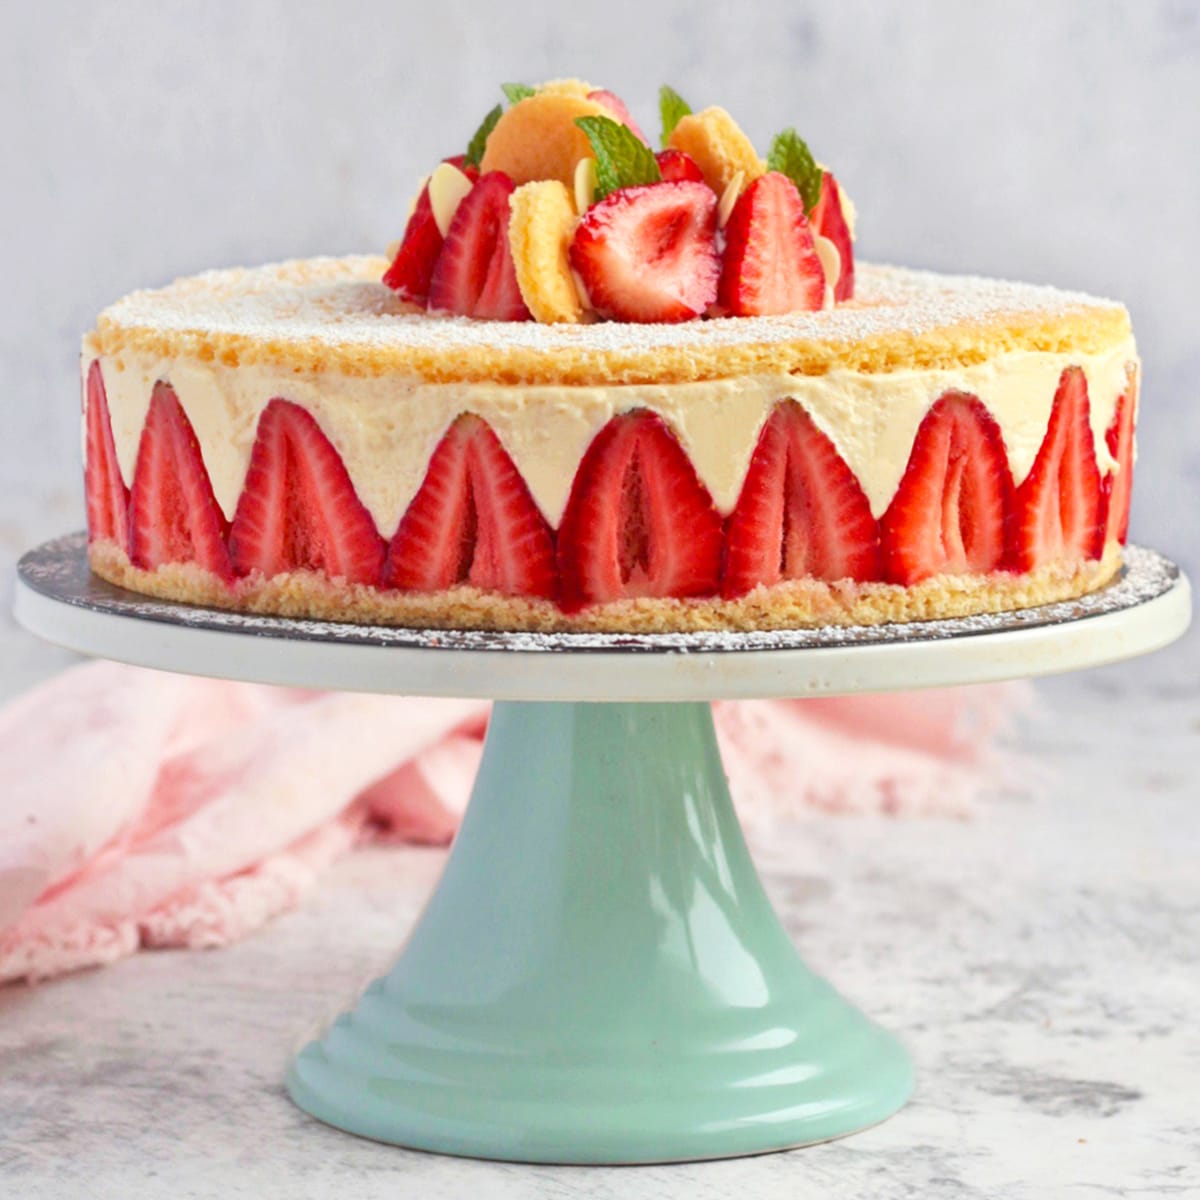
Jump to:
- Why we love this recipe
- What is a Fraisier
- French Strawberry Cake Layers
- Equipment needed to make this cake
- Easy Genoise Sponge
- Quick Strawberry Syrup
- Diplomat Cream (Crème Diplomate)
- How to assemble a Fraisier step by step
- Top Tips to make this Strawberry Mousse Cake
- Recipe FAQs
- More Classic French Desserts
- Recipe
- Comments
Why we love this recipe
Out of all French Strawberry Desserts, I have a favourite: the classic Fraisier. Don't get me wrong, I absolutely adore Strawberry Custard Tartlets and Strawberry Charlotte Cake, but there is something special about this one.
Maybe it is the delicate Genoise Cake Layers, the abundance of fresh Strawberries or the luscious Diplomat Cream flavoured with Vanilla and Orange Blossom Water... but it is probably a combination of all three!
What is a Fraisier
A "Fraisier" is a traditional and classic French Dessert made in summer with Fresh Strawberries. Its name simply comes from the French word "Fraises" which means "Strawberries".
A similar cake can be made with Raspberries instead, called Framboisier (for the French word "Framboises" meaning "Raspberries").
It is made with layers of delicate Genoise Sponge soaked with a Strawberry Syrup, a Cream Filling (traditionally a Mousseline Cream, but I personally prefer to use a lighter Diplomat Cream), Fresh Strawberries and sometimes Marsipan.
You can find a slightly simplified version of this cake with this Strawberry Mousse Cake.
French Strawberry Cake Layers
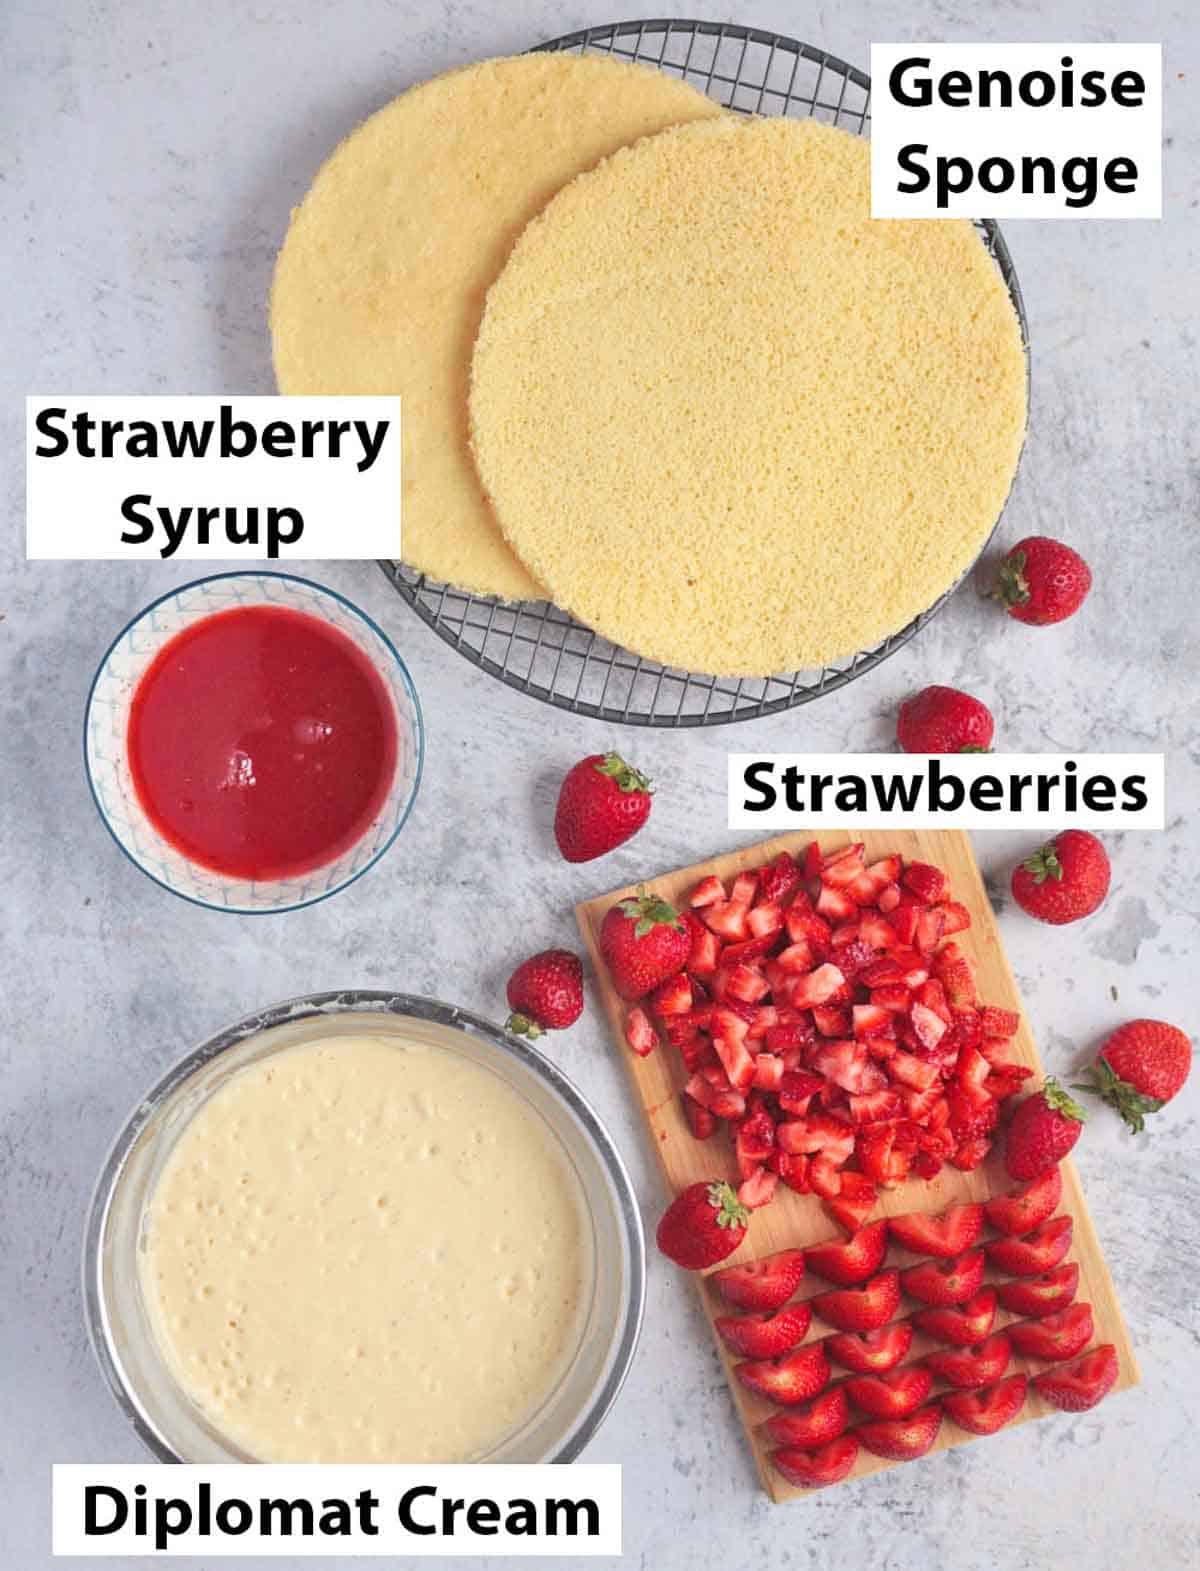
This Fraisier is made out of 4 elements:
- Two Layers of a Genoise (French Sponge Cake)
- a Diplomate Cream Filling (traditionally, a Mousseline Cream is used but I much prefer the taste of Diplomat Cream)
- a Strawberry Soaking Syrup for the Genoise Cake
- Fresh Strawberries - sliced in half to create the edges of the cake and cubed inside the cake.
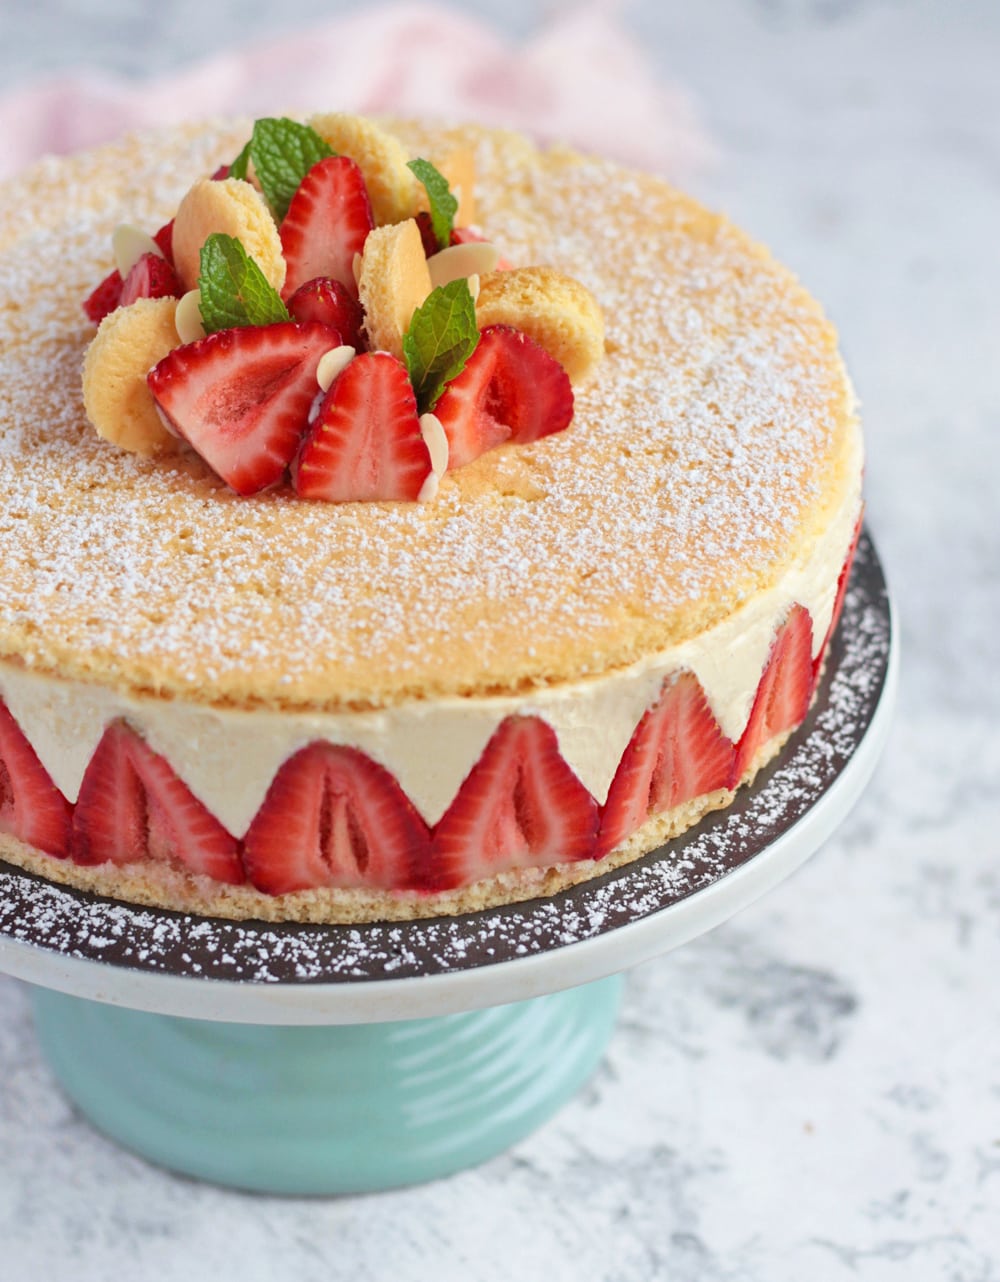
This cake is sometimes topped with Marsipan too, but I personally dislike marsipan... I simply finished the dessert with Fresh Strawberries, a few leaves of Mint and some flaked Almonds.
Equipment needed to make this cake
- Stand Mixer (or Hand Mixer) with a whisk attachment
- Flat Baking Tray, large enough to cut out two circles of Genoise (alternatively, the genoise can be baked in two round baking pans or in two small flat trays)
- Large Round Pastry Ring (sometimes called "Mousse Ring") - I used a 20x5 cm / 8x2 inch Ring (alternatively can be replaced by a Springform Pan)
- Piping Bag and large round Piping Tip
- Optional: Acetate Roll (sometimes called Cake Collars or Cake Strips)
Easy Genoise Sponge
A Genoise is a classic French Sponge Cake that is known to be extremely light and airy. That is because it is mainly made out Eggs whipped for a long time to incorporate as much as into the cake as possible.
Traditionally, a Genoise is made by whisking the Eggs and Sugar on the stove over a Double Boiler (Bain-Marie), but this recipe is much easier and quicker.
This Sponge is made out of 4 ingredients (see all quantities below):
- Eggs
- Caster Sugar
- Plain Flour
- Cornstarch (can be substituted with more plain flour, but the cornstarch adds some lightness).
To make a Genoise:
- Whisk the Eggs and Sugar in the bowl of your mixer for 5 to 8 minutes. It needs to have doubled (if not tripled) in size and be very pale and fluffy.
- Sift the Flour and Cornstarch over the Eggs and gently fold in with a spatula until all incorporated. Do not overmix or you will deflated the whipped eggs.
- Pour over a flat baking tray lined with baking paper (make sure it is large enough to cut out 2 circles of sponge - otherwise bake on two separate trays or in a round baking pan).
- Spread using an Offset Spatula. Try to be as regular as possible in the thickness of the batter to enable an even baking.
- Bake for 10 to 12 minutes, or until puffed an golden. Leave to cool down completely before removing the baking paper and cutting off two circles using the Pastry Ring.
Quick Strawberry Syrup
The strawberry syrup is brushed over the genoise once ready to put the cake together. It is a great way to insure the sponge stays moist and light, and also brings a subtle flavour to it.
You will need:
- Strawberries
- Water
- Caster Sugar
To make it:
- Blend the strawberries and pour it through a sieve to keep the liquid only. Discard the rest.
- Place the strawberry juice, water and sugar in a small pot on medium heat. Bring to a simmer and leave to cook for about 5 minutes, occasionally stirring, or until the sugar has dissolved and the liquid has slightly thickened. Set aside to cool down.
Diplomat Cream (Crème Diplomate)
A Diplomat Cream is one of the basic French Pastry Cream. It is made with a Pastry Cream (Crème Pâtissière) mixed with Gelatine and a Whipped Cream. It is very similar to a Light Cream (Crème Légère) or Princess Cream (Crème Princesse), which is the same cream but made without gelatine.
This cream is the based of the Fraisier Filling. You could substitute it with another cream filling if preferred, but I do not recommend using only whipped cream that does not bring much flavour.
To make this Creme Diplomate, you will need (see all quantities below):
- Full Cream Milk
- Vanilla - bean or paste recommended, but extract can be used if needed
- Orange Blossom Water - optional but highly recommended!
- Egg Yolks
- Caster Sugar
- Cornstarch
- Gelatine Powder - with a little bit of cold water to hydrate it
- Heavy / Thickened Cream - or a cream you can whip (it needs to have at least 30% fat content)
How to make Diplomat Cream:
First, prepare the Pastry Cream and mix it with the Gelatine.
Would you like to save this recipe?
- Place the Milk, Vanilla and Orange Blossom Water in a small pot and heat up on low heat (if using a bean, leave to infuse for 5 minutes, then slice in half, scrap the beans and add them to the milk. With paste of extract, simply whisk in the milk).
- While the milk is heating up, whisk together the Egg Yolks and Caster Sugar in a separate bowl. Add the Cornstarch and whisk well until all incorporated.
- Once the milk starts to simmer, carefully pour about half of it over the Egg/Sugar mixture and whisk well, then transfer it all back into the pan.
- Still on low heat, whisk well until you reach the first boil (it will have thickened by then), then count 30 seconds to fully cook the eggs. Remove from the heat - this is your Pastry Cream Base.
- Mix the Gelatine Powder with a little bit of water to dissolve it and add it to the hot Pastry Cream. Whisk well until all dissolved, then transfer into a clean bowl or tray (I used a brownie pan). Cover with plastic wrap touching the surface, and place in the fridge to cool down.
The second step is to mix the Pastry Cream and Whipped Cream.
- Once the Pastry Cream has cooled down (*), start to whip the Cream until you reach stiff peaks (it will take a few minutes on high speed).
- Transfer the Pastry Cream in a clean bowl (if it was chilling on a tray, otherwise keep it in the same bowl) and whisk it to loosen it.
- Using a spatula, fold the Whipped Cream into the Pastry Cream in 3 or 4 times. Leave at room temperature until ready to assemble the cake (do not put it back in the fridge now or it will start to set and become hard to pipe).
(*) the temperature of the pastry cream is really important. The gelatine starts to set around once it approximatively reaches room temperature. If you chill the pastry cream for too long, it will have set and become really hard to mix with the whipped cream. If not chilled enough, it will melt the whipped cream. You want the pastry cream to be at around room temperature (20'C/70'F).
How to assemble a Fraisier step by step
The key to make this cake is to be organised, and make sure all of the different elements are ready before you put together the cake.
Before you start assembling the cake, make sure that:
- the Genoise Layers are cool and cut into 2 circles the size of the pastry ring.
- The Syrup has cooled down
- The Diplomat Cream is ready and at room temperature
- The Strawberries are sliced: some in half to create the edges (make sure to pick the ones that have similar height to create a regular edge) and the rest into small cubes to fill the cake.
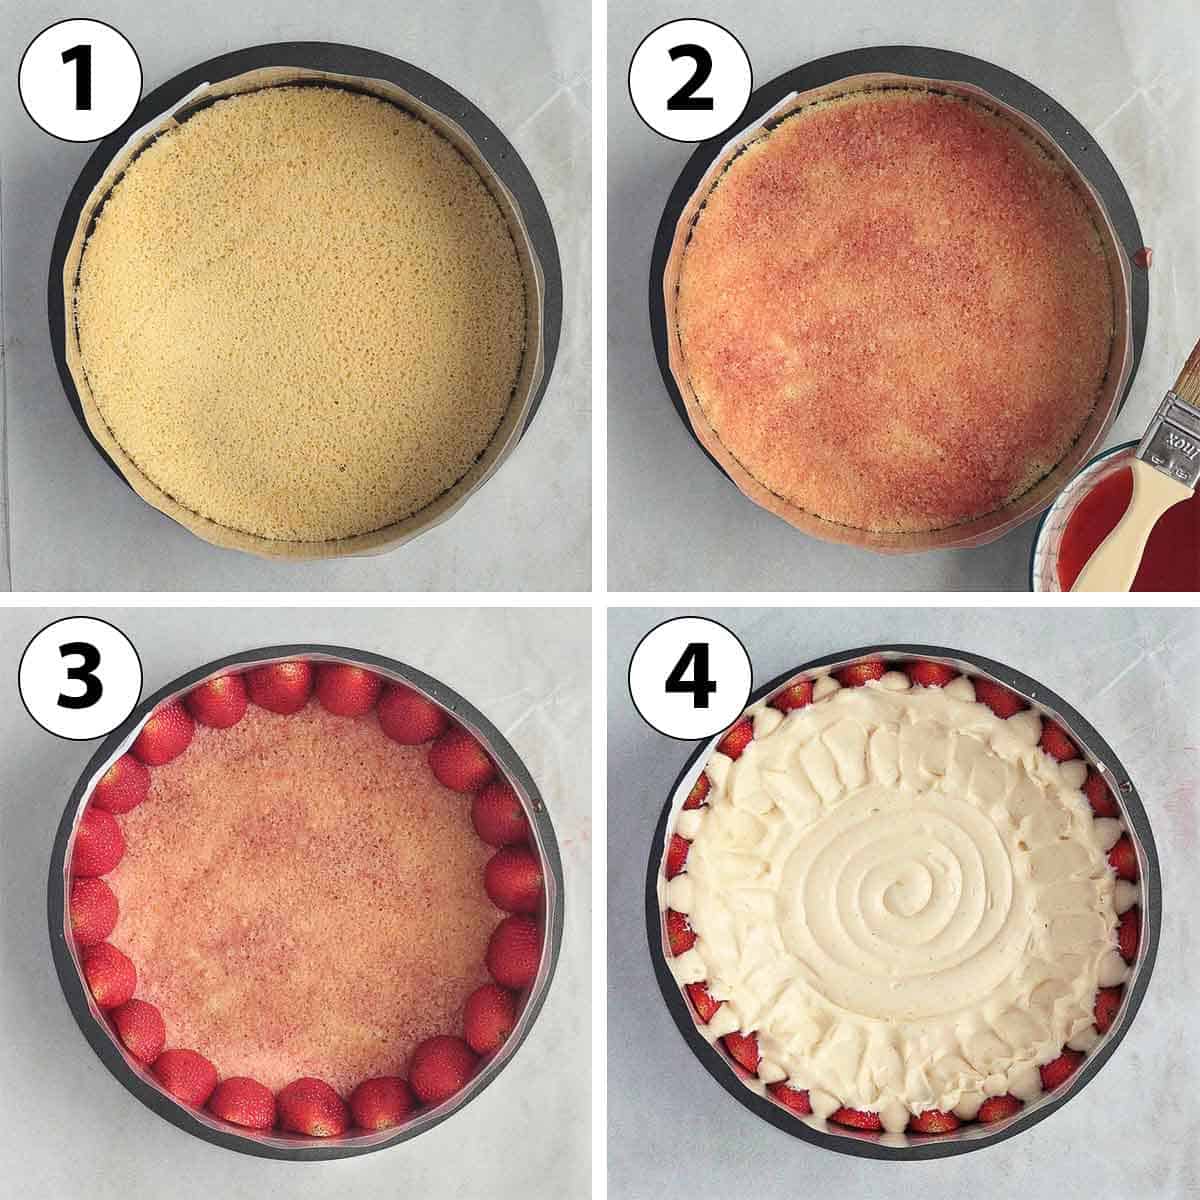
Step 1 to 4
- Place one of the layer of Genoise at the bottom of the Pastry Ring. Optionally, use an Acetate Roll ("Cake Collar") to line the inside of the pastry ring. - photo 1
- Brush the Genoise Bottom Layer with the Strawberry Syrup. - photo 2
- Place the Strawberries sliced in half around the edges of the cake, as tightly as possible. Make sure that the sliced side is facing out (touching the pastry ring). - photo 3
- Pour about half of the Diplomat Cream over the Genoise. The best way to do that is by using a Pastry Bag and piping the cream. Start by piping the cream between the strawberries (*), then pipe the cream from the middle of the cake toward the edges in a spiral movement. - photo 4
Use a small Offset Spatula to smooth out the cream if needed, especially around the edges.
(*) It is really important to have the cream go between each strawberries on the edges (pipe it as high as the strawberries, if not even higher) to have a smooth finish.
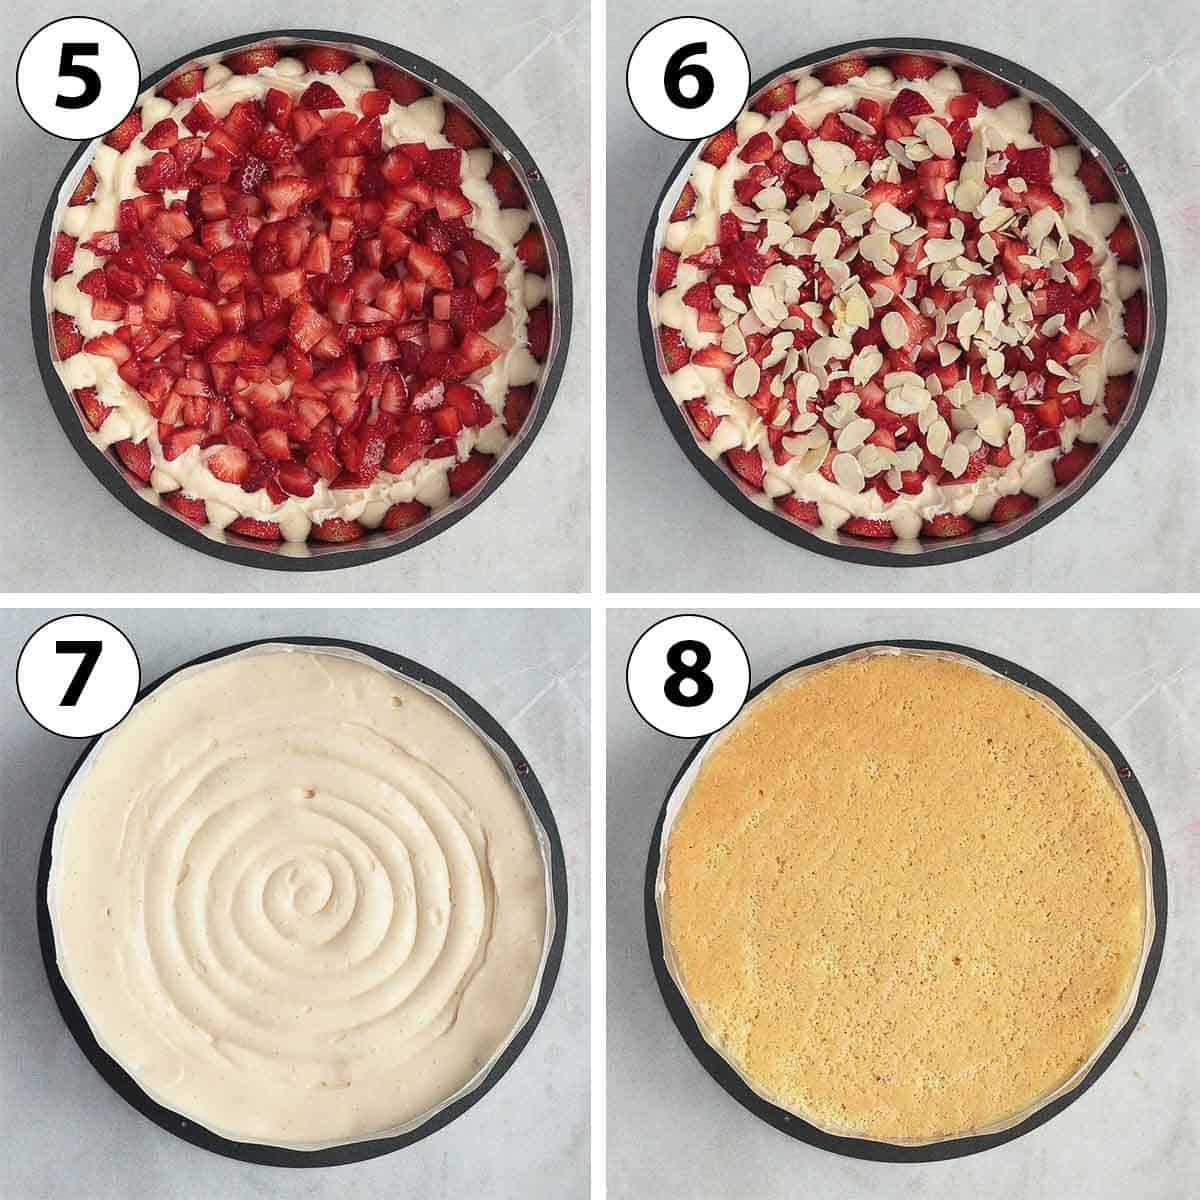
Step 5 to 8
- Place the cubed Strawberries over the Cream and gently press on them to make sure there are no large air pockets. - photo 5
- (Optional) Sprinkle the Flaked Almonds over the Strawberries. You can also toast them in the oven if preferred, or use Coconut Flakes instead. - photo 6
- Pipe the rest of the Diplomat Cream over the the Strawberries and Almonds. Again, the easiest way to do so is by starting in the centre and spiral toward the edges. Spread more evenly with an offset spatula if needed. - photo 7
- Brush the second layer of Genoise with the Strawberry Syrup (the layer that will be facing the inside of the cake over the cream only) then place it over the filling. Gently press to even it out. - photo 8
- Place in the fridge to set for at least 2 to 3 hours, or overnight.
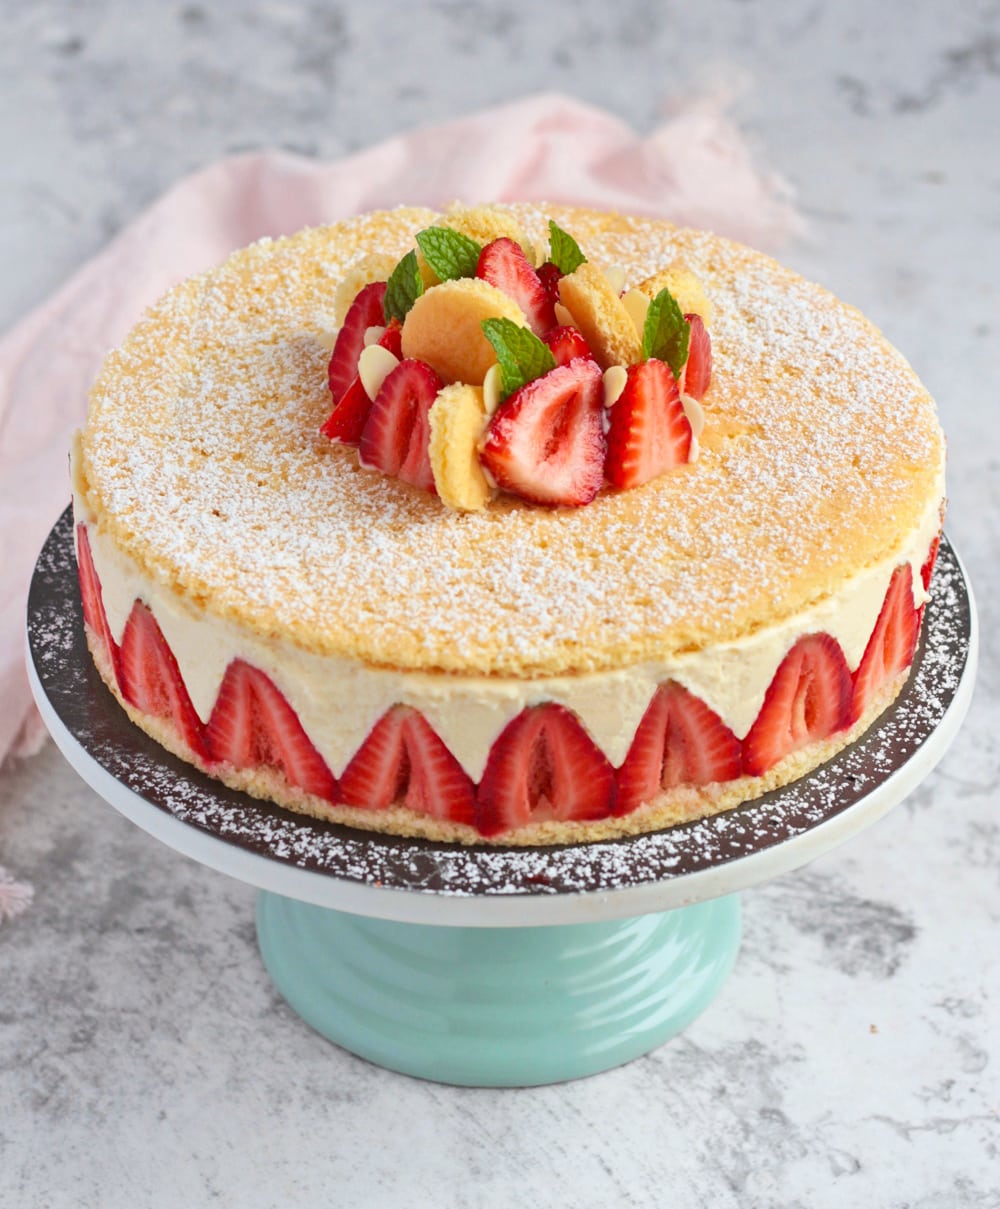
To finish the cake, is sprinkled a little bit of Icing Sugar over the Genoise. I also used some Strawberries sliced in half, along with offcuts of Genoise leftovers cut into small rounds, some flaked almonds and a few leaves of fresh Mint.
Top Tips to make this Strawberry Mousse Cake
- Follow the Cooling and Setting Time - especially to make the Diplomat Cream. If too hot, the cream will melt and it will be really hard to fill the cake with it. If too cold, the gelatine will have started to set and you will struggle to pour it into the cake.
- Do not spread the Genoise Batter too thinly on the baking sheet before baking it or it will become hard and crack. Try to spread it as evenly as possible to insure a consistent result. You want to avoid having over-baked parts that will crack next to under-baked part that could still be raw.
- Be well organised: make sure all of the different elements of this cake are ready before assembling them. You do not want to realise you are missing something halfway through putting this cake together
- Assemble the cake as soon as all of the elements are ready.
- Assemble the cake together directly on the plate you will serve it over to avoid having to transfer it once put together and fragile.
- Pick the best looking side of the two Genoise Sponge to be used as the top layer.
- To create the edges of the cake, choose strawberries that have the same height to get a regular finish.
- Make sure you pipe the cream between each edge strawberries and go over it as well to insure a smooth finish.
- Use leftover Genoise offcuts to use as cake topping. Use a small round cookie cutter to create round genoise garnishes, along with more fresh strawberries.
- If not serving straight away, only place the toppings last minute to insure the strawberries and mint stay fresh.
Recipe FAQs
As soon as the Fraisier is assembled, it should be stored in the fridge until ready to be served. Make sure to cover the strawberry cake to make sure it does not absorb any smell from the fridge, or dries out.
When ready to be served, carefully remove the Pastry Ring (and acetate collar). Keep any leftovers in the fridge, well covered with wrap or transferred into an air-tight container.
This dessert can be kept for an additional 2 days in the fridge.
This cake is delicious on its own, and relatively rich. I personally serve it on its own, but you could also serve it with:
- more fresh Strawberries
- a scoop of Vanilla Ice Cream
- some Strawberry Coulis or Raspberry Coulis
- a Mixed Berry Compote
More Classic French Desserts
Made this recipe?
Let us know if you liked it by leaving a comment below, and tag us on Instagram @a.baking.journey with a photo of your creation!
Recipe
Fraisier Cake with Diplomat Cream
Ingredients
Genoise Sponge
- 4 large Eggs
- 80 gr Caster Sugar
- 100 gr Plain / All-Purpose Flour
- 20 gr Cornstarch
Strawberry Syrup
- 60 gr Strawberries, fresh or frozen
- 90 ml Water
- 50 gr Caster Sugar
Diplomate Cream
- 500 ml Full Cream / Whole Milk
- 1 1/2 teaspoon Vanilla Paste, or 1 fresh Vanilla Bean
- 1 teaspoon Orange Blossom Water, optional
- 4 large Egg Yolks, at room temperature
- 40 gr Caster Sugar
- 40 gr Cornstarch
- 1 1/2 teaspoon Gelatine Powder, + 2 tablespoon cold water
- 250 ml Thickened / Heavy Cream, 35% fat content min.
Cake Filling
- 500 gr Fresh Strawberries, or more to taste
- 20 gr Flaked Almonds, optional
Cake Toppings
- Icing Sugar, to taste
- Fresh Strawberries, to taste
- Flaked Almonds, to taste
- Mint Leaves, to taste
Instructions
Genoise Sponge
- Preheat your oven on 160'C/325'F. Line 30 x 45 cm (12 x 18 inch) flat baking tray (see note 1) with Baking Paper and set aside.
- In the bowl of your stand mixer, whisk the Eggs and Caster Sugar on medium to medium high speed for about 10 minutes. The mixture should look very pale, thick, frothy and have at least doubled in size.
- Sift the Flour and Cornstarch over the egg mixture and very gently fold it in using a spatula. Stop as soon as the dry ingredients look fully incorporated. Pour the mixture into the lined baking tray and gently spread with an offset spatula to level the batter.
- Bake for 10 to 12 minutes or until puffed and golden. Transfer over a cooling rack and leave to cool down completely before removing the baking paper and cutting the two circles of sponge using a 20 cm / 8-inch Pastry Ring.
Strawberry Syrup
- Blend the Strawberries (thawed if using frozen) until smooth then pour it through a thin mesh sieve to keep the liquid only.
- Place the Strawberry juice, Water and Sugar into a small pot on low to medium heat. Cook for about 5 minutes, occasionally stirring, or until the sugar has dissolved and the liquid has started to thicken a bit. Set aside to cool down.
Diplomate Cream
- Place the Milk, Vanilla Paste (2) and Orange Blossom Water in a small saucepan and heat up on low heat.
- In a separate bowl, whisk together the Egg Yolks and Sugar. Add the Cornstarch and whisk until combined.
- Once the milk starts to simmer, pour about half of it over the Sugar/Egg Yolks, whisk well, then transfer it all back onto the pot. Cook on low to medium-low heat for about 5 minutes or until the mixture has thickened (ideally, use a kitchen thermometer to check the cream has reached 82 degrees Celsius). Remove from the heat.
- In a small bowl, stir the Gelatine Powder and a little bit of Cold Water to dissolve it (3). When thick, add to the cooked custard and whisk well until dissolved. Transfer the pastry cream into a clean bowl or tray (4), cover with plastic wrap touching the surface and place in the fridge to cool down.
- Once the Pastry Cream has reached room temperature (5), start whipping the cold Cream until you reach stiff peaks.
- Whisk the Pastry Cream to loosen it (if you used a tray to cool it down, you may want to transfer it back into a large bowl), then gently fold in the whipped cream in 3 or 4 times. Transfer into a Piping Bag with large round Piping Tip.
Assembling the Cake
- Pick strawberries that have about the same height to create the edges of the cake, and slice them in half (6). Cut the rest of the strawberries into small cubes and set aside.
- Place the 20x5 cm/ 8x2 inch Pastry Ring over a flat surface (7) and surround the interior of the ring with an Acetate Strip (8).
- Put the first layer of Genoise at the bottom of the ring and brush it with Strawberry Syrup.
- Place the Strawberries sliced in Half around the edges of the cake, sliced side facing out. Try to place them as tightly against each other as possible.
- Pipe the Diplomat Cream between each strawberries, going as high as the pastry ring. Add about half the of the Cream over the Genoise (9) and spread with an offset spatula if needed.
- Cover the cream with the cubed Strawberries and Almond Flakes (optional). Gently press on them to avoid any large air pockets.
- Pipe the rest of the Diplomat Cream over the cubed Strawberries and Almonds, going all the way to the edges of the Pastry Ring (and over the strawberries on the edges).
- Brush the second layer of Genoise with the Strawberry Syrup (on one side only) and cover the cream with it, brushed side facing in. Gently press on it to even it out.
- Place in the fridge to set for at least 3 to 4 hours, preferably overnight.
Cake Toppings
- To finish the cake, I sprinkled a little bit of Icing Sugar over the Genoise. I also added some slices of Fresh Strawberries in the centre of the cake with Fresh Mint Leaves and Flaked Almonds (10).
- Carefully remove the Pastry Ring and Acetate Strip (11) before serving.
Video
Would you like to save this recipe?
Notes
- You can use a regular flat baking tray lined with baking paper or a flat silicone baking with slightly raised edges. Either way, make sure the tray is large enough to cut 2 x 20cm disks of sponge to fit into the pastry ring. Alternatively, use 2 smaller baking trays or a round Baking Pan.
- If using a whole Vanilla Bean, leave it to infuse in the warm milk for 5 to 10 minutes. Then slice it in half, scrap the seeds and add the seeds to the milk.
- I used about 2 tbsp of Cold Water for 1 1/2 tsp of Gelatine Powder. Read the instructions on the pack of gelatine you use as it may recommend another ratio.
- I use a baking tray similar to a large brownie pan to cool down the pastry cream. The thickest the layer of pastry cream, the longer it will take to cool down and it will cool down unevenly. Spreading it thinly on a tray provides a great way to cool it down evenly and quickly.
- You do not want the Pastry Cream to get too cold or the Gelatine will start to set. The ideal temperature is around 20'C/70'F or room temperature - as it will be warm enough for the gelatine not to have set but cool enough not to melt the whipped cream.
- With a Pastry Bag, start at the centre of the cake and make your way toward the edges in a spiral movement.
- Check if you have enough to go create the edges before you cube the rest of the strawberries
- Using an Acetate Strip (or 'cake collar') is optional, but it creates a much cleaner finish. It also makes it easier to remove the Pastry Ring when ready to serve as no cream will be sticking to it.
- Use the Plate you will serve the cake on - it is much easier to assemble the cake on the serving plate straight away rather than try to transfer it later on.
- If you have some cream left, you can use it as a "glue" for the cake toppings.
- If you did not use an Acetate Strip, you may find it a bit harder to remove the Ring as the cream may be sticking to it. A tip to remove the ring if stuck is to use a blow torch on the outside of the ring for a couple of seconds to 'melt' the cream.
Nutrition (per serving)
Read this recipe as a Web Story!


lex says
I made this last week during the Flyers Vs. Pittsburgh game so my daughter could practice making it for her French project, and our guests devoured it. She has to bring it to school this Friday, so is there a way to make it today and put it all together and then freeze it for two days or is there a better option to make it last longer? Thank you so much, once again we fell in love with this recipe. It was light and airy, and absolutely delightful!
Sylvie says
Hi Lex, love to hear you enjoyed the recipe! I wouldnt freeze the whole cake, no - the cream itself doesnt freeze well, and the strawberries will turn watery once defrosted. You could make the sponge and freeze those; the cream itself will last in the fridge for two days, and it can be assembled a day ahead. Hope that helps!
Carrie says
Really like appreciate the amount of detail you give in your instructions. The recipe itself is really nice and I enjoyed making this cake.
My only issues were with the sponge. I feel like I probably over mixed causing this issue but please confirm if you know. I tried the sponge recipe twice and although the second one got a better rise, they both ended up tasting like sweet scrambled eggs. I've made a successful genoise sponge before so I'm confused as to what could have happened.
Sylvie says
Hi Carrie, I'm glad you enjoyed making this cake! A cake tasting "eggy" might be due to the eggs being under-whipped. For a nice rise and light texture + flavour, the eggs need to be whipped quite well. Another possibility is that the eggs you used were larger than mine (I usually use 50gr eggs without the shell), giving your sponge a more pronounced egg taste. The last thing I can think of is that the sponge could be a bit underbaked - either your oven runs a bits cooler than mine or it was not baked long enough. I hope that helps!
Naomi says
The cream and strawberry combination is delicious.
I had an issue with the sponge cake, mine came out dense, almost like a thick crepe (was still tasty haha).
I think a picture showing how the cake batter is supposed to look before baking would be helpful! I am a beginner and I suspect that I did not execute that correctly. More pictures of the process would be useful!
Sylvie says
Hi Naomi, if your sponge was too dense, it's usually a sign that the eggs and sugar were not whisked for long enough or were deflated when you mixed in the cornstarch. It is the air bubbles created as you whisk the eggs for a long time that make the sponge rise and turn light and fluffy so if the batter wasn't aerated enough, you might end up with a dense cake. Hope that helps!
ann marie whitten says
Love this and can’t wait to make it! Question for you please . I am in Canada and wondering what our equivalent to heavy cream would be ? I see it calls for both heavy cream and whipping cream
Thank you so much
Ann Marie
Sylvie says
Hi Ann Marie, I'm not sure how specifically it is called in Canada, but it is a cream that contains at least 30% fat. Sometimes called heavy whipping cream 🙂
Rob says
It looks like the cake layers should only be between 1/4” and 1/2”? Is that right?
Sylvie says
They will be pretty thin yes 🙂
H O'Brien says
The sponge rose well, but I think the lack of butter, which I normally put in a genoise sponge led it to be a bit un exciting. If I make the dessert again I'll use my normal genoise recipe.
A Baking Journey says
Hi there, this is a traditional genoise which in French Pastry isnt usually made with butter, but feel free to add butter if preferred. Cheers
Jasmine says
Excuse me, can this recipe be used for a square Fraisier? or can it only be a circle cake? Thank you so much!
A Baking Journey says
Hi Jasmine, I don't see why not - you might just need to adapt the ingredients quantity if the size of your square mold is much bigger or smaller. Cheers!
María Paiz says
Divine recipe and so easy to follow! Thank you so much, my first Fraisier was a success. I decorated the top with a basket weave of whipped cream and everyone loved it. I didn't add the almonds and definitely missed the crunch. Next time I want to try making the genoise's a bit thicker and adding zest... or maybe some herbs in the cream... Anyways, THANK YOU!!!!
A Baking Journey says
So glad you are enjoying the recipe! The decoration seems lovely and the addition of zest or even herbs in the cream sounds delicious!
Eeman says
I’m making this as I type. I’m confused about the sugar in the diplomat cream. You’ve only used 2 tablespoons. Is that enough for all that cream? I just got done making the pastry cream and even that isn’t sweet enough. I haven’t even added the whipped cream to it.
A Baking Journey says
Hi Eeman, the cream is relatively low in sugar as I personally don't like overly sweet desserts, but you can absolutely increase the quantity of sugar to suit your taste if preferred! Cheers
Emma says
Hello,
I would really like to make this for my mother's birthday, but she is lactose intolerant. Would it be possible to replace the dairy with lactose free alternatives in the cream? Maybe some kind of coconut based whipping cream and lactose free milk? I definitely don't want to ruin it, but I would love to hear if you had any opinions on this issue.
A Baking Journey says
Hi Emma, I have not tried this particular one with dairy-free alternative so I can't say for sure, but I don't see why not. I've made the Pastry Cream with Soy Milk before with no issues, but just make sure to replace the cream with one that you can be whipped (at least 30% fat content). If you use a flavoured dairy alternative, it will change the final taste so jut be aware of that 🙂