
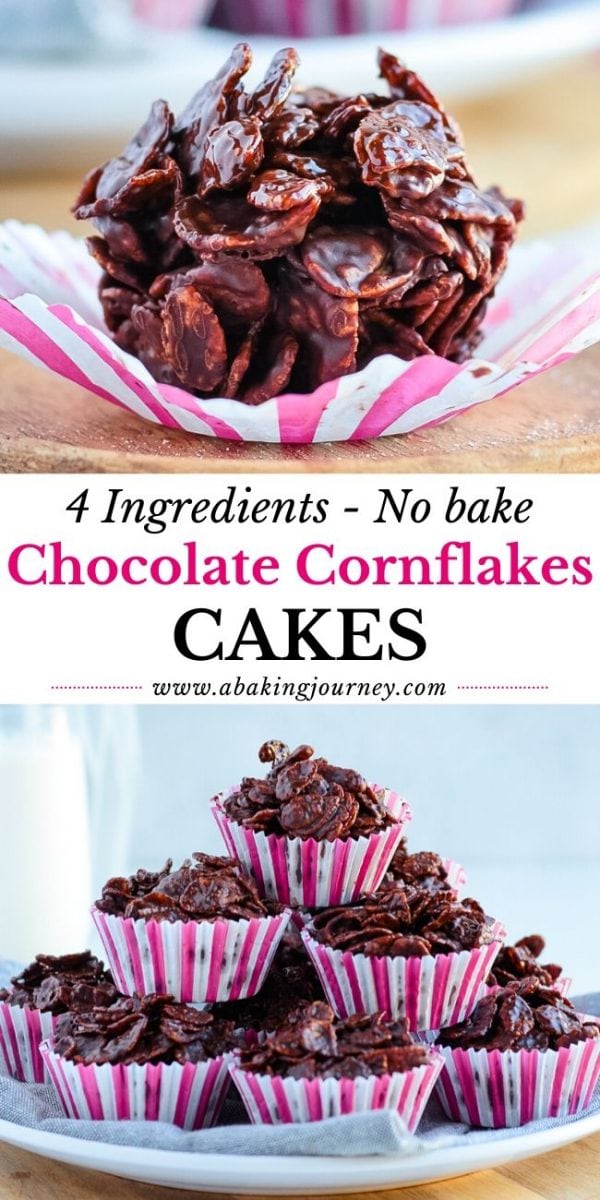
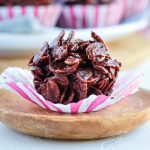
These super easy Chocolate Cornflake Cakes are deliciously crunchy little sweet treats, packed with dark chocolate. They are made from 4 ingredients only (no golden syrup required!) and will be ready to set in 15 minutes.

Jump to:
Why we love this recipe
These No Bake Chocolate Cornflake Cakes are probably one of the easiest sweet recipe to make - ever. And one of the most delicious too! They are a super fun easy baking project to make with kids - but adults will love them just as much.
Made with 4 ingredients only, these little cornflakes cakes are exactly what you need when you are looking for a quick fix to your sweet cravings. I simply love the combination of the super crunchy cornflakes with the intense dark chocolate taste!
Mixing Cornflakes with Chocolate is always a winning combination, whether it is in the form of little bite like here, Chocolate Peanut Butter Balls or even No Bake Chocolate Peanut Butter Bars.
This recipe is also a fun twist on the classic Australia Honey Joys: a Chocolate Honey Joy! Though as opposed to the traditional recipe, this one does not require any actual cooking or baking.
Ingredients
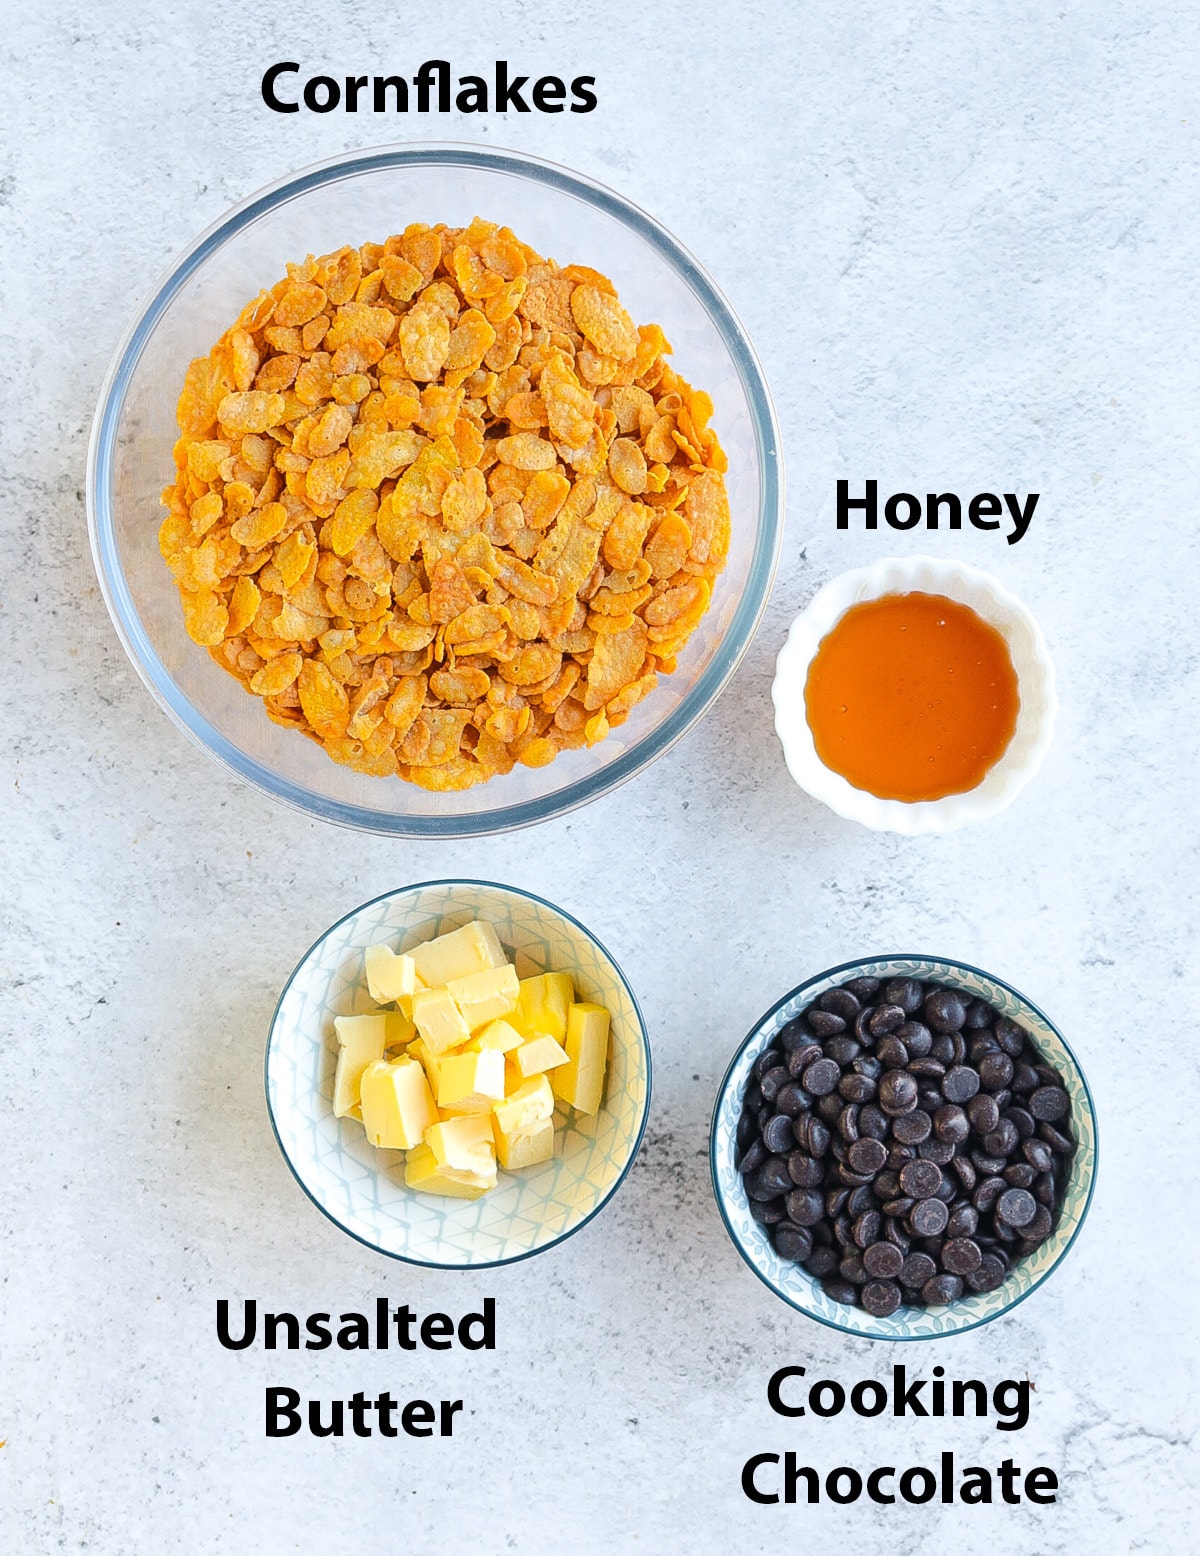
This recipe uses super simple, basic ingredients. And you will only need 4:
Scroll down to recipe card below for all quantities
- Cornflakes: use certified gluten-free cornflakes to make these treats gluten-free.
- Honey: these cornflake cakes are made with Honey instead of Golden Syrup - the ingredient usually used in the British Recipe. But as mentioned above, this is also a take on the Aussie Honey Joys - so it is made with Honey!
- Butter: unsalted butter.
- Dark Chocolate: it is important to use proper Cooking Chocolate and not regular eating chocolate that won't melt and reset properly. Depending on the brand of chocolate (and it's fluidity once melted), you might need a little bit more chocolate than the recommended quantity.
Ingredient Substitution
- Honey: you can use Golden Syrup or Rice Malt Syrup instead for a plant-based sweetener. I do not recommend using Maple or Agave Syrup here as they have a more liquid texture.
- Butter: can be substituted with a Dairy-Free Butter Spread or Margarine. I have never tried to make these with Coconut Oil so cannot tell if it would work.
How to make Chocolate Cornflake Cakes
There are only a few steps to follow to make this recipe. Again, SO easy!
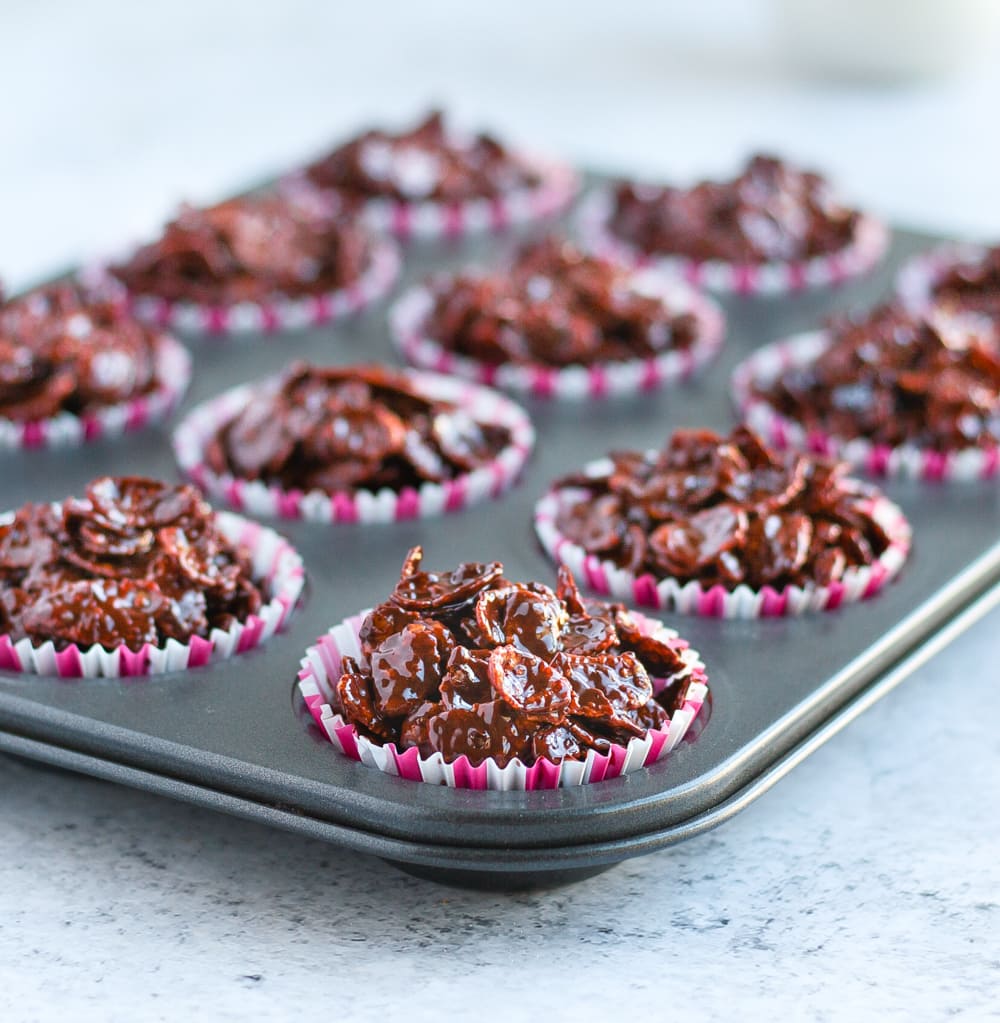
- First, prepare your Muffin Pan with some paper liners or cupcake cases. I do not recommend making these cakes directly into the pan as they will stick and be almost impossible to take out.
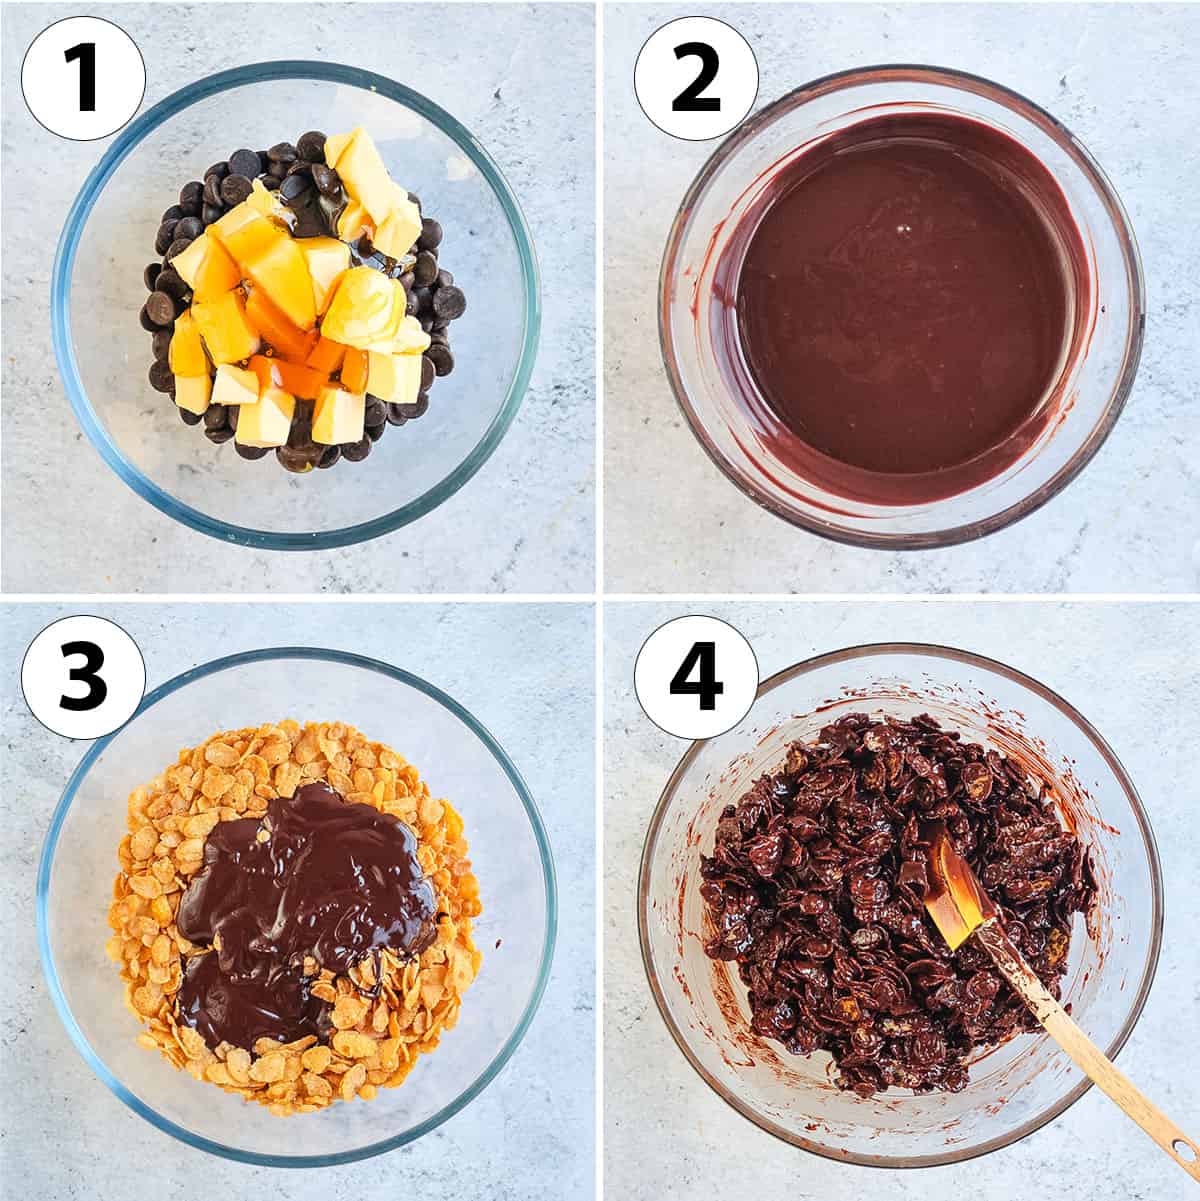
- Photo 1: Finely chop the chocolate and place it in a heatproof bowl along with the Butter and Honey.
Would you like to save this recipe?
- Photo 2: melt in the microwave (with a microwavable bowl) or over a double boiler (placing the bowl over a small saucepan filled with a little bit of simmering water on low heat) until fully melted and smooth.
If using the microwave, melt in 30 seconds intervals and stir well each time to avoid burning the chocolate.
- Photo 3: Place the Cornflakes in a large mixing bowl (the cornflakes will take a lot of space so make sure to use a very large bowl!) and pour the warm melted Chocolate mixture over them.
- Photo 4: Use a spatula or wooden spoon to mix it all together. Keep stirring until all the cornflakes are evenly covered with the Chocolate, making sure to scrape the bottom of the bowl.
Note that depending on the brand of chocolate you use and its fluidity once melted, you might need to increase the chocolate quantity slightly.
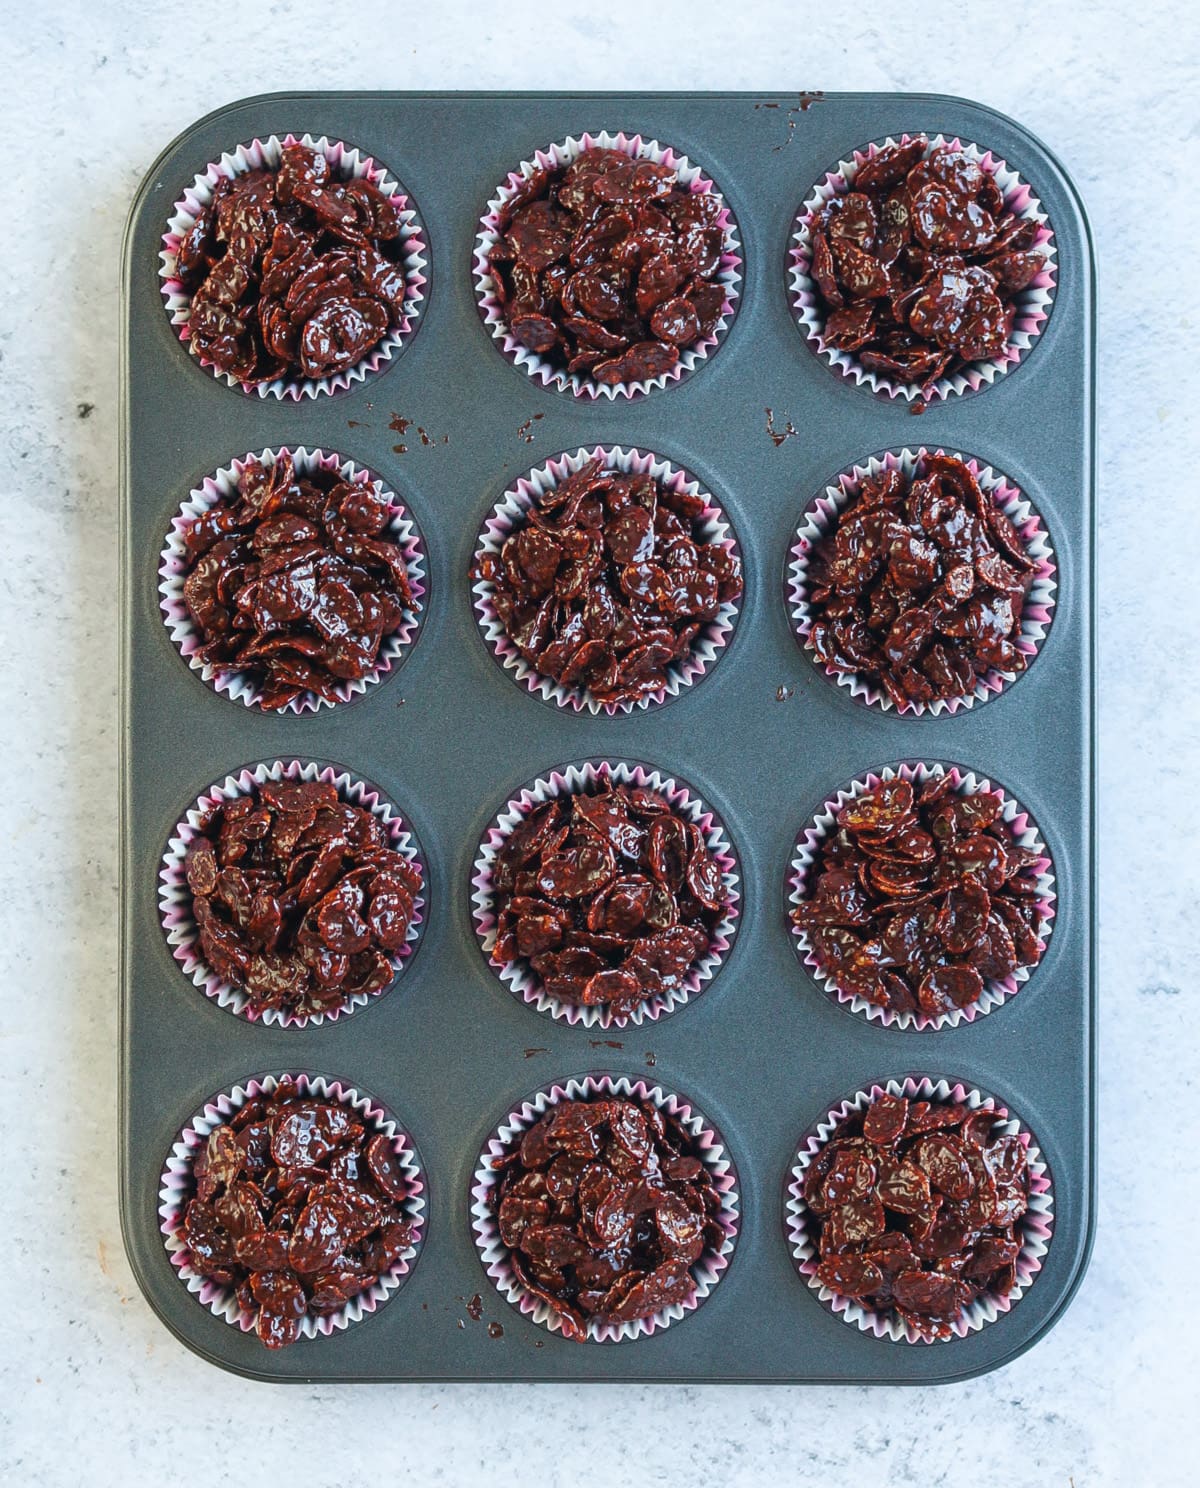
- Place the chocolate covered cornflakes inside the prepared muffin tin and gently press to compact them. Make sure all the cornflakes touch each other or they might not hold together properly when cold.
I like to add about one tablespoon of cornflakes at the time and gently compact them before adding more. This is to insure there are no large air pocket in the cakes.
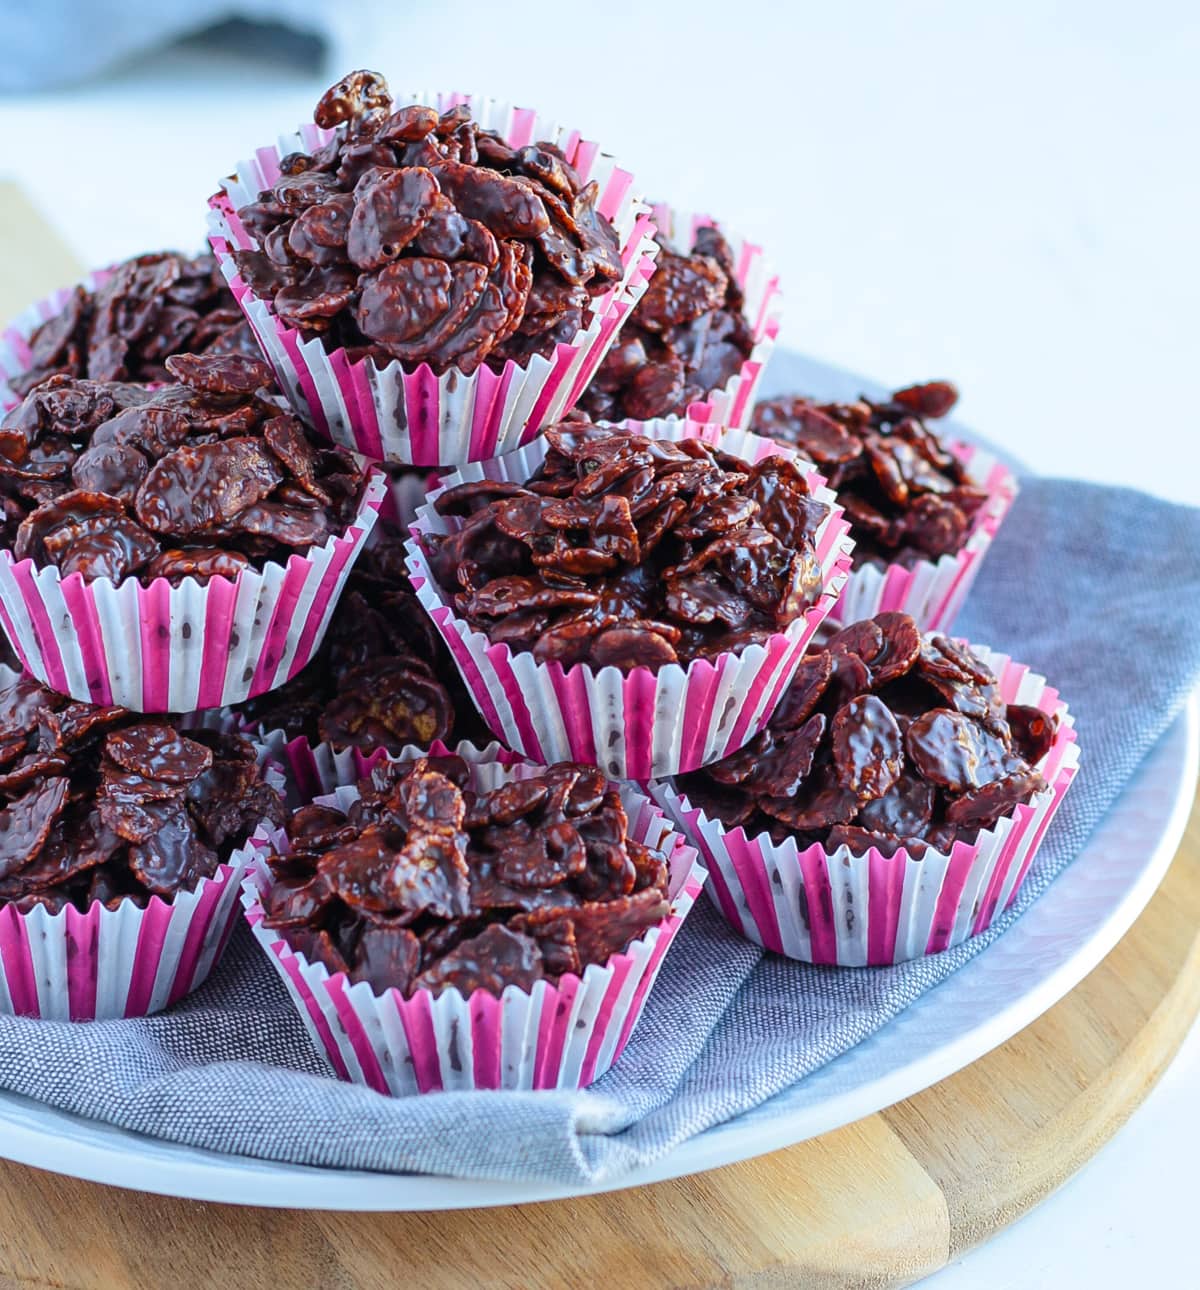
- Put in the refrigerator to set for about an hour, or until the Chocolate has hardened. Keep in the fridge until ready to eat.
Depending on the size of your muffin pan and how much you pack them, this recipe will make 12 to 15 cakes.
Cornflake Cakes FAQs
Make sure to use proper Cooking Chocolate. As opposed to eating chocolate, this type of chocolate will easily melt without becoming grainy then set again in the fridge.
I used a 70% Dark Chocolate - which is my favourite baking chocolate - but you can really use any type of chocolate you want. You can absolutely go for a less intense dark chocolate or a milk chocolate if preferred.
You may have used too much butter or honey.
The exact time can vary based on the percentage of cocoa butter contained in your chocolate, but they usually take around 1 to 1,5 hours to set.
Absolutely, this recipe is a great base for fun creations! At Easter time, you can top them with Mini Eggs to make Easter nests for example.
You can also enjoy making these with your children and get them to add their preferred decoration on top of each individual cakes, like mini marshmallows, sprinkles or a drizzle of white chocolate!
Storing & Freezing
These Chocolate Cornflake Cakes should be kept in the fridge for up to 3 days. Once they have set, you can either keep them in the muffin pan covered with wrap, or transfer them in an air-tight container. This is to make sure they do not absorb any odours from the fridge.
I do not recommend keeping them at room temperature as the chocolate and butter will start to melt and it will become messy.
Because they will keep fresh for a few days, they are great make-ahead treats that can be made in advance for parties or for your kids after-school snack for example!
These cakes will not freeze well.
Made this recipe?
Let us know if you liked it by leaving a comment below, and tag us on Instagram @a.baking.journey with a photo of your creation!
Recipe
Chocolate Cornflakes Cakes
Ingredients
- 200 to 300 gr (7 to 10,5 oz) Dark Cooking Chocolate, (see note *)
- 50 gr (3 1/2 tbps) Unsalted Butter
- 50 gr ( 2 1/2 tbsp Honey
- 200 gr (6 cups) Cornflakes, Certified Gluten-Free if required
Instructions
- Prepare a Muffin Pan with Paper Liners or Wrappers and set aside.
- Place the Cooking Chocolate (1), Butter and Honey in a heat-proof bowl and melt in the microwave (2) or on a double boiler. Stir until completely smooth.
- Place the Cornflakes in a very large Mixing Bowl, and pour the warm melted Chocolate over them. Using a spatula, mix them together until all the Cornflakes are evenly covered in Chocolate.
- With a spoon, place the Chocolate Cornflakes in each Muffin Liners, gently pressing on them to make sure they are tightly and compactly packed together (3).
- Place in the fridge to set for about 1 hour, or until the Chocolate is fully set and hard.
Video
Would you like to save this recipe?
Notes
Start with 200 gr of chocolate (7 oz) and if you notice that a lot of the cornflakes are not covered with chocolate, melt a little bit more and mix it in.
Note that you need to use proper Cooking Chocolate (not eating chocolate) for the chocolate to melt properly without becoming grainy. Instructions Notes:
- If using a Cooking Chocolate Bar, make sure to thinly chop the chocolate before melting it so that it will melt more quickly and smoothly.
- If melting in the microwave, stop to stir every 30 seconds to avoid burning the chocolate. You do not need to leave it in the microwave until fully melted; if there are a few small bits of unmelted chocolate, it will melt with the residual heat.
- You want to make sure all the cornflakes are touching each other or the cakes might break apart when set and cool. I like to add about one tablespoon of cornflakes at the time and gently compact them before adding more. This is to insure there are no large air pocket in the cakes.


