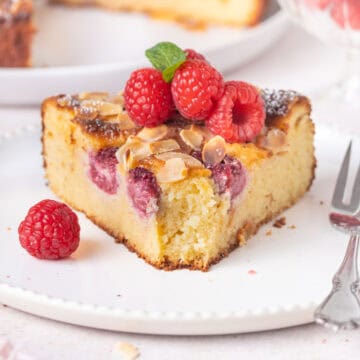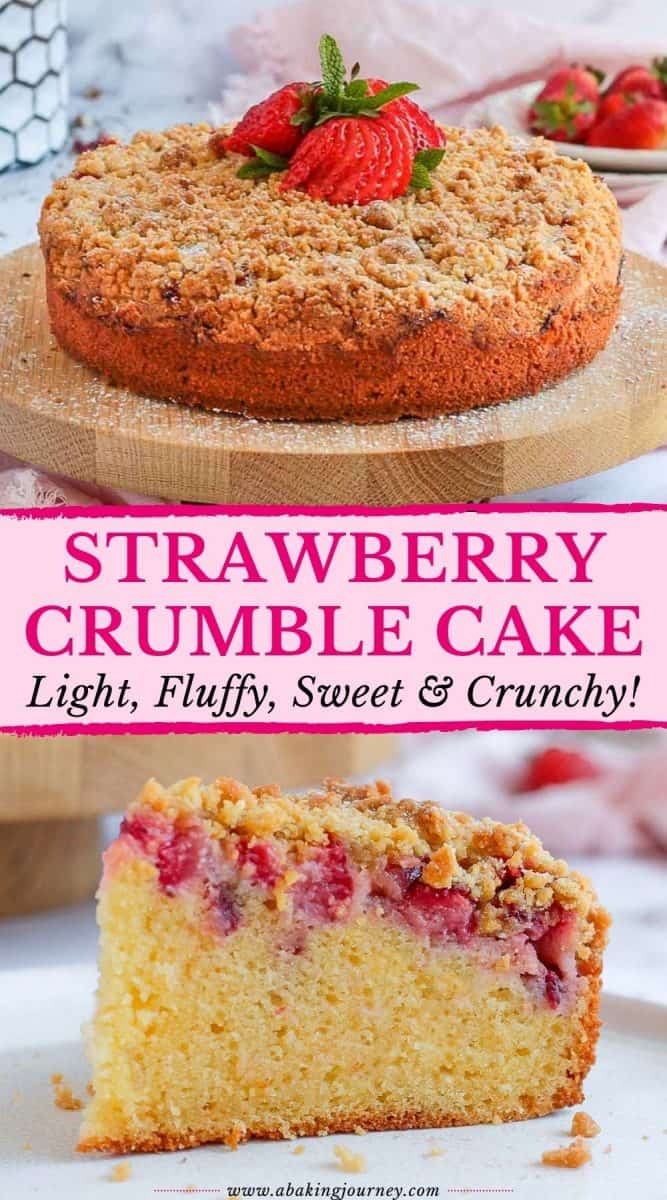
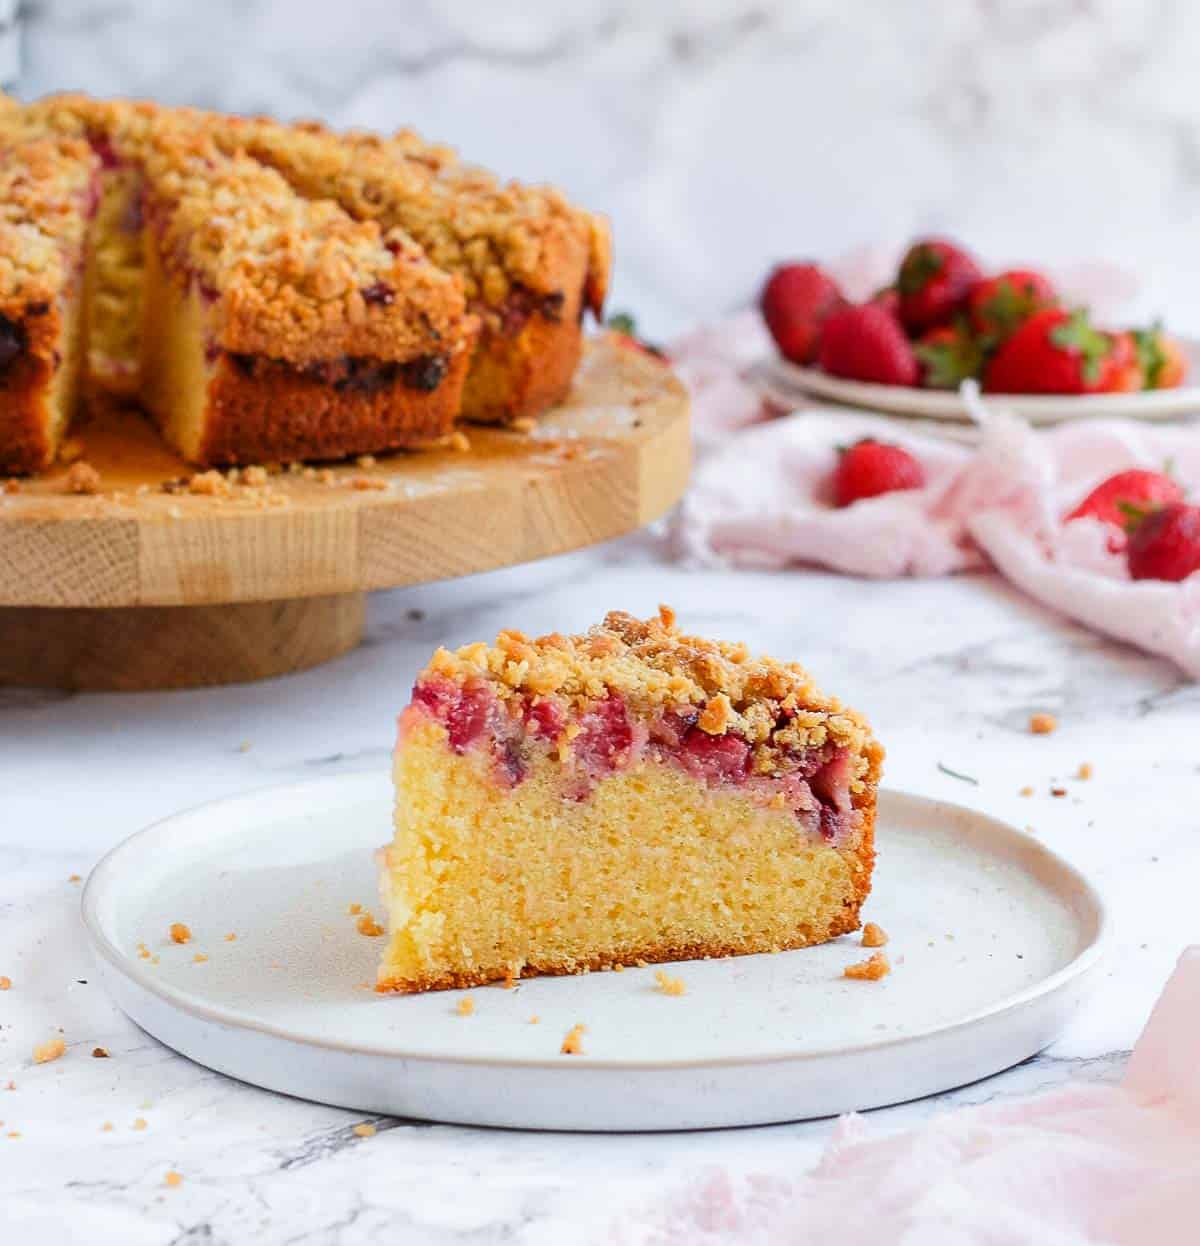
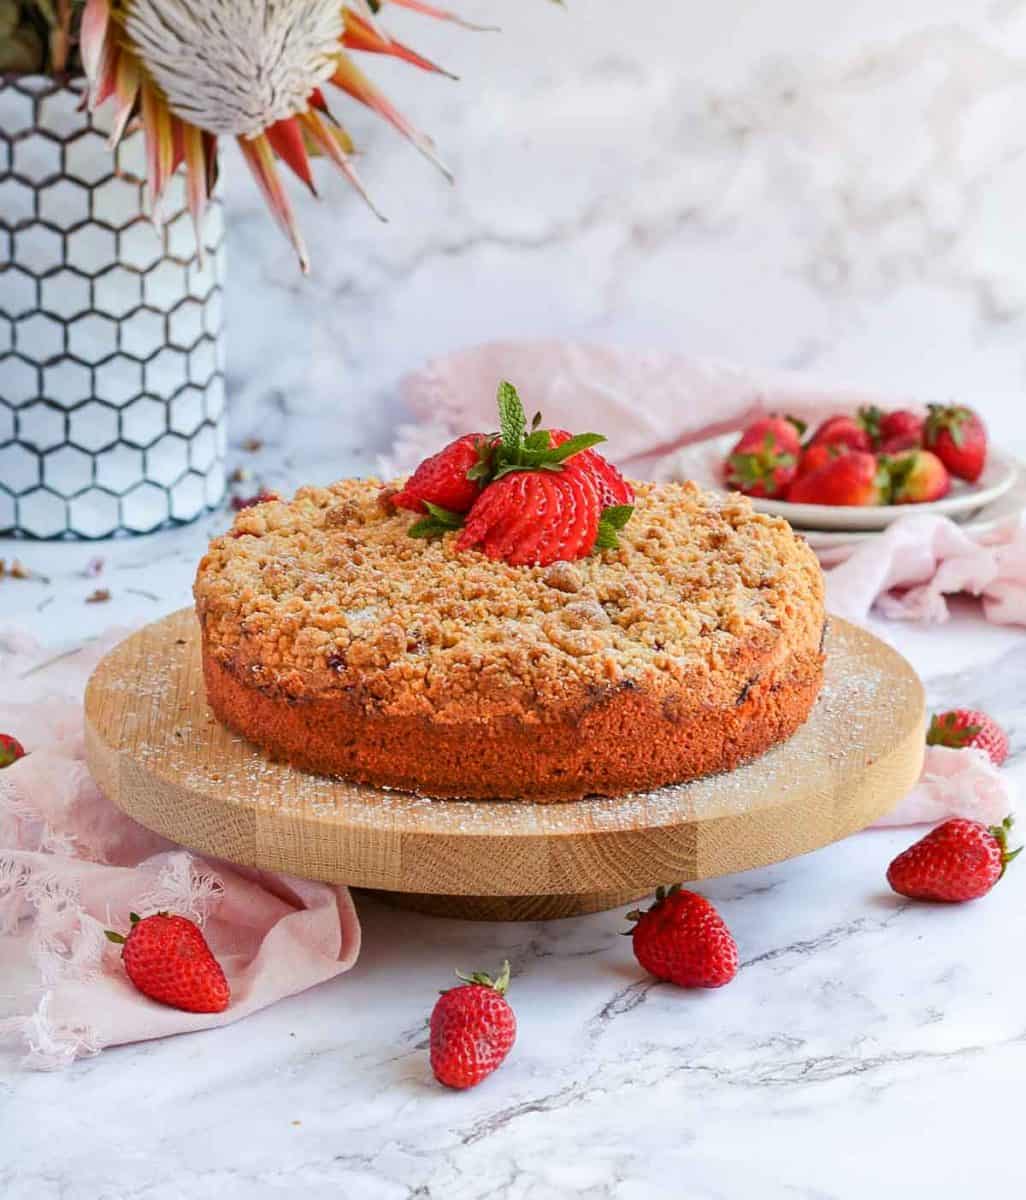
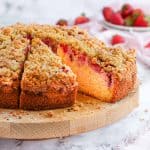
This Strawberry Crumble Cake combines a deliciously light and moist Vanilla Butter Cake, Fresh Strawberries and a crunchy Crumble topping. It is the perfect Summer cake to serve for afternoon tea or dessert!

Jump to:
Why we love this recipe
This summer coffee cake is all about flavour and texture: a light and fluffy butter cake, some fresh and sweet strawberries and a deliciously crunchy crumble topping. It's a party in your mouth!
Crumbles are often used with Winter fruits like for these Apple Cinnamon Crumble Muffins, Applesauce Crumb Cake or Pear Crumble Cake, but this recipe is a perfect summer dessert along with my Blueberry Sour Cream Coffee Cake. This Strawberry Cake with Crumble Topping is great for afternoon tea or to serve at the end of a meal.
If you are looking for a fancy(ish) cake but don't want to put too much work into it, and got lots of fresh strawberries to use, this Strawberry Crumble Cake or Strawberry Upside-Down Cake are a must try!
Ingredients
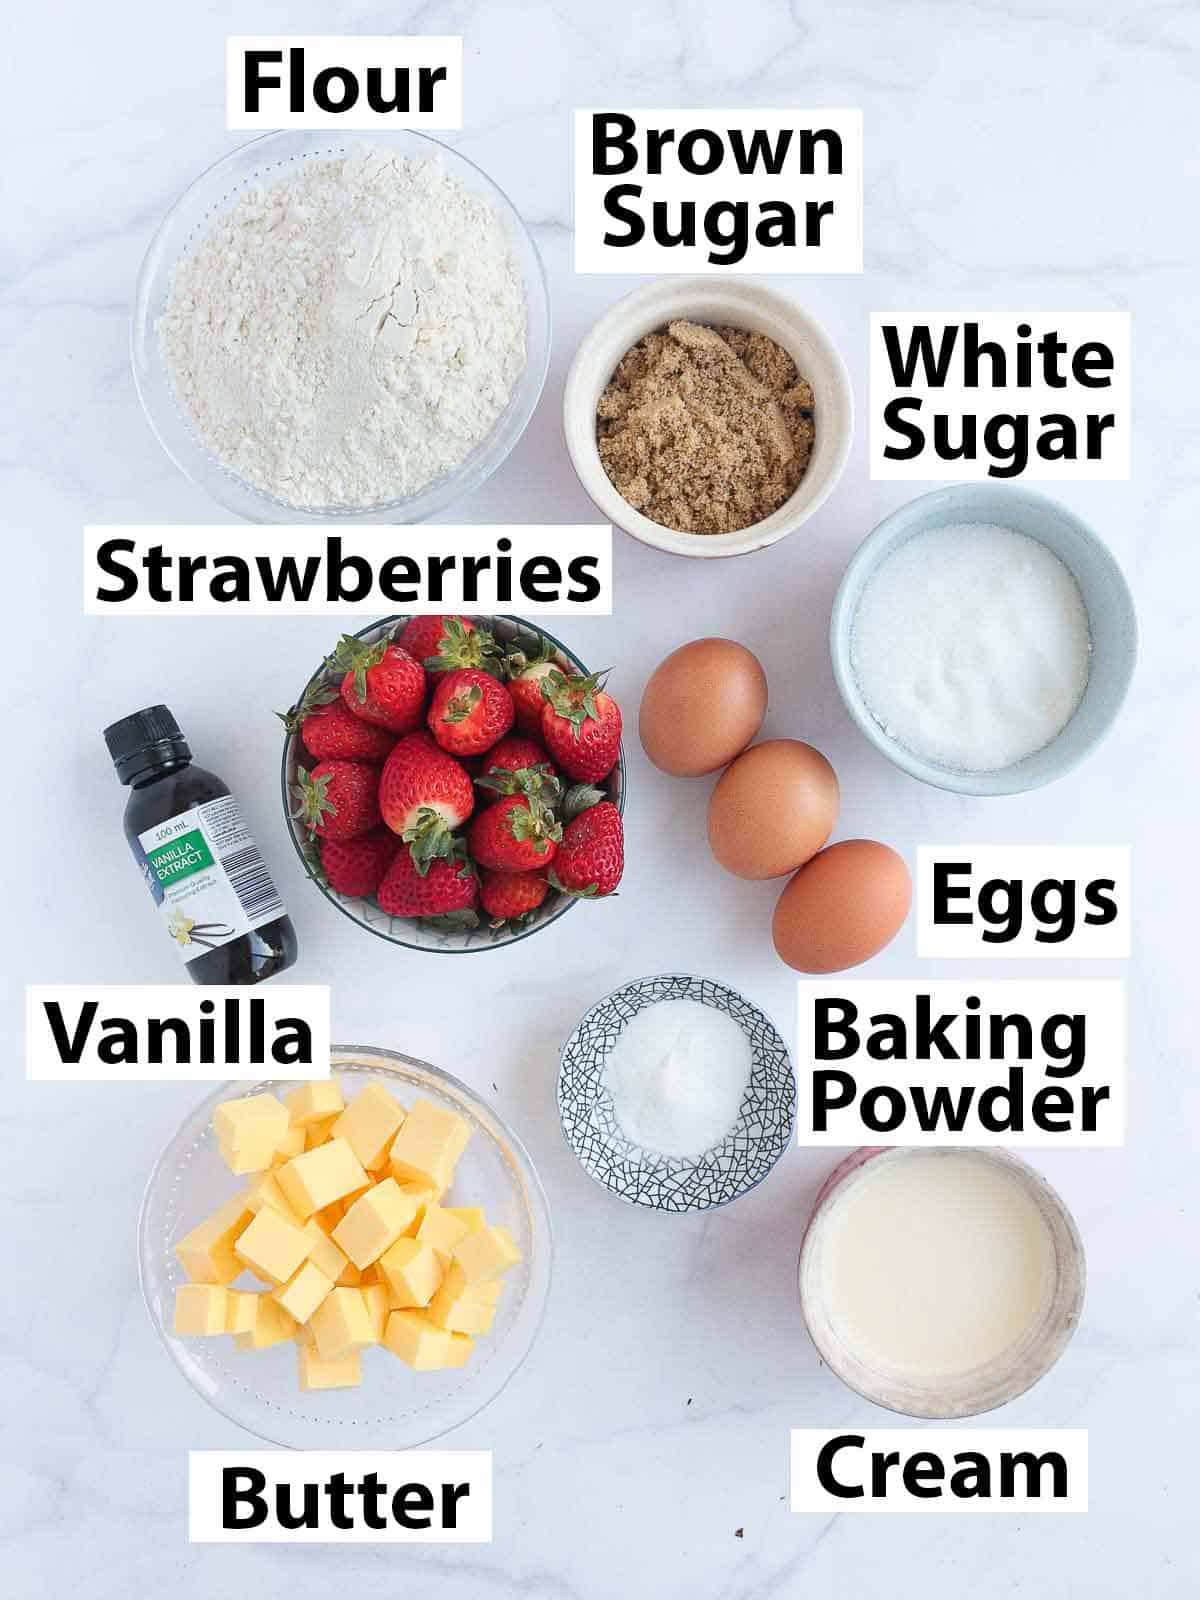
There are two sets of ingredients required to make this cake. First, for the base, then secondly for the crumb topping. Don't be alarmed by the long list of ingredients - you should already have most of them in your pantry!
For the Butter Cake (scroll down to recipe card for all quantities):
- Flour (and a pinch of Salt): Plain / All-Purpose Flour. Make sure it is sifted.
- Eggs: medium size, at room temperature (it is important for the eggs to be at room temperature, or your batter might curdle when you add the eggs to the creamed butter)
- Vanilla: you can use Extract, Essence or even Vanilla Paste if preferred.
- Butter: unsalted and very soft so it easily mixes with the sugar.
- Cream: heavy / thickened cream. Always avoid a low fat or no fat cream (or dairy) when baking for the best flavours and to get a moist cake.
- Strawberries: washed, hulled and cut into small cubes. I don't recommend using frozen strawberries as it will add a lot of unwanted water/moisture over the cake.
For the Crumble Topping (scroll down to recipe card for all quantities):
A simple mix of Plain / AP Flour, Brown Sugar (I used Dark Brown Sugar) and cold unsalted Butter.
How to make Strawberry Crumb Cake
Streusel Topping
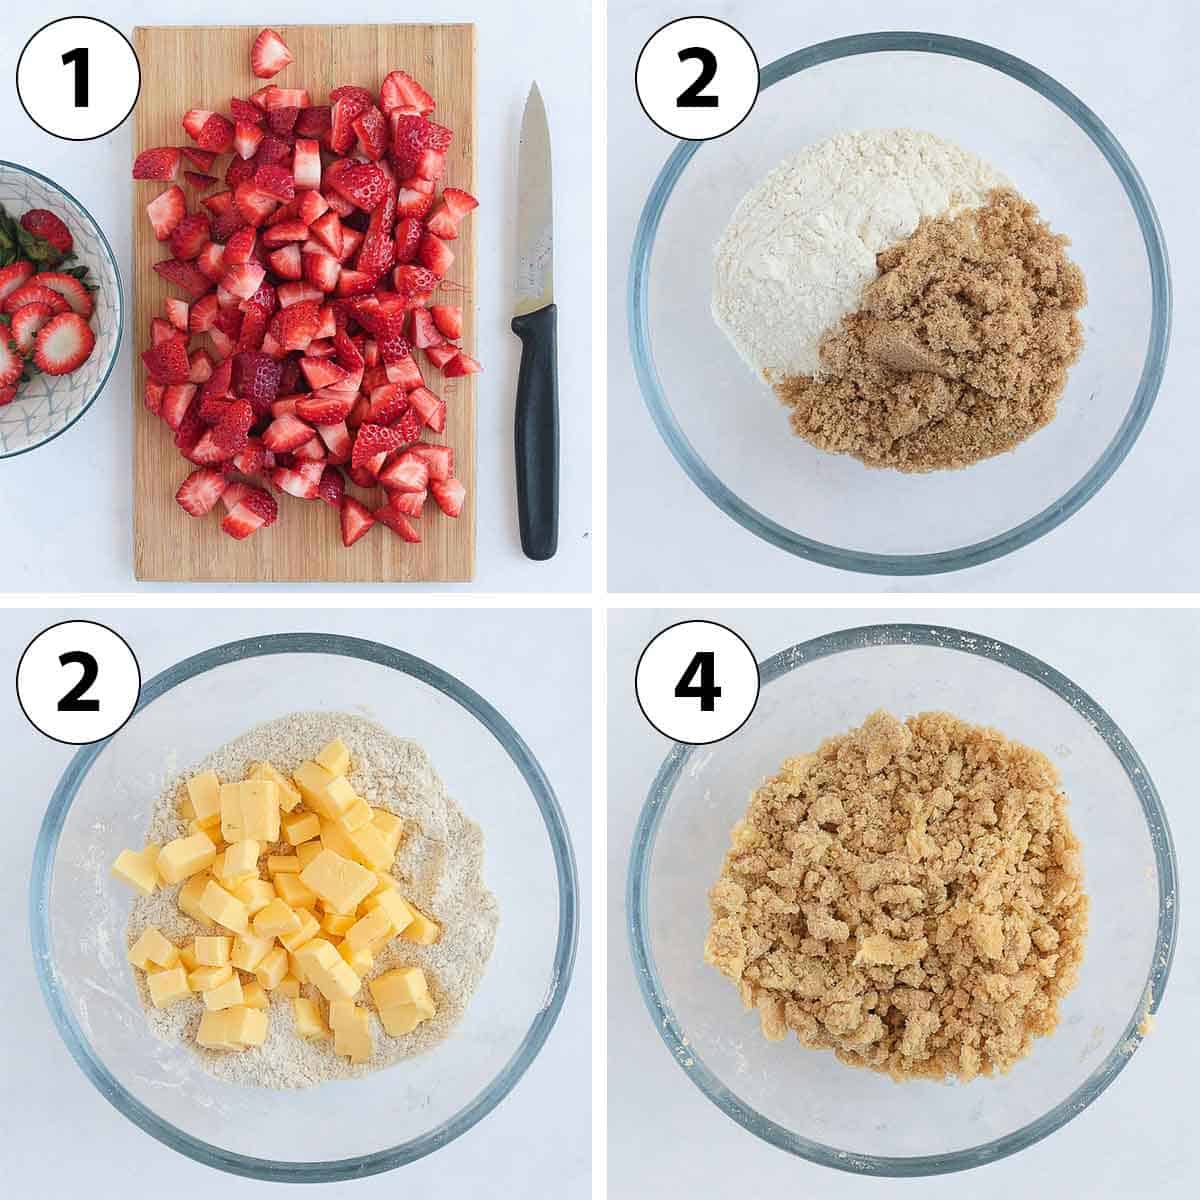
This first step is to prepare the Strawberries and the Streusel Topping for the cake.
- Photo 1: Wash, hull and cut the strawberries into small cubes. Set aside.
- Photo 2: Prepare the crumble topping by mixing the Flour and Brown Sugar in a bowl.
- Photo 3: Add the cold Butter, cut into small cubes.
- Photo 4: Using your fingers or a Pastry Cutter, create small crumbs by rubbing the butter and flour together.
Set the crumbles aside while you prepare the rest of the cake. If it is really hot in your kitchen, you might want to store the crumble in the fridge to keep the butter cold.
Vanilla Butter Cake
Once the strawberries and crumble are ready, you can start making the Cake.
- Preheat your oven on 180'C/350'F. Line a 22 cm / 9 inch Springform Pan with Baking Paper and lightly grease the edges.
Would you like to save this recipe?
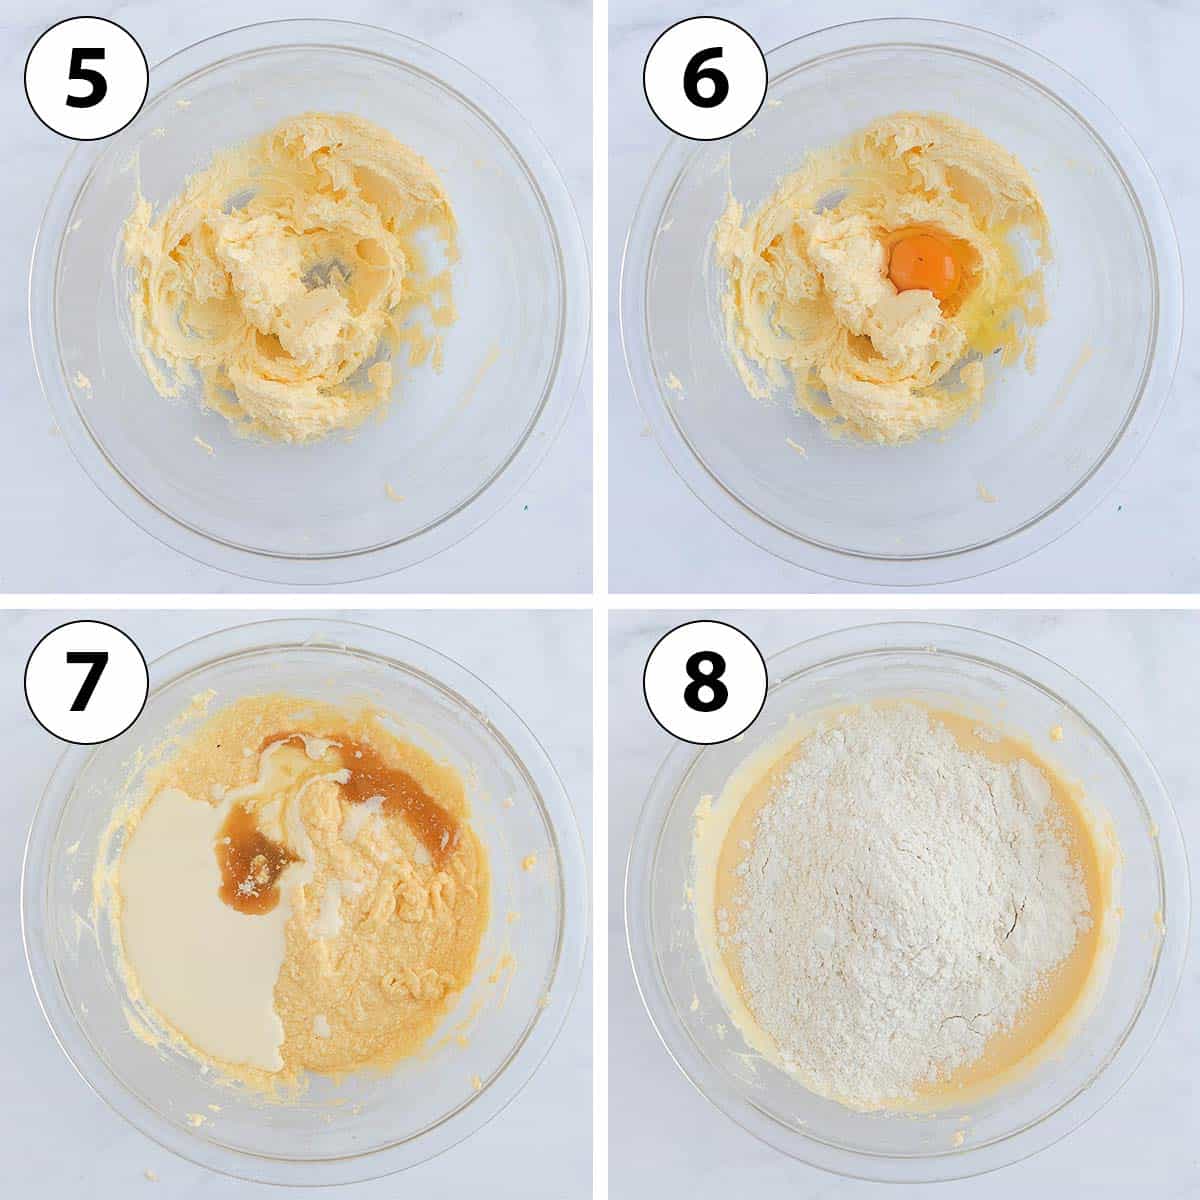
- Photo 5: Place the soft Butter and White Sugar in a large mixing bowl and cream with a hand mixer (or in the bowl of your stand mixer fitted with a paddle attachment) for about 5 minutes. It should look pale, fluffy and have increased in volume.
You shouldn't feel any grain of sugar when rubbing it between your fingers.
- Photo 6: Add the Eggs one at the time, mixing them in on slow. Don't worry if the batter seem to curdle a bit, it will come back together when adding the dry ingredients.
- Photo 7: Add the Cream and Vanilla Extract and mix to combine.
- Photo 8: Lastly, sift in the Flour, Salt and Baking Powder.
Assembling the Crumb Cake
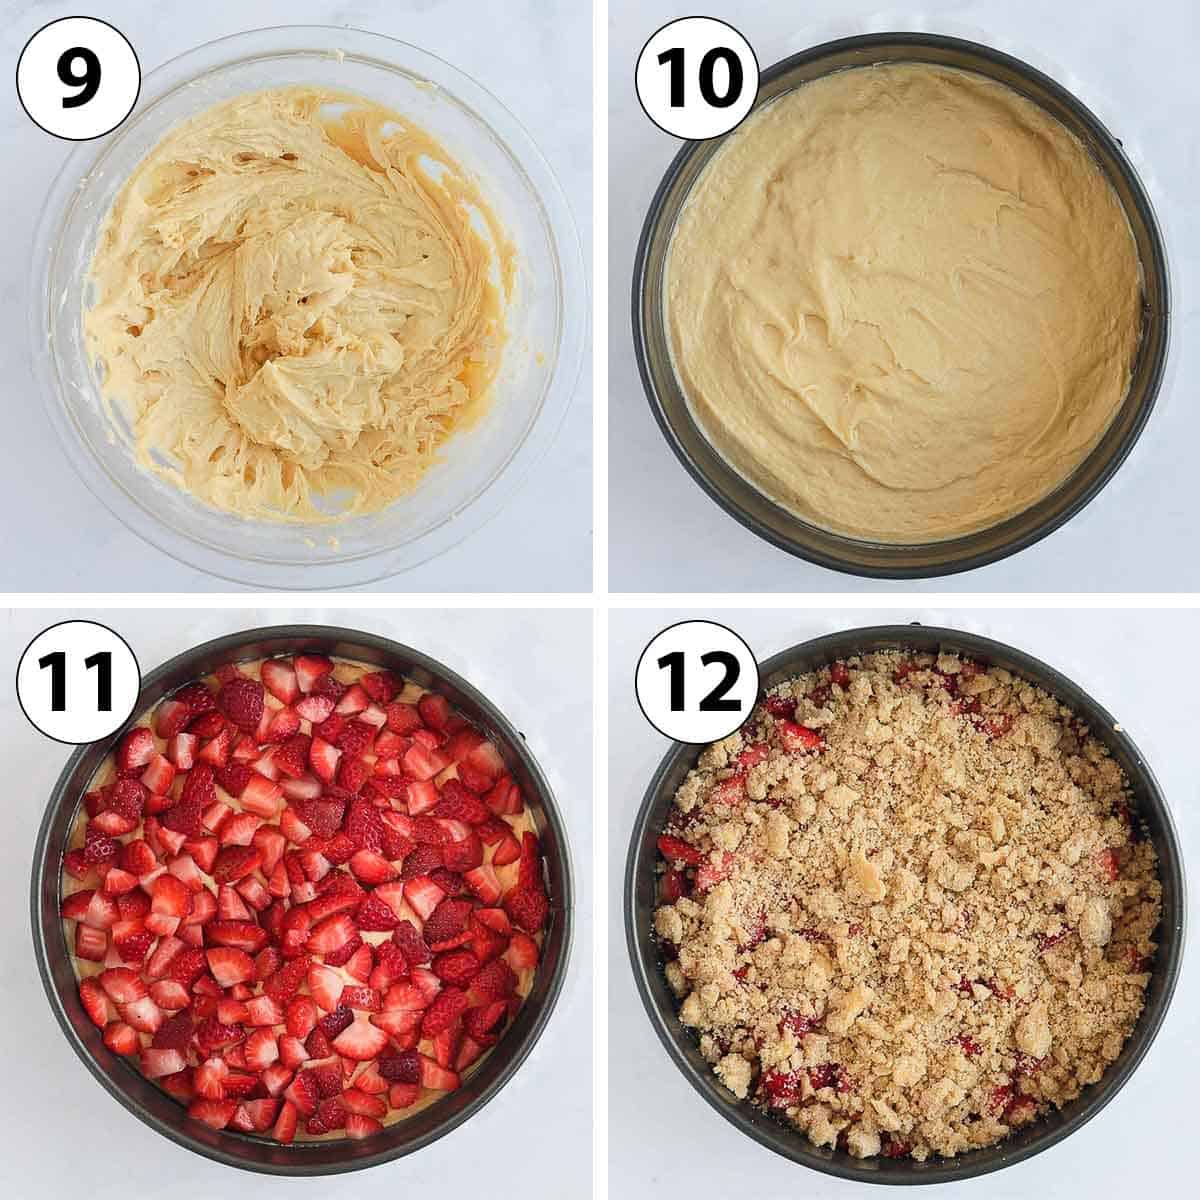
- Photo 9: Mix in the dry ingredients just until combined to avoid overworking the batter. Stop as soon as you can't see any bits of flour.
- Photo 10: Transfer the cake batter into the prepared Springform Pan. Spread it with the back of a spoon or a small offset spatula if needed.
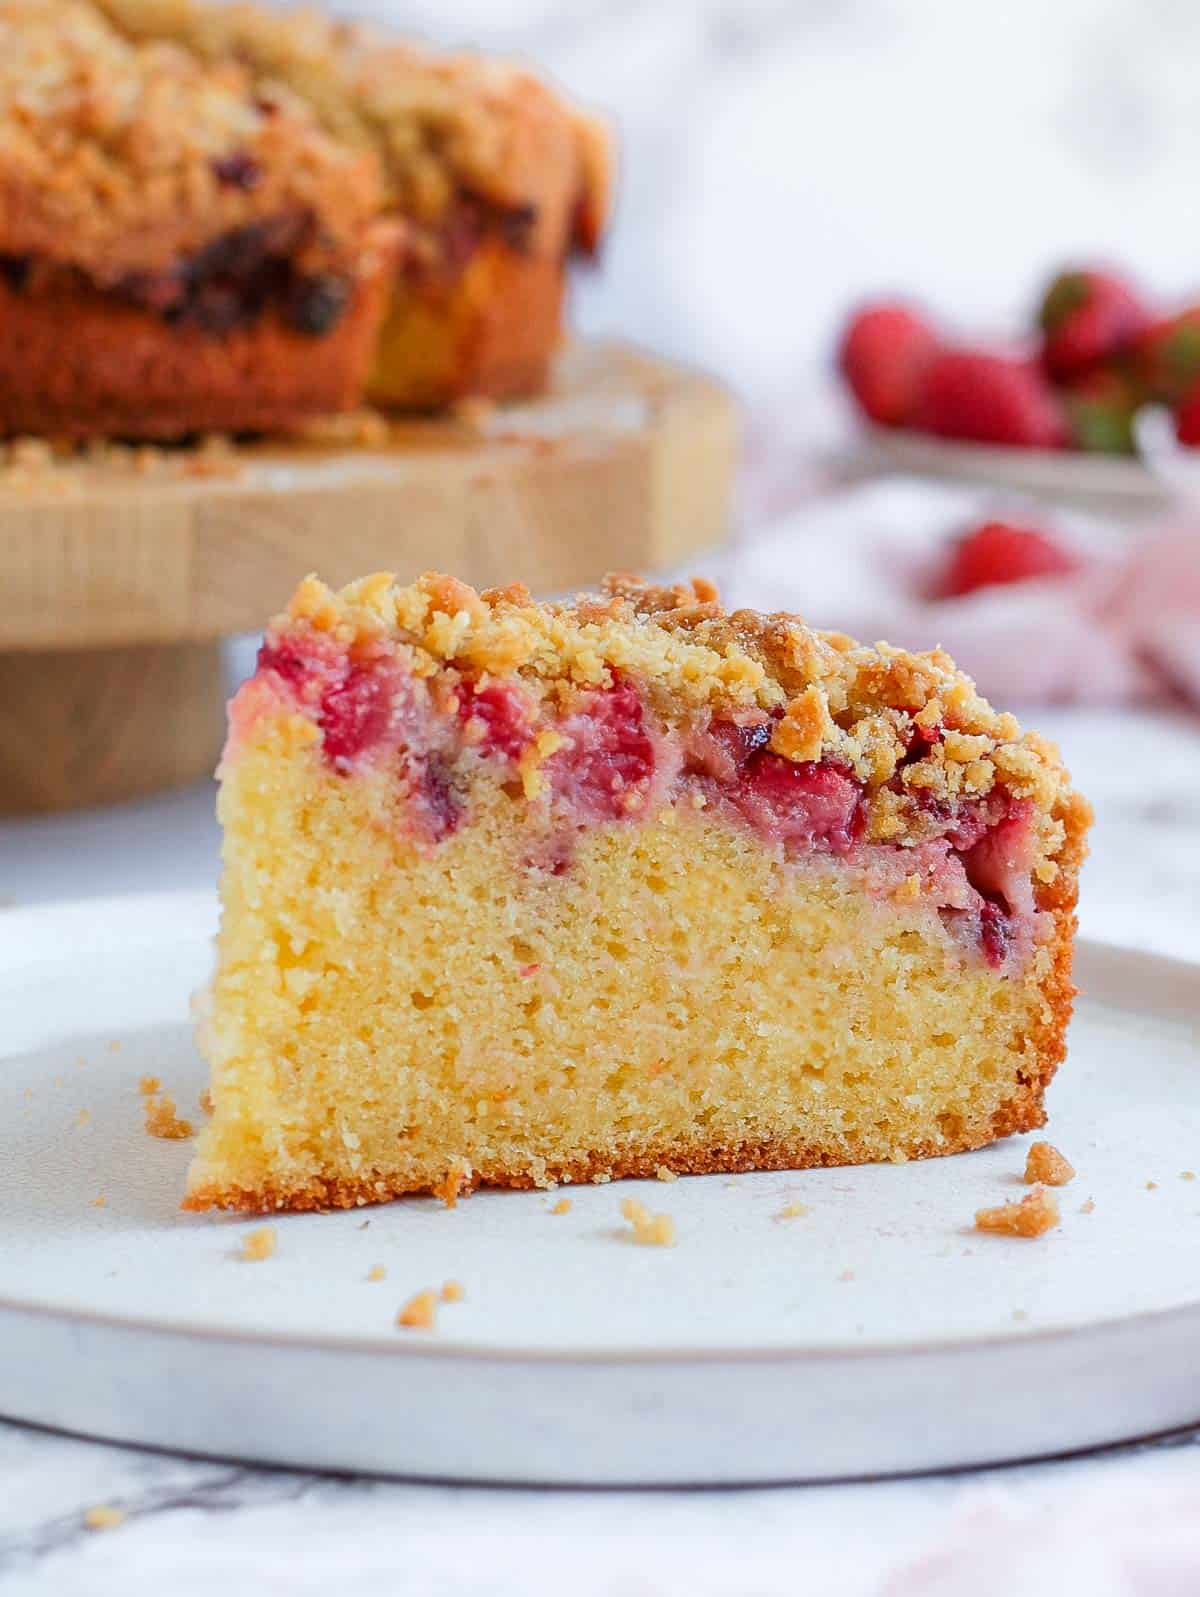
- Photo 11: Cover with the cubed Strawberries.
- Photo 12: And finally, top with the Crumble Topping.
- Place in the oven and bake for 45 to 55 minutes, or until the tip of a knife (or skewer) comes out clean. Leave to cool down before removing from the pan.
Tips to make this recipe
- Make sure all of your ingredients for the Butter Cake are at room temperature - especially the butter and the eggs. This is the best way to insure all ingredients combine easily when mixed.
- Cream the Butter and Sugar for at least 5 minutes on medium to medium high. The more air you create during this step, the lighter and fluffier the cake will be.
- Be careful not to overmix the batter after adding the Flour. If you mix it too much at this step, you might end up with a chewy, tough cake.
- While you need the butter to be very soft to make the cake batter, it needs to be cold for the crumble. If you use soft butter for the crumble, it will melt straight away and you won't get a nice crunch in the topping.
What to serve with this Cake
I personally really enjoy this strawberry crumble cake on its own with a cup of coffee or tea, but you can top it with many different creams and sauces too:
- a scoop of Ice Cream
- Strawberry Coulis or Raspberry Coulis
- some Whipped Cream
- a Blueberry Compote or Mixed Berry Compote
- a drizzle of Strawberry Syrup
- Stewed Rhubarb
Recipe FAQs
Absolutely, you could really use any type of berries for this cake - or mix different berries together too!
I highly recommend using fresh strawberries for this cake. Using frozen strawberries will leak a lot of water/moisture while baking and potentially make the cake soggy.
Up to you - both options are delicious!
Storing & Freezing
This cake can be kept at room temperature, in an air-tight container or covered with wrap for about 2 days. It will keep for up to 3 days in the fridge but will tend to become more dry. If keeping in the fridge, I recommend re-heating it before eating for a softer crumb.
I don't recommend freezing this Strawberry Crumb Cake as the crumble topping will loose its crunchy texture when frozen.
Made this recipe?
Let us know if you liked it by leaving a comment below, and tag us on Instagram @a.baking.journey with a photo of your creation!
Recipe
Strawberry Crumble Cake
Ingredients
- 400 gr Strawberries
Crumble Topping
- 100 gr Plain / All-Purpose Flour
- 75 gr Unsalted Butter, cold
- 60 gr Brown Sugar
Butter Cake
- 120 gr Unsalted Butter, soft, at room temperature
- 100 gr Caster Sugar, or Fine White Granulated Sugar
- 3 large Eggs, at room temperature
- 150 ml Heavy / Thickened Cream
- 1 1/2 teaspoon Vanilla Extract
- 225 gr Plain / All-Purpose Flour
- 1 1/2 teasp. Baking Powder
- 1 pinch Salt
Instructions
- Wash, hull and cut the strawberries into small cubes. Set aside.
Crumble Topping
- Place the Flour and Brown Sugar in a mixing bowl and stir to combine.
- Add the cold Butter, cut into small cubes. Using your fingers (or a pastry cutter), create small crumbs by rubbing and working the butter into the dry ingredients. Set aside (see note 1).
Butter Cake
- Preheat your oven on 180'C/350'F. Line a 22 cm / 9 inch Springform Pan with baking paper and lightly grease the edges.
- Place the very soft Butter and Caster Sugar in a large mixing bowl (or the bowl of your stand mixer fitted with the paddle attachment). Using a hand mixer, cream the butter and sugar together for about 5 minutes, or until light, pale and increased in volume (see note 2).
- Add the Eggs one at the time, slowly mixing them in (see note 3).
- Pour in the Cream and Vanilla Extract and mix to combine.
- Sift in the Flour, Baking Powder and Salt. Mix in on the lowest speed and stop as soon as combined (see note 4).
Assembling the Cake
- Pour the Butter Cake Batter into the Springform Pan. If needed, spread it out using the back of a spoon or a small offset spatula.
- Top with the Strawberry Cubes, then cover with the Crumble topping.
- Bake for 45 to 55 minutes, or until the tip of a knife (or skewer) comes out clean (see note 5). Leave to cool down completely before removing from the pan.
Would you like to save this recipe?
Notes
- If it is hot in your kitchen - or preparing the crumble topping in advance - store the crumble in the fridge so that the butter remains cold.
- To know it has been creamed enough, rub a little bit of the butter between your fingers. The sugar should be fully dissolved so you should't feel any grains of sugar.
- Don't worry if the batter seem to curdle at this point, it will get back together once you add the flour.
- It is really important to stop mixing as soon as you cannot see flour anymore to avoid overworking the batter, which would create a tough, drier cake.
- As always, the exact baking time will depend on your oven. I recommend checking the cake after about 30 to 35 minutes and leave it to bake for longer if required.