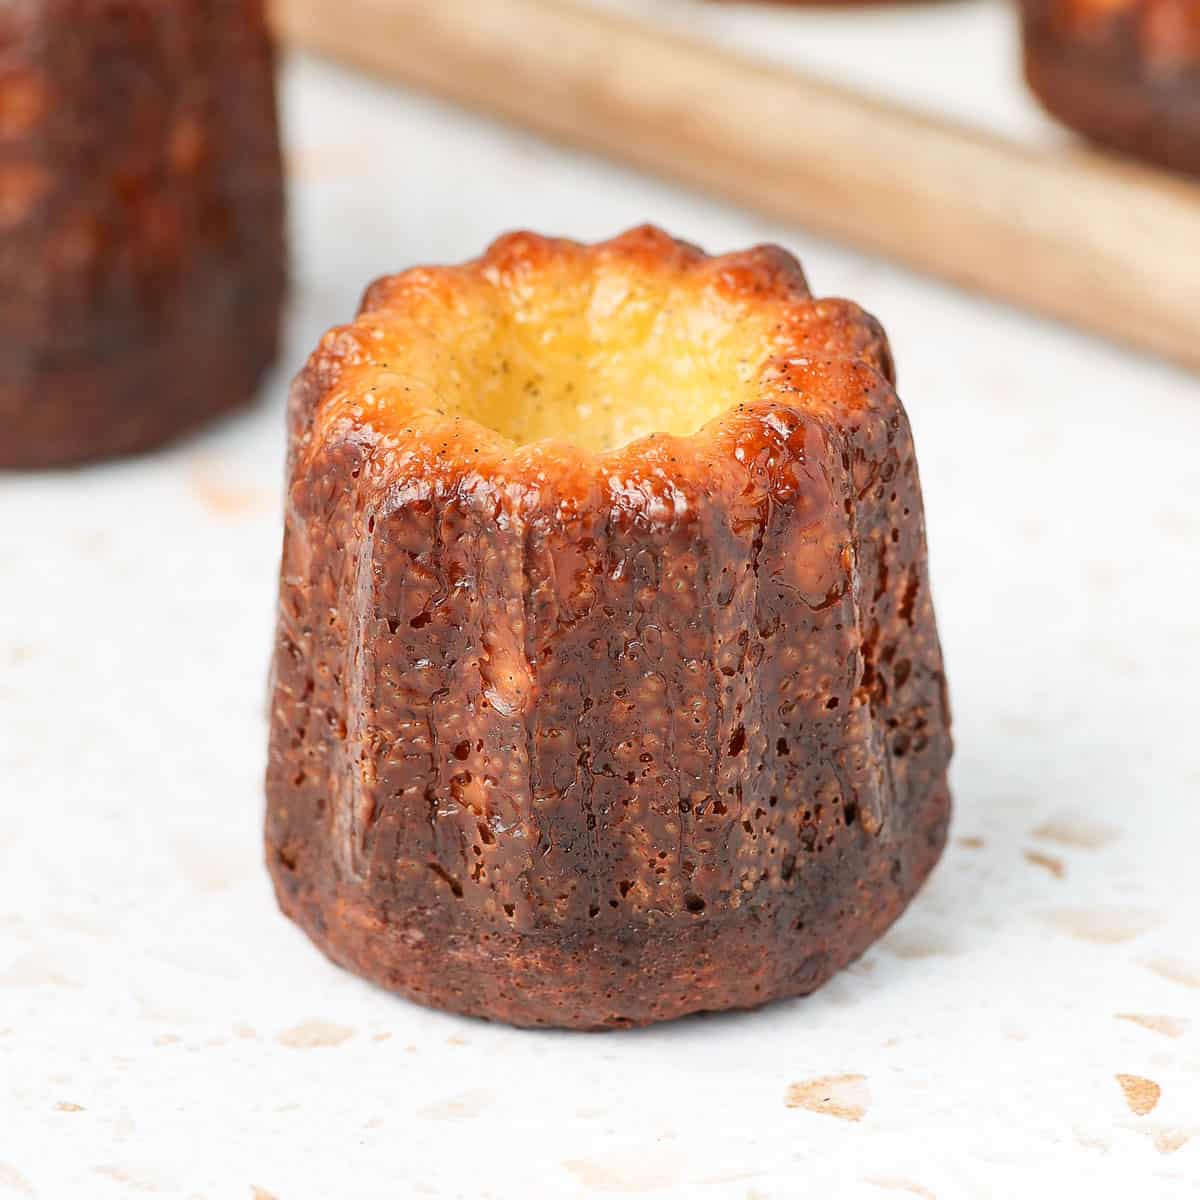
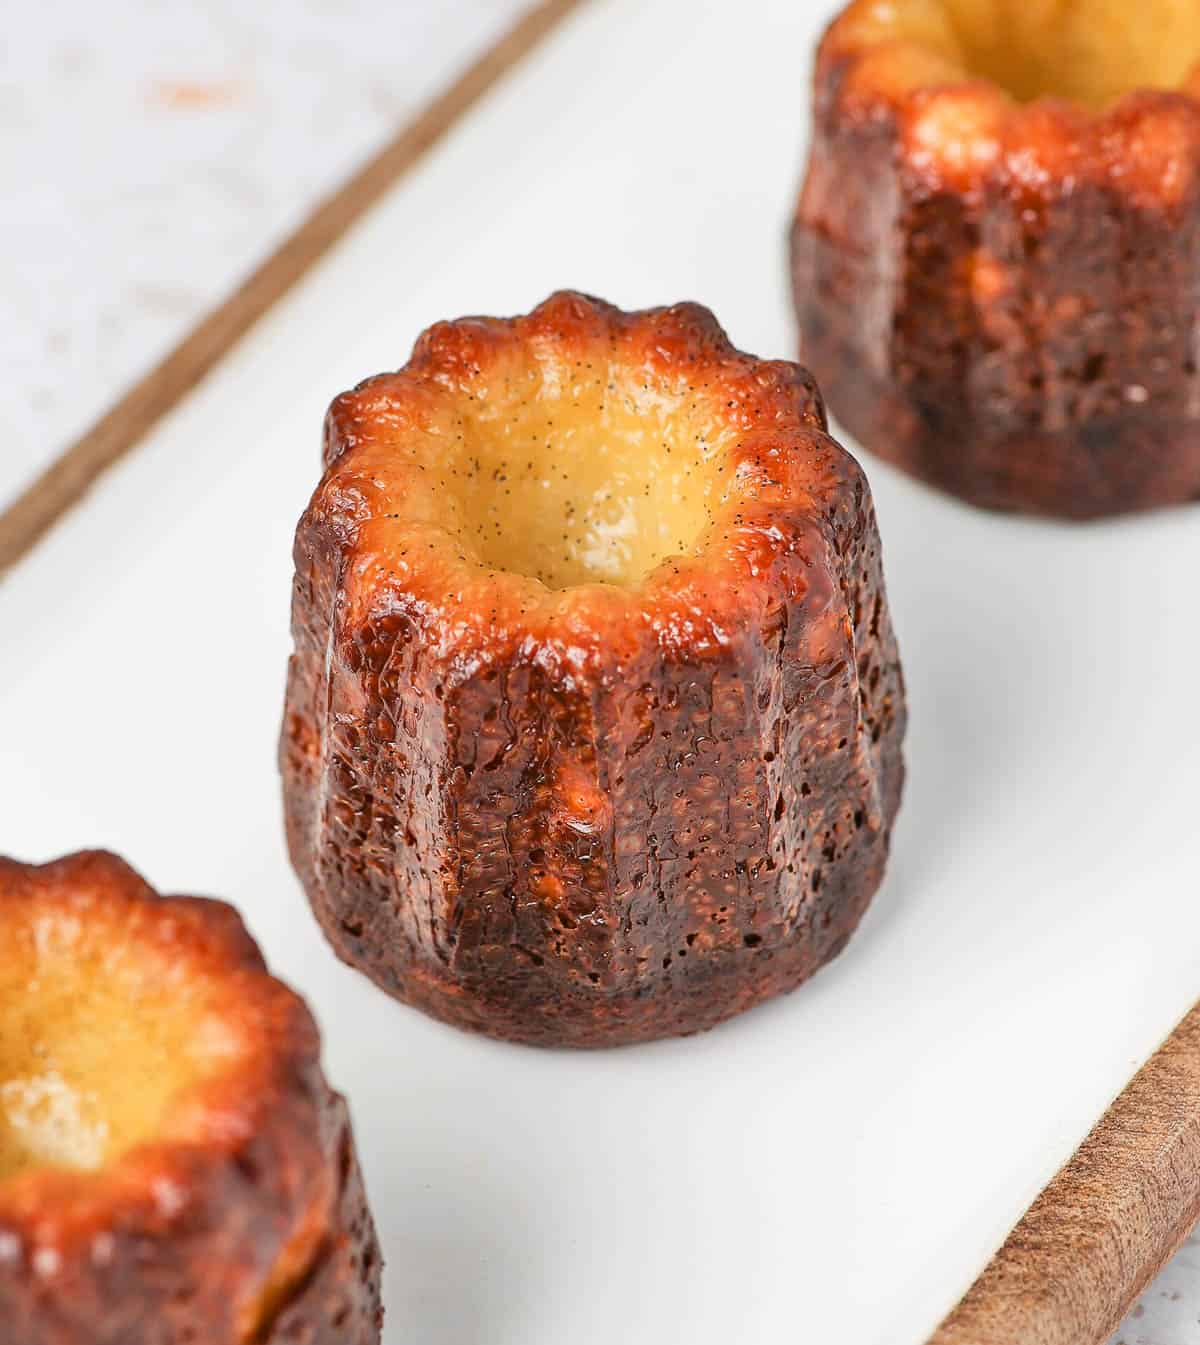
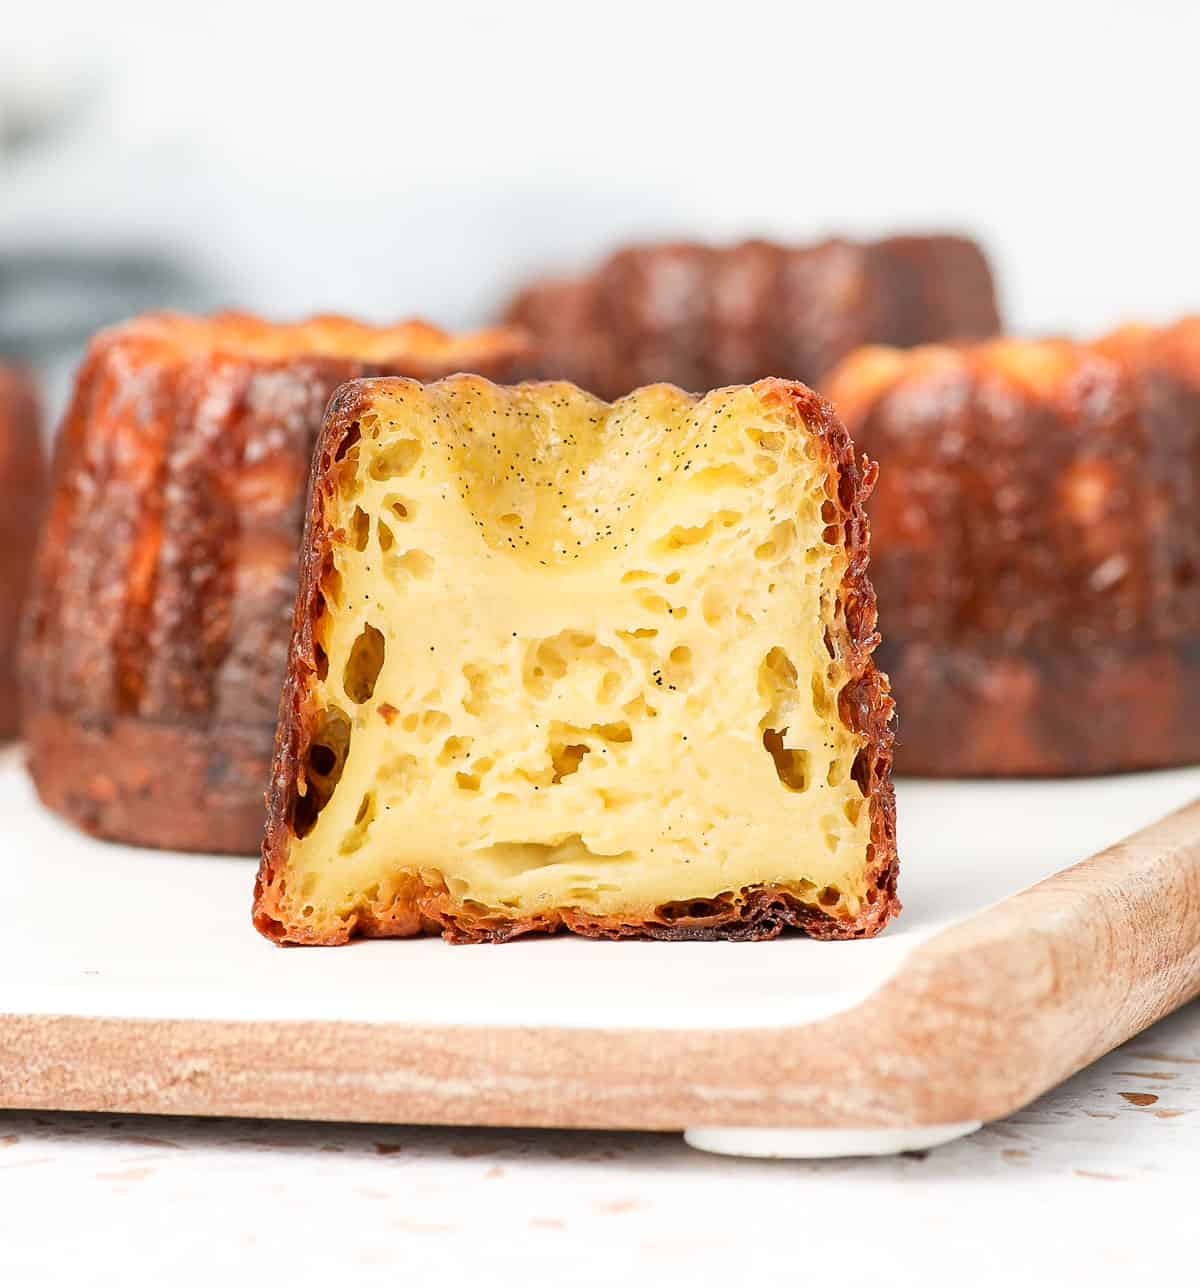
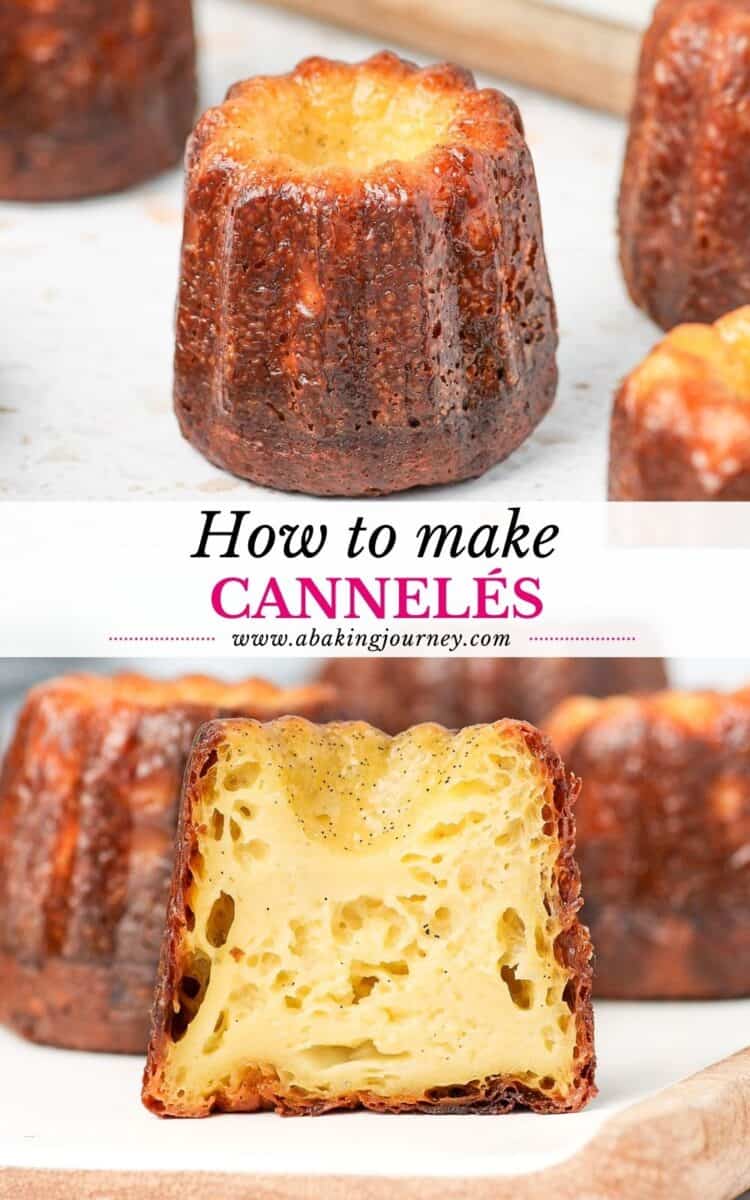
Cannelés - sometimes spelled Canelés - are a classic French pastry that has a deliciously crispy caramelised exterior and soft baked custard centre. These little cakes are packed with fresh Vanilla flavours and a touch of Rum.
Jump to:
Why we love this recipe
There is something SO irresistible about these Cannelés Bordelais. They have an incredible contrasting texture with the crispy crust and silky, soft custardy interior. The combination of fresh vanilla and spiced rum creates an unforgettable flavour.
Enjoy them while still slightly warm as an every day treat and trust me - you won't be able to stop at one!
What are Cannelés (or Canelés)
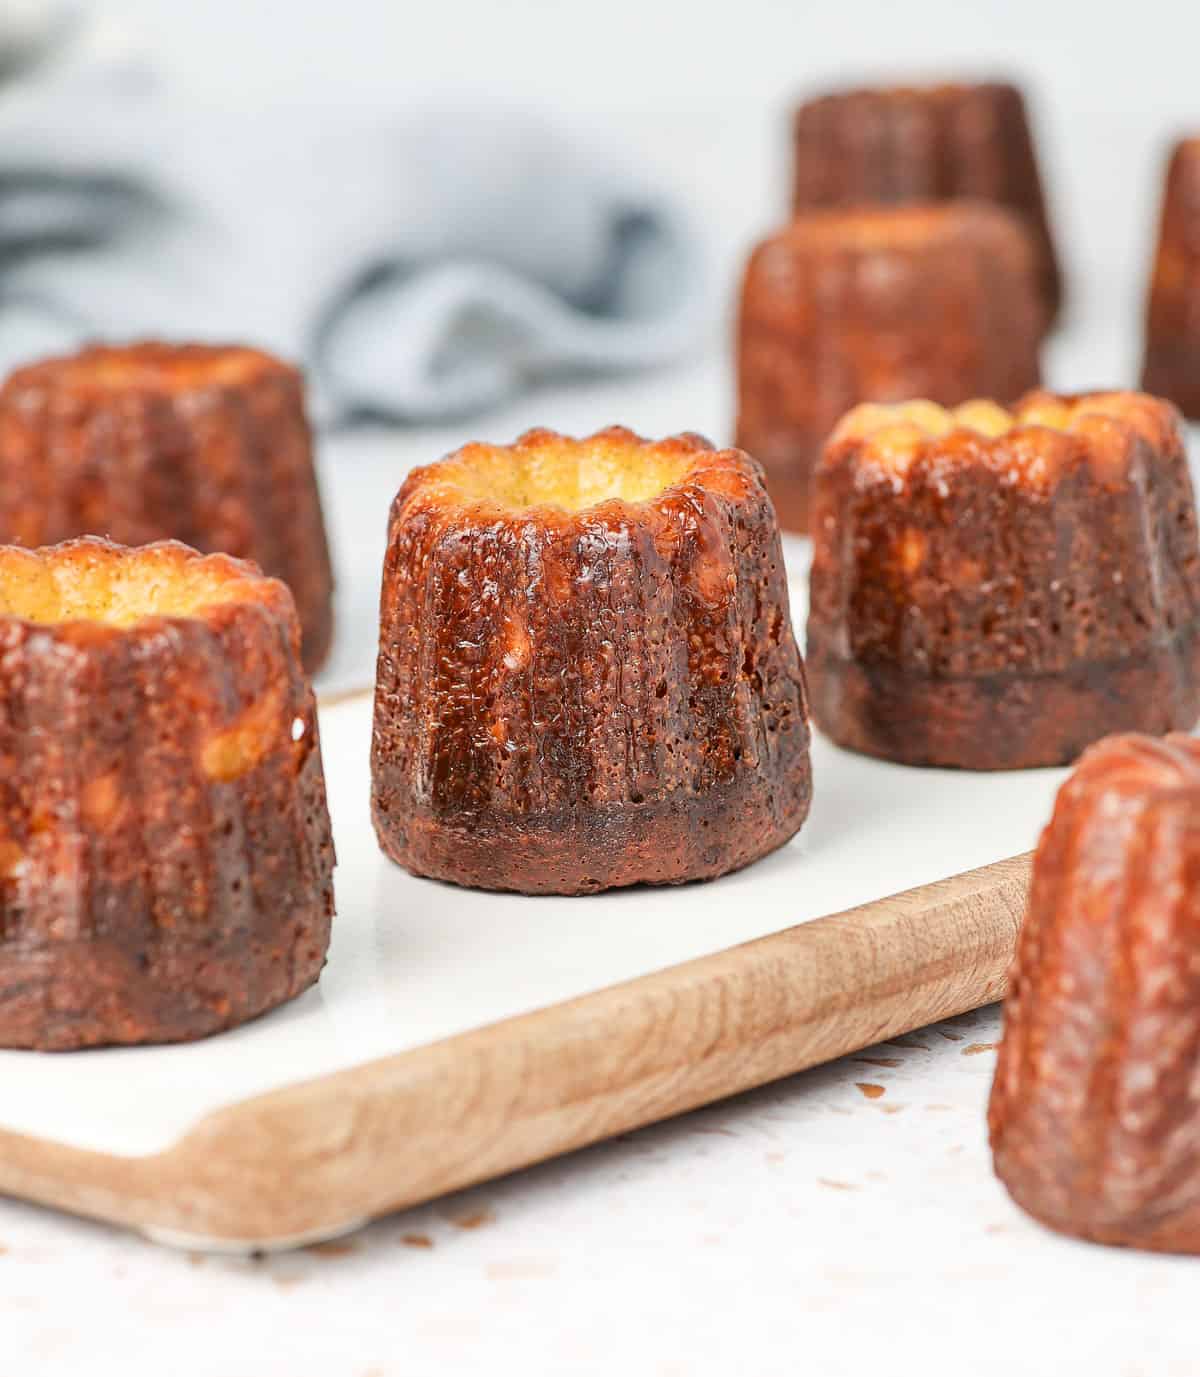
Cannelés or Canelés (pronounced "kan-lay") are a traditional pastry from the region of Bordeaux in France. They have a distinctive cylinder shape with a slight depression on top. These cakes are baked at high temperature for a long time, giving them a crispy caramelised exterior with a super soft interior.
Ingredients
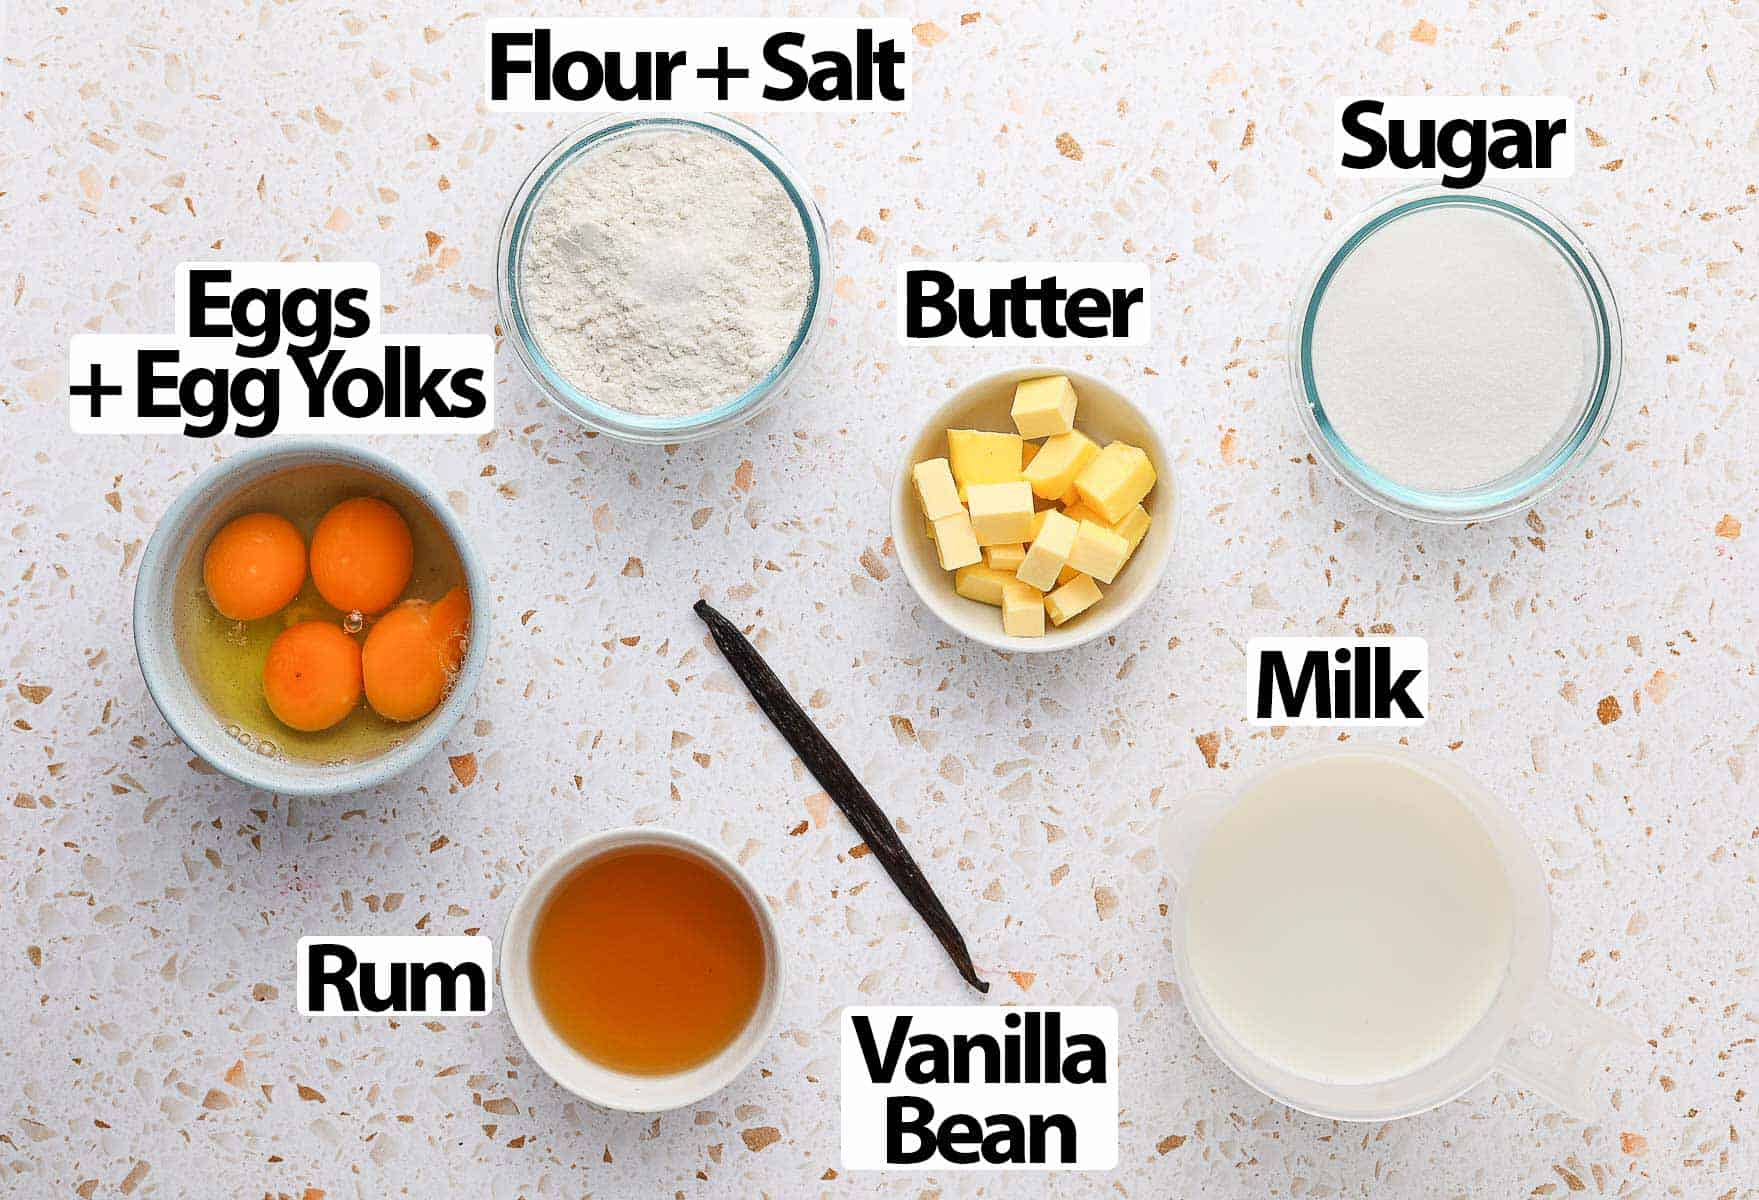
What are Canneles made off (scroll down to recipe card below for all quantities):
- Milk: use Full Cream / Whole Milk for the best flavours and texture. That is a milk that has at least 3 to 4% fat in it.
- Butter: unsalted. It will get melted straight away so no need to let it come back to room temperature.
- Vanilla: Canneles is one of those recipes that is really worth using real fresh vanilla bean for. The second best option if you don't have fresh vanilla is vanilla paste. You will really loose in flavour if you use vanilla extract or essence.
- Eggs: a mix of whole eggs and egg yolks only. Make sure they are at room temperature. Keep the egg whites for another recipe.
- Sugar: Caster Sugar or Fine White granulated sugar.
- Flour + Salt: Plain / All-Purpose Flour, preferably sifted. Pastry flour will work too. The salt is a fine table salt.
- Rum: I recommend using a spiced rum or dark rum for extra flavour. You can discard it if preferred.
How to make Cannelés
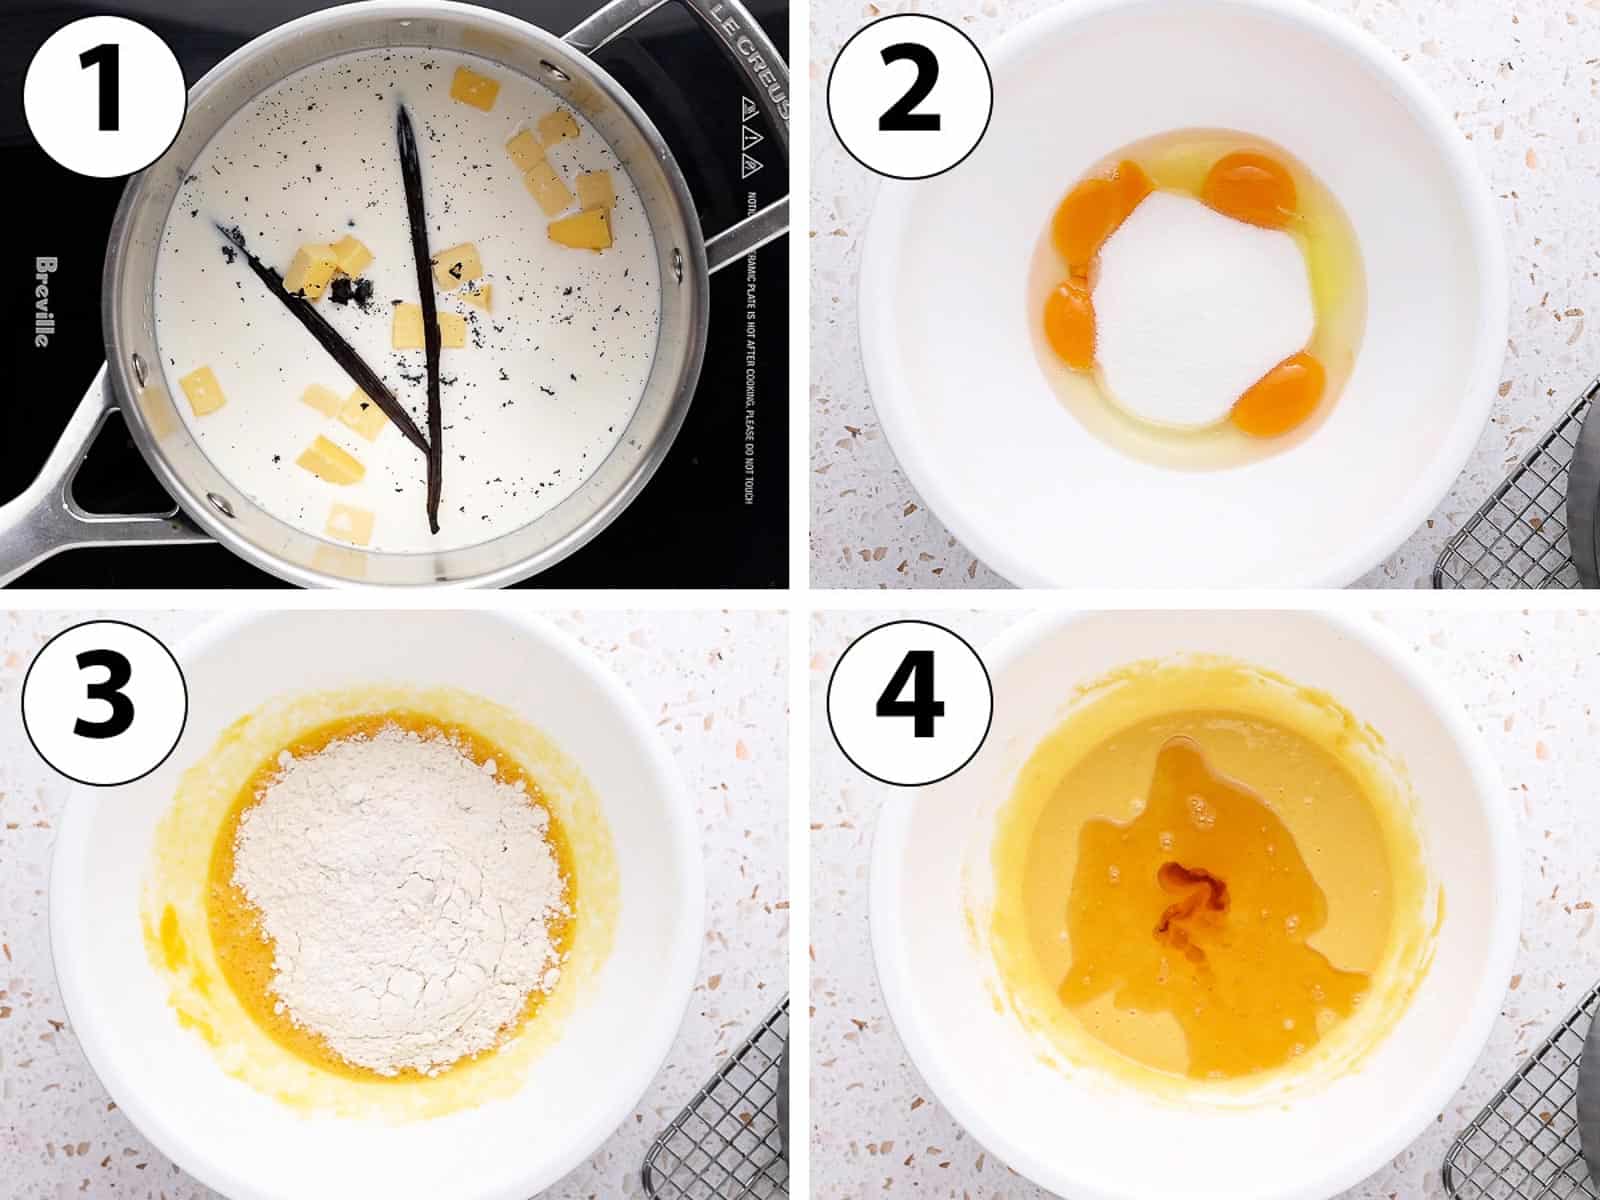
The best way to make canneles is over two days, as the flavours in the batter will really develop while it rests in the fridge overnight (or 24 hours). The first day, start preparing the batter.
- Photo 1: Place the Milk, Butter and Vanilla in a small saucepan. To get the vanilla out of the pod, slice it in half lengthways and gently scrape the seeds with a small knife. Put both the seeds and the pod in the milk.
- Turn on low heat and bring to a simmer (no need to boil here), occasionally stirring. Turn off the heat, cover the saucepan with a lid and set aside for 10 to 15 minutes to let the vanilla infuse in the milk. Remove the vanilla pod.
- Photo 2: in the meantime, place the Eggs, Egg Yolks and Sugar in a heat-proof mixing bowl. Whisk until combined.
- Photo 3: Stir in the sifted Flour and Salt.
- Photo 4: lastly, whisk in the Rum. You should get a smooth, light batter.
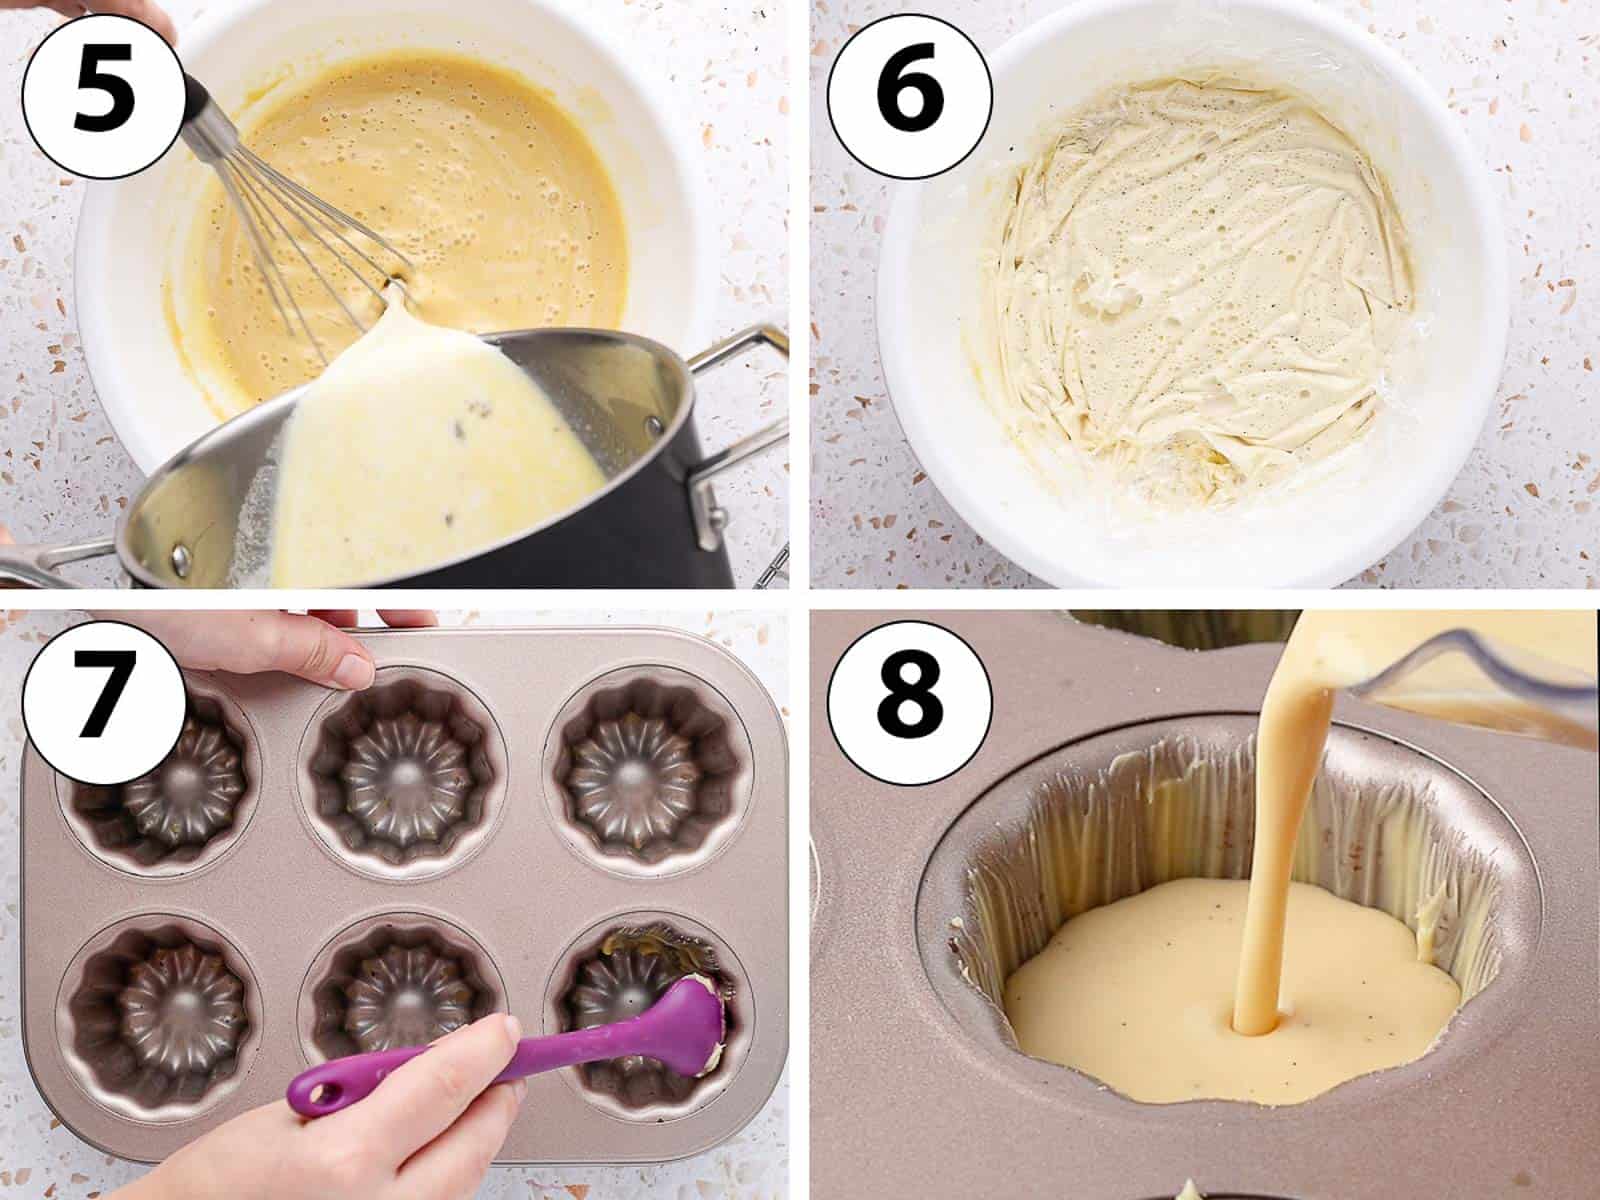
- Photo 5: pour the warm milk over the egg mixture while stirring. Whisk well. The batter will appear to be quite liquid, that's normal!
- Photo 6: Cover the cannele batter with plastic wrap touching its surface and put in the fridge to rest overnight.
You will get the best flavours and texture by resting the batter for a long time - up to 24 hours.
On the second day:
- Take the mixture out of the fridge, whisk it for a few seconds to insure all the ingredients are evenly distributed in the batter and let it come back to room temperature for 30 minutes to 1 hour.
- Preheat your oven on 215 degree Celsius / 420 degree Fahrenheit.
- Photo 7: Using a pastry brush, brush the mold with soft butter. You want to make sure the mold is evenly coated to insure the cakes come out easily once baked.
- Photo 8: Pour it into the prepared pan to fill about 3/4 of the mold. Make sure not to fill it completely as the pastries will rise in the oven.
- Bake for 20 minutes, them reduce the heat to 180 degree Celsius / 350 degree Fahrenheit and bake for an additional 35 to 40 minutes. The top should look well caramelised.
- Take out of the oven, place on a cooling rack for 5 minutes then carefully flip over to take the cannelés out of the pan. There could be some hot butter dripping out so be careful. Let the cakes cool down to room temperature before serving them.
Recipe FAQs
You will find a few different types of cannelés molds on the market:
- Copper: the most traditional ones, usually sold in individual cannele molds. They will give you the crispiest, most caramelised exterior but have a rather high cost - so they are not the most accessible. They also need to be seasoned with beeswax.
- Metal (Aluminium) Pan: the best alternative to copper molds, without the high price. They will give you a nice caramelised exterior as well and don't required to be seasoned with beeswax.
- Silicone: the cheapest option (and usually the easiest one to find around), but I personally find that it does not give the same crispiness to the canneles as the heat won't travel through silicone mould the way it does through metal.
I personally use this Metal Cannele Mold that is the best compromise between price and good results.
The traditional coating of the mold is usually done with melted beeswax - especially if using copper molds. I have tried both soft butter and beeswax with my aluminium pan.
I found beeswax to be very hard to use as it hardens extremely quickly, so you have to work very quickly. It is also quite hard (or impossible) to clean.
Butter is obviously much easier to find, and also way less messy. There was no real difference in taste or texture in the batches made using beeswax or butter so I personally recommend using soft butter for ease.
Yes - you will just need to adjust the baking time as the mini cannelés will bake faster.
Tips for Success
- Resting the mixture in the fridge overnight (or preferably 24 hours) will really help develop the flavours and create a super soft texture. Don't skip that step! Plus, it means that you can prepared them in advance as well.
- Butter the mold well, using a pastry brush or by placing a little bit of soft butter on a paper towel (or go straight with your fingers!). Not only it helps the cannelés come out of the pan easily, it is also essential to create that delicious caramelised, crispy shell.
- The exact baking time and heat might vary based on the type of pan you use and your oven. Always start with a higher heat to create the crispy shell, then drop the temperature to allow for the custard centre to bake fully.
- Let the canneles come back to room temperature before eating them. Slicing them when still hot will make the interior of the cake deflate, making them less airy and more dense.
Storing & Freezing
Canneles are best eaten straight away while still slightly warm, or within 24 hours. Store them at room temperature in an air-tight container in the meantime; they will turn soggy more quickly in the fridge.
They are safe to be eaten for a few days but the crust will start to get softer so you will loose the crunchiness. After 24 hours, you might want to re-heat them up in the oven for 5 minutes.
Although canneles can be frozen, I personally only recommend to serve them fresh for the best texture. If frozen, allow to thaw at room temperature then place back in the oven for 5 to 10 minutes to re-crisp the shell.
Recipe
Cannelés de Bordeaux
Ingredients
- 500 ml Full Cream Milk - or whole milk
- 1 fresh Vanilla Bean - see notes for substitution
- 50 gr Unsalted Butter
- 150 gr Caster Sugar - or fine white granulated sugar
- 2 Eggs - at room temperature
- 2 Egg Yolks - at room temperature
- 120 gr Plain / All-Purpose Flour
- 1/4 teaspoon Fine Salt
- 45 ml Rum - optional
- Unsalted Butter - for coating the molds
Disclaimer
I highly recommend using the measurements in grams & ml (instead of cups & spoons) for more accuracy and better results.
Instructions
- Place the Milk, Butter and Vanilla seeds & pod in a small saucepan (see note 1 on how to prepare the vanilla bean). Turn on low heat and occasionally stir. When it starts to simmer and the butter has melted, turn off the heat, cover the saucepan with a lid and set aside for 10 to 15 minutes to let the vanilla infuse in the milk.
- In a separate heat-proof bowl, whisk together the Sugar, Eggs and Egg Yolks. Mix in the sifted Flour and Salt, then the Rum. The batter should be smooth and have no lumps.
- Remove the vanilla pod from the milk mixture (see note 2). Slowly pour the warm milk over the egg mixture while whisking. Mix until completely smooth then cover with plastic wrap touching the surface.
- Place in the fridge to rest overnight, or preferably for 24 hours (see note 3).
- Take the cannele batter out of the fridge, whisk it for a few seconds (see note 4) and let it come back to room temperature for 30 minutes to 1 hour.
- Preheat your oven on 215 degree Celsius / 420 degree Fahrenheit.
- Brush the copper or aluminium cannele mold with soft butter, making sure each molds is well coated. Fill about 3/4 of the mold with the batter (see note 5).
- Bake for 20 minutes, then drop the temperature to 180 degree Celsius / 350 degree Fahrenheit and bake for an additional 35 to 40 minutes (see note 6).
- Take out of the oven and leave to cool down slightly for 5 minutes before carefully flipping the pan over and get the Cannelés out. Leave the cakes to come back to room temperature then serve straight away.
Tried this recipe? Make sure to leave a comment and star rating below!
Notes
- To get the vanilla out of the pod, slice it in half lengthways leaving one of the edge attached. Gently scrape the seeds out of each side with a small knife and put them in the milk. Place the rest of the pod in the milk as well, it contains a lot of flavours, but remove it after the milk has infused.
- The vanilla pod can be lightly washed to remove any milk then stored to make homemade vanilla extract or a vanilla powder.
- It is important to let the batter rest for a long time to create the best flavours and texture. If you don't want to wait 24 hours, make sure to chill it for at least 12 hours or overnight.
- The flour will tend to drop to the bottom of the bowl so the batter will be thicker at the bottom than at the top. Whisking it again insures all the ingredients are well combined before you bake the cakes.
- The canneles will rise fast in the oven so make sure not to overfill the molds.
- The top and edges should look brown and well caramelised. If the top seems light in colour, it needs a little bit longer. Note that the exact baking time and heat might vary based on the type of pan you use and your oven. You might have to experiment with the temperature and timing a little bit.


Kristi Felbinger says
I have made a few batches now but this is the first time I’ve tried to make this amazing pastry. The recipe is so accessible and easy to follow. The only tweaks I’ve made are to oven temperature and baking time like she says you may have to do. I’m so excited to be able to learn these!
Sylvie says
So happy you like the recipe Kristi!